How To Make A Pillow Fort

Beginner-friendly templates, step-by-step guides,
and weekly project ideas in your inbox.
Remember those magical childhood days?
The thrill of transforming ordinary furniture into an extraordinary hideaway was pure joy.
Having built countless forts, from simple couch cushion castles to elaborate multi-room structures, I’m here to share the secrets to crafting your very own epic sanctuary.
Quick Overview
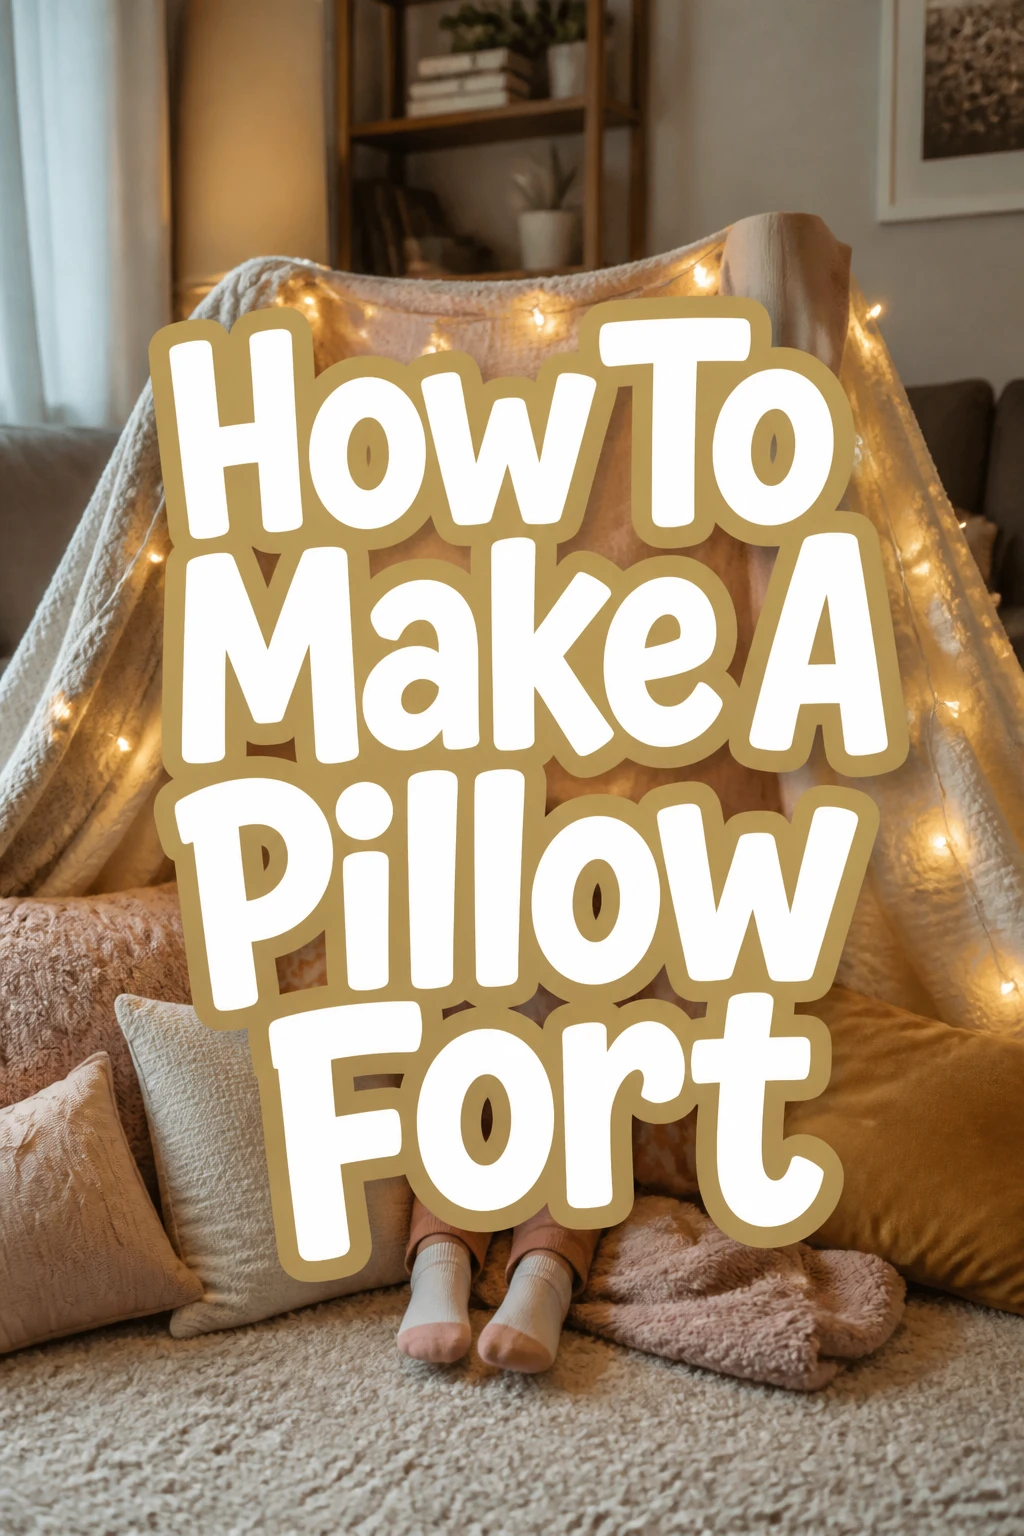
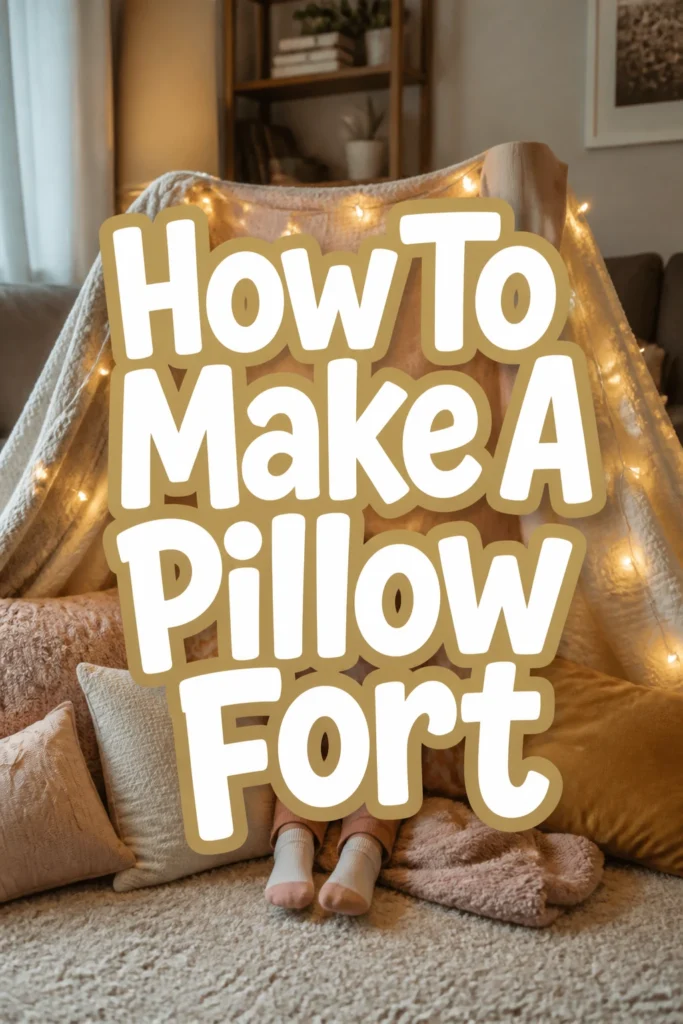
Building a pillow fort is an adventure in creativity and engineering. You’ll construct a cozy, personal space perfect for reading, relaxing, or just escaping the everyday.
- Time needed: 1-3 hours (depending on desired complexity and size)
- Difficulty: Beginner (with room for intermediate architectural flair)
- What you’ll need: Blankets, pillows, chairs, couch cushions, sturdy clips or clothesline, and a dash of imagination.
Step-by-Step Instructions
Step 1: Gather Your Supplies
The success of any great fort begins with a bountiful collection of materials. Think big, think soft, think sturdy.
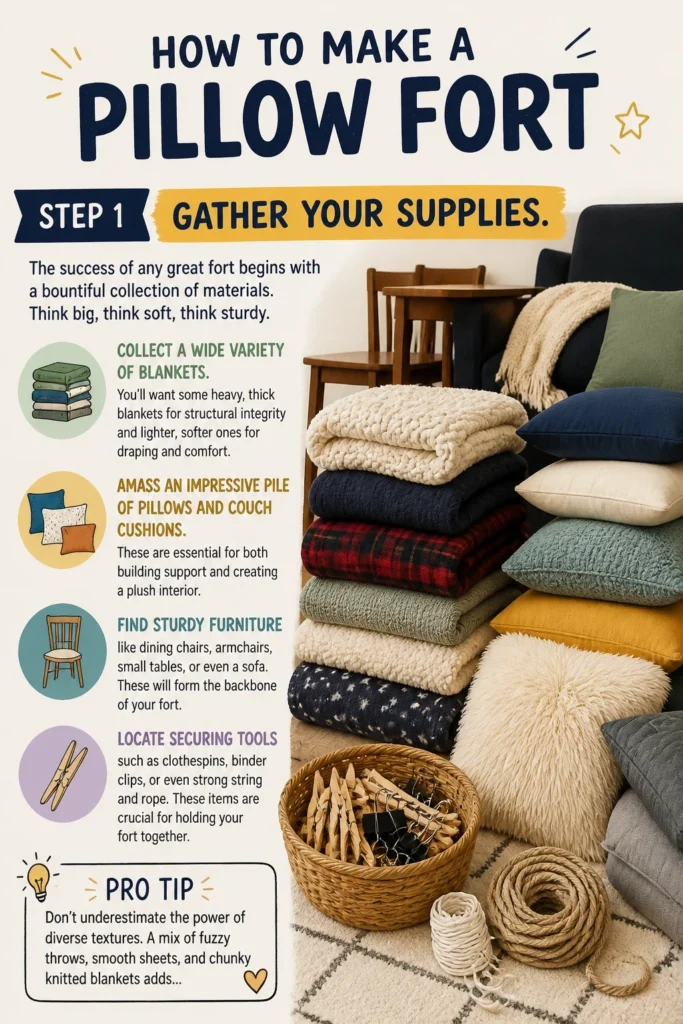
Collect a wide variety of blankets. You’ll want some heavy, thick blankets for structural integrity and lighter, softer ones for draping and comfort.
Amass an impressive pile of pillows and couch cushions. These are essential for both building support and creating a plush interior.
Find sturdy furniture like dining chairs, armchairs, small tables, or even a sofa. These will form the backbone of your fort.
Locate securing tools such as clothespins, binder clips, or even strong string and rope. These items are crucial for holding your fort together.
Pro Tip: Don’t underestimate the power of diverse textures. A mix of fuzzy throws, smooth sheets, and chunky knitted blankets adds character and comfort to your fort.
Step 2: Choose Your Location
Selecting the right spot is like finding the perfect building site for a real house. Consider stability, space, and potential anchors.
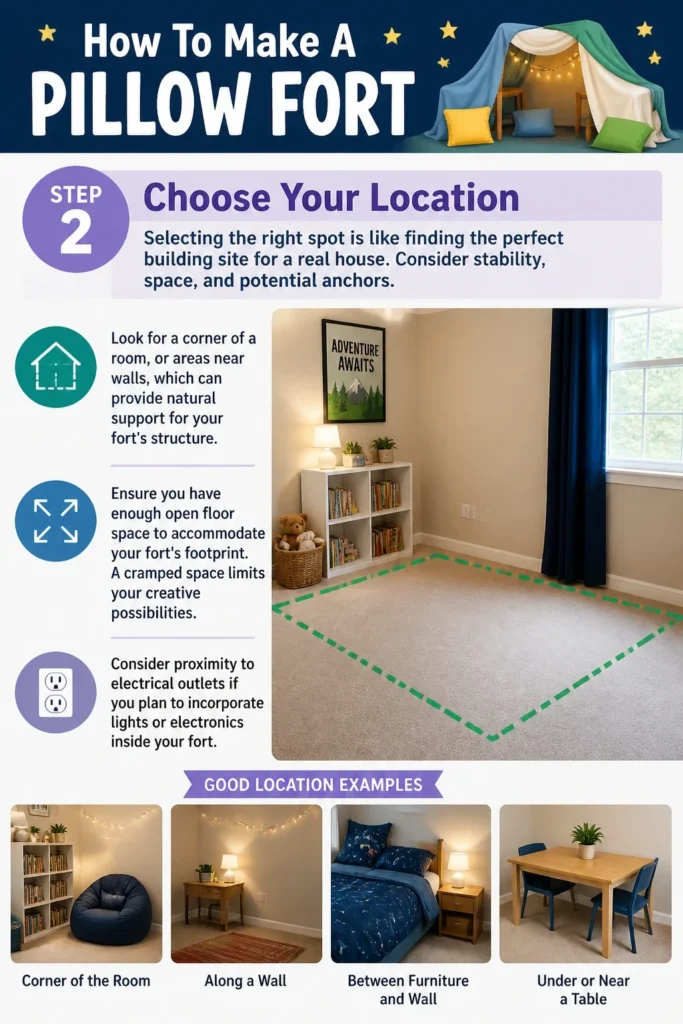
Look for a corner of a room, or areas near walls, which can provide natural support for your fort’s structure.
Ensure you have enough open floor space to accommodate your fort’s footprint. A cramped space limits your creative possibilities.
Consider proximity to electrical outlets if you plan to incorporate lights or electronics inside your fort.
Step 3: Establish the Framework
This is where your fort truly begins to take shape. You’re constructing the skeleton that will hold everything upright.
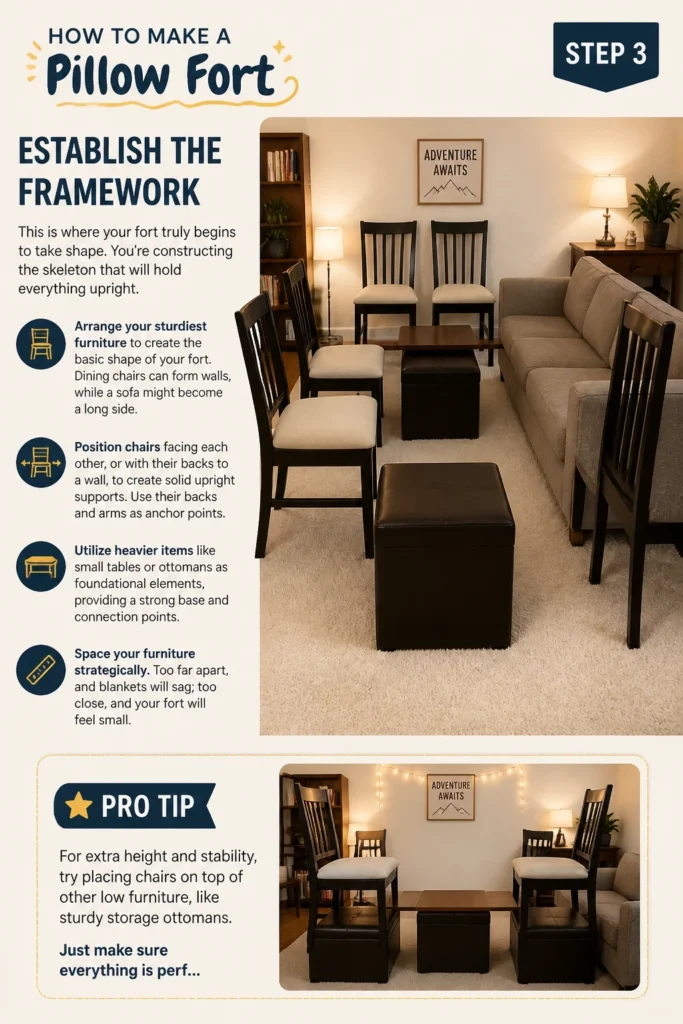
Arrange your sturdiest furniture to create the basic shape of your fort. Dining chairs can form walls, while a sofa might become a long side.
Position chairs facing each other, or with their backs to a wall, to create solid upright supports. Use their backs and arms as anchor points.
Utilize heavier items like small tables or ottomans as foundational elements, providing a strong base and connection points.
Space your furniture strategically. Too far apart, and blankets will sag; too close, and your fort will feel small.
Pro Tip: For extra height and stability, try placing chairs on top of other low furniture, like sturdy storage ottomans. Just make sure everything is perfectly balanced.
Step 4: Drape the Walls and Ceiling
Now it’s time to transform your skeletal frame into a cozy enclosure. This step requires a bit of finesse and blanket management.
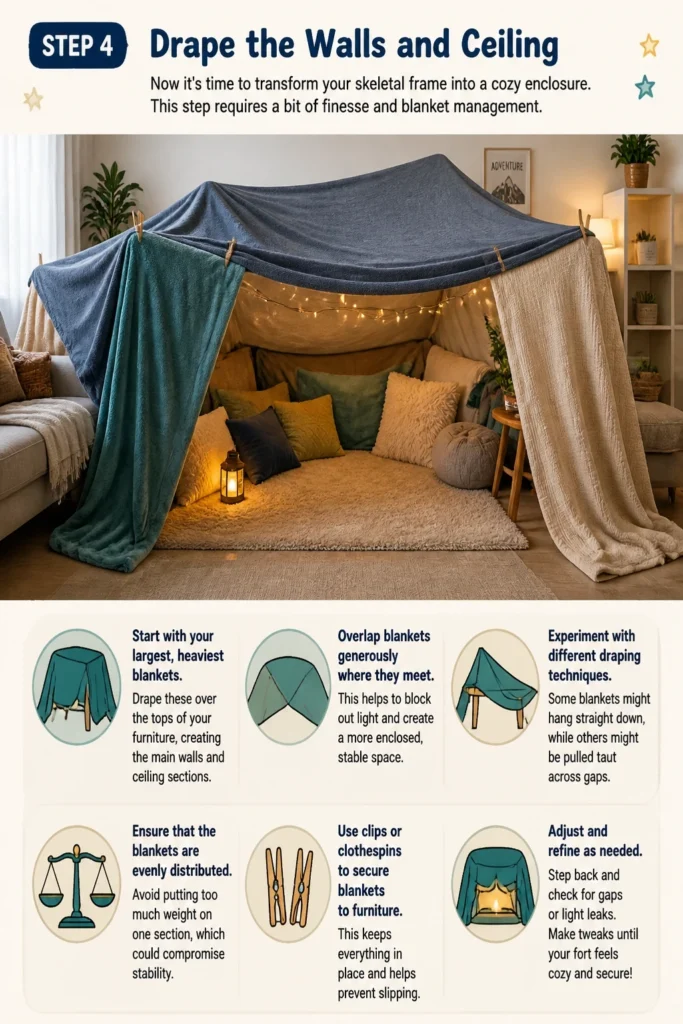
Start with your largest, heaviest blankets. Drape these over the tops of your furniture, creating the main walls and ceiling sections.
Overlap blankets generously where they meet. This helps to block out light and create a more enclosed, stable space.
Experiment with different draping techniques. Some blankets might hang straight down, while others might be pulled taut across gaps.
Ensure that the blankets are evenly distributed. Avoid putting too much weight on one section, which could compromise stability.
Step 5: Secure Your Structure
A fort that collapses is no fort at all. This step is about making sure your hard work stays standing.
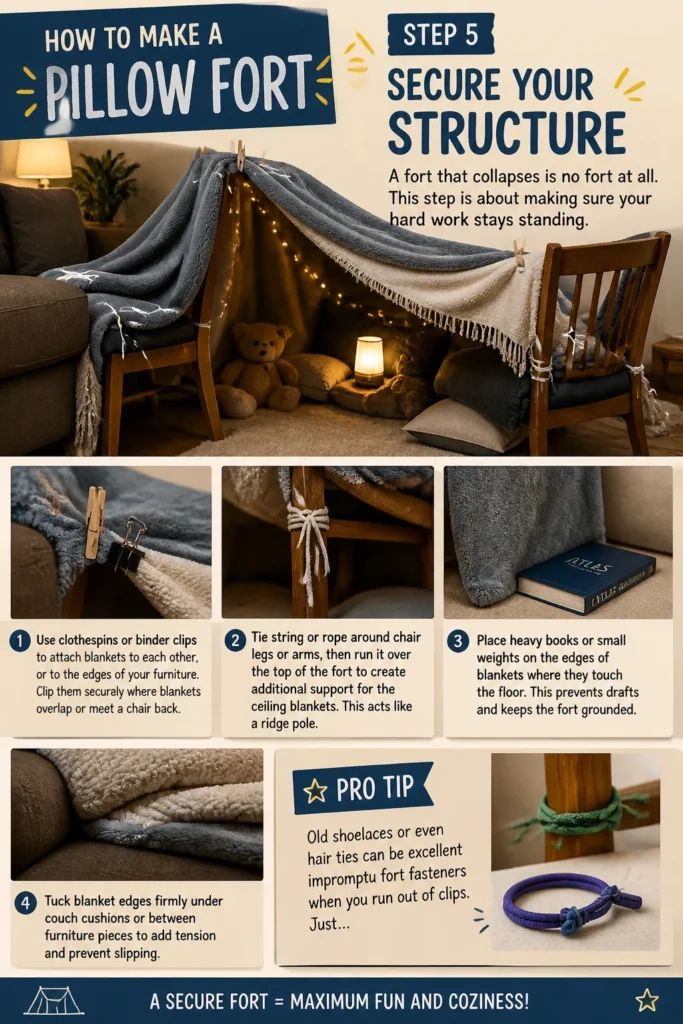
Use clothespins or binder clips to attach blankets to each other, or to the edges of your furniture. Clip them securely where blankets overlap or meet a chair back.
Tie string or rope around chair legs or arms, then run it over the top of the fort to create additional support for the ceiling blankets. This acts like a ridge pole.
Place heavy books or small weights on the edges of blankets where they touch the floor. This prevents drafts and keeps the fort grounded.
Tuck blanket edges firmly under couch cushions or between furniture pieces to add tension and prevent slipping.
Pro Tip: Old shoelaces or even hair ties can be excellent impromptu fort fasteners when you run out of clips. Just make sure they are strong enough to hold.
Step 6: Fortify Your Foundation and Floor
A good fort isn’t just stable; it’s comfortable. This step focuses on making the interior soft and inviting.
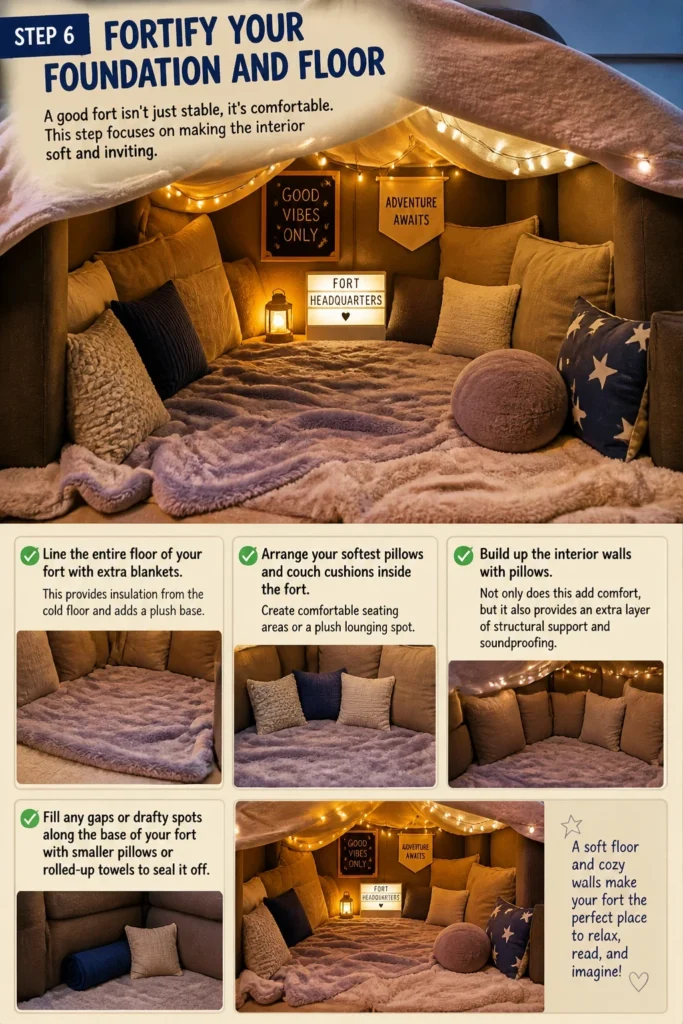
Line the entire floor of your fort with extra blankets. This provides insulation from the cold floor and adds a plush base.
Arrange your softest pillows and couch cushions inside the fort. Create comfortable seating areas or a plush lounging spot.
Build up the interior walls with pillows. Not only does this add comfort, but it also provides an extra layer of structural support and soundproofing.
Fill any gaps or drafty spots along the base of your fort with smaller pillows or rolled-up towels to seal it off.
Step 7: Create Your Entrance
Every great hideaway needs a way in and out. Design an entrance that suits your fort’s style and functionality.
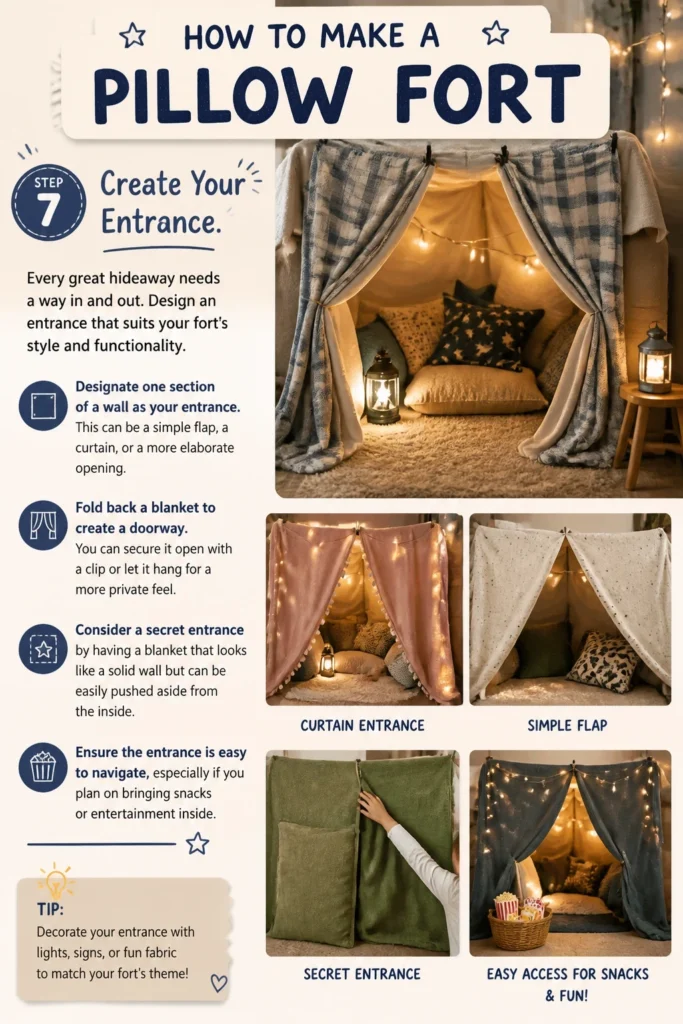
Designate one section of a wall as your entrance. This can be a simple flap, a curtain, or a more elaborate opening.
Fold back a blanket to create a doorway. You can secure it open with a clip or let it hang for a more private feel.
Consider a “secret” entrance by having a blanket that looks like a solid wall but can be easily pushed aside from the inside.
Ensure the entrance is easy to navigate, especially if you plan on bringing snacks or entertainment inside.
Step 8: Personalize Your Interior
This is where your fort truly becomes yours. Add touches that make it a unique and special space.
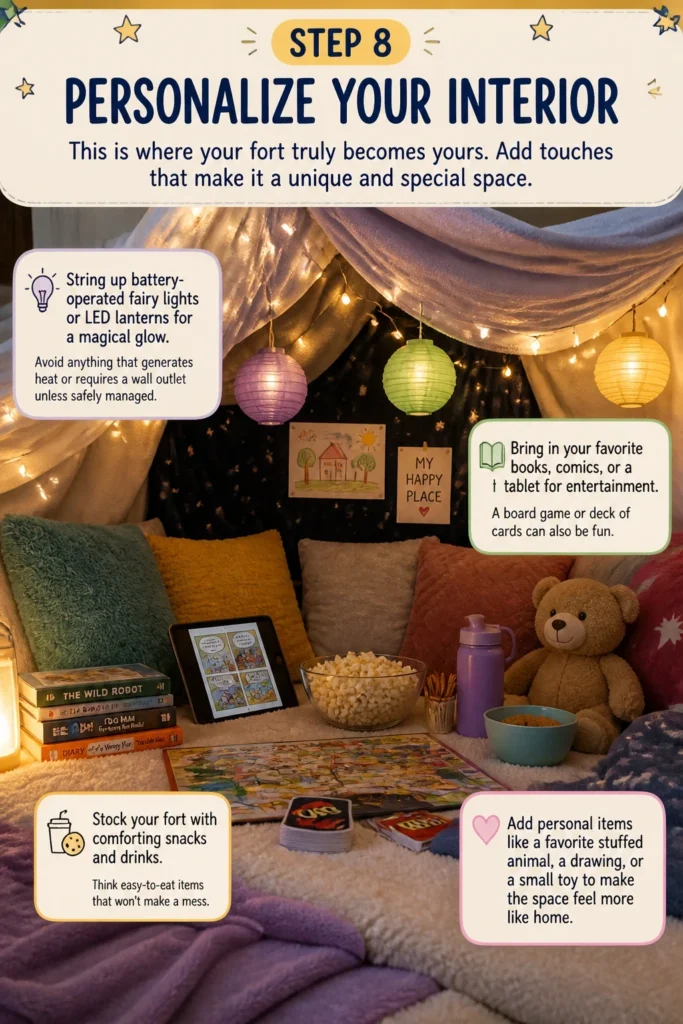
String up battery-operated fairy lights or LED lanterns for a magical glow. Avoid anything that generates heat or requires a wall outlet unless safely managed.
Bring in your favorite books, comics, or a tablet for entertainment. A board game or deck of cards can also be fun.
Stock your fort with comforting snacks and drinks. Think easy-to-eat items that won’t make a mess.
Add personal items like a favorite stuffed animal, a drawing, or a small toy to make the space feel more like home.
Step 9: Test and Refine
Before settling in, give your fort a quick quality check. A little refinement now can prevent future collapses.
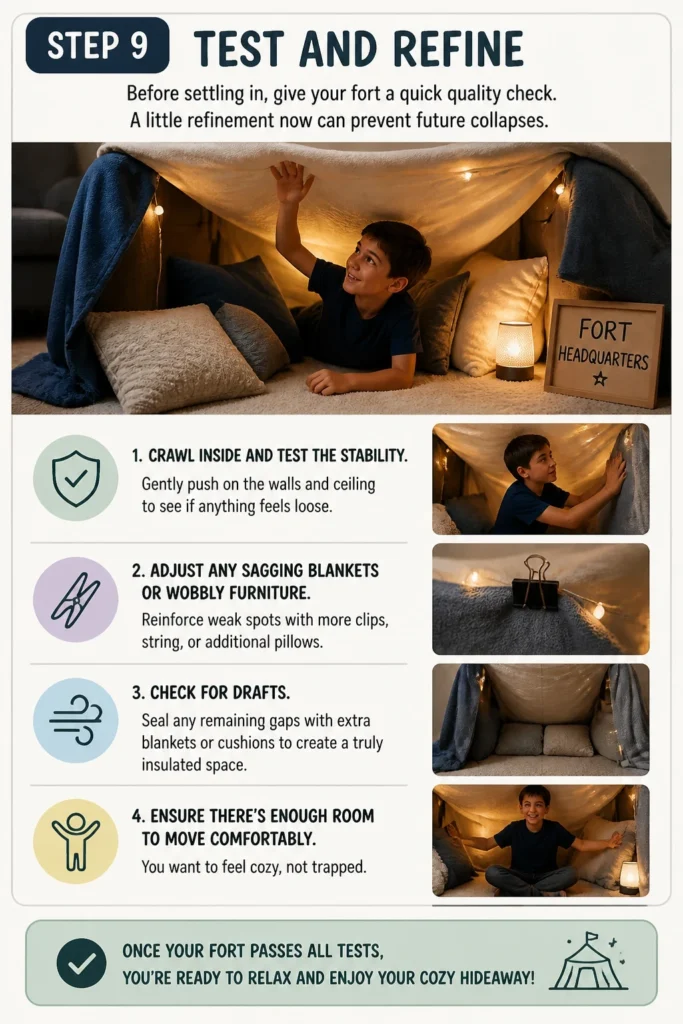
Crawl inside and test the stability. Gently push on the walls and ceiling to see if anything feels loose.
Adjust any sagging blankets or wobbly furniture. Reinforce weak spots with more clips, string, or additional pillows.
Check for drafts. Seal any remaining gaps with extra blankets or cushions to create a truly insulated space.
Ensure there’s enough room to move comfortably. You want to feel cozy, not trapped.
Step 10: Enjoy Your Sanctuary
Your masterpiece is complete! The final step is the most rewarding one.
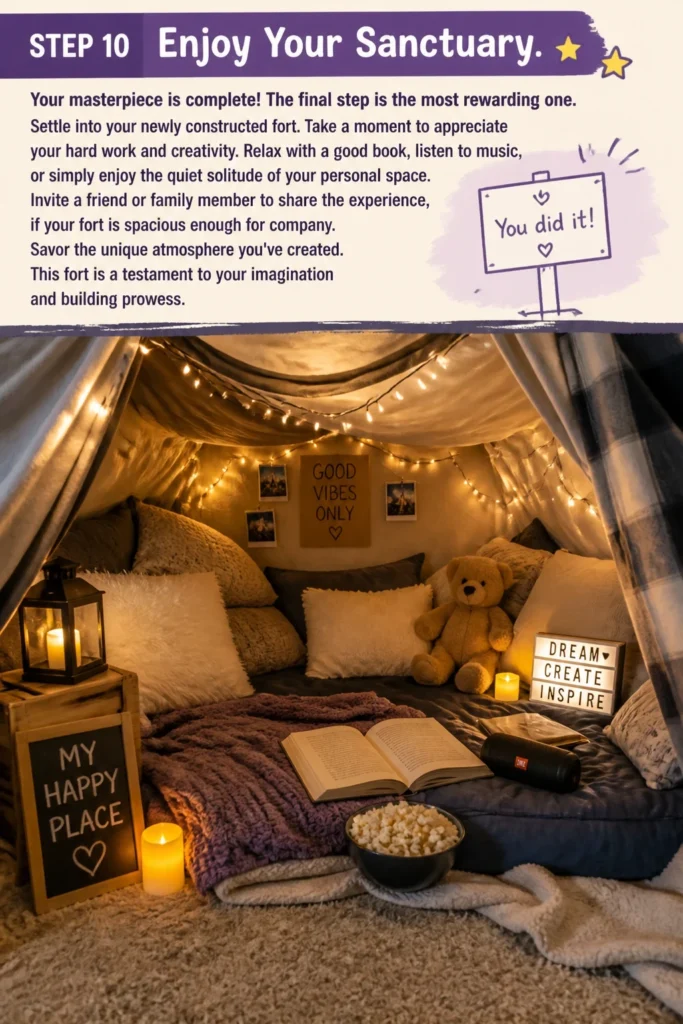
Settle into your newly constructed fort. Take a moment to appreciate your hard work and creativity.
Relax with a good book, listen to music, or simply enjoy the quiet solitude of your personal space.
Invite a friend or family member to share the experience, if your fort is spacious enough for company.
Savor the unique atmosphere you’ve created. This fort is a testament to your imagination and building prowess.
Common Mistakes to Avoid
Weak Foundation
One of the most frequent errors is using flimsy furniture or spacing supports too far apart. If your initial framework isn’t sturdy, the entire structure will be prone to collapse. Always choose robust chairs, sofas, or tables as your primary supports, ensuring they are stable and not easily tipped.
Insufficient Supplies
Starting a fort with too few blankets or pillows often leads to a half-finished, drafty, or unstable structure. It’s better to over-gather supplies than to run out mid-build. A good fort requires layers for stability, comfort, and light blocking, so having extra materials on hand is always a good idea.
Ignoring Gravity
Forgetting to secure blankets properly is a recipe for disaster. Gravity will inevitably pull unsecured blankets down, leading to frustration. Always use clips, string, or heavy objects to anchor blankets to furniture and to each other, creating tension that keeps your fort standing tall.
Overcrowding the Space
While a fort should be cozy, making it too small or filling it with too many items can make it feel claustrophobic. Plan for comfortable movement inside. Prioritize essential comfort items and entertainment, leaving enough breathing room to truly enjoy your private retreat.
Troubleshooting
Fort Collapses
If your fort begins to sag or completely collapses, the most likely culprit is an unstable framework or insufficient securing. First, examine your primary furniture supports; ensure they are firmly positioned and not wobbling. Re-drape blankets, making sure to use plenty of clips or string to create tension and strong connections between blankets and furniture. Adding more pillows around the base of the furniture can also provide extra buttressing.
Too Drafty/Cold
A chilly or breezy fort diminishes the cozy experience. This usually means there are gaps in your blanket coverage. Inspect the fort from both the inside and outside, looking for any visible openings or thin spots. Use smaller blankets, towels, or extra pillows to plug these gaps, especially along the floor and where blankets meet. Overlapping blankets more generously will also help create a better seal.
Not Dark Enough Inside
For some, the appeal of a fort is its cave-like darkness. If too much light is seeping in, you’ll need to layer up. Use darker, thicker blankets as your primary fort walls and ceiling. Double-layer lighter blankets or add an extra sheet over bright spots. Ensure all seams and overlaps are tight and secured, as light often sneaks through small cracks.
Key Takeaways
- Plan Your Build: A little forethought about location and design goes a long way.
- Prioritize Stability: A strong furniture framework is the backbone of any lasting fort.
- Secure Every Connection: Clips, string, and heavy objects are your best friends for preventing collapses.
- Embrace Comfort: Layering blankets and pillows creates a truly inviting interior.
- Personalize Your Space: Add lights, snacks, and personal touches to make it uniquely yours.
- Enjoy the Process: Building a fort is as much fun as spending time inside it.
Frequently Asked Questions
What’s the best type of blanket to use?
For structural support, use heavier, thicker blankets like quilts, comforters, or heavy throws. These provide good coverage and stability. For comfort and interior layering, softer, lighter blankets like fleece throws or thin sheets work wonderfully. A mix of both types gives you versatility.
How do I make my fort stand up without furniture?
You can get creative! Use laundry baskets turned upside down, large cardboard boxes, or even broomsticks held upright by heavy objects. Clothes drying racks can also make excellent frameworks. The key is to find items that can bear the weight of blankets without toppling over easily.
Can I build a fort outside?
Absolutely! Outdoor forts offer a different kind of adventure. Just remember to consider the weather; use waterproof tarps or old shower curtains for rain protection. Choose a flat, dry spot, and be prepared to use natural elements like trees or bushes as part of your framework.
What if I don’t have enough clamps?
No worries, improvisation is key! Strong shoelaces, bungee cords, rubber bands, or even hair ties can secure blankets. Heavy books or small decorative weights can hold down blanket edges. You can also tuck blanket ends tightly under couch cushions or between furniture pieces for a secure hold.
Our Top Recommended Finds
- Heavy-Duty Binder Clips: These are incredibly strong and excellent for securing multiple layers of blankets to each other or to furniture.
- Battery-Operated LED String Lights: Safe and energy-efficient, they add a magical ambiance without the need for an outlet or generating heat.
- Extra-Large Fleece Throws: Versatile and soft, these blankets are perfect for both draping over large sections and adding plush comfort inside.
Your Cozy Creation Awaits
Building a pillow fort is more than just stacking cushions; it’s an act of imagination, a testament to simple joys, and a fantastic way to create a personal retreat. Whether you’re seeking a quiet reading nook or a fun project with loved ones, the process itself is half the adventure.
So, gather your materials, clear some space, and let your inner architect take over. The perfect, cozy sanctuary is just a few blankets and pillows away. Start building your dream hideaway today!
Beginner-friendly templates, step-by-step guides,
and weekly project ideas in your inbox.