How To Make A Wreath Bow

Beginner-friendly templates, step-by-step guides,
and weekly project ideas in your inbox.
There’s a special joy in decorating your home with handmade touches.
I remember my first attempt at a wreath bow, a tangled mess that barely resembled anything festive.
But with a few simple techniques, anyone can craft a beautiful, professional-looking bow that truly elevates any wreath or gift.
Quick Overview
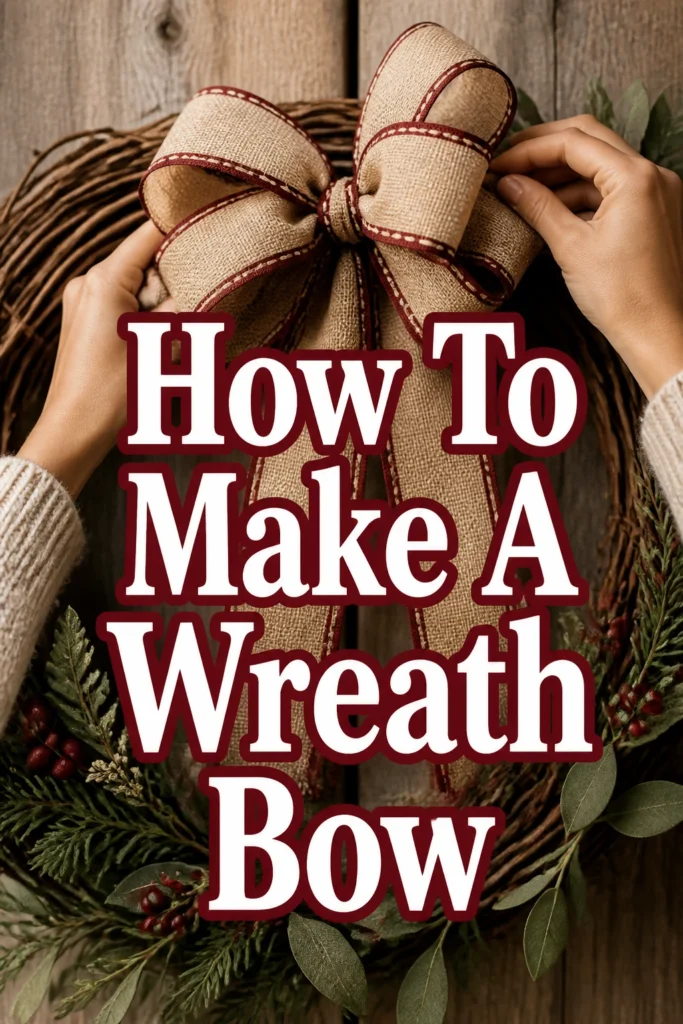
Crafting your own wreath bow adds a distinct personal flair to any decoration. This guide will walk you through creating a full, elegant bow from start to finish.
- Time needed: 20-45 minutes (depending on practice and bow complexity)
- Difficulty: Beginner to Intermediate
- What you’ll need: Wired ribbon, floral wire, sharp scissors
Step-by-Step Instructions
Step 1: Gather Your Materials
Before you begin, assemble all the necessary tools and ribbon in one convenient place. This makes the entire process smoother and more enjoyable.
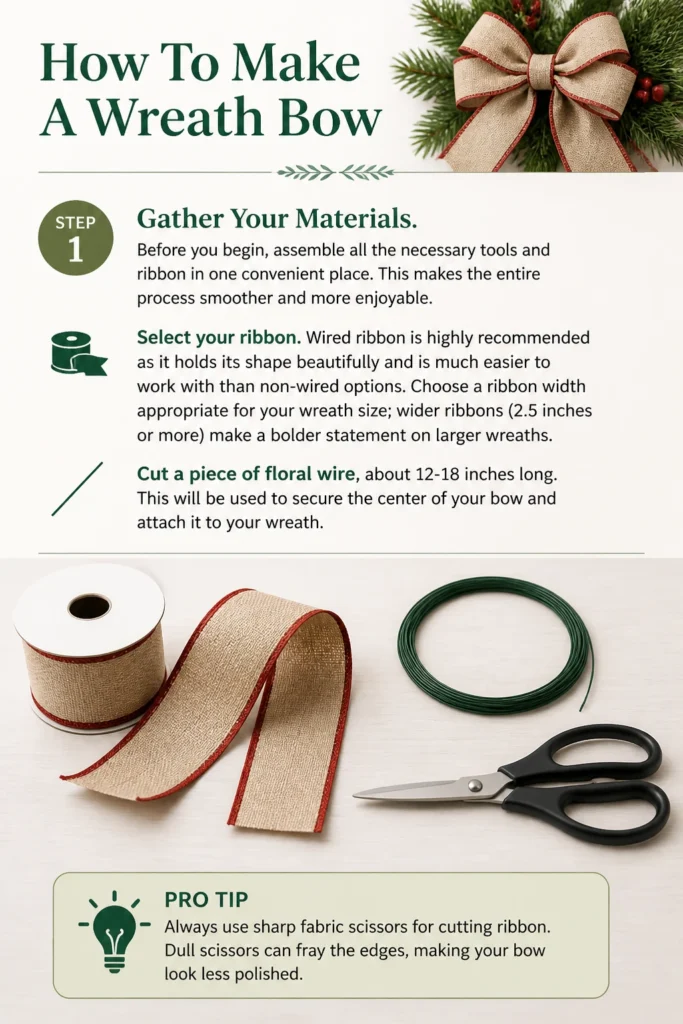
Select your ribbon. Wired ribbon is highly recommended as it holds its shape beautifully and is much easier to work with than non-wired options.
Choose a ribbon width appropriate for your wreath size; wider ribbons (2.5 inches or more) make a bolder statement on larger wreaths.
Cut a piece of floral wire, about 12-18 inches long. This will be used to secure the center of your bow and attach it to your wreath.
Pro Tip: Always use sharp fabric scissors for cutting ribbon. Dull scissors can fray the edges, making your bow look less polished.
Step 2: Measure and Create the First Loop
Begin by determining the length of your bow’s tails. These are the decorative ends that hang down from the bow itself.
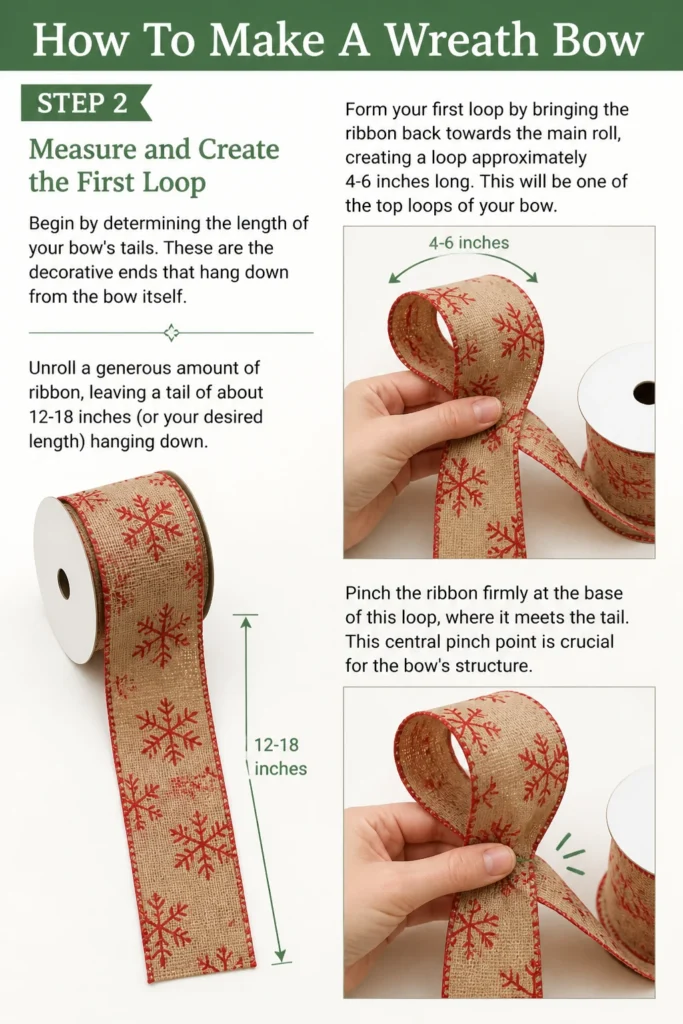
Unroll a generous amount of ribbon, leaving a tail of about 12-18 inches (or your desired length) hanging down.
Form your first loop by bringing the ribbon back towards the main roll, creating a loop approximately 4-6 inches long. This will be one of the top loops of your bow.
Pinch the ribbon firmly at the base of this loop, where it meets the tail. This central pinch point is crucial for the bow’s structure.
Step 3: Form Subsequent Loops
Building on your first loop, you will now create the symmetrical loops that give your bow its fullness.
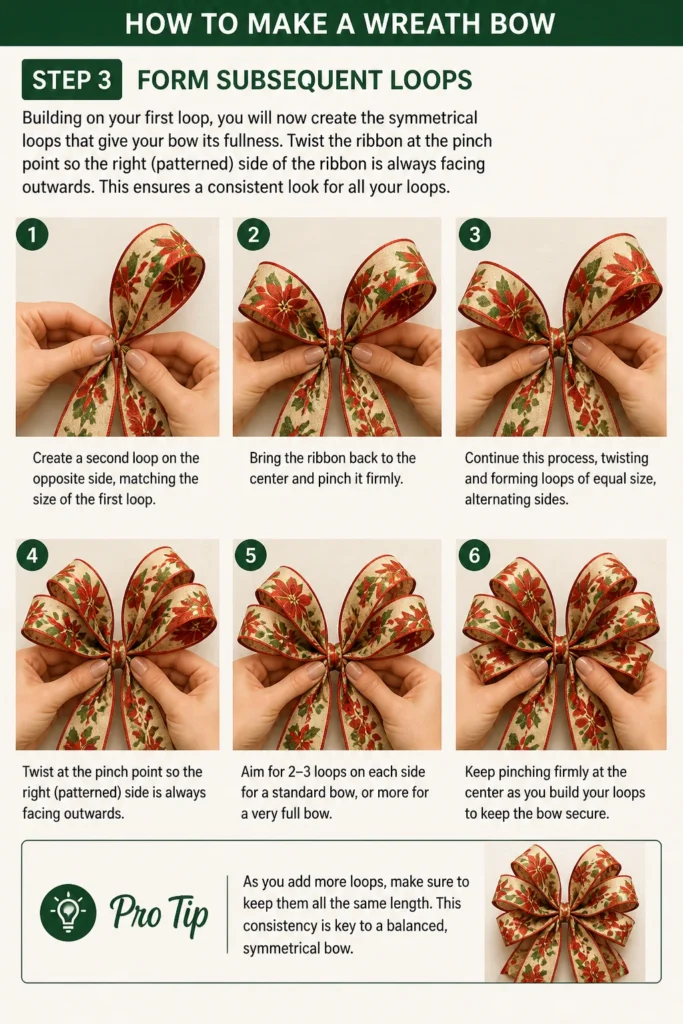
Twist the ribbon at the pinch point so the “right” (patterned) side of the ribbon is always facing outwards. This ensures a consistent look for all your loops.
Create a second loop on the opposite side, matching the size of the first loop. Bring the ribbon back to the center and pinch it firmly.
Continue this process, twisting and forming loops of equal size, alternating sides. Aim for 2-3 loops on each side for a standard bow, or more for a very full bow.
Pro Tip: As you add more loops, make sure to keep them all the same length. This consistency is key to a balanced, symmetrical bow.
Step 4: Create the Center Loop (Optional, but Recommended)
A small center loop adds a finished, professional touch to your bow and helps conceal the securing wire.
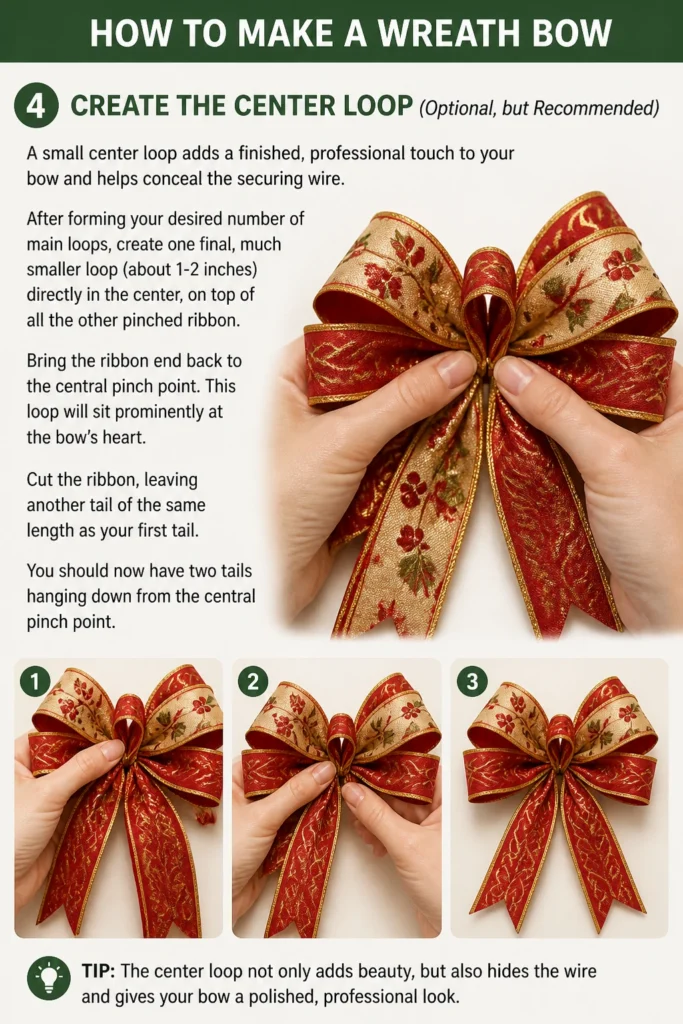
After forming your desired number of main loops, create one final, much smaller loop (about 1-2 inches) directly in the center, on top of all the other pinched ribbon.
Bring the ribbon end back to the central pinch point. This loop will sit prominently at the bow’s heart.
Cut the ribbon, leaving another tail of the same length as your first tail. You should now have two tails hanging down from the central pinch point.
Step 5: Secure the Center
This step is critical for holding all your loops and tails together firmly.
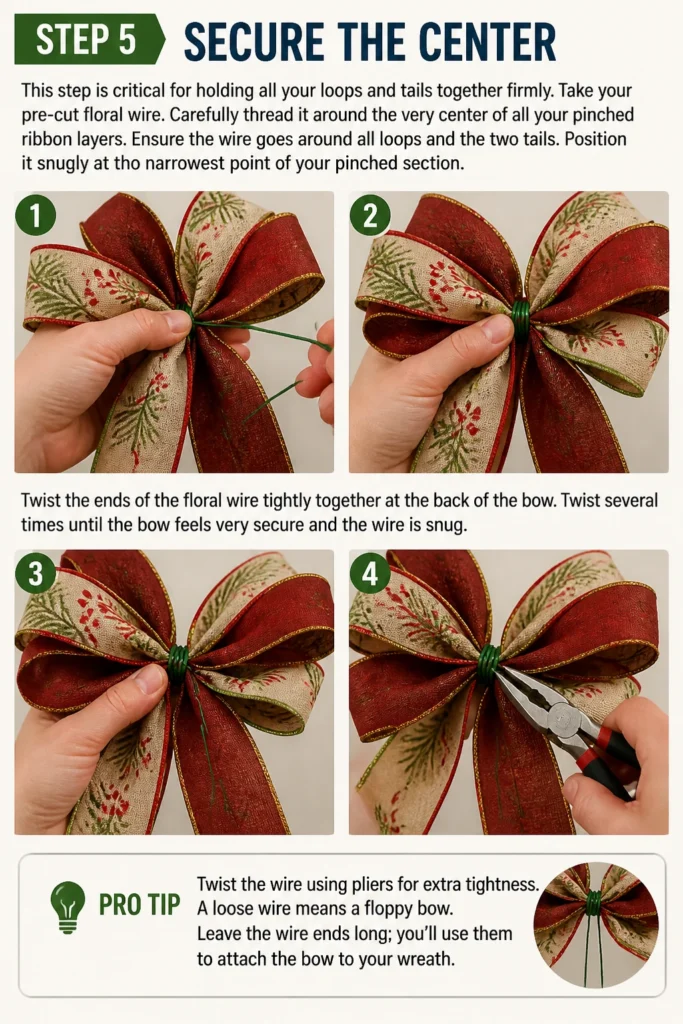
Take your pre-cut floral wire. Carefully thread it around the very center of all your pinched ribbon layers.
Ensure the wire goes around all loops and the two tails. Position it snugly at the narrowest point of your pinched section.
Twist the ends of the floral wire tightly together at the back of the bow. Twist several times until the bow feels very secure and the wire is snug.
Pro Tip: Twist the wire using pliers for extra tightness. A loose wire means a floppy bow. Leave the wire ends long; you’ll use them to attach the bow to your wreath.
Step 6: Fluff and Shape the Loops
Now comes the fun part: transforming your flat ribbon bundle into a voluminous bow.
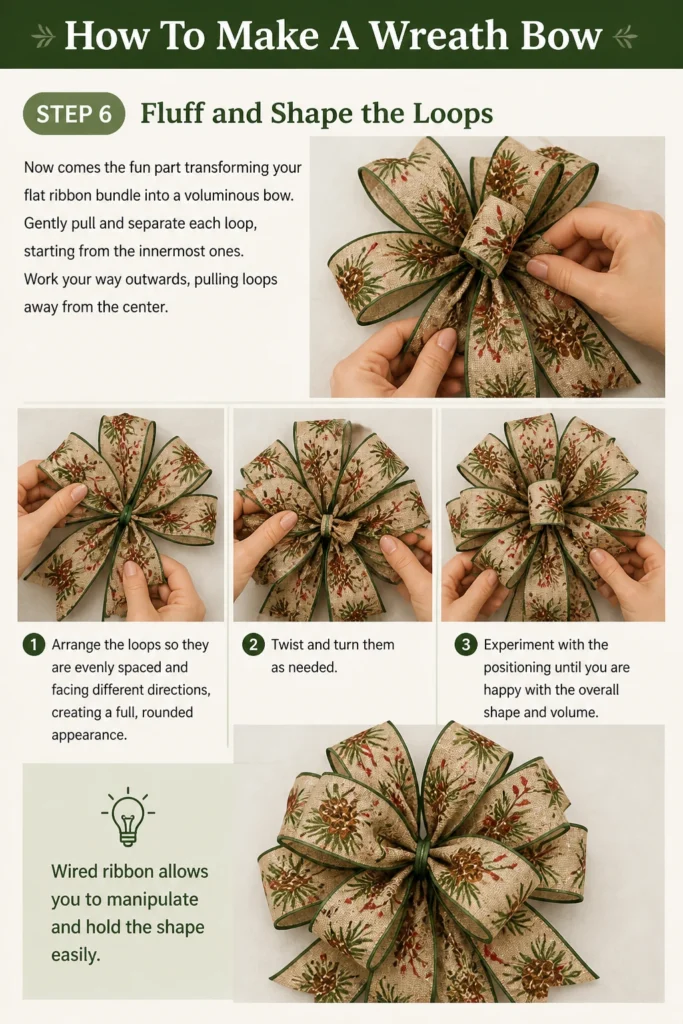
Gently pull and separate each loop, starting from the innermost ones. Work your way outwards, pulling loops away from the center.
Arrange the loops so they are evenly spaced and facing different directions, creating a full, rounded appearance. Twist and turn them as needed.
Experiment with the positioning until you are happy with the overall shape and volume. Wired ribbon allows you to manipulate and hold the shape easily.
Step 7: Finish the Tails
The tails add elegance and a finished look to your bow. There are a few common ways to style them.
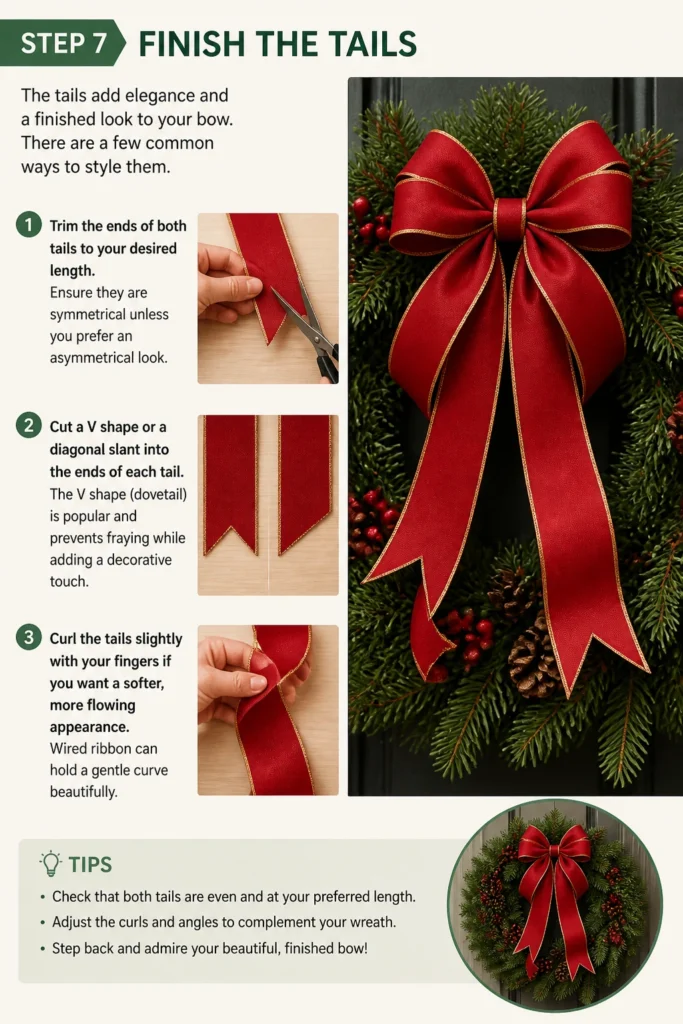
Trim the ends of both tails to your desired length. Ensure they are symmetrical unless you prefer an asymmetrical look.
Cut a “V” shape or a diagonal slant into the ends of each tail. The “V” shape (dovetail) is popular and prevents fraying while adding a decorative touch.
Curl the tails slightly with your fingers if you want a softer, more flowing appearance. Wired ribbon can hold a gentle curve beautifully.
Common Mistakes to Avoid
Uneven Loops
One common pitfall is creating loops of varying sizes. When loops are not uniform, the bow can appear lopsided or unbalanced, detracting from its overall appeal. To avoid this, always measure your loops against each other as you form them, making small adjustments to ensure consistent length and symmetry.
Too Loose or Too Tight Center
Securing the center too loosely will result in a floppy bow that quickly loses its shape, while making it too tight can crush the ribbon and make fluffing difficult. The key is to secure the wire firmly enough to hold everything in place without distorting the ribbon. Aim for a snug but not suffocating tightness, allowing the loops room to be fluffed.
Neglecting the Tails
Often, the focus is solely on the loops, leading crafters to overlook the importance of well-finished tails. Untrimmed or poorly cut tails can make an otherwise beautiful bow look unfinished and amateurish. Always take the time to trim your tails to an appropriate length and cut them with a decorative “V” or diagonal shape for a polished finish.
Using the Wrong Ribbon Type
Attempting to make a structured bow with flimsy, non-wired ribbon is a recipe for frustration. Non-wired ribbon struggles to hold its shape, resulting in a limp and unappealing bow. Always opt for wired ribbon, especially when creating multi-loop bows, as the wire edge provides the necessary structure and allows for easy shaping and fluffing.
Troubleshooting
Bow Looks Flat
If your bow appears flat or lifeless after assembly, it likely needs more fluffing and shaping. The key is to gently pull and separate each loop, working from the inside out, and angling them in different directions. Don’t be afraid to manipulate the wired ribbon; it’s designed to be shaped and will hold its form once arranged. Ensure no loops are stuck together.
Ribbon Keeps Slipping
If your ribbon slips out of your grasp while you’re forming loops, your central pinch might not be firm enough. It’s crucial to maintain a strong, consistent pinch at the bow’s center throughout the loop-making process. If you find your fingers cramping, you might need a brief break or consider using a clothespin or a bow-making tool to help hold the initial loops in place.
Center Knot is Bulky
A bulky center can make your bow look messy and detract from its elegance. This often happens when the floral wire isn’t twisted tightly enough or when too much ribbon is gathered in one spot. Ensure you’re twisting the wire as tightly as possible at the narrowest point of the pinched ribbon. If using very wide ribbon, consider making the center loop slightly wider to accommodate the bulk, or use a thinner gauge floral wire.
Key Takeaways
- Always choose wired ribbon for bows that hold their shape well.
- Maintain consistent loop sizes for a balanced and symmetrical bow.
- Secure the bow’s center tightly with floral wire to prevent sagging.
- Fluff and shape each loop individually to achieve maximum volume and fullness.
- Finish the ribbon tails with a decorative cut for a polished look.
- Practice makes perfect; don’t be discouraged by your first attempt.
Frequently Asked Questions
What’s the best ribbon for a wreath bow?
Wired ribbon is hands-down the best choice for wreath bows. The wire edges allow the ribbon to be shaped and fluffed, holding its form beautifully against the elements or over time. It comes in various materials like burlap, sheer, satin, and grosgrain, all with wired edges.
How do I attach the bow to the wreath?
The floral wire you used to secure the bow’s center is also your attachment method. Simply thread the two long ends of the floral wire through the branches or frame of your wreath. Pull them tightly to the back and twist them securely around the wreath frame or a strong branch. Trim any excess wire.
Can I make a bow with multiple ribbons?
Absolutely! Layering multiple ribbons adds depth and texture. You can either make separate bows and layer them, or, for a simpler approach, hold two different ribbons together as one and follow the same steps. Ensure one ribbon is slightly wider or a contrasting texture for the best effect.
How do I store my bows?
To keep your bows in pristine condition, gently fluff them and then store them in a box or container where they won’t be crushed. You can also hang them individually on hangers in a closet. Placing tissue paper between bows can help maintain their shape and prevent dust accumulation.
Our Top Recommended Finds
- High-Quality Wired Ribbon: Essential for bows that maintain their shape and look professional. Look for durable fabric and strong wire.
- Floral Wire (22-24 Gauge): Provides the necessary strength to secure your bow without being too thick or difficult to twist.
- Sharp Fabric Scissors: Crucial for clean, crisp cuts that prevent fraying and give your bow a polished finish.
Unleash Your Inner Bow Artisan
Creating your own wreath bow is a rewarding experience, transforming simple ribbon into a statement piece.
With practice, you’ll find your rhythm and develop a unique style that reflects your personal touch.
So, gather your supplies, follow these steps, and start crafting beautiful bows for every occasion today!
Beginner-friendly templates, step-by-step guides,
and weekly project ideas in your inbox.