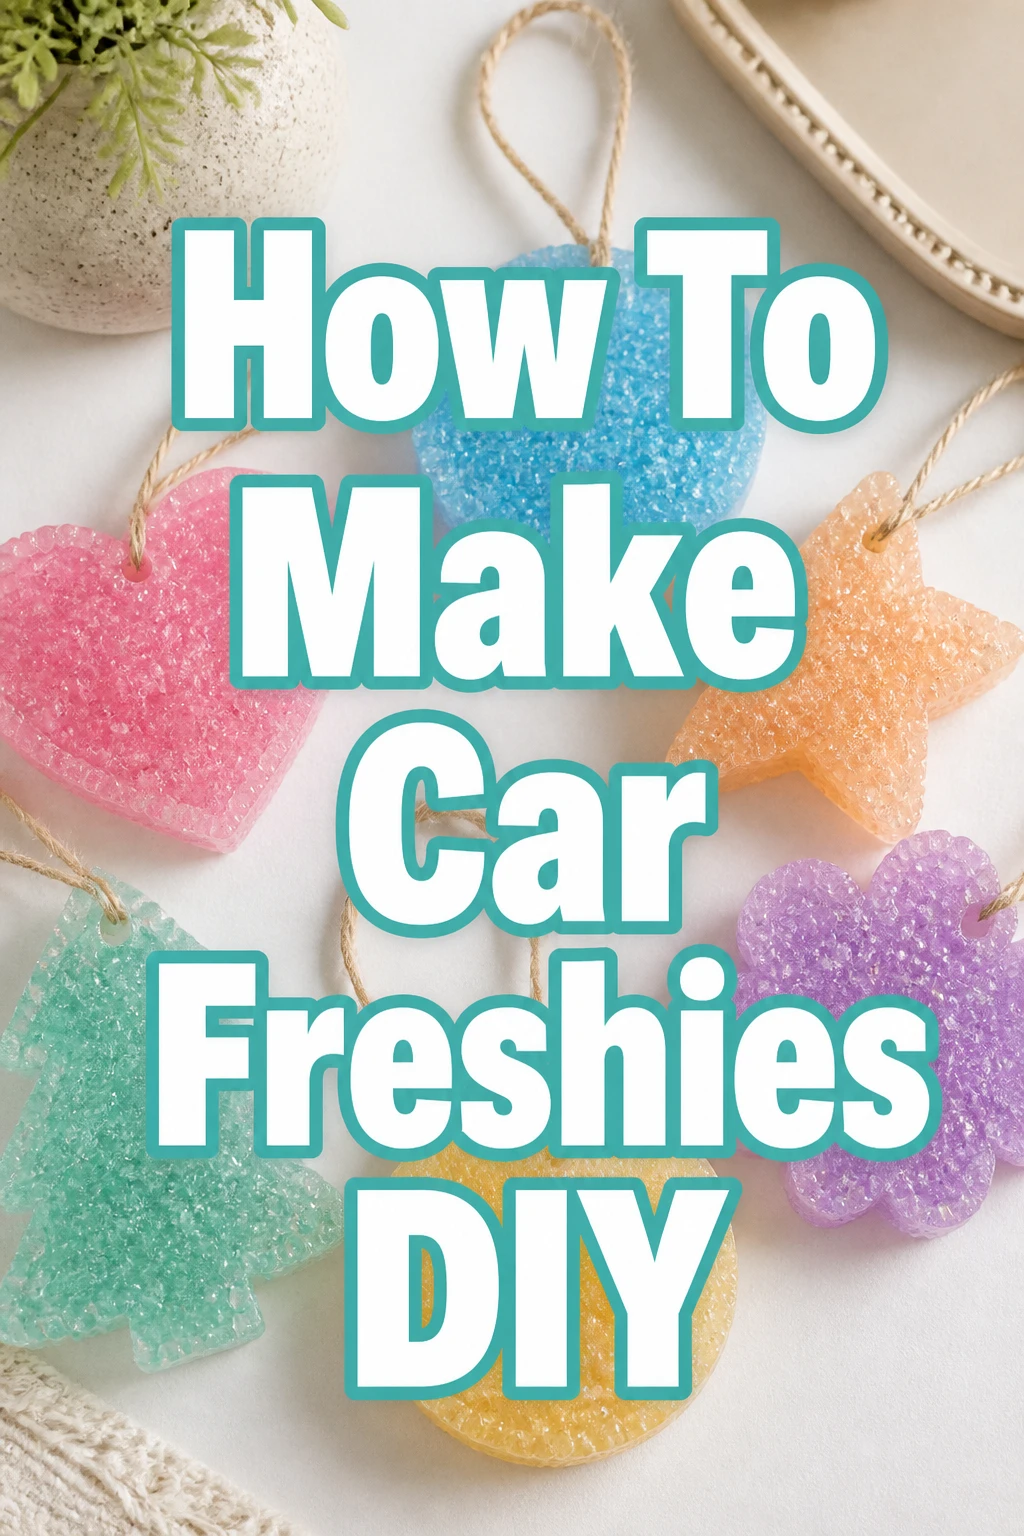
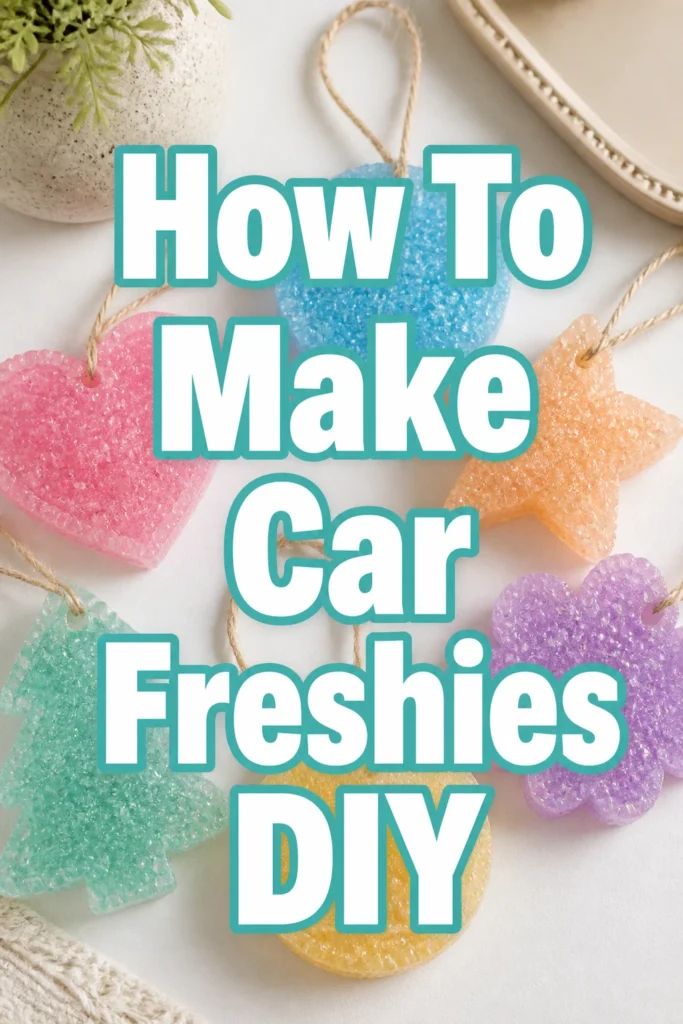
How To Make Car Freshies DIY

Beginner-friendly templates, step-by-step guides,
and weekly project ideas in your inbox.
Tired of those flimsy, short-lived car air fresheners?
Making your own car freshies is a rewarding project that lets you customize scents and shapes.
I’ve personally experimented with countless batches, finding the perfect balance for long-lasting fragrance and vibrant designs, and I’m here to share those secrets with you.
Quick Overview
This guide will walk you through creating personalized car freshies, transforming your vehicle’s interior with custom scents and styles.
You’ll learn everything from selecting materials to curing your finished freshies for optimal performance.
- Time needed: 2-3 hours active time, plus 2-5 days curing
- Difficulty: Beginner
- What you’ll need: Aroma beads, fragrance oil, mica powder, cookie cutters, parchment paper, baking sheet, string
Step-by-Step Instructions
Step 1: Gather Your Supplies
Before you begin, ensure you have all necessary materials laid out on a clean, protected surface.
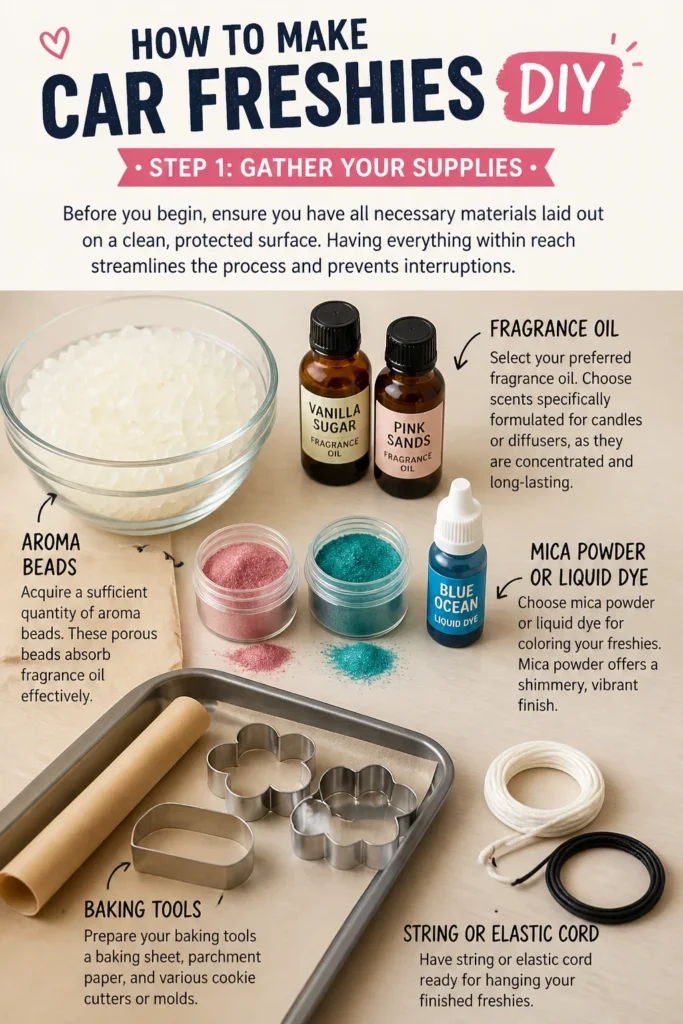
Having everything within reach streamlines the process and prevents interruptions.
- Acquire a sufficient quantity of aroma beads. These porous beads absorb fragrance oil effectively.
- Select your preferred fragrance oil. Choose scents specifically formulated for candles or diffusers, as they are concentrated and long-lasting.
- Choose mica powder or liquid dye for coloring your freshies. Mica powder offers a shimmery, vibrant finish.
- Prepare your baking tools: a baking sheet, parchment paper, and various cookie cutters or molds.
- Have string or elastic cord ready for hanging your finished freshies.
Step 2: Scent and Color the Aroma Beads
This step is crucial for achieving a powerful and even fragrance distribution in your freshies.
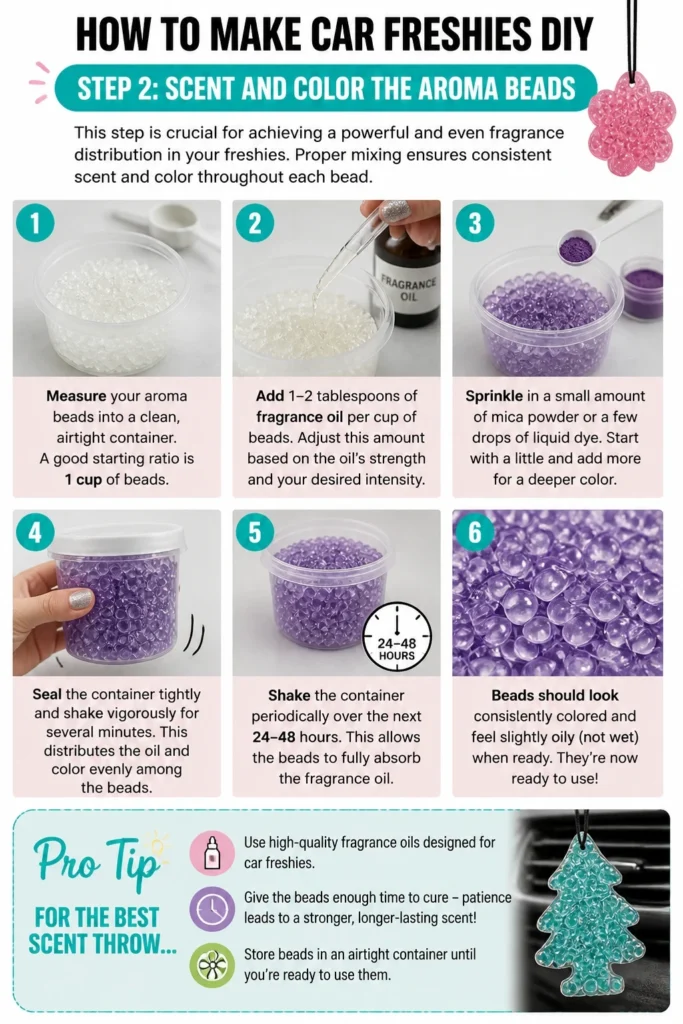
Proper mixing ensures consistent scent and color throughout each bead.
- Measure your aroma beads into a clean, airtight container. A good starting ratio is 1 cup of beads.
- Add 1-2 tablespoons of fragrance oil per cup of beads. Adjust this amount based on the oil’s strength and your desired intensity.
- Sprinkle in a small amount of mica powder or a few drops of liquid dye. Start with a little and add more for a deeper color.
- Seal the container tightly and shake vigorously for several minutes. This distributes the oil and color evenly among the beads.
- Shake the container periodically over the next 24-48 hours. This allows the beads to fully absorb the fragrance oil.
Pro Tip: For the best scent throw, let your beads “marinate” in the fragrance oil for at least 24-48 hours. Some crafters even recommend up to a week for maximum absorption.
Step 3: Prepare for Baking
Setting up your workspace correctly helps prevent messes and ensures your freshies bake evenly.
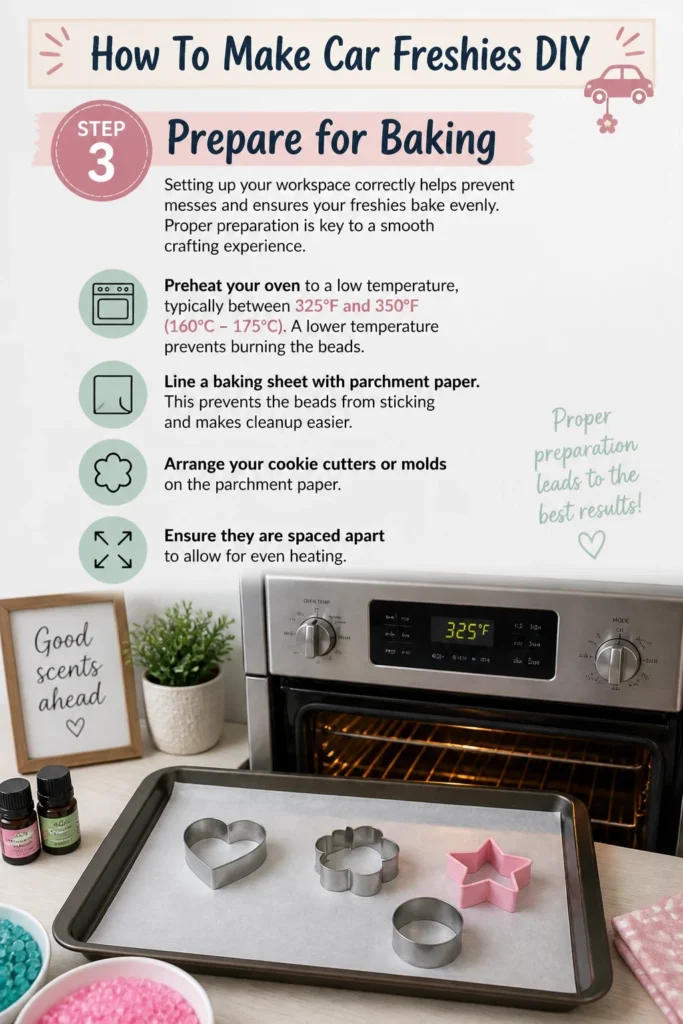
Proper preparation is key to a smooth crafting experience.
- Preheat your oven to a low temperature, typically between 325F and 350F (160C – 175C). A lower temperature prevents burning the beads.
- Line a baking sheet with parchment paper. This prevents the beads from sticking and makes cleanup easier.
- Arrange your cookie cutters or molds on the parchment paper. Ensure they are spaced apart to allow for even heating.
Step 4: Fill the Molds
Careful filling ensures your freshies have a uniform thickness and a professional appearance.
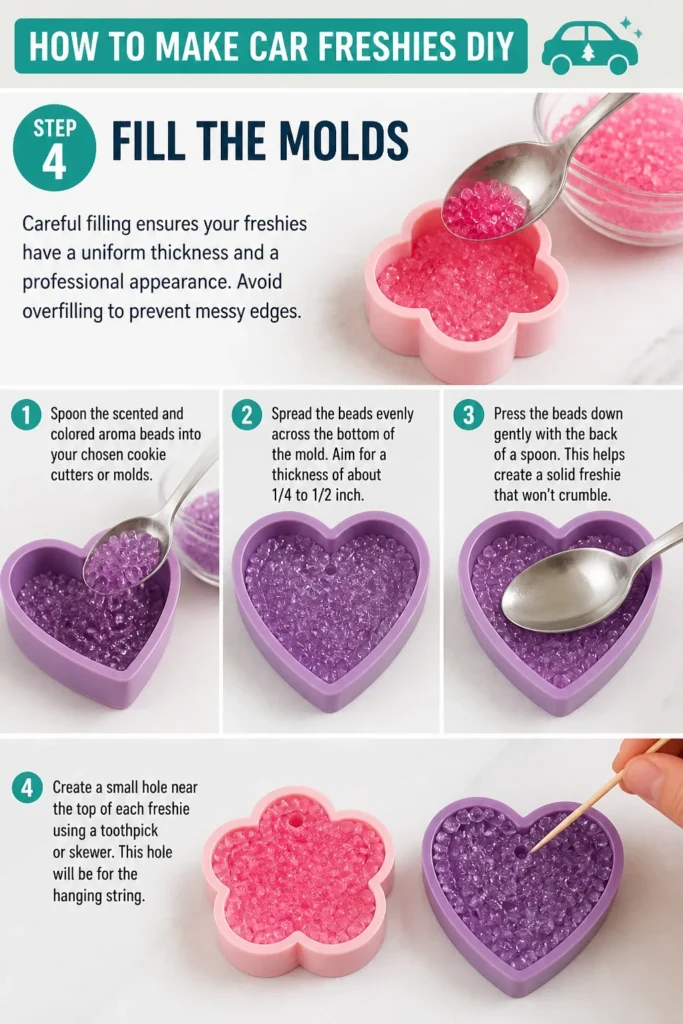
Avoid overfilling to prevent messy edges.
- Spoon the scented and colored aroma beads into your chosen cookie cutters or molds.
- Spread the beads evenly across the bottom of the mold. Aim for a thickness of about 1/4 to 1/2 inch.
- Press the beads down gently with the back of a spoon. This helps create a solid freshie that won’t crumble.
- Create a small hole near the top of each freshie using a toothpick or skewer. This hole will be for the hanging string.
Step 5: Bake the Freshies
Baking transforms the loose beads into solid, fragrant air fresheners.
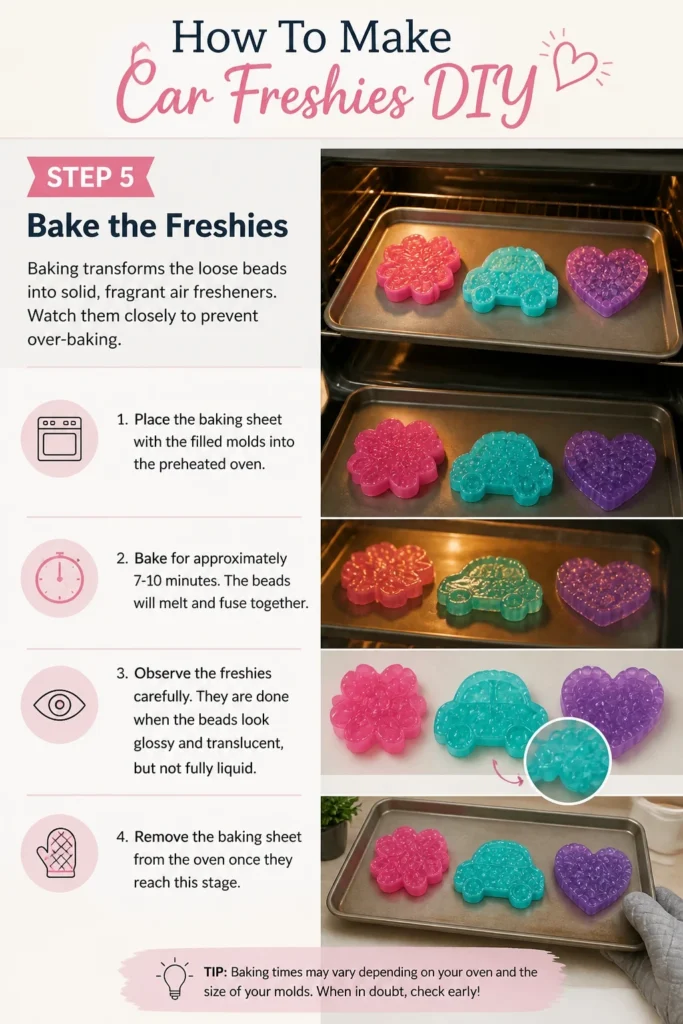
Watch them closely to prevent over-baking.
- Place the baking sheet with the filled molds into the preheated oven.
- Bake for approximately 7-10 minutes. The beads will melt and fuse together.
- Observe the freshies carefully. They are done when the beads look glossy and translucent, but not fully liquid.
- Remove the baking sheet from the oven once they reach this stage.
Step 6: Cool and Demold
Allowing proper cooling prevents breakage and ensures your freshies maintain their shape.
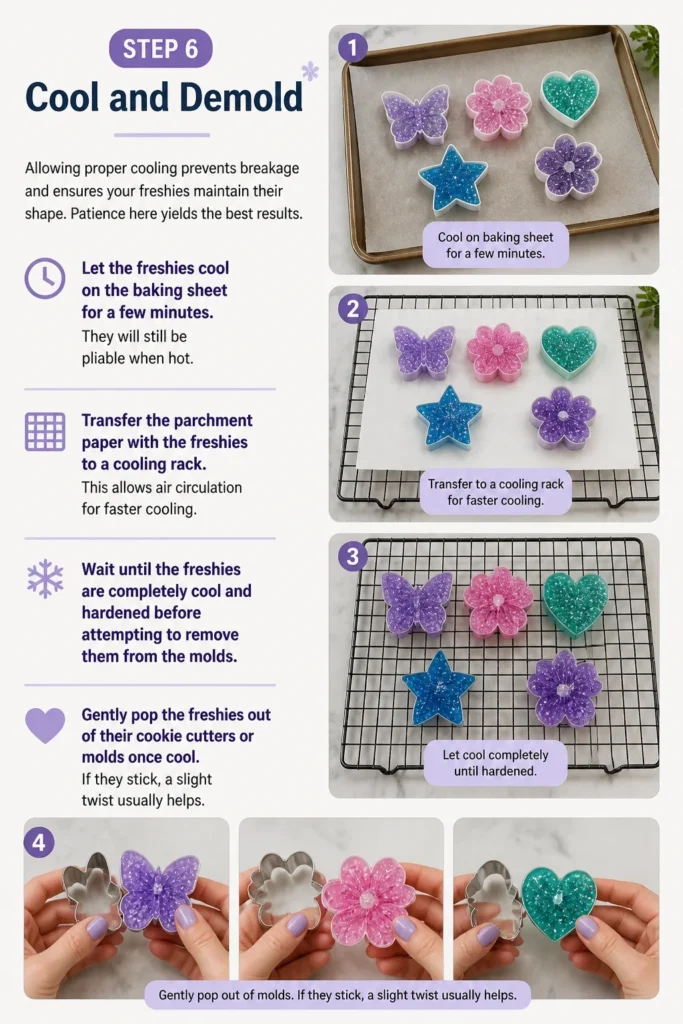
Patience here yields the best results.
- Let the freshies cool on the baking sheet for a few minutes. They will still be pliable when hot.
- Transfer the parchment paper with the freshies to a cooling rack. This allows air circulation for faster cooling.
- Wait until the freshies are completely cool and hardened before attempting to remove them from the molds.
- Gently pop the freshies out of their cookie cutters or molds once cool. If they stick, a slight twist usually helps.
Step 7: Add the Hanger
This final touch makes your freshies ready for display and use.
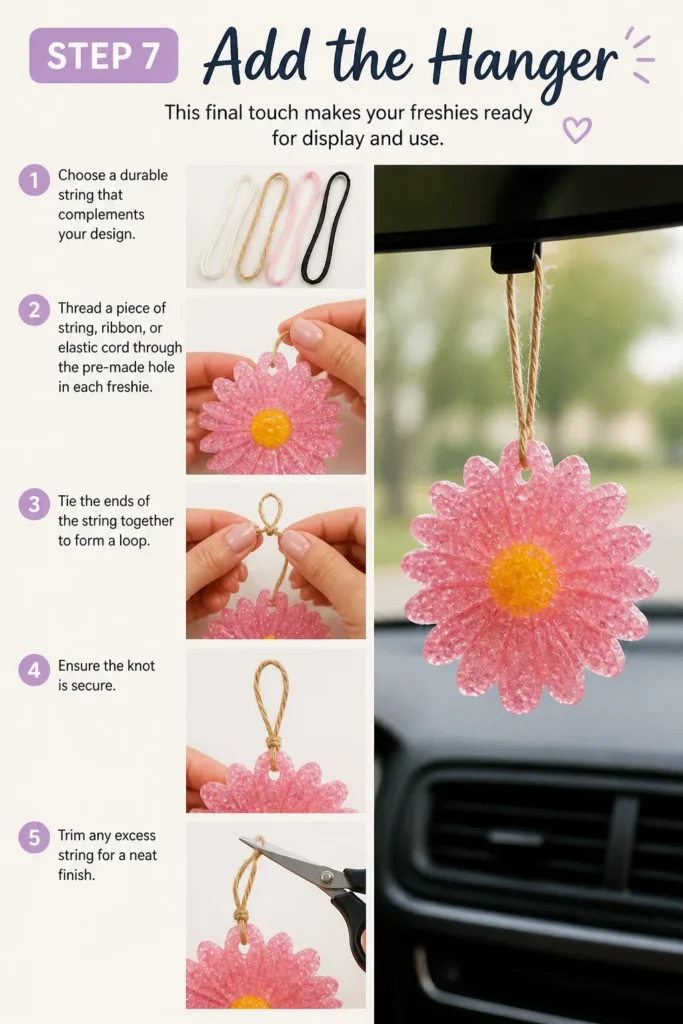
Choose a durable string that complements your design.
- Thread a piece of string, ribbon, or elastic cord through the pre-made hole in each freshie.
- Tie the ends of the string together to form a loop. Ensure the knot is secure.
- Trim any excess string for a neat finish.
Step 8: Cure Your Freshies
Curing is a vital step that allows the fragrance oil to fully set and the freshies to harden, leading to a longer-lasting scent.
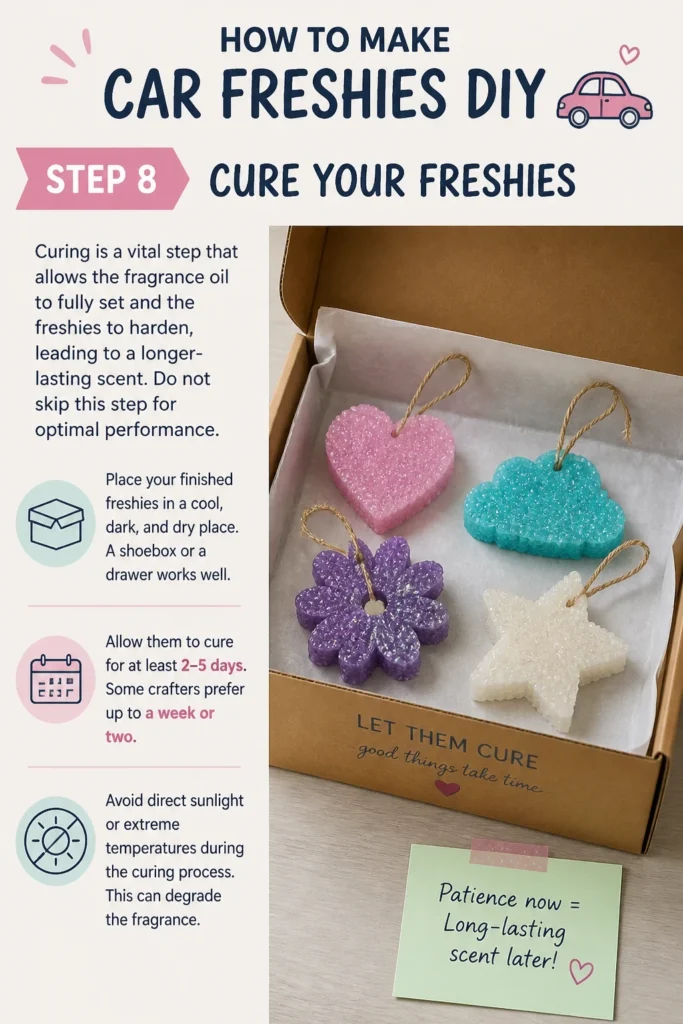
Do not skip this step for optimal performance.
- Place your finished freshies in a cool, dark, and dry place. A shoebox or a drawer works well.
- Allow them to cure for at least 2-5 days. Some crafters prefer up to a week or two.
- Avoid direct sunlight or extreme temperatures during the curing process. This can degrade the fragrance.
Common Mistakes to Avoid
Using Too Much Fragrance Oil
Adding an excessive amount of fragrance oil might seem like a good idea for a stronger scent, but it can actually prevent the beads from melting properly. Over-oiling can result in a greasy, crumbly freshie that doesn’t hold its shape or scent as long.
Stick to the recommended ratios, typically 1-2 tablespoons per cup of beads, and let the beads fully absorb the oil over time for the best results.
Baking at Too High a Temperature
A high oven temperature will cause the aroma beads to melt too quickly, potentially burning the fragrance oil and creating an unpleasant smell. It can also lead to a brittle freshie that cracks easily.
Always bake at a low temperature, around 325-350F, and watch them closely. The goal is a gradual melt to fuse the beads, not a rapid liquefaction.
Not Curing Long Enough
Skipping the curing step or rushing it will significantly reduce the lifespan and throw of your freshie’s scent. The fragrance oil needs time to properly bind with the beads and harden.
Allowing your freshies to cure for at least 2-5 days, or even longer, in a cool, dark place ensures the scent is locked in and slowly released over time.
Troubleshooting
My Freshies Are Crumbly
If your freshies are falling apart, it’s often due to not enough fragrance oil or insufficient baking time/temperature. The beads didn’t fully fuse together.
Ensure you’re using the correct amount of fragrance oil and that the beads are fully saturated before baking. Also, double-check your oven temperature and baking duration; they might need a minute or two longer in the oven, or a slightly higher temperature (within the recommended range).
The Scent Isn’t Strong Enough
A weak scent can be caused by using a low-quality fragrance oil, not enough oil, or an inadequate curing period. Some fragrance oils are naturally less potent than others.
Try increasing the fragrance oil slightly in your next batch, or source a higher-quality, concentrated oil. Most importantly, ensure your freshies cure for the recommended amount of time to allow the scent to fully develop.
My Freshies Are Unevenly Colored
Uneven color typically occurs when the mica powder or dye isn’t thoroughly mixed with the aroma beads. The color settles or clumps, leading to splotchy freshies.
Shake your container of beads and color more vigorously and for a longer duration. You can also stir the mixture occasionally during the absorption phase to ensure even distribution of color.
Key Takeaways
- Always use high-quality aroma beads and concentrated fragrance oils for the best results.
- Ensure thorough mixing of fragrance oil and color with the beads, allowing ample absorption time.
- Bake freshies at a low temperature (325-350F) for 7-10 minutes, monitoring them closely.
- Create a hole for hanging before baking, as the freshie will be too hard afterward.
- Cure your finished freshies for at least 2-5 days in a cool, dark place for maximum scent longevity.
- Avoid common pitfalls like over-oiling or insufficient curing to ensure durable, fragrant freshies.
Frequently Asked Questions
How long do car freshies typically last?
The lifespan of a car freshie varies depending on the quality and amount of fragrance oil used, as well as environmental factors like car temperature. Generally, a well-made freshie will emit a noticeable scent for 2-4 weeks, with some subtle fragrance lasting even longer.
Can I use essential oils instead of fragrance oils?
While you can use essential oils, they are often not as concentrated or long-lasting as fragrance oils specifically designed for air fresheners. Essential oils may also be more expensive and some can be irritating in high concentrations. Test a small batch first if you choose to use them.
What if my freshies melt in the car?
Freshies can melt if exposed to extreme heat, especially when left in direct sunlight on a hot day. To prevent this, consider hanging them in a less direct sun spot, like from the rearview mirror but tucked behind the sun visor. Using a slightly higher baking temperature during creation can also make them a bit more heat resistant.
How do I make my freshies smell stronger?
To enhance scent strength, ensure you are using a good quality, concentrated fragrance oil. You can slightly increase the amount of oil used (up to 2 tablespoons per cup of beads) and extend the curing time. A longer curing period allows the oil to fully bind, resulting in a more potent and lasting scent.
Our Top Recommended Finds
- Premium Aroma Beads: High-absorption beads are crucial for holding maximum fragrance.
- Concentrated Fragrance Oils: Look for oils specifically labeled for candles or diffusers for strong, lasting scents.
- Silicone Molds or Metal Cookie Cutters: Offer diverse shapes and are reusable, making them great for batch production.
Craft Your Signature Scent
Now that you have all the knowledge, it’s time to put these steps into action.
Imagine the satisfaction of stepping into your car, greeted by a custom scent you created yourself.
Start experimenting with different shapes, colors, and fragrances today to personalize your ride.
Beginner-friendly templates, step-by-step guides,
and weekly project ideas in your inbox.