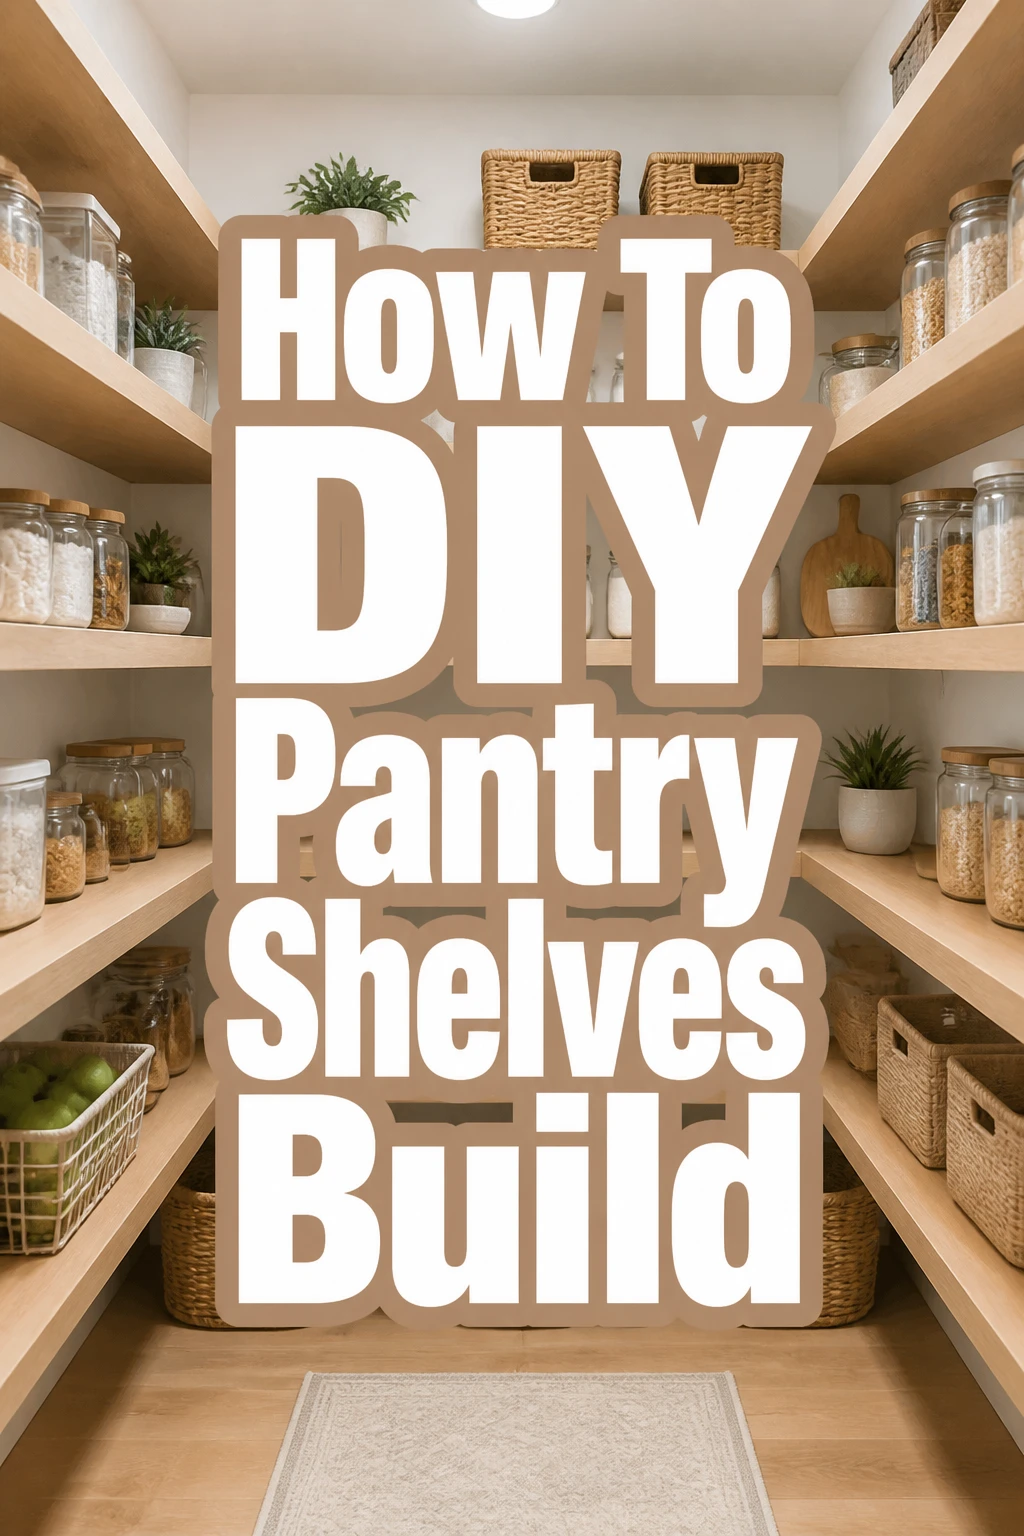
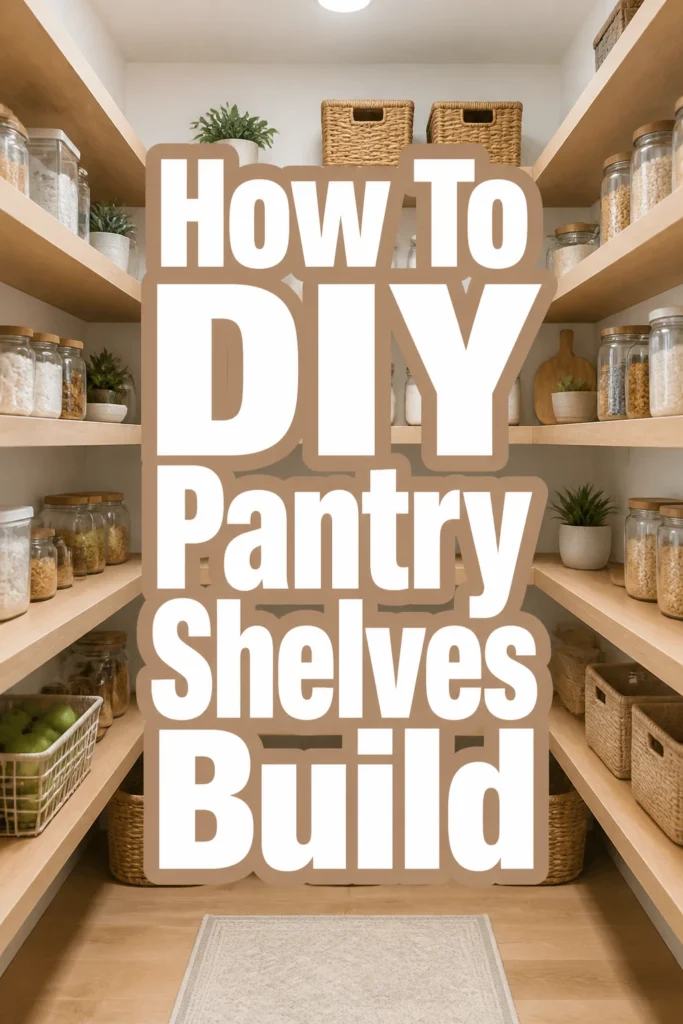
How To DIY Pantry Shelves Build

Beginner-friendly templates, step-by-step guides,
and weekly project ideas in your inbox.
A disorganized pantry makes every meal feel like a chore.
I spent years shuffling through boxes of pasta and loose cans before I finally built custom shelves that fit my family’s needs.
This guide shares the exact process I used to turn a cramped closet into a high-capacity storage zone using basic tools and materials.
Quick Overview
Building your own pantry shelves is one of the most rewarding home improvement projects you can tackle.
It allows you to maximize every inch of vertical space while ensuring the structure is strong enough to hold heavy kitchen appliances and bulk supplies.
- Time needed: 6 to 8 hours over a weekend
- Difficulty: Intermediate
- What you’ll need: 3/4-inch plywood, 1×2 pine boards for cleats, wood screws, a level, a stud finder, and a circular saw or table saw.
Step-by-Step Instructions
Step 1: Measure Your Space and Plan the Layout
Measure the width and depth of your pantry at three different heights to account for walls that might not be perfectly straight.
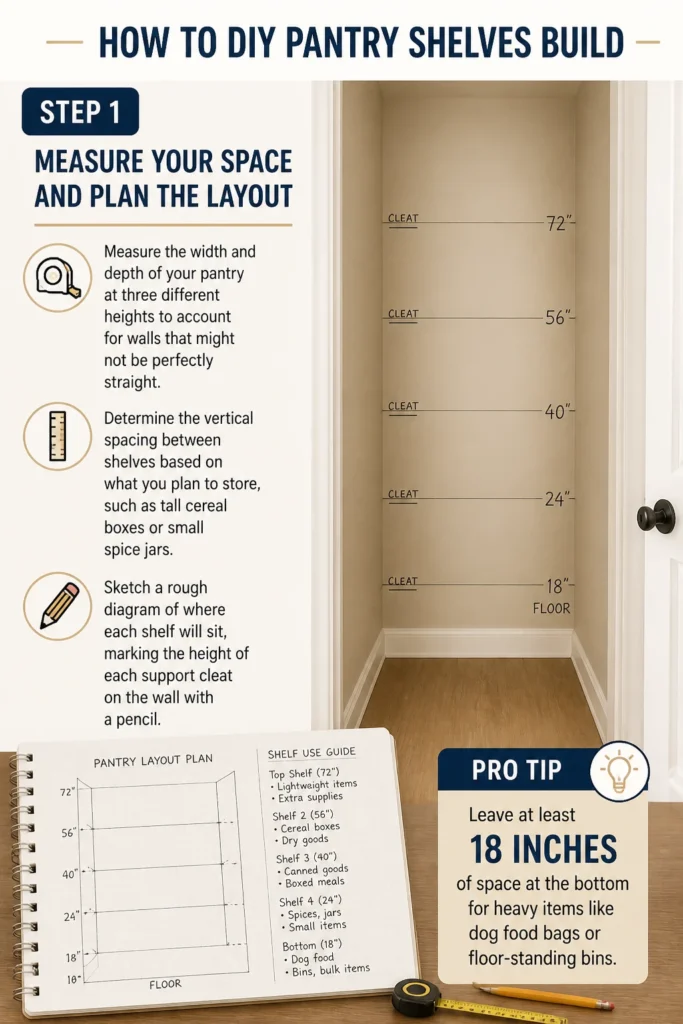
Determine the vertical spacing between shelves based on what you plan to store, such as tall cereal boxes or small spice jars.
Sketch a rough diagram of where each shelf will sit, marking the height of each support cleat on the wall with a pencil.
Pro Tip: Leave at least 18 inches of space at the bottom for heavy items like dog food bags or floor-standing bins.
Step 2: Clear the Area and Prep the Walls
Remove all existing wire shelving or temporary racks from the pantry space.
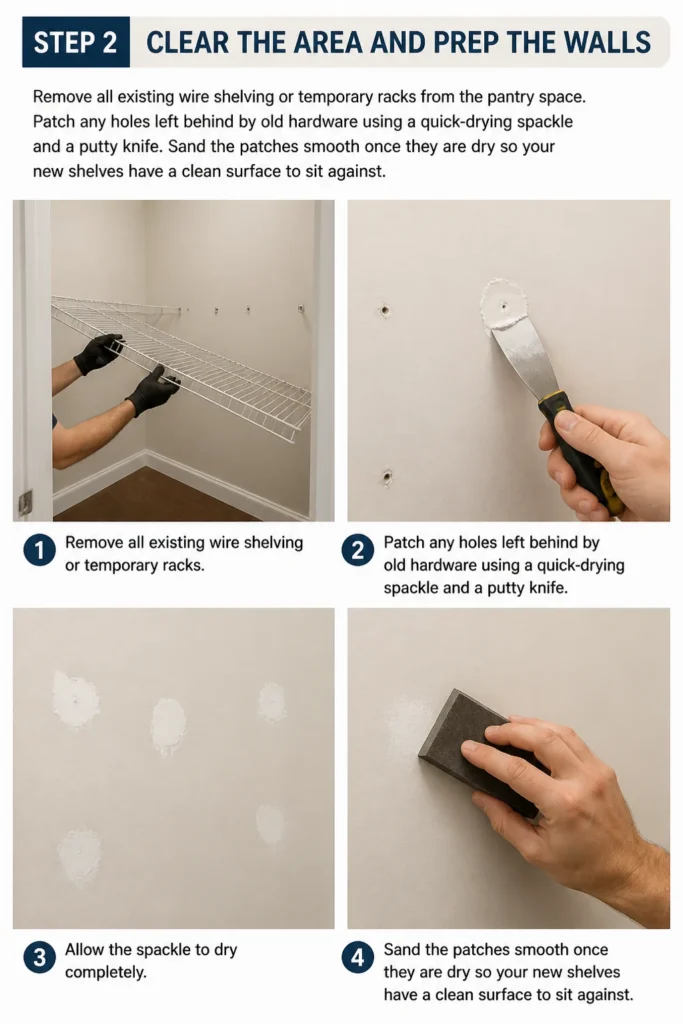
Patch any holes left behind by old hardware using a quick-drying spackle and a putty knife.
Sand the patches smooth once they are dry so your new shelves have a clean surface to sit against.
Step 3: Locate and Mark the Wall Studs
Use a reliable stud finder to locate the vertical wooden framing behind your drywall.
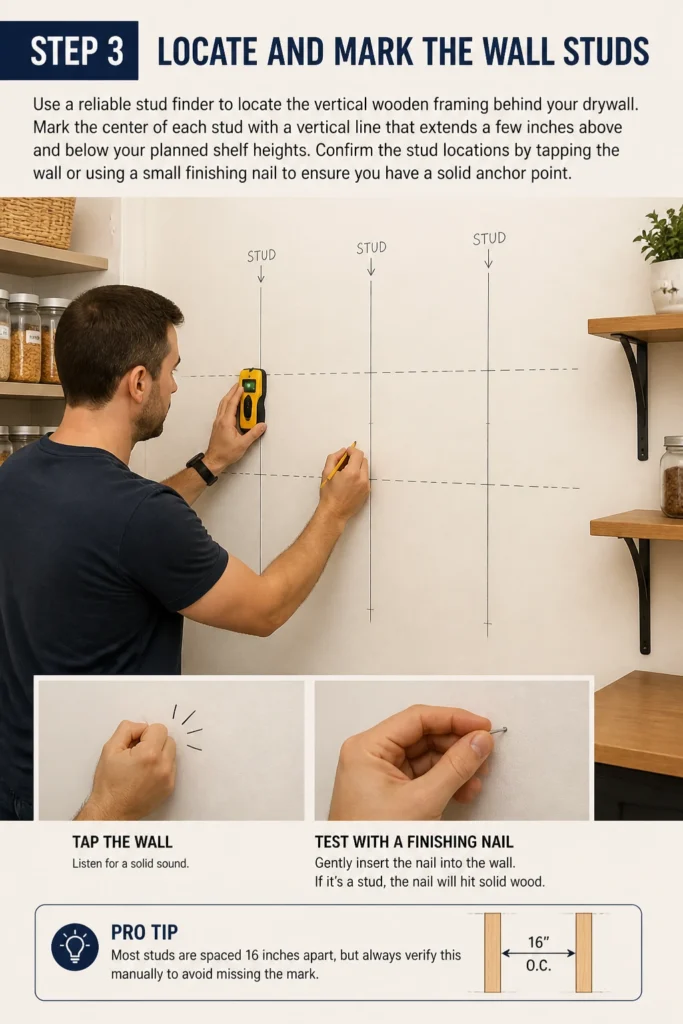
Mark the center of each stud with a vertical line that extends a few inches above and below your planned shelf heights.
Confirm the stud locations by tapping the wall or using a small finishing nail to ensure you have a solid anchor point.
Pro Tip: Most studs are spaced 16 inches apart, but always verify this manually to avoid missing the mark.
Step 4: Cut the Support Cleats to Size
Select 1×2 pine or poplar boards to serve as the cleats that will hold up your shelf boards.
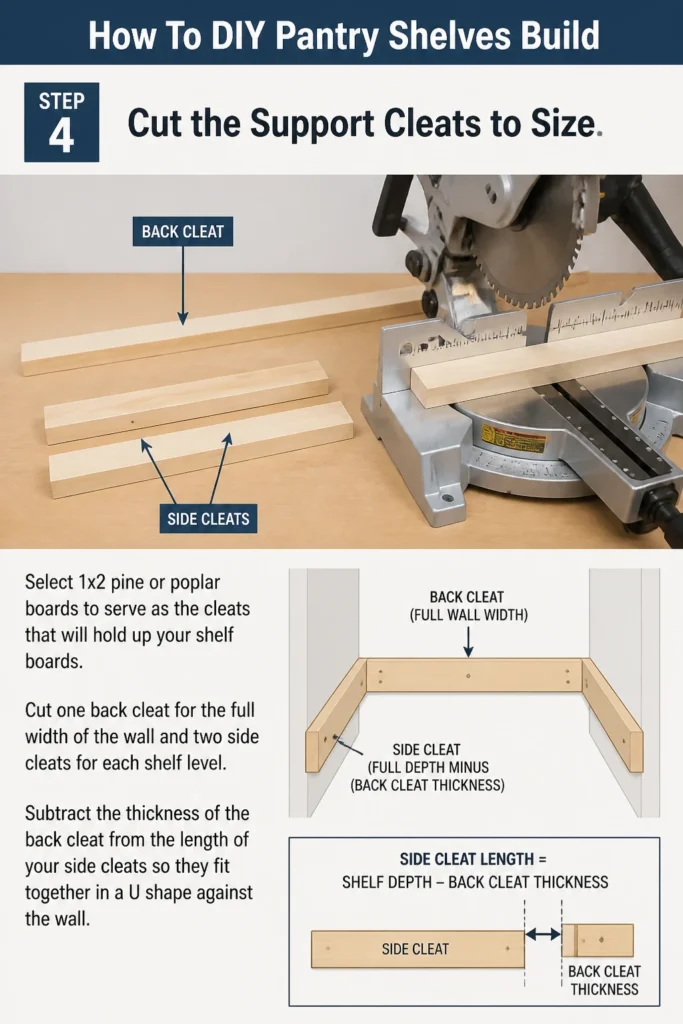
Cut one back cleat for the full width of the wall and two side cleats for each shelf level.
Subtract the thickness of the back cleat from the length of your side cleats so they fit together in a “U” shape against the wall.
Step 5: Install the Back and Side Cleats
Align the back cleat with your horizontal pencil marks and check it with a long bubble level.
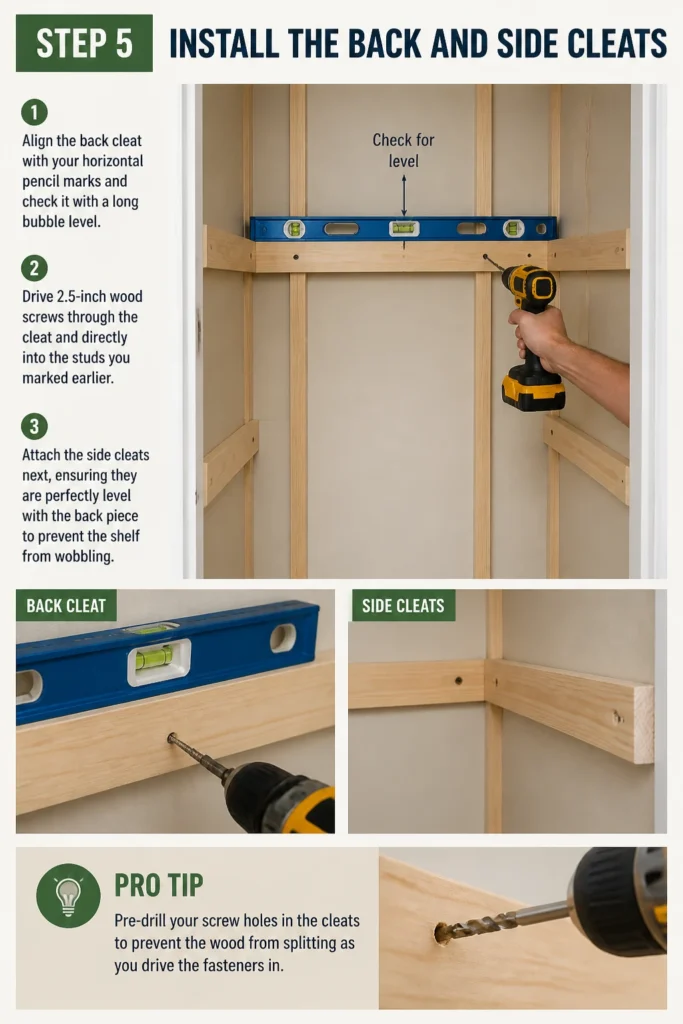
Drive 2.5-inch wood screws through the cleat and directly into the studs you marked earlier.
Attach the side cleats next, ensuring they are perfectly level with the back piece to prevent the shelf from wobbling.
Pro Tip: Pre-drill your screw holes in the cleats to prevent the wood from splitting as you drive the fasteners in.
Step 6: Cut the Shelf Boards
Measure the distance between the side walls again now that the cleats are installed.
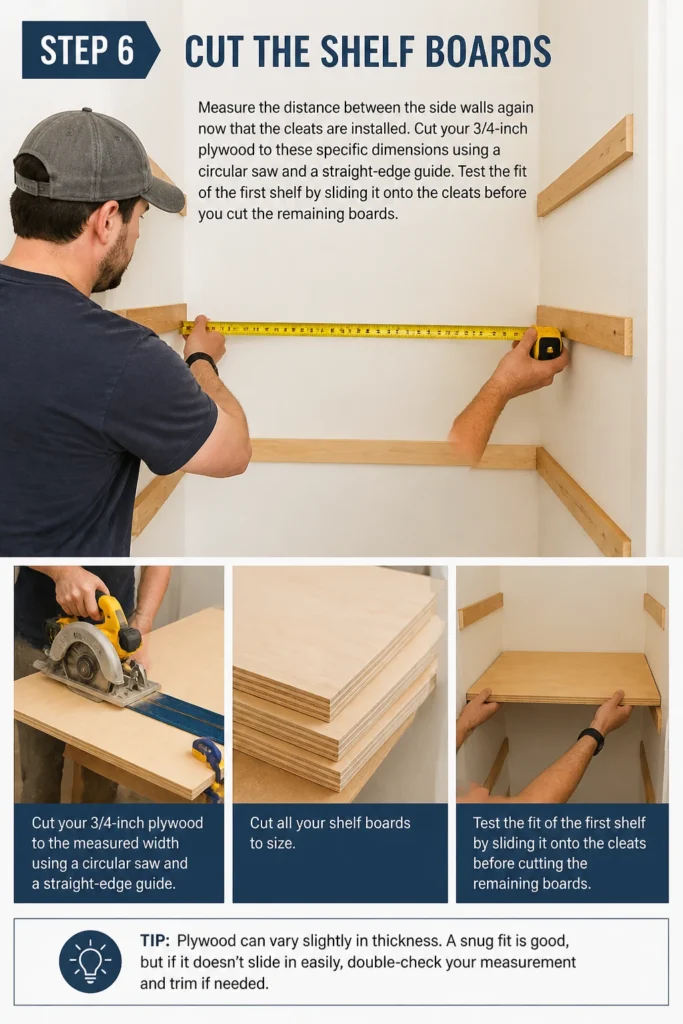
Cut your 3/4-inch plywood to these specific dimensions using a circular saw and a straight-edge guide.
Test the fit of the first shelf by sliding it onto the cleats before you cut the remaining boards.
Step 7: Add Front Trim for Strength and Style
Cut strips of 1×2 wood to the exact width of your plywood shelves.
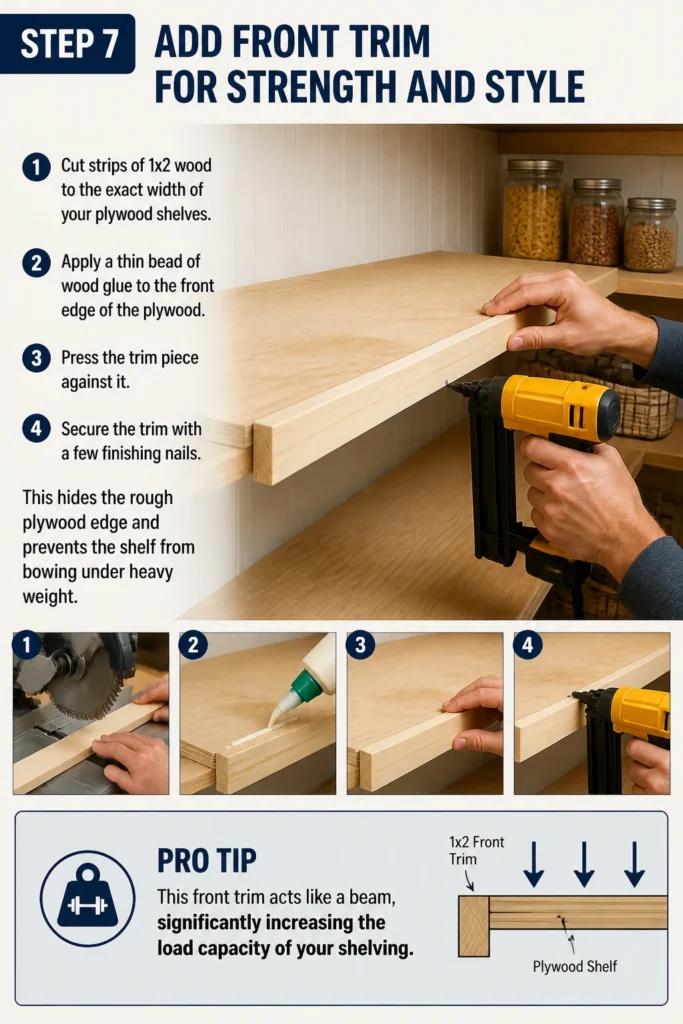
Apply a thin bead of wood glue to the front edge of the plywood and press the trim piece against it.
Secure the trim with a few finishing nails, which hides the rough plywood edge and prevents the shelf from bowing under heavy weight.
Pro Tip: This front trim acts like a beam, significantly increasing the load capacity of your shelving.
Step 8: Sand and Apply a Finish
Sand the surfaces and edges of your shelves with 120-grit and then 220-grit sandpaper.
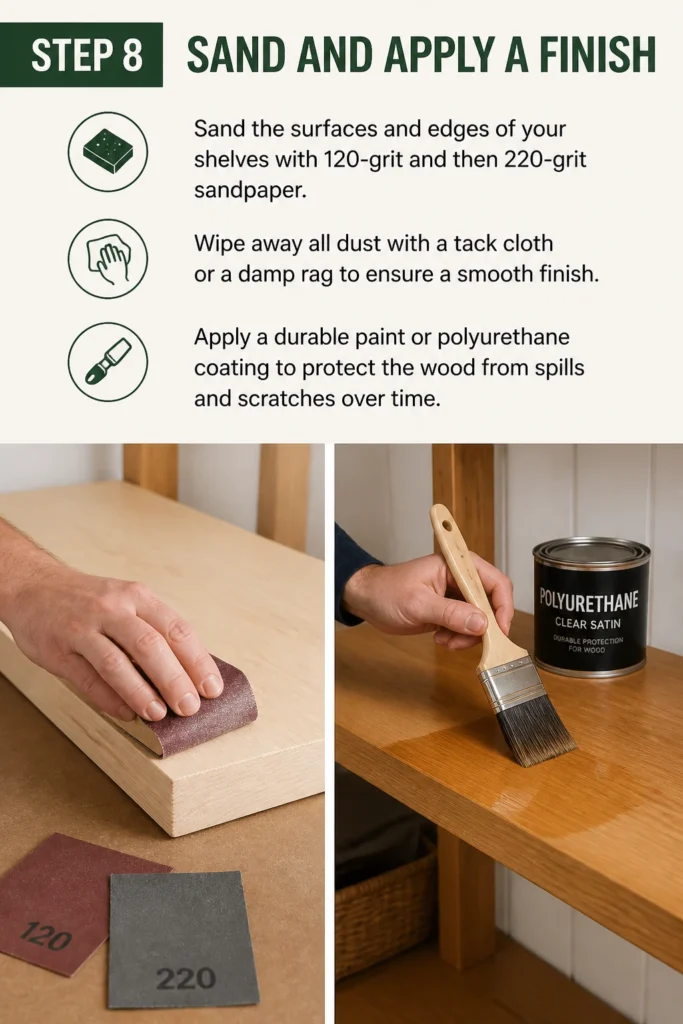
Wipe away all dust with a tack cloth or a damp rag to ensure a smooth finish.
Apply a durable paint or polyurethane coating to protect the wood from spills and scratches over time.
Step 9: Final Assembly and Loading
Slide the finished shelves onto the cleats once the paint has completely cured for at least 24 hours.
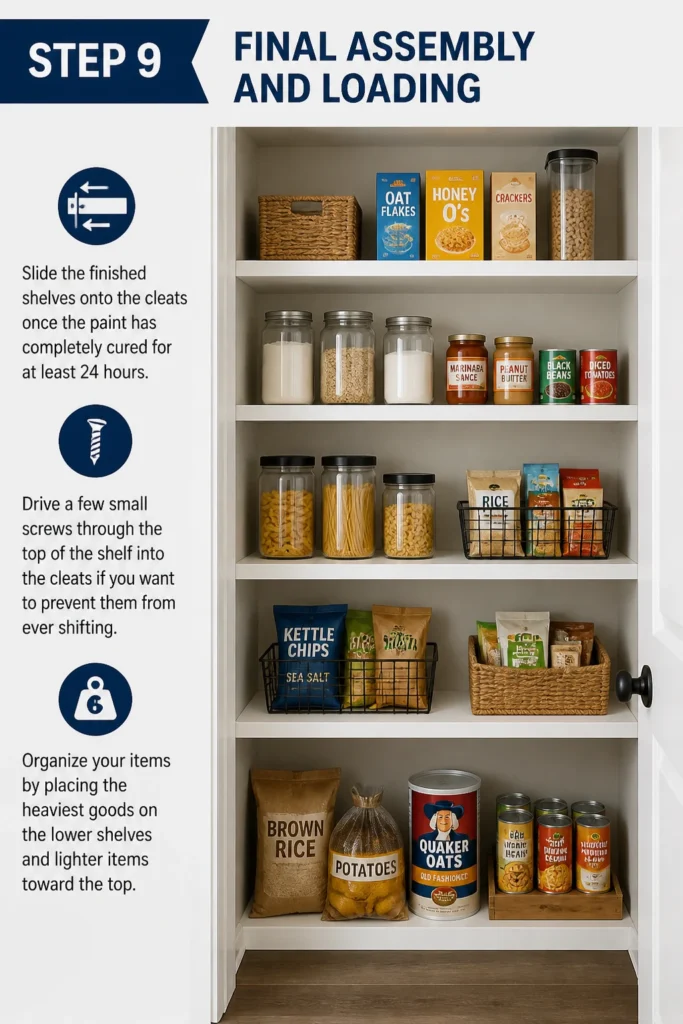
Drive a few small screws through the top of the shelf into the cleats if you want to prevent them from ever shifting.
Organize your items by placing the heaviest goods on the lower shelves and lighter items toward the top.
Common Mistakes to Avoid
Ignoring the Importance of Studs
Many people try to use drywall anchors to hold up pantry shelves. This is a recipe for disaster because the weight of canned goods will eventually pull the anchors out of the wall. Always secure your cleats into the wooden studs for a permanent and safe installation.
Failing to Account for Wall Imperfections
Walls in most homes are rarely perfectly square or straight. If you cut all your shelves to the exact same measurement without checking each level, some may be too tight while others leave large gaps. Measure the width at every single shelf location to ensure a custom fit.
Using Thin Material for Heavy Loads
Using 1/2-inch plywood or cheap particle board might save money initially, but these materials will sag quickly. Pantry items are deceptively heavy when grouped together. Stick with 3/4-inch plywood or solid wood to ensure your shelves stay flat and functional for years.
Troubleshooting
The Shelf Board is Too Tight to Slide In
If your shelf board gets stuck halfway, the wall probably has a slight bulge. Use a hand plane or a sander with 60-grit paper to shave a small amount of wood off the sides of the shelf. Check the fit frequently as you remove material so you do not create a large gap.
The Cleats are Not Level Across the Back
If you realize a cleat is slanted after installation, do not try to shim the shelf board. Remove the screws, fill the holes with wood glue and toothpicks, and re-drill the holes at the correct height. A level foundation is the only way to ensure your pantry items do not slide toward one side.
Visible Gaps Between the Shelf and the Wall
Small gaps are common when walls are bowed. You can hide these gaps by installing a small decorative molding on top of the shelf against the wall. Alternatively, use a paintable caulk to fill the gap before your final coat of paint for a seamless built-in look.
Key Takeaways
- Preparation is key: Always locate studs and mark your levels before buying lumber.
- Material choice matters: Use 3/4-inch plywood and 1×2 cleats for maximum durability and weight capacity.
- Leveling is mandatory: Check for level at every stage of the cleat installation to prevent sloping shelves.
- Reinforce the front: Adding a 1×2 trim piece to the front edge prevents sagging and hides plywood layers.
- Custom spacing: Tailor the height between shelves to fit your specific kitchen gadgets and storage containers.
- Safety first: Secure all supports directly into the wall framing to handle the heavy load of food storage.
Frequently Asked Questions
What is the best wood for pantry shelves?
Cabinet-grade plywood is generally the best choice because it is stable and resists warping. Pine or poplar are excellent for the support cleats and front trim because they are easy to work with and take paint well. Avoid MDF if you expect any moisture or heavy spills, as it can swell and lose its structural integrity.
How deep should pantry shelves be?
Standard pantry shelves are usually between 12 and 16 inches deep. If you make them deeper than 16 inches, items often get lost in the back and become difficult to reach. For small items like spices or canned goods, 10-inch shelves are often more than enough to keep everything visible.
Can I build these without a power saw?
It is possible to use a hand saw, but it will be very labor-intensive and difficult to get perfectly straight lines. Many home improvement stores will cut your plywood into manageable strips for a small fee. You can then use a miter box and a hand saw to cut the cleats and trim to the final length at home.
How much weight can these shelves hold?
When properly anchored into studs with 3/4-inch plywood and front trim, these shelves can easily hold 50 to 75 pounds per linear foot. This is more than enough for a full row of glass jars or heavy kitchen mixers. Always distribute the weight evenly across the shelf rather than stacking everything in the center.
Our Top Recommended Finds
- Self-Leveling Laser Level: This tool projects a perfectly straight line across all three walls of your pantry, making cleat installation much faster.
- Pocket Hole Jig: This is helpful if you want to attach the front trim to the plywood without using visible nails on the face of the wood.
- Magnetic Stud Finder: This helps you find the exact center of the wall studs by locating the screws used to hang the drywall.
Enhance Your Home Organization
Once your new shelves are installed, you can focus on fine-tuning the organization with baskets and labels. This project provides a solid foundation that you can build upon as your storage needs change over time.
Consider adding pull-out drawers on the bottom levels or a vertical divider for baking sheets. Taking the time to build these shelves yourself ensures you have a custom solution that fits your home perfectly.
Start by measuring your space today and sketching out a plan that works for your kitchen. A weekend of work will result in years of stress-free cooking and a much more efficient home environment.
Beginner-friendly templates, step-by-step guides,
and weekly project ideas in your inbox.