How To Remove Paint From Wood

Beginner-friendly templates, step-by-step guides,
and weekly project ideas in your inbox.
Stripping old paint from wood can feel like a daunting task.
I’ve personally spent countless hours restoring antique furniture and tired trim, learning the best techniques firsthand.
This guide will equip you with the practical steps and confidence to tackle your own paint removal project.
Quick Overview
Transforming painted wood back to its natural beauty is a rewarding project. This guide will walk you through various effective methods, ensuring you achieve a clean, smooth surface ready for its next finish.
- Time needed: Several hours to multiple days, depending on project size and paint layers.
- Difficulty: Intermediate
- What you’ll need: Safety gear, paint stripper, heat gun, scrapers, sanders, cleaning supplies.
Step-by-Step Instructions
Step 1: Prepare Your Workspace and Gather Safety Gear
Before beginning any paint removal, safety is paramount. Ensure you have the right protective equipment and a suitable environment.
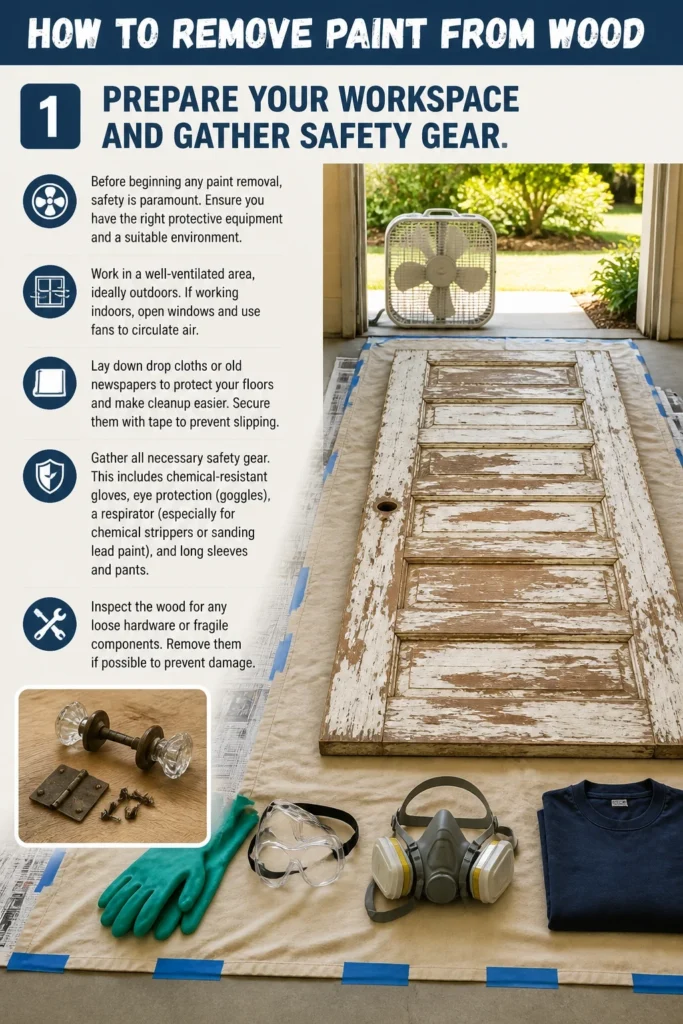
Work in a well-ventilated area, ideally outdoors. If working indoors, open windows and use fans to circulate air.
Lay down drop cloths or old newspapers to protect your floors and make cleanup easier. Secure them with tape to prevent slipping.
Gather all necessary safety gear. This includes chemical-resistant gloves, eye protection (goggles), a respirator (especially for chemical strippers or sanding lead paint), and long sleeves and pants.
Inspect the wood for any loose hardware or fragile components. Remove them if possible to prevent damage.
Step 2: Assess the Paint and Choose Your Method
The type of paint, the age of the wood, and the project’s size will influence your approach. Consider testing a small, inconspicuous area first.
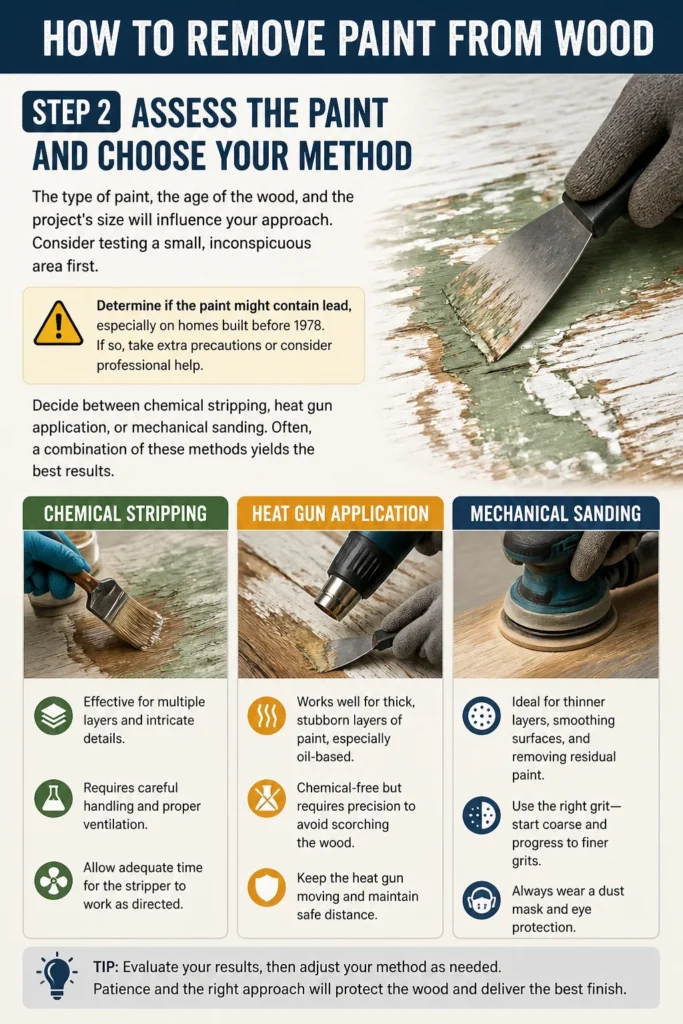
Determine if the paint might contain lead, especially on homes built before 1978. If so, take extra precautions or consider professional help.
Decide between chemical stripping, heat gun application, or mechanical sanding. Often, a combination of these methods yields the best results.
Chemical strippers are effective for multiple layers and intricate details. They require careful handling and proper ventilation.
Heat guns work well for thick, stubborn layers of paint, especially oil-based. They are chemical-free but require precision to avoid scorching the wood.
Sanding is ideal for thinner layers, smoothing surfaces, and removing residual paint after chemical or heat treatment. It’s less effective for very thick layers alone.
Step 3: Apply Chemical Paint Stripper (Method 1)
Chemical strippers soften and lift paint, making it easy to scrape away. Always follow the product’s specific instructions.
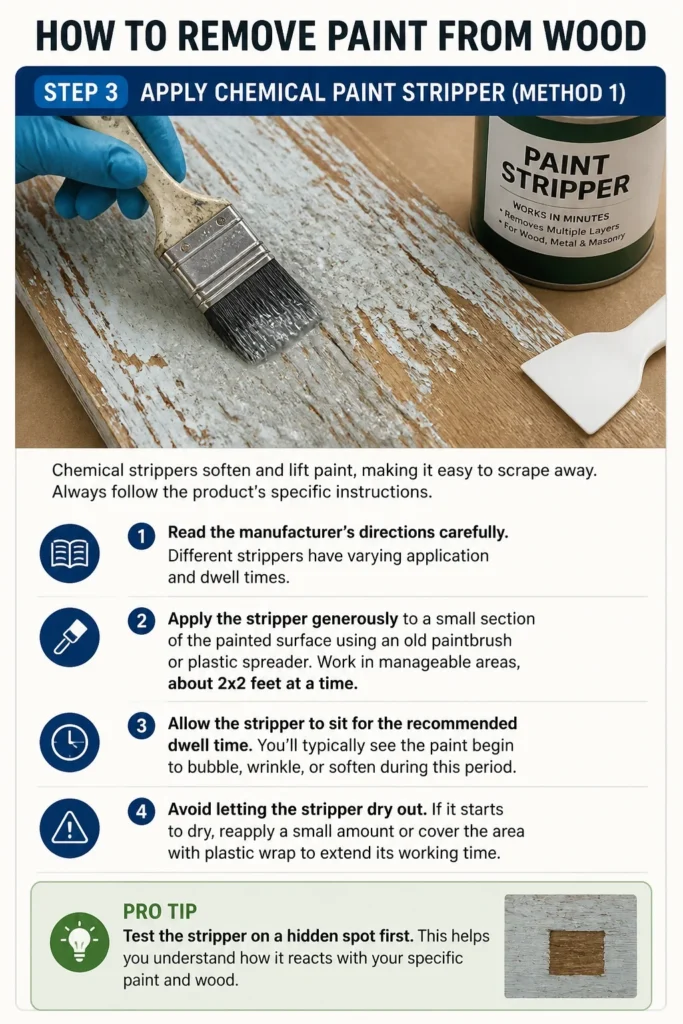
Read the manufacturer’s directions carefully. Different strippers have varying application and dwell times.
Apply the stripper generously to a small section of the painted surface using an old paintbrush or plastic spreader. Work in manageable areas, about 2×2 feet at a time.
Allow the stripper to sit for the recommended dwell time. You’ll typically see the paint begin to bubble, wrinkle, or soften during this period.
Avoid letting the stripper dry out. If it starts to dry, reapply a small amount or cover the area with plastic wrap to extend its working time.
Pro Tip: Test the stripper on a hidden spot first. This helps you understand how it reacts with your specific paint and wood, and how long to leave it on.
Step 4: Scrape Away Softened Paint
Once the paint has softened, it’s time to gently remove it from the wood surface.
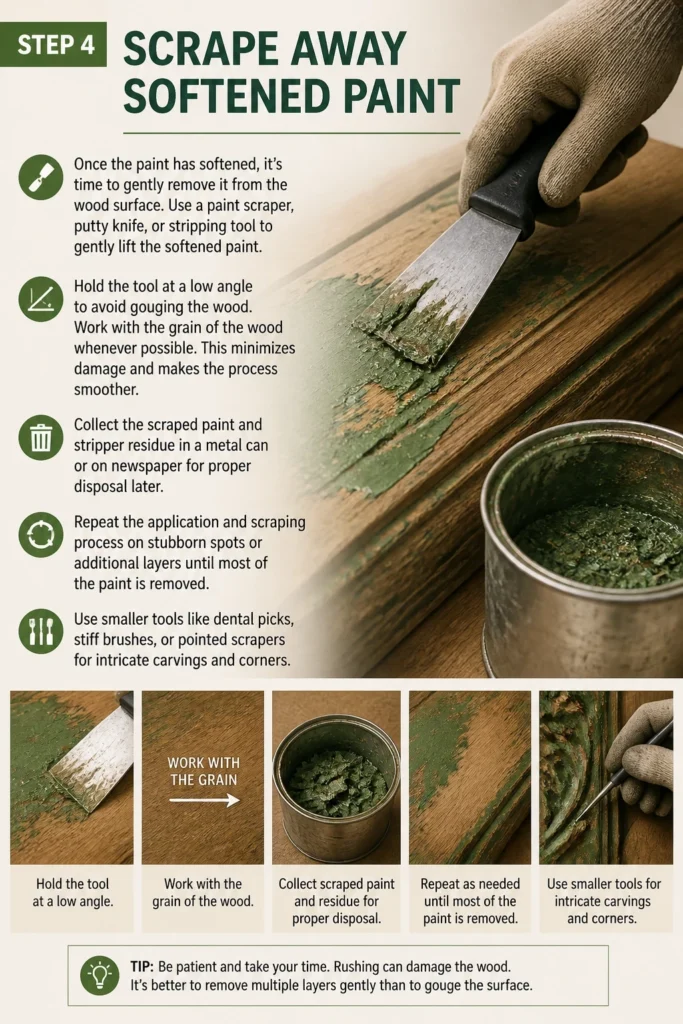
Use a paint scraper, putty knife, or stripping tool to gently lift the softened paint. Hold the tool at a low angle to avoid gouging the wood.
Work with the grain of the wood whenever possible. This minimizes damage and makes the process smoother.
Collect the scraped paint and stripper residue in a metal can or on newspaper for proper disposal later.
Repeat the application and scraping process on stubborn spots or additional layers until most of the paint is removed.
Use smaller tools like dental picks, stiff brushes, or pointed scrapers for intricate carvings and corners.
Step 5: Use a Heat Gun (Method 2)
A heat gun can be a fast and effective way to remove multiple layers of paint without chemicals.
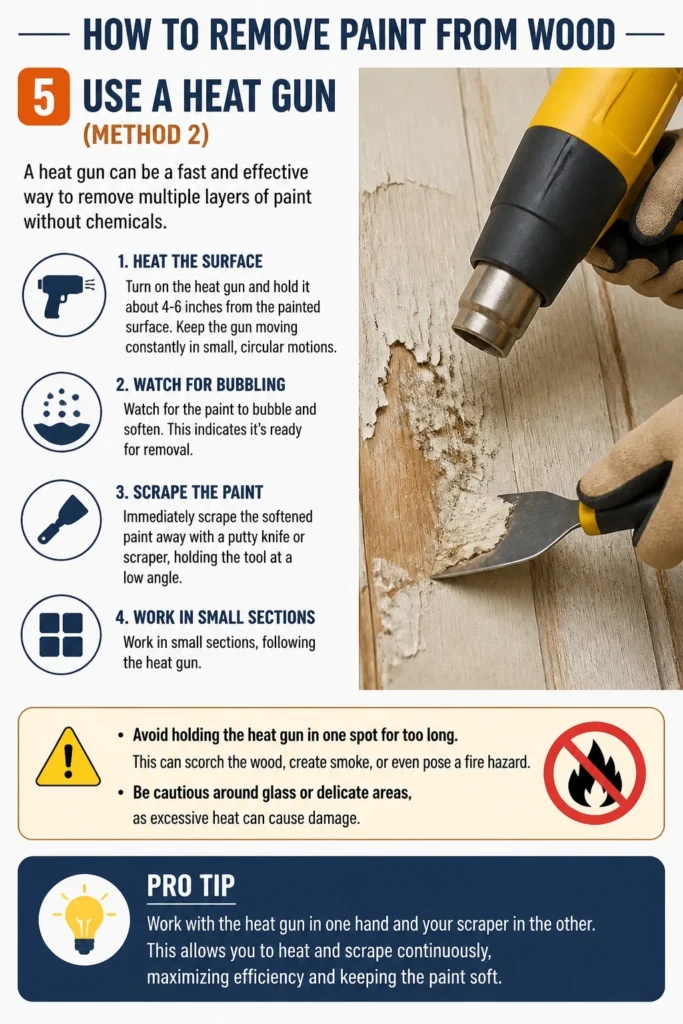
Turn on the heat gun and hold it about 4-6 inches from the painted surface. Keep the gun moving constantly in small, circular motions.
Watch for the paint to bubble and soften. This indicates it’s ready for removal.
Immediately scrape the softened paint away with a putty knife or scraper, holding the tool at a low angle. Work in small sections, following the heat gun.
Avoid holding the heat gun in one spot for too long. This can scorch the wood, create smoke, or even pose a fire hazard.
Be cautious around glass or delicate areas, as excessive heat can cause damage.
Pro Tip: Work with the heat gun in one hand and your scraper in the other. This allows you to heat and scrape continuously, maximizing efficiency.
Step 6: Sand Away Remaining Paint and Smooth the Surface
After the bulk of the paint is removed, sanding will clean up residues and prepare the wood for its new finish.
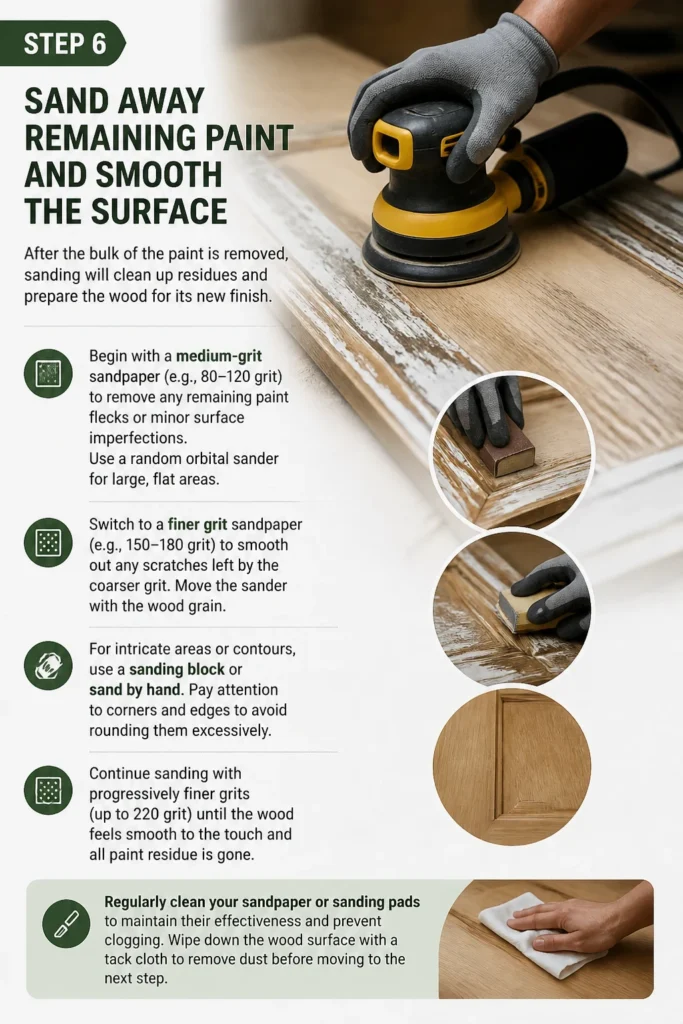
Begin with a medium-grit sandpaper (e.g., 80-120 grit) to remove any remaining paint flecks or minor surface imperfections. Use a random orbital sander for large, flat areas.
Switch to a finer grit sandpaper (e.g., 150-180 grit) to smooth out any scratches left by the coarser grit. Move the sander with the wood grain.
For intricate areas or contours, use a sanding block or sand by hand. Pay attention to corners and edges to avoid rounding them excessively.
Continue sanding with progressively finer grits (up to 220 grit) until the wood feels smooth to the touch and all paint residue is gone.
Regularly clean your sandpaper or sanding pads to maintain their effectiveness and prevent clogging with paint dust.
Step 7: Clean and Neutralize the Wood
Proper cleaning ensures no residue remains that could interfere with a new finish.
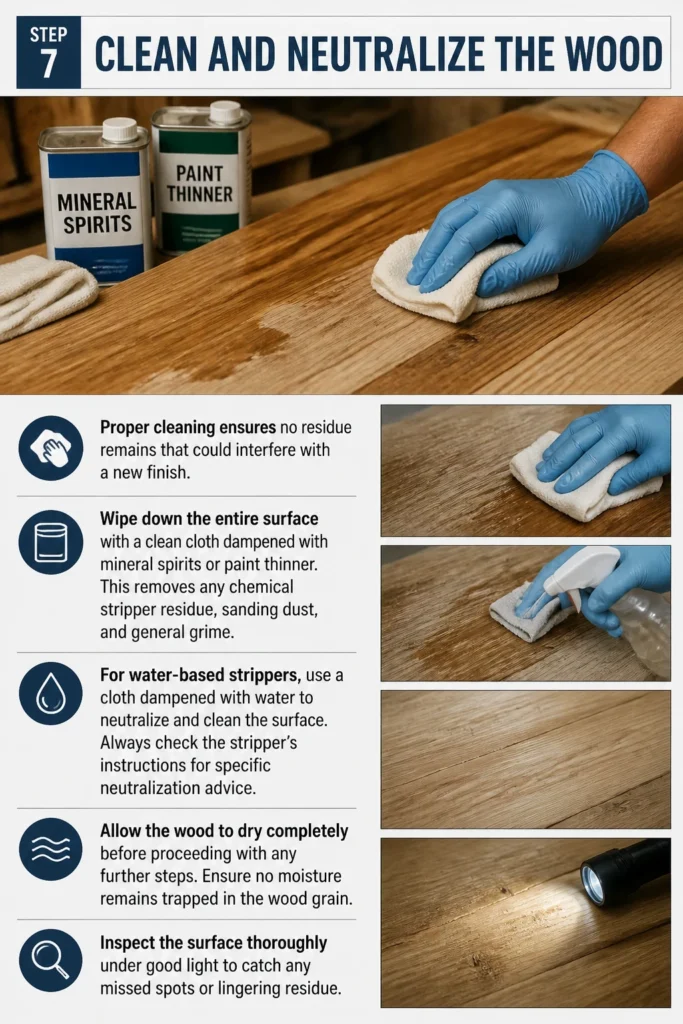
Wipe down the entire surface with a clean cloth dampened with mineral spirits or paint thinner. This removes any chemical stripper residue, sanding dust, and general grime.
For water-based strippers, use a cloth dampened with water to neutralize and clean the surface. Always check the stripper’s instructions for specific neutralization advice.
Allow the wood to dry completely before proceeding with any further steps. Ensure no moisture remains trapped in the wood grain.
Inspect the surface thoroughly under good light to catch any missed spots or lingering residue.
Step 8: Final Inspection and Preparation for Finishing
The wood is now ready for its next life, whether that’s a new coat of paint, stain, or clear finish.
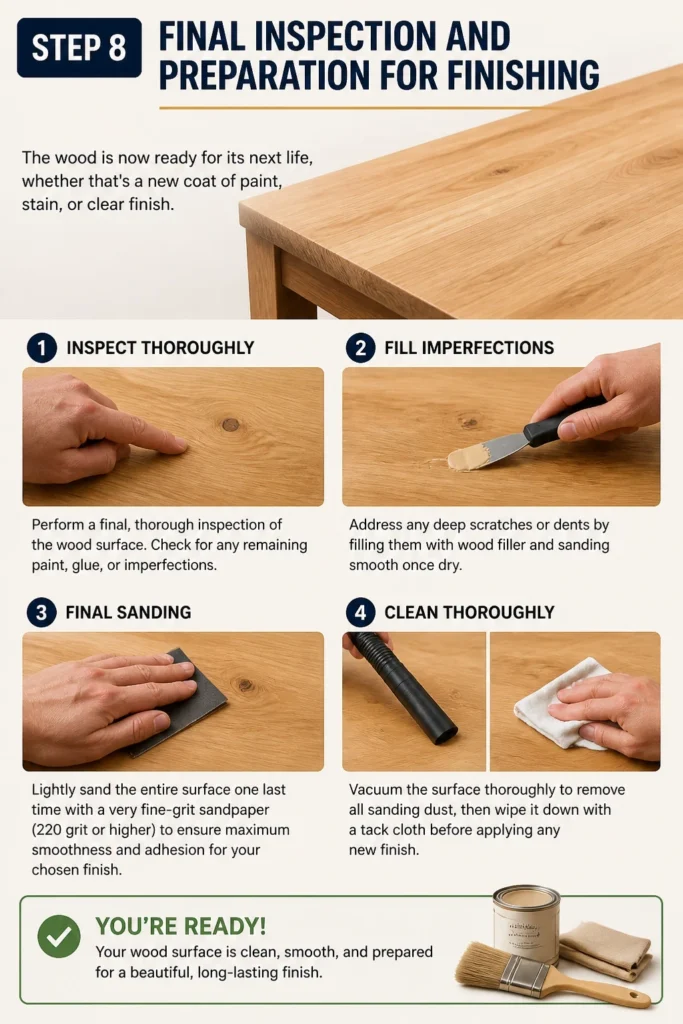
Perform a final, thorough inspection of the wood surface. Check for any remaining paint, glue, or imperfections.
Address any deep scratches or dents by filling them with wood filler and sanding smooth once dry.
Lightly sand the entire surface one last time with a very fine-grit sandpaper (220 grit or higher) to ensure maximum smoothness and adhesion for your chosen finish.
Vacuum the surface thoroughly to remove all sanding dust, then wipe it down with a tack cloth before applying any new finish.
Common Mistakes to Avoid
Ignoring Safety Precautions
Many people skip wearing gloves, eye protection, or a respirator. Chemical strippers can cause severe burns, and sanding dust, especially from old paint, can be harmful to your lungs. Always prioritize your health by using the correct personal protective equipment for the task.
Over-Scraping or Gouging the Wood
Rushing the scraping process or using too much force can easily damage the underlying wood. This creates deep gouges that are difficult to remove later. Always hold your scraper at a low angle and apply gentle, even pressure, allowing the stripper or heat to do most of the work.
Not Allowing Stripper Enough Dwell Time
Patience is crucial when using chemical strippers. Removing the stripper too early means the paint hasn’t fully softened, leading to more effort and less effective removal. Always follow the manufacturer’s recommended dwell time, or even slightly longer if the paint is particularly stubborn.
Overheating the Wood with a Heat Gun
Holding a heat gun in one spot for too long can scorch the wood, leaving dark burn marks that are very difficult to sand out. It can also create a fire hazard. Keep the heat gun moving constantly, focusing on just softening the paint enough for easy removal.
Troubleshooting
Paint Not Lifting Easily
If the paint isn’t bubbling or lifting after stripper application, it might be a very thick or particularly tough type of paint. Try reapplying a fresh layer of stripper and covering it with plastic wrap to prevent drying, extending the dwell time. For heat guns, ensure the heat is consistent and you’re not moving too quickly.
Wood Getting Damaged During Scraping
Deep scratches or gouges indicate you’re likely applying too much pressure or using the wrong angle. Switch to a duller scraper or a plastic one. Hold the scraper at a flatter angle to the wood surface. Let the chemical or heat do more of the work, making the paint easy to push off rather than scrape.
Chemical Residue Remaining After Cleaning
Sometimes, a sticky or hazy residue persists even after initial cleaning. This often means the stripper wasn’t fully neutralized or rinsed. Re-wipe the area with mineral spirits for oil-based strippers or water for water-based ones. Ensure thorough drying between applications and consider a final wipe with denatured alcohol for a super clean surface.
Key Takeaways
- Always prioritize safety by wearing appropriate personal protective equipment.
- Carefully assess the paint and wood to choose the most effective removal method.
- Patience and proper technique are vital to avoid damaging the wood.
- Chemical strippers and heat guns offer different advantages; often, a combination works best.
- Thorough cleaning and sanding after paint removal are crucial for a successful new finish.
- Properly dispose of all paint and chemical waste according to local regulations.
Frequently Asked Questions
Can I remove paint from wood without chemicals?
Yes, you absolutely can. A heat gun is an excellent chemical-free option for softening and scraping off paint. For thinner layers or after bulk removal, mechanical sanding can effectively remove remaining paint and smooth the wood surface.
Is old lead paint dangerous to remove?
Yes, lead paint is dangerous, especially when sanded or heated, as it releases toxic dust and fumes. If your home was built before 1978, assume paint contains lead. Take extreme precautions, including a respirator, full body protection, and containment of dust. Consider professional lead abatement services for large projects.
How do I protect the wood from damage during paint removal?
To protect the wood, always use the least aggressive method first. Hold scrapers at a low angle to avoid gouging. Keep heat guns moving to prevent scorching. For sanding, start with a medium grit and progress to finer grits, always sanding with the wood grain.
What if the wood is veneered?
Removing paint from veneered wood requires extra caution. Chemical strippers can weaken the adhesive holding the veneer, causing it to lift or bubble. Heat guns can also damage veneer easily. Gentle sanding or very light chemical application for short periods might be possible, but it’s often best to test a very small, hidden area first or avoid harsh methods entirely.
Our Top Recommended Finds
- Citrus-based Paint Stripper: A less harsh chemical option, often effective for multiple layers with fewer fumes.
- Variable Temperature Heat Gun: Offers control over heat levels, crucial for delicate work and preventing scorching.
- Random Orbital Sander: Essential for quickly and effectively smoothing large, flat wood surfaces without leaving swirl marks.
- Flexible Putty Knife Set: A variety of sizes and flexibility helps navigate contours and tight spaces without damaging the wood.
Embrace the Wood’s Natural Beauty
Removing old paint is more than just a chore; it’s an act of restoration, revealing the hidden character of wood.
With the right tools and techniques, you can transform tired pieces into stunning focal points.
Don’t put off that project any longer. Start your paint removal journey today and rediscover the beauty beneath the surface.
Beginner-friendly templates, step-by-step guides,
and weekly project ideas in your inbox.