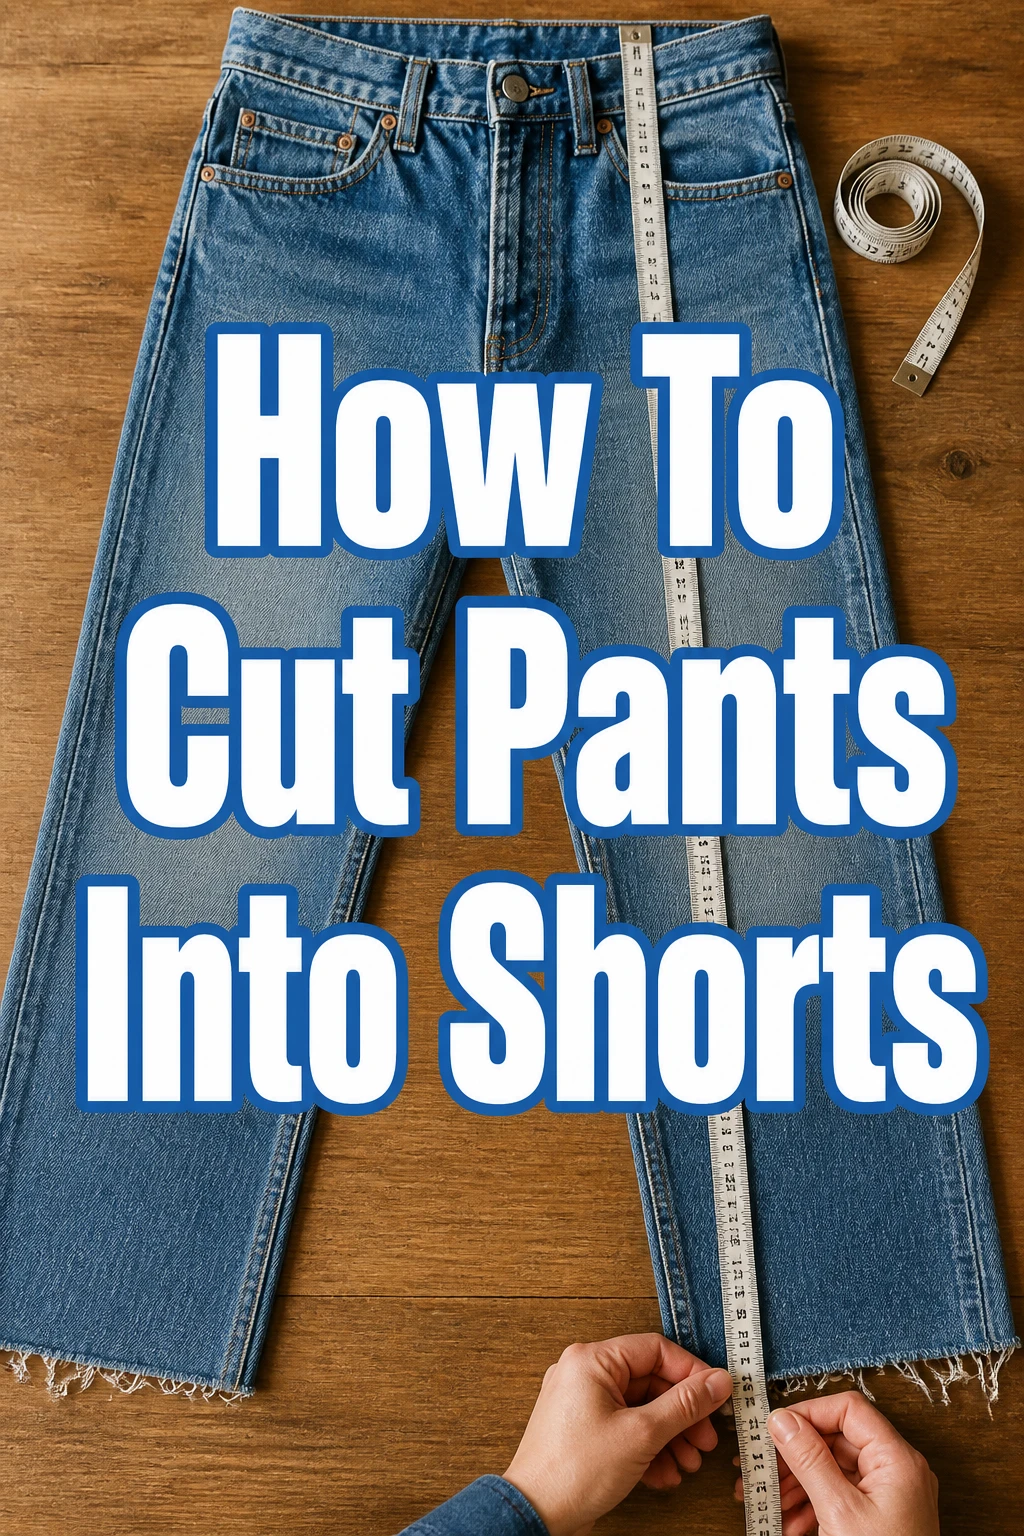
How To Cut Pants Into Shorts

Beginner-friendly templates, step-by-step guides,
and weekly project ideas in your inbox.
Transforming old pants into stylish shorts is a rewarding project. It’s a fantastic way to give new life to a beloved pair of trousers or save money on a new summer wardrobe. I’ve personally repurposed countless pairs of jeans and chinos, learning the best techniques along the way. This guide will walk you through each step, ensuring a great result you’ll love to wear.
Quick Overview
This guide will empower you to create custom-fit shorts from any pair of long pants. You’ll learn how to measure, cut, and finish your new garment with confidence.
- Time needed: 30-60 minutes (plus optional finishing time)
- Difficulty: Beginner
- What you’ll need: Pants, sharp scissors, fabric marker/chalk, measuring tape, ruler, pins, iron (optional), sewing machine/needle & thread (optional)
Step-by-Step Instructions
Step 1: Gather Your Essential Tools
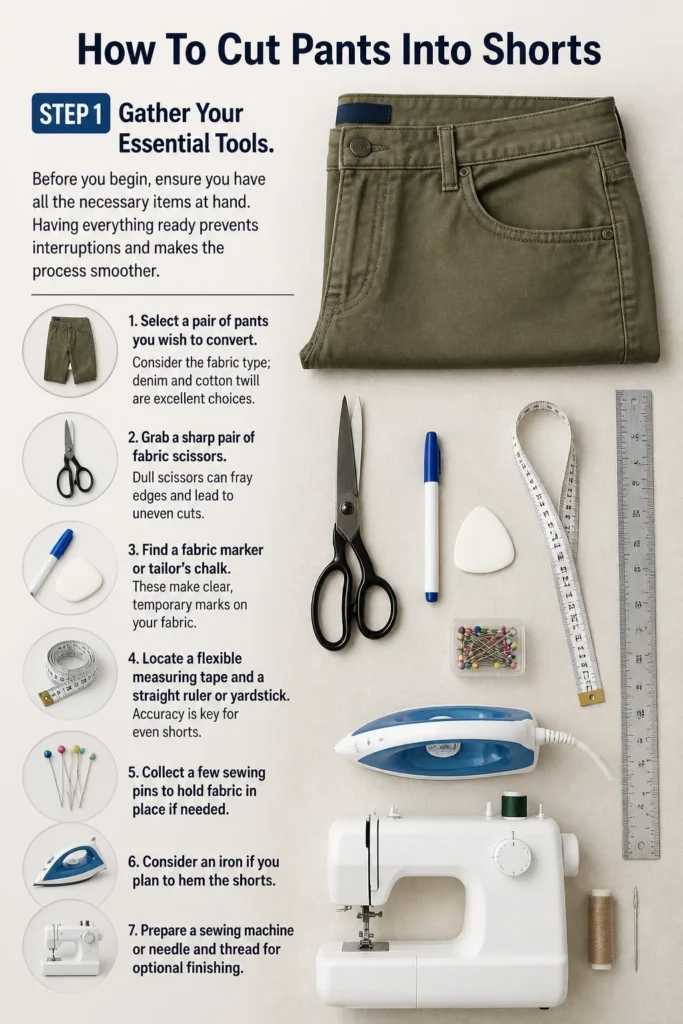
Before you begin, ensure you have all the necessary items at hand. Having everything ready prevents interruptions and makes the process smoother.
- Select a pair of pants you wish to convert. Consider the fabric type; denim and cotton twill are excellent choices.
- Grab a sharp pair of fabric scissors. Dull scissors can fray edges and lead to uneven cuts.
- Find a fabric marker or tailor’s chalk. These make clear, temporary marks on your fabric.
- Locate a flexible measuring tape and a straight ruler or yardstick. Accuracy is key for even shorts.
- Collect a few sewing pins to hold fabric in place if needed.
- Consider an iron if you plan to hem the shorts.
- Prepare a sewing machine or needle and thread for optional finishing.
Step 2: Choose Your Desired Length
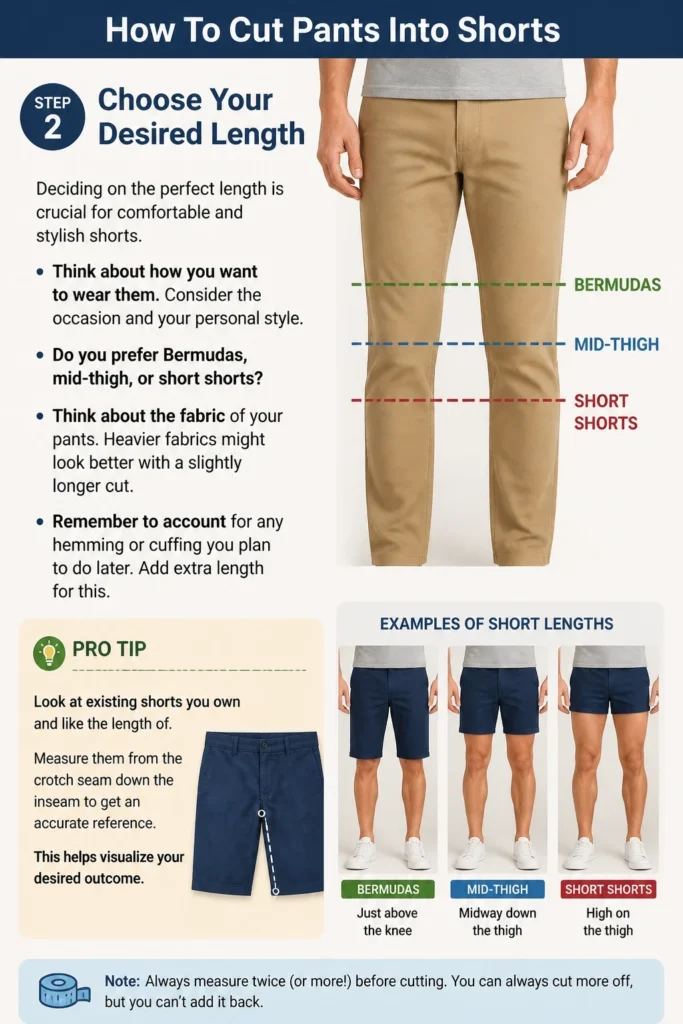
Deciding on the perfect length is crucial for comfortable and stylish shorts. Think about how you want to wear them.
- Consider the occasion and your personal style. Do you prefer Bermudas, mid-thigh, or short shorts?
- Think about the fabric of your pants. Heavier fabrics might look better with a slightly longer cut.
- Remember to account for any hemming or cuffing you plan to do later. Add extra length for this.
Pro Tip: Look at existing shorts you own and like the length of. Measure them from the crotch seam down the inseam to get an accurate reference. This helps visualize your desired outcome.
Step 3: Try On and Mark the Initial Cut Line
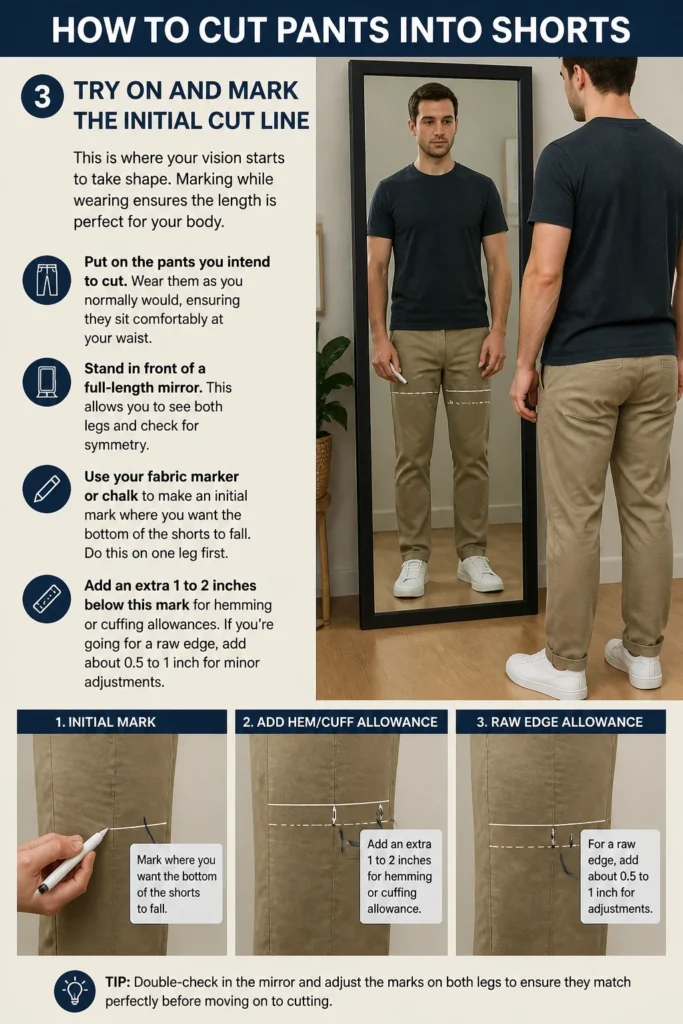
This is where your vision starts to take shape. Marking while wearing ensures the length is perfect for your body.
- Put on the pants you intend to cut. Wear them as you normally would, ensuring they sit comfortably at your waist.
- Stand in front of a full-length mirror. This allows you to see both legs and check for symmetry.
- Use your fabric marker or chalk to make an initial mark where you want the bottom of the shorts to fall. Do this on one leg first.
- Add an extra 1 to 2 inches below this mark for hemming or cuffing allowances. If you’re going for a raw edge, add about 0.5 to 1 inch for minor adjustments.
Step 4: Remove Pants and Refine the Cut Line
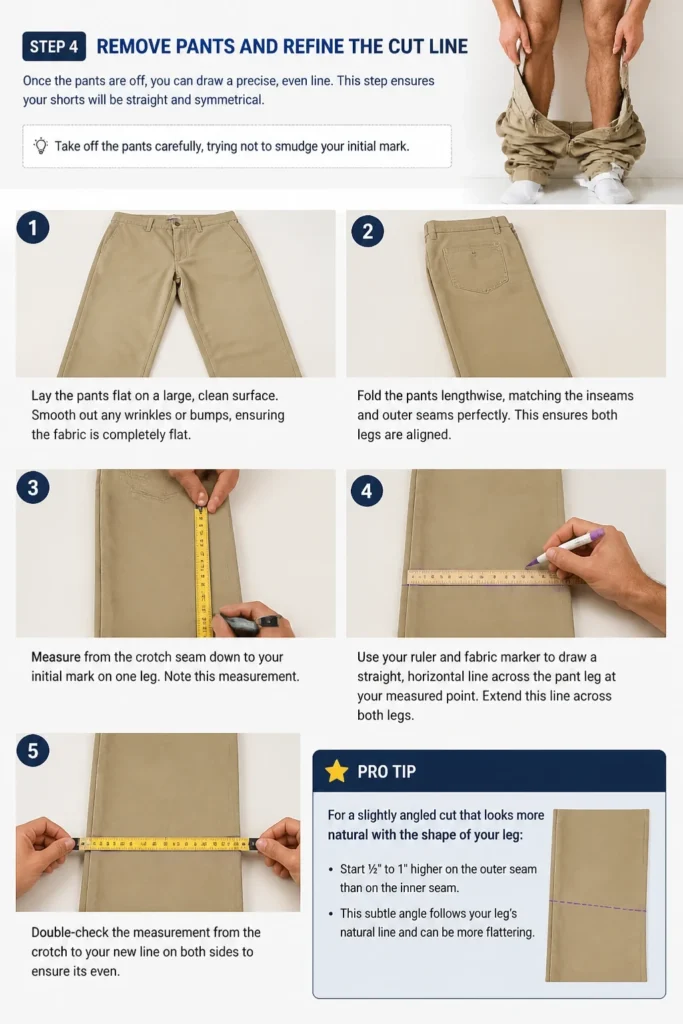
Once the pants are off, you can draw a precise, even line. This step ensures your shorts will be straight and symmetrical.
- Take off the pants carefully, trying not to smudge your initial mark.
- Lay the pants flat on a large, clean surface. Smooth out any wrinkles or bumps, ensuring the fabric is completely flat.
- Fold the pants lengthwise, matching the inseams and outer seams perfectly. This ensures both legs are aligned.
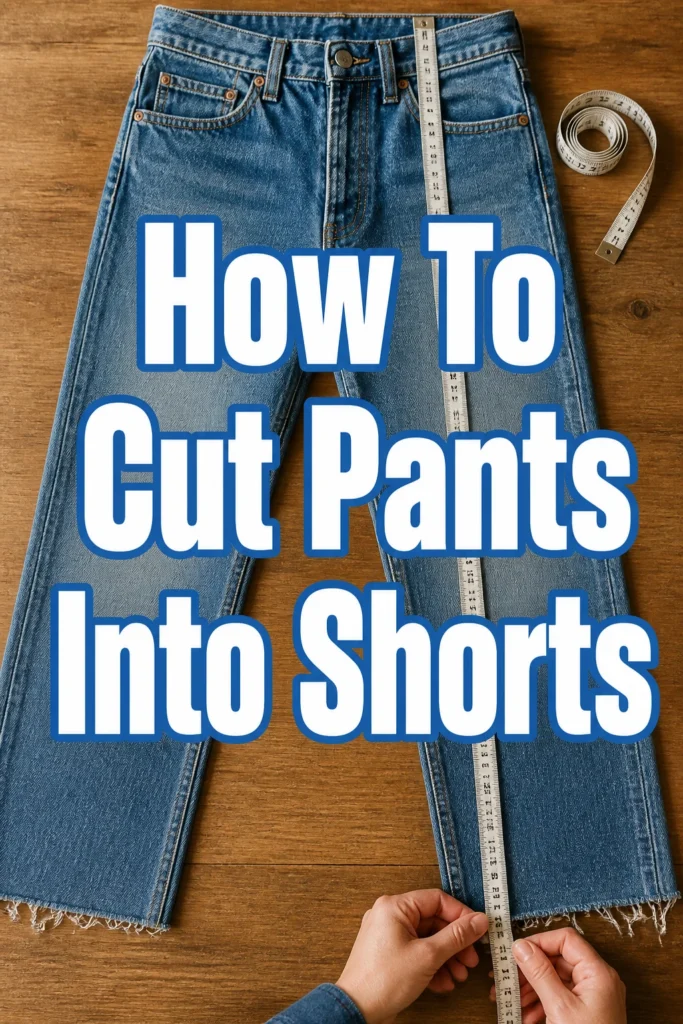
- Measure from the crotch seam down to your initial mark on one leg. Note this measurement.
- Use your ruler and fabric marker to draw a straight, horizontal line across the pant leg at your measured point. Extend this line across both legs.
- Double-check the measurement from the crotch to your new line on both sides to ensure it’s even.
Pro Tip: For a slightly angled cut that looks more natural on the leg, you can make the outer seam about 0.5 to 1 inch longer than the inseam. This creates a subtle curve.
Step 5: Carefully Cut the First Leg
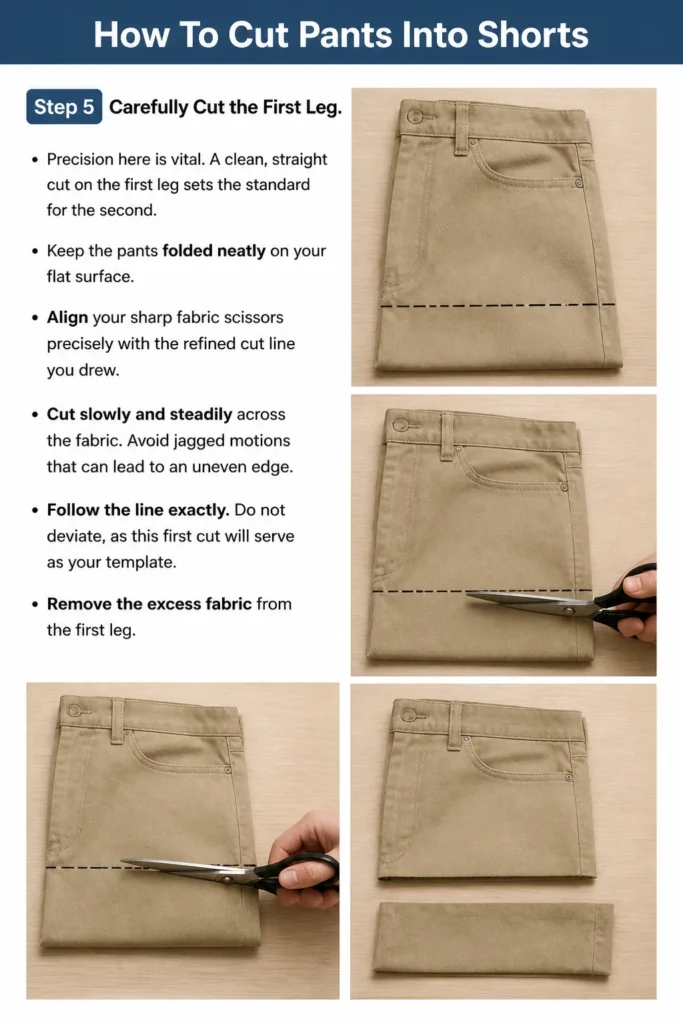
Precision here is vital. A clean, straight cut on the first leg sets the standard for the second.
- Keep the pants folded neatly on your flat surface.
- Align your sharp fabric scissors precisely with the refined cut line you drew.
- Cut slowly and steadily across the fabric. Avoid jagged motions that can lead to an uneven edge.
- Follow the line exactly. Do not deviate, as this first cut will serve as your template.
- Remove the excess fabric from the first leg.
Step 6: Use the First Leg as a Template for the Second
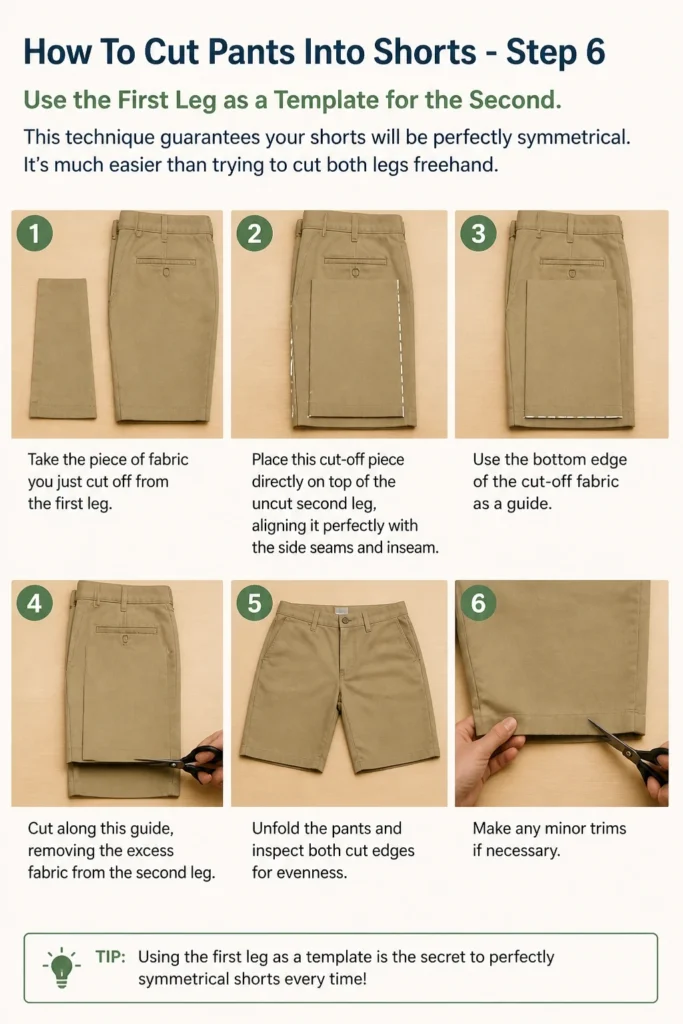
This technique guarantees your shorts will be perfectly symmetrical. It’s much easier than trying to cut both legs freehand.
- Keep the pants folded and smoothed out.
- Take the piece of fabric you just cut off from the first leg.
- Place this cut-off piece directly on top of the uncut second leg, aligning it perfectly with the side seams and inseam.
- Use the bottom edge of the cut-off fabric as a guide.
- Cut along this guide, removing the excess fabric from the second leg.
- Unfold the pants and inspect both cut edges for evenness. Make any minor trims if necessary.
Step 7: Finish the Raw Edges (Optional but Recommended)
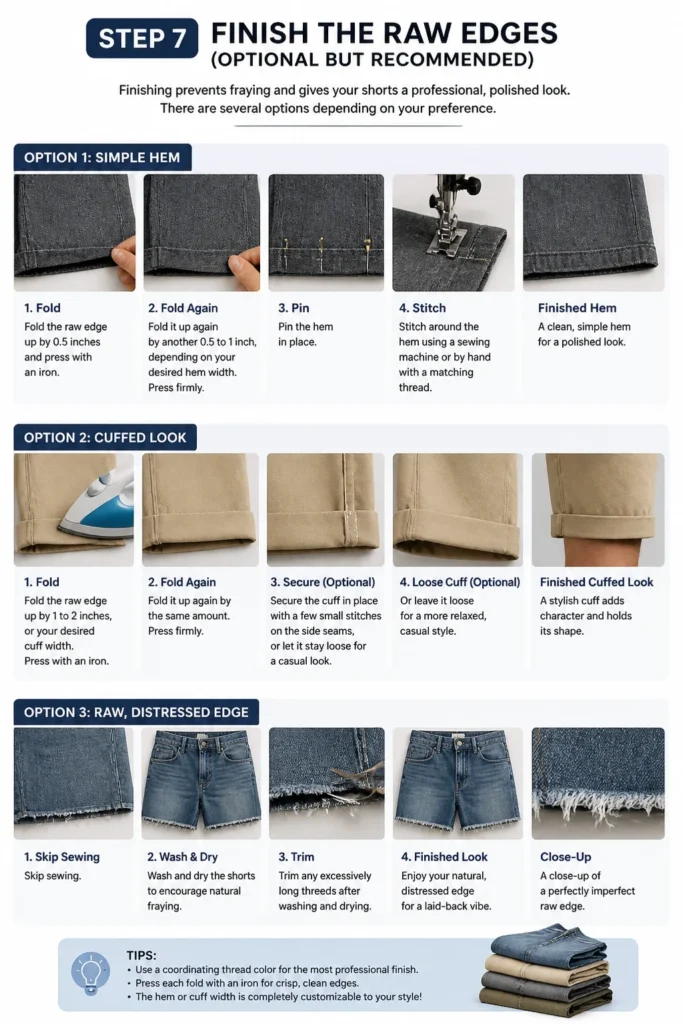
Finishing prevents fraying and gives your shorts a professional, polished look. There are several options depending on your preference.
- For a simple hem:
- Fold the raw edge up by 0.5 inches and press with an iron.
- Fold it up again by another 0.5 to 1 inch, depending on your desired hem width. Press firmly.
- Pin the hem in place.
- Stitch around the hem using a sewing machine or by hand with a matching thread.
- For a cuffed look:
- Fold the raw edge up by 1 to 2 inches, or your desired cuff width. Press with an iron.
- Fold it up again by the same amount. Press firmly.
- Secure the cuff in place with a few small stitches on the side seams, or let it stay loose for a casual look.
- For a raw, distressed edge:
- Skip sewing.
- Wash and dry the shorts to encourage natural fraying.
- Trim any excessively long threads after washing to maintain a neat appearance.
Step 8: Try On and Adjust
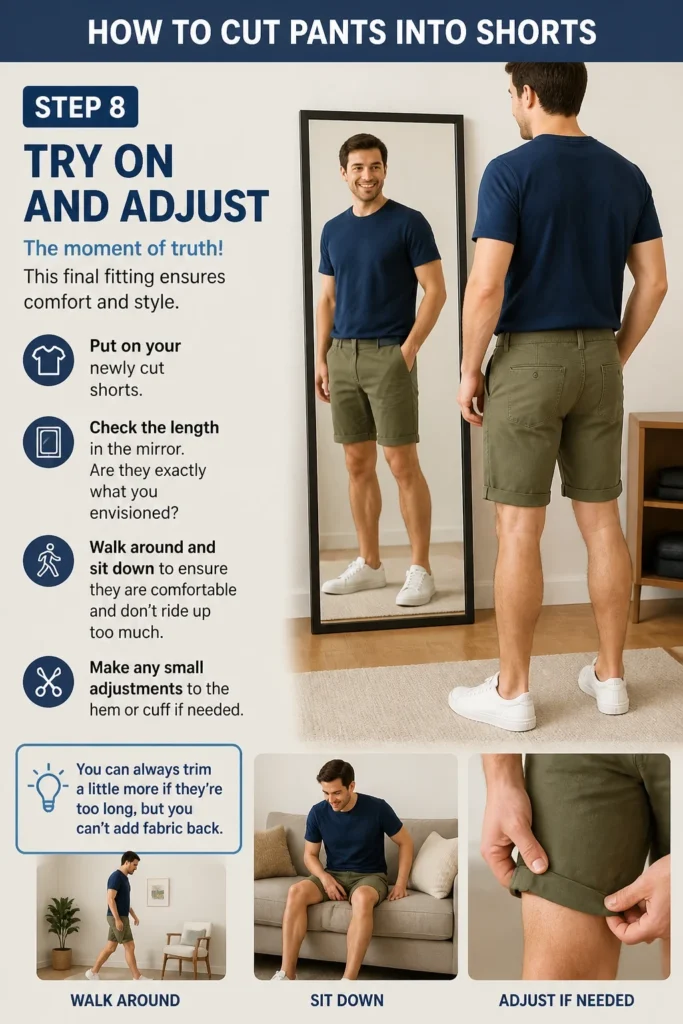
The moment of truth! This final fitting ensures comfort and style.
- Put on your newly cut shorts.
- Check the length in the mirror. Are they exactly what you envisioned?
- Walk around and sit down to ensure they are comfortable and don’t ride up too much.
- Make any small adjustments to the hem or cuff if needed. You can always trim a little more if they’re too long, but you can’t add fabric back.
Step 9: Style Your New Shorts
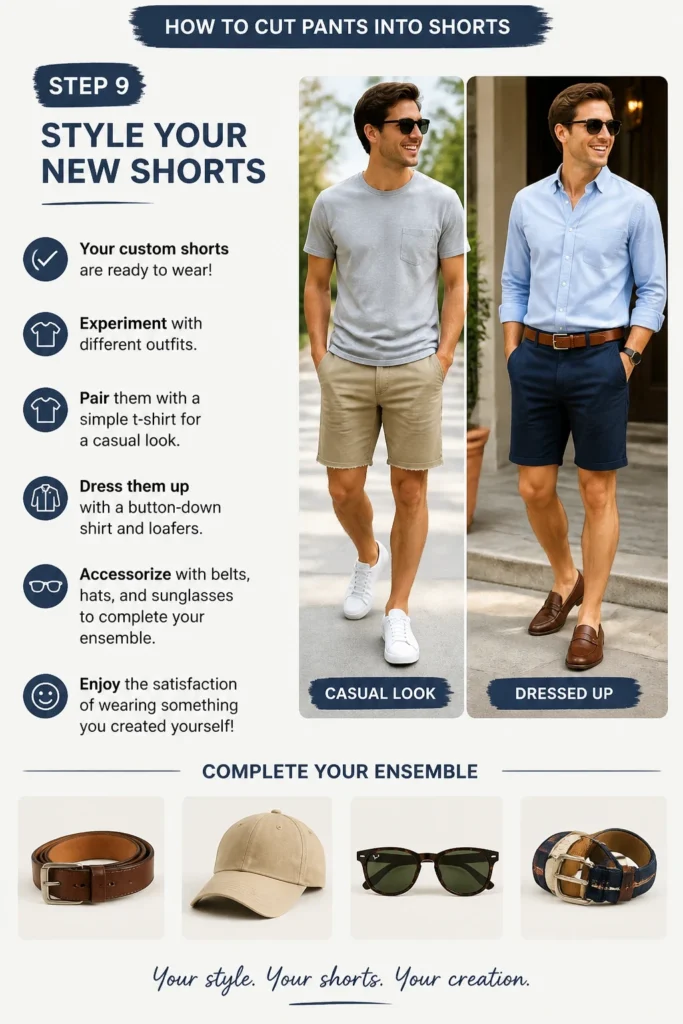
Your custom shorts are ready to wear! Experiment with different outfits.
- Pair them with a simple t-shirt for a casual look.
- Dress them up with a button-down shirt and loafers.
- Accessorize with belts, hats, and sunglasses to complete your ensemble.
- Enjoy the satisfaction of wearing something you created yourself!
Common Mistakes to Avoid
Cutting Too Short Initially
Many people get excited and cut their pants too short right away. This is a common irreversible error. Always cut longer than you think you need, especially if you plan to hem or cuff the shorts. You can always trim more fabric, but you cannot add it back once it’s cut.
Using Dull Scissors
Dull scissors will chew through fabric rather than cut it cleanly. This leads to frayed, uneven edges that are difficult to hem and give a messy appearance. Invest in a sharp pair of fabric scissors specifically for textiles to ensure clean, precise cuts.
Not Measuring and Marking Accurately
Eyeballing the cut line often results in crooked or uneven shorts. Taking the time to measure from the crotch seam, marking with a ruler, and double-checking ensures symmetry. A precise line is the foundation for a professional-looking finish.
Skipping the Finishing Step
Leaving raw edges, especially on woven fabrics like denim or canvas, will lead to excessive fraying over time. While a distressed look can be intentional, completely unfinished edges will unravel and look sloppy after a few washes. Hemming or cuffing adds durability and a polished touch.
Troubleshooting
My Shorts Look Uneven
If your shorts appear uneven after cutting, it’s likely due to the pants not being perfectly flat and aligned during the cutting process, or an inaccurate initial mark. Lay them flat again, smooth out all wrinkles, and fold them precisely, matching all seams. Use a ruler to re-measure from the crotch seam on both legs and make small, corrective trims if needed.
The Edges Are Fraying Too Much
Excessive fraying indicates that the fabric isn’t properly finished or that the fabric type is prone to heavy fraying. If you desire a clean look, reinforce the hem with a tighter stitch, or consider adding a serged edge if you have access to a serger. For a controlled distressed look, wash and dry them, then trim only the longest, unruly threads.
The Shorts Feel Too Tight/Loose After Cutting
The cutting process itself doesn’t alter the fit around the waist or hips, only the length. If your shorts feel too tight or loose, the original pants likely had that issue. This guide focuses on length adjustment. For fit adjustments, you would need more advanced sewing skills to take in or let out seams.
Key Takeaways
- Always start by cutting longer than your desired final length to allow for adjustments and hemming.
- Accurate measuring and marking are crucial for symmetrical and professional-looking shorts.
- Use sharp fabric scissors for clean cuts that prevent fraying and make hemming easier.
- Consider the fabric type and your personal style when deciding on the final length and finish.
- Finishing the raw edges, whether by hemming or cuffing, significantly improves durability and appearance.
- Don’t be afraid to experiment with different lengths and finishes to find your perfect style.
Frequently Asked Questions
Can I cut any type of pants into shorts?
Most woven fabrics like denim, cotton twill, linen, and canvas are excellent for cutting into shorts. Knit fabrics, like sweatpants, can also be cut, but they might require a different hemming technique to prevent rolling. Avoid very delicate fabrics that fray easily unless you’re experienced.
What if I don’t have a sewing machine?
You can still create great shorts without a sewing machine. Hand-stitching a hem with a needle and thread is perfectly viable, though it takes more time. Alternatively, you can opt for a raw, distressed edge and simply wash the shorts to encourage natural fraying, trimming any excess threads. Fabric glue or fusible web can also create no-sew hems.
How do I prevent my denim shorts from fraying too much?
To control fraying on denim, finish the raw edge. A simple double-fold hem, stitched by hand or machine, will encapsulate the raw edge and prevent it from unraveling. If you want a slight fringe, you can stitch a straight line about 0.5 inches above the raw edge; this will limit the fraying to below the stitch line.
Can I make these shorts reversible?
Making truly reversible shorts would be a more advanced project, involving lining and specific seam finishes. This guide focuses on a basic cut and hem. However, you can create shorts with a cuffed hem that shows a different side of the fabric if the inside of your pant leg has an interesting contrast.
Our Top Recommended Finds
- Fiskars Fabric Scissors: Known for their sharpness and ergonomic design, making clean cuts effortless and precise.
- Dritz Tailor’s Chalk: Provides clear, temporary marks on various fabrics, easily brushed away once your project is complete.
- Singer Sewing Kit: A comprehensive kit including needles, thread, pins, and a measuring tape, perfect for all your basic sewing needs.
Your Next Fashion Statement Awaits
You now have all the tools and knowledge to transform those forgotten pants into a fresh, personalized pair of shorts. It’s an accessible project that offers immediate gratification and a boost to your wardrobe. Take the plunge and give your old clothes a new lease on life. Start your cutting project today and wear your creativity with pride!
Beginner-friendly templates, step-by-step guides,
and weekly project ideas in your inbox.