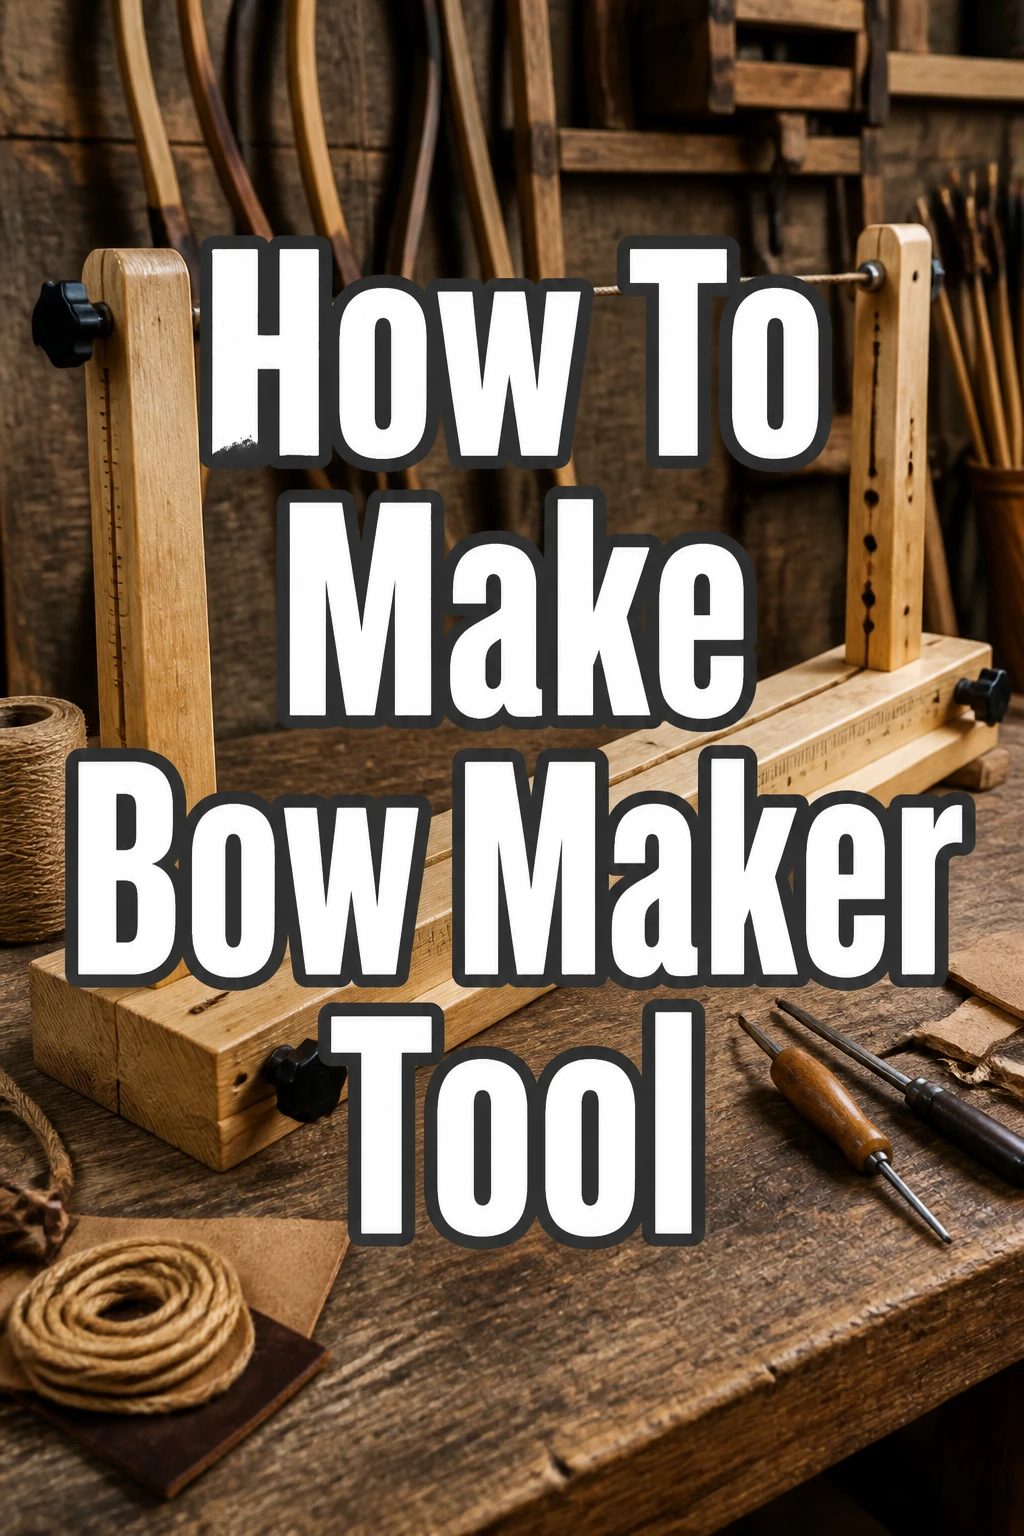
How To Make Bow Maker Tool

Beginner-friendly templates, step-by-step guides,
and weekly project ideas in your inbox.
I’ve crafted countless bows for wreaths, gifts, and home decor over the years.
Learning to make my own bow maker tool transformed my crafting, making every bow perfect and professional.
This guide shares my practical experience, ensuring you can build a reliable tool that elevates your DIY projects.
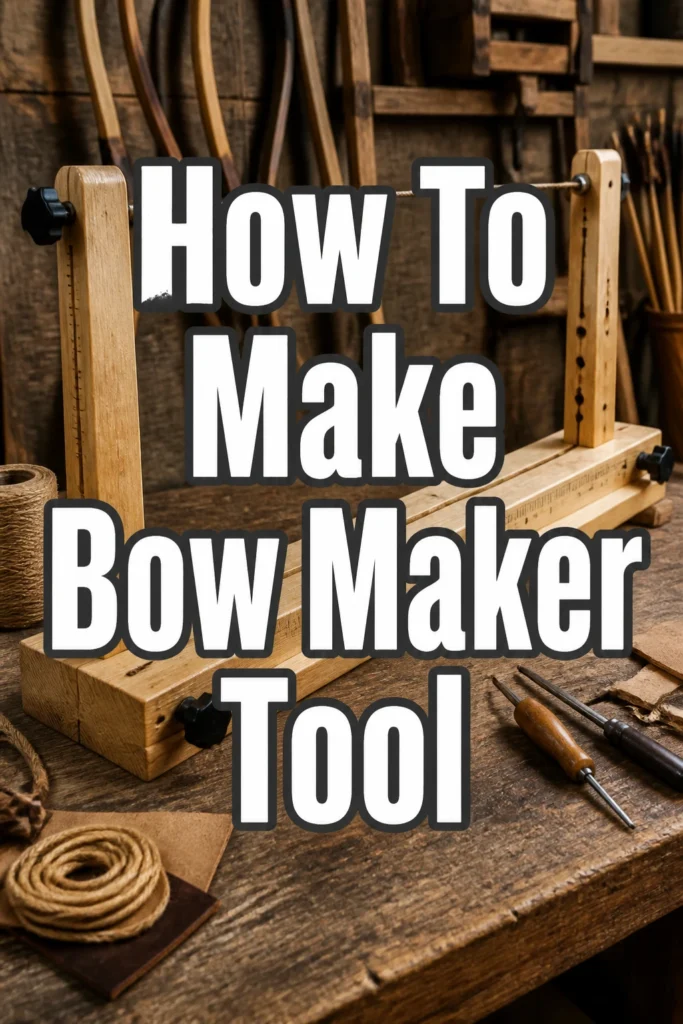
Quick Overview
You’re about to create a versatile bow maker tool, perfect for consistent, beautiful bows every time.
This project is straightforward and will significantly enhance your crafting capabilities.
- Time needed: 1-2 hours
- Difficulty: Beginner
- What you’ll need: A piece of wood, wooden dowels, drill, saw, measuring tape.
Step-by-Step Instructions
Step 1: Gather Your Materials
Before beginning, ensure you have all the necessary items at hand.
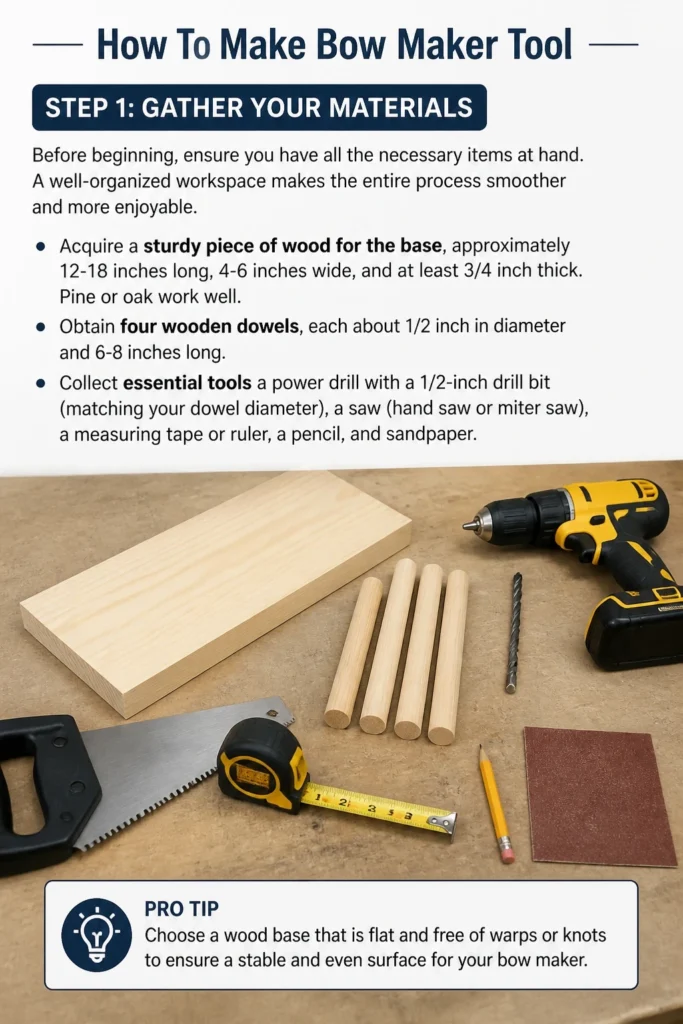
A well-organized workspace makes the entire process smoother and more enjoyable.
- Acquire a sturdy piece of wood for the base, approximately 12-18 inches long, 4-6 inches wide, and at least 3/4 inch thick. Pine or oak work well.
- Obtain four wooden dowels, each about 1/2 inch in diameter and 6-8 inches long.
- Collect essential tools: a power drill with a 1/2-inch drill bit (matching your dowel diameter), a saw (hand saw or miter saw), a measuring tape or ruler, a pencil, and sandpaper.
Pro Tip: Choose a wood base that is flat and free of warps or knots to ensure a stable and even surface for your bow maker.
Step 2: Prepare the Wood Base
A properly prepared base is crucial for the stability and functionality of your bow maker.
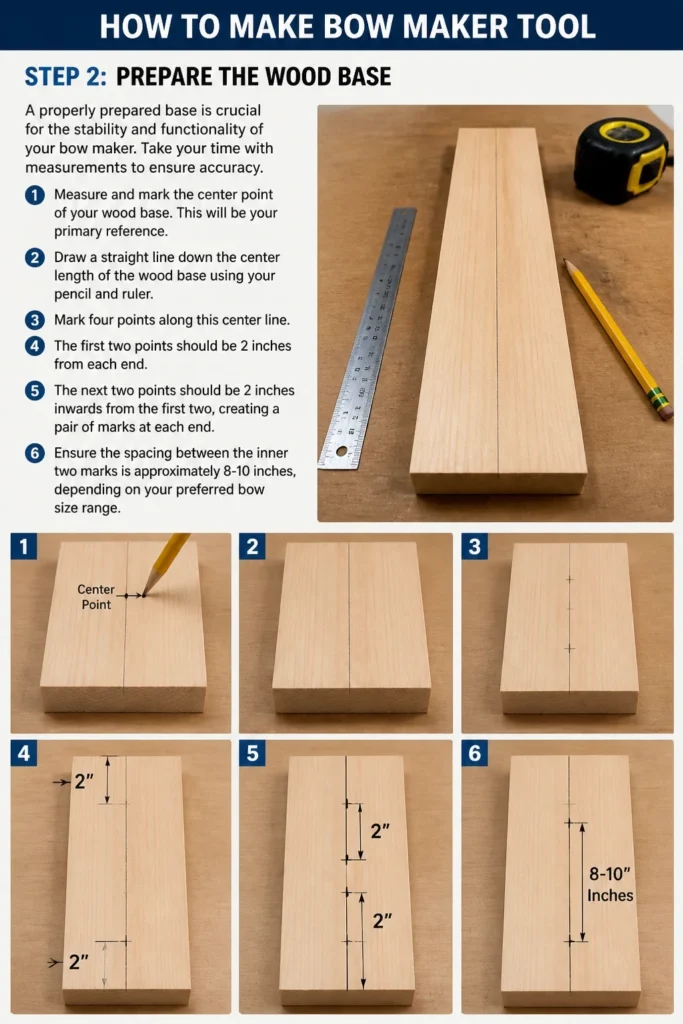
Take your time with measurements to ensure accuracy.
- Measure and mark the center point of your wood base. This will be your primary reference.
- Draw a straight line down the center length of the wood base using your pencil and ruler.
- Mark four points along this center line. The first two points should be 2 inches from each end. The next two points should be 2 inches inwards from the first two, creating a pair of marks at each end.
- Ensure the spacing between the inner two marks is approximately 8-10 inches, depending on your preferred bow size range.
Step 3: Drill the Dowel Holes
Accurate drilling is key to ensuring your dowels stand straight and secure.
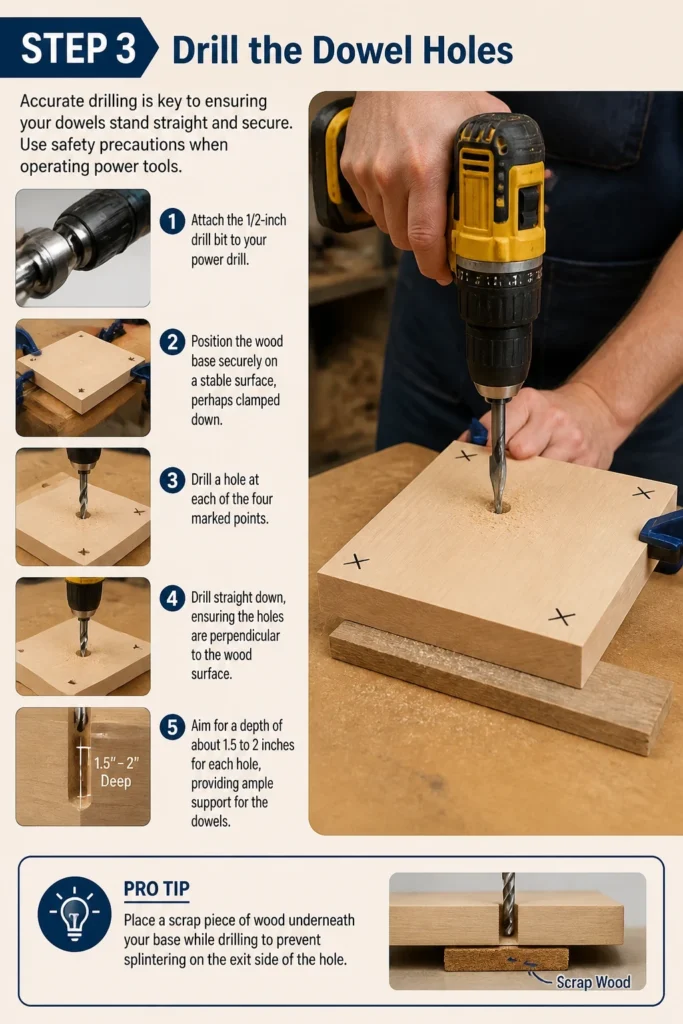
Use safety precautions when operating power tools.
- Attach the 1/2-inch drill bit to your power drill.
- Position the wood base securely on a stable surface, perhaps clamped down.
- Drill a hole at each of the four marked points. Drill straight down, ensuring the holes are perpendicular to the wood surface.
- Aim for a depth of about 1.5 to 2 inches for each hole, providing ample support for the dowels.
Pro Tip: Place a scrap piece of wood underneath your base while drilling to prevent splintering on the exit side of the hole.
Step 4: Cut the Dowels
The length of your dowels will determine the working height of your bow maker.
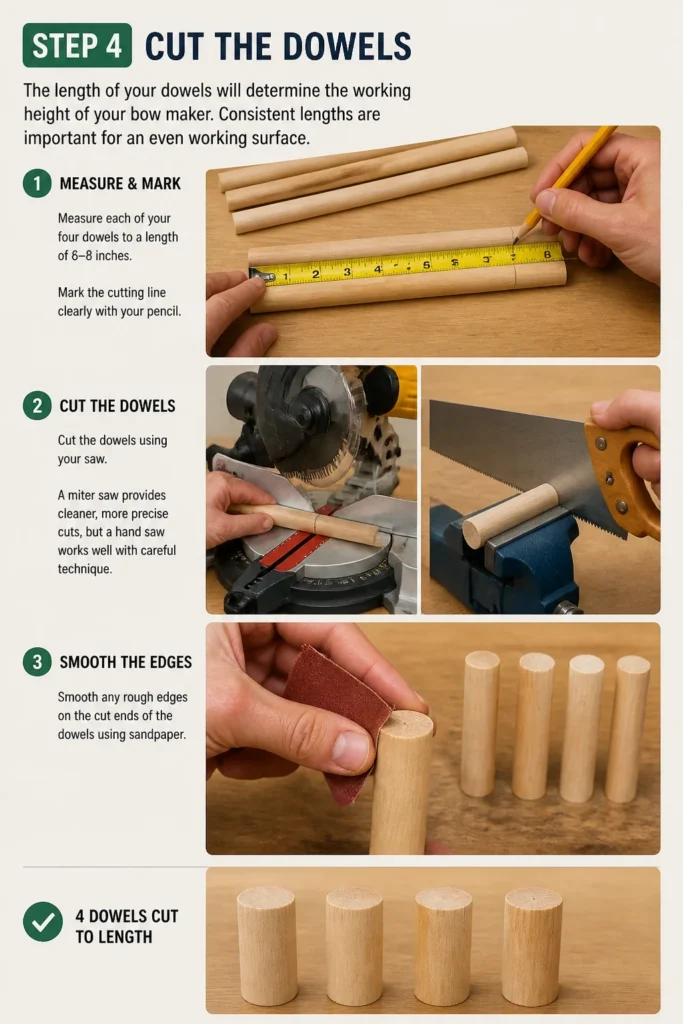
Consistent lengths are important for an even working surface.
- Measure each of your four dowels to a length of 6-8 inches.
- Mark the cutting line clearly with your pencil.
- Cut the dowels using your saw. A miter saw provides cleaner, more precise cuts, but a hand saw works well with careful technique.
- Smooth any rough edges on the cut ends of the dowels using sandpaper.
Step 5: Insert the Dowels
This step brings your bow maker tool to life, creating the posts around which bows are formed.
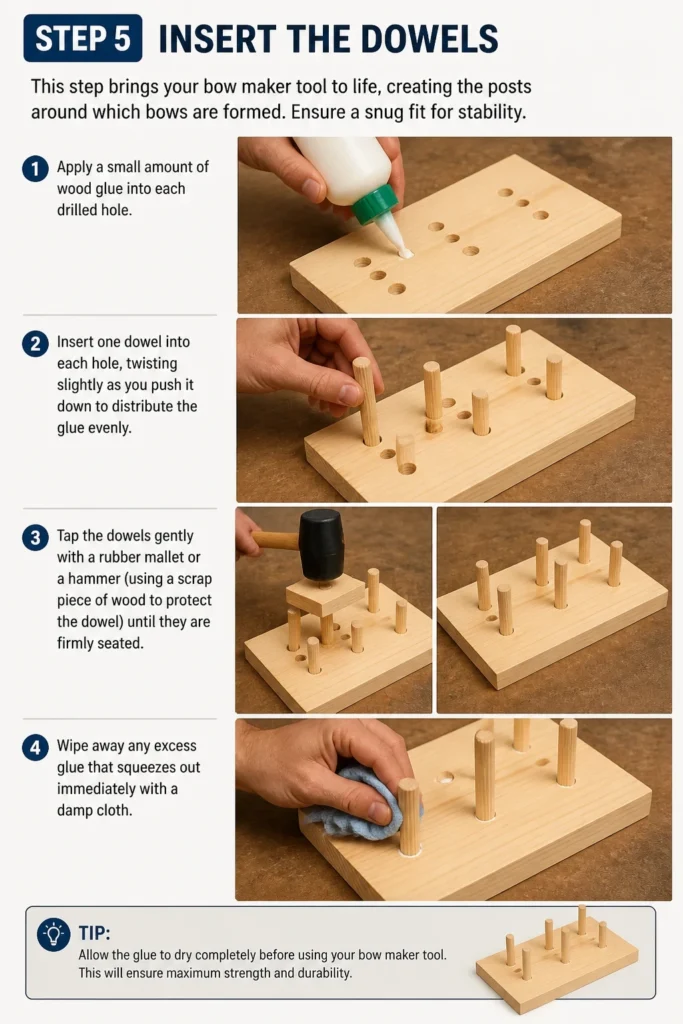
Ensure a snug fit for stability.
- Apply a small amount of wood glue into each drilled hole.
- Insert one dowel into each hole, twisting slightly as you push it down to distribute the glue evenly.
- Tap the dowels gently with a rubber mallet or a hammer (using a scrap piece of wood to protect the dowel) until they are firmly seated.
- Wipe away any excess glue that squeezes out immediately with a damp cloth.
Step 6: Allow Glue to Dry
Patience here ensures a strong, durable tool.
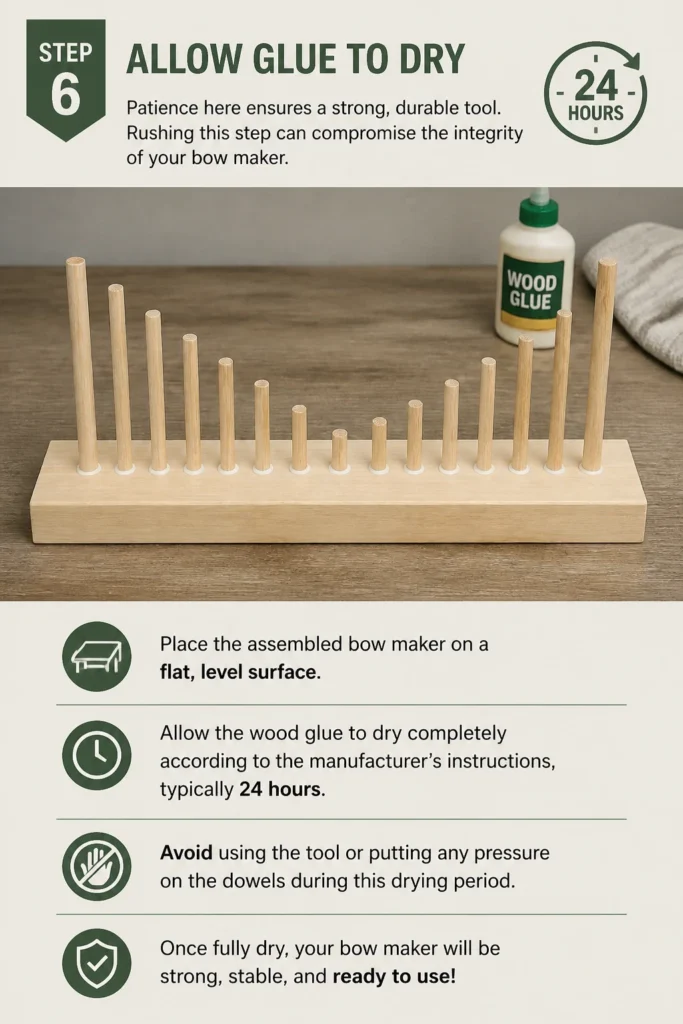
Rushing this step can compromise the integrity of your bow maker.
- Place the assembled bow maker on a flat, level surface.
- Allow the wood glue to dry completely according to the manufacturer’s instructions, typically 24 hours.
- Avoid using the tool or putting any pressure on the dowels during this drying period.
Step 7: Finish and Refine
A smooth finish not only looks good but also prevents snagging your ribbon.
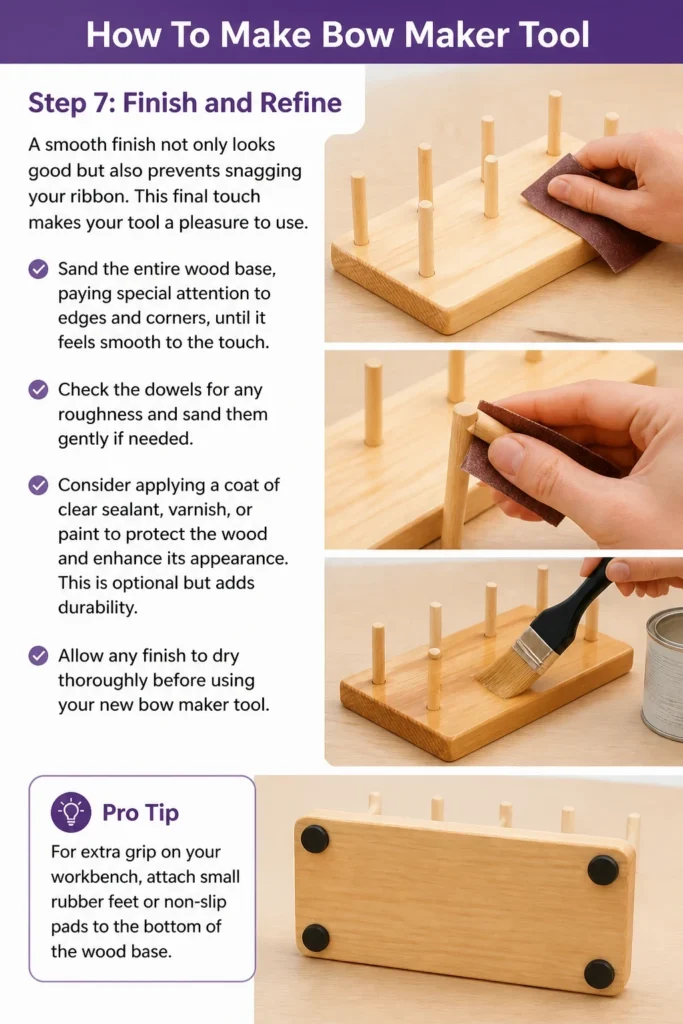
This final touch makes your tool a pleasure to use.
- Sand the entire wood base, paying special attention to edges and corners, until it feels smooth to the touch.
- Check the dowels for any roughness and sand them gently if needed.
- Consider applying a coat of clear sealant, varnish, or paint to protect the wood and enhance its appearance. This is optional but adds durability.
- Allow any finish to dry thoroughly before using your new bow maker tool.
Pro Tip: For extra grip on your workbench, attach small rubber feet or non-slip pads to the bottom of the wood base.
Common Mistakes to Avoid
Incorrect Dowel Hole Depth
Drilling holes too shallow will result in wobbly dowels that can pull out easily during use. This makes it difficult to maintain tension on your ribbon and creates inconsistent bows. Ensure your holes are at least 1.5 to 2 inches deep for maximum stability.
Uneven Dowel Spacing
Inconsistent spacing between your dowels can lead to asymmetrical bows. If the gaps are not uniform, your ribbon loops will vary in size. Always measure and mark your drill points carefully before drilling to ensure symmetry.
Skipping Sanding and Finishing
Neglecting to sand the wood base and dowels leaves rough edges that can snag and damage delicate ribbon. Unfinished wood can also absorb moisture and warp over time. A smooth finish protects your ribbon and extends the life of your tool.
Insufficient Drying Time for Glue
Using the bow maker before the wood glue has fully cured will weaken the bond between the dowels and the base. This can cause the dowels to become loose or detach, making the tool unusable. Always allow the recommended drying time for the glue to achieve maximum strength.
Troubleshooting
Dowels Feel Wobbly After Drying
If your dowels are not firmly seated, it likely means the holes were drilled slightly too large, or not enough glue was used. You can try to remove the wobbly dowel, apply more wood glue (perhaps a thicker type), or even use a small shim if the gap is significant, then reinsert and allow to dry completely.
Ribbon Snags on the Wood Base or Dowels
This indicates rough spots that were missed during sanding. Carefully identify the areas causing the snagging. Use fine-grit sandpaper (180-220 grit) to smooth those specific spots. If you applied a finish, you might need to reapply it to the sanded areas.
Bow Maker Slides on Workbench
A sliding tool makes bow-making frustrating and inefficient. The simplest solution is to attach non-slip rubber feet or small silicone pads to the underside of your wood base. Alternatively, place a non-slip mat or shelf liner beneath the tool while you work.
Key Takeaways
- Accurate measurements are fundamental for a balanced and functional bow maker.
- Proper drilling depth and perpendicular alignment ensure dowel stability.
- Using wood glue is essential for permanently securing the dowels in place.
- Allowing adequate drying time for the glue is crucial for structural integrity.
- Thorough sanding and optional finishing protect your ribbon and extend tool life.
- This DIY project saves money and provides a custom tool perfectly suited to your needs.
Frequently Asked Questions
Can I use different size dowels?
Yes, you can adjust the dowel size. If you use larger dowels, ensure your drill bit matches the new diameter. Smaller dowels might be less stable, so sticking to 1/2-inch or 3/8-inch is generally recommended for durability and ease of use.
What type of wood glue is best?
Standard wood glue (PVA glue) is perfectly suitable for this project. It creates a strong bond between the dowels and the base. Make sure it’s rated for wood and follow the manufacturer’s instructions for application and drying time.
How far apart should the dowels be?
The spacing allows for different bow sizes. A common setup is to have the inner dowels 8-10 inches apart, and the outer dowels 2 inches from the ends. This provides a versatile range for small to large bows. You can customize this based on the typical bow sizes you plan to make.
Can I make it adjustable?
Making it adjustable adds complexity but is possible. Instead of gluing the dowels, you could drill larger holes and use wing nuts and bolts through the base to hold adjustable dowel sleeves. However, for a simple and sturdy tool, fixed dowels are easier to build and very effective.
Our Top Recommended Finds
- Power Drill Kit: A reliable cordless drill makes drilling holes quick and effortless, useful for many DIY projects.
- Wood Glue: Titebond III Ultimate Wood Glue offers strong, waterproof bonds, perfect for ensuring your dowels stay put.
- Assorted Grit Sandpaper Pack: Having a range of sandpaper grits ensures you can smooth rough cuts and achieve a professional finish.
Craft Your Perfect Bows Today
You now have a clear path to creating your very own bow maker tool.
Imagine the beautiful, professional-looking bows you’ll craft for every occasion, adding a personal touch to gifts and decorations.
Don’t wait; gather your materials and start building this essential crafting companion this afternoon.
For your next project, consider exploring different ribbon types or even making a custom ribbon storage solution to complement your new tool.
Beginner-friendly templates, step-by-step guides,
and weekly project ideas in your inbox.