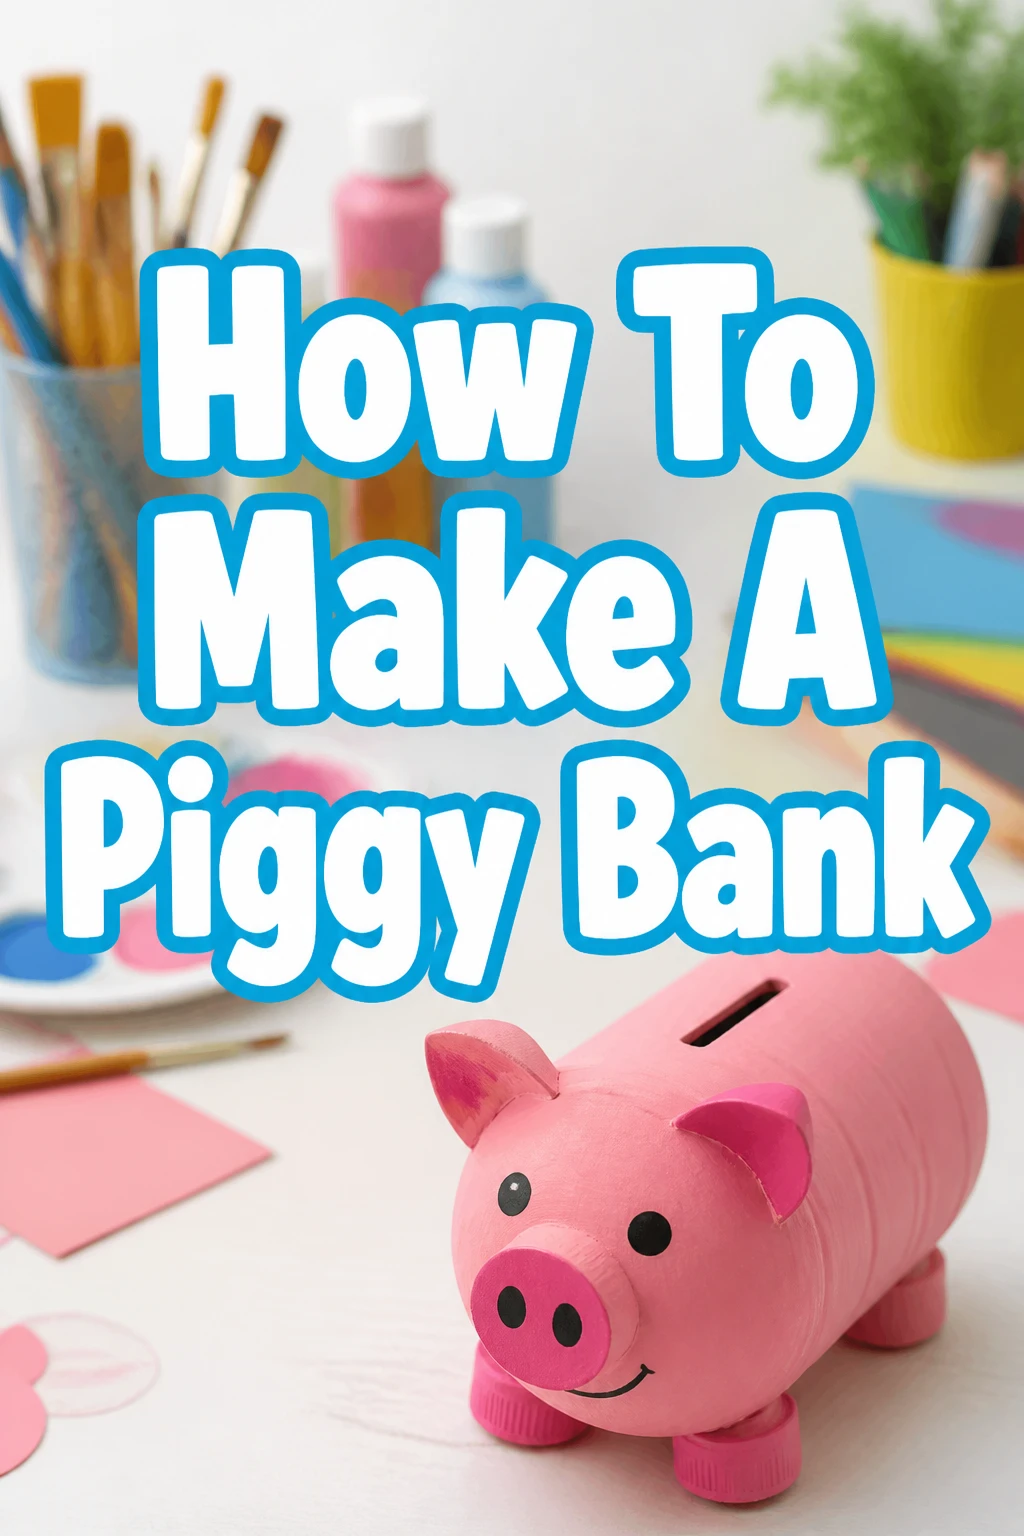
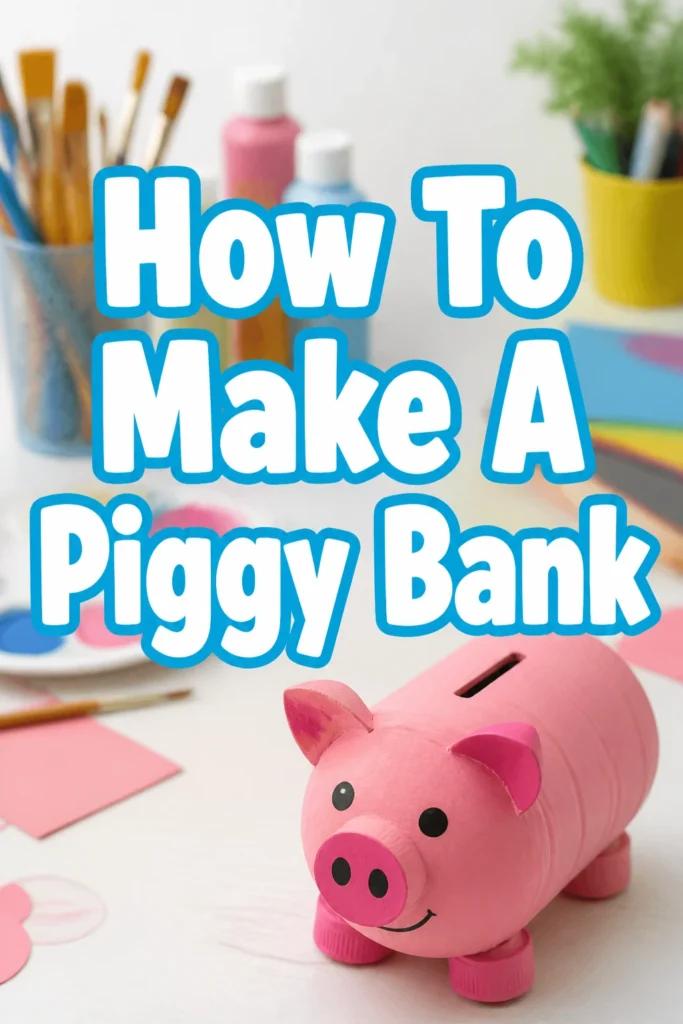
How To Make A Piggy Bank

Beginner-friendly templates, step-by-step guides,
and weekly project ideas in your inbox.
Making your own piggy bank offers a unique blend of creativity and financial empowerment.
I remember the excitement of decorating my first homemade bank, a simple shoebox that felt like a treasure chest.
This guide draws on that hands-on joy, giving you practical steps to build a personalized savings tool today.
Quick Overview
You’re about to embark on a fun, rewarding project that results in a unique container for your coins and bills. This guide will walk you through transforming everyday items into a functional and beautiful piggy bank.
- Time needed: 2-4 hours (includes drying time)
- Difficulty: Beginner
- What you’ll need: A container, craft knife, glue, paint/decorations
Step-by-Step Instructions
Step 1: Gather Your Materials
The foundation of your piggy bank is a suitable container. Think creatively about what you already have around the house.
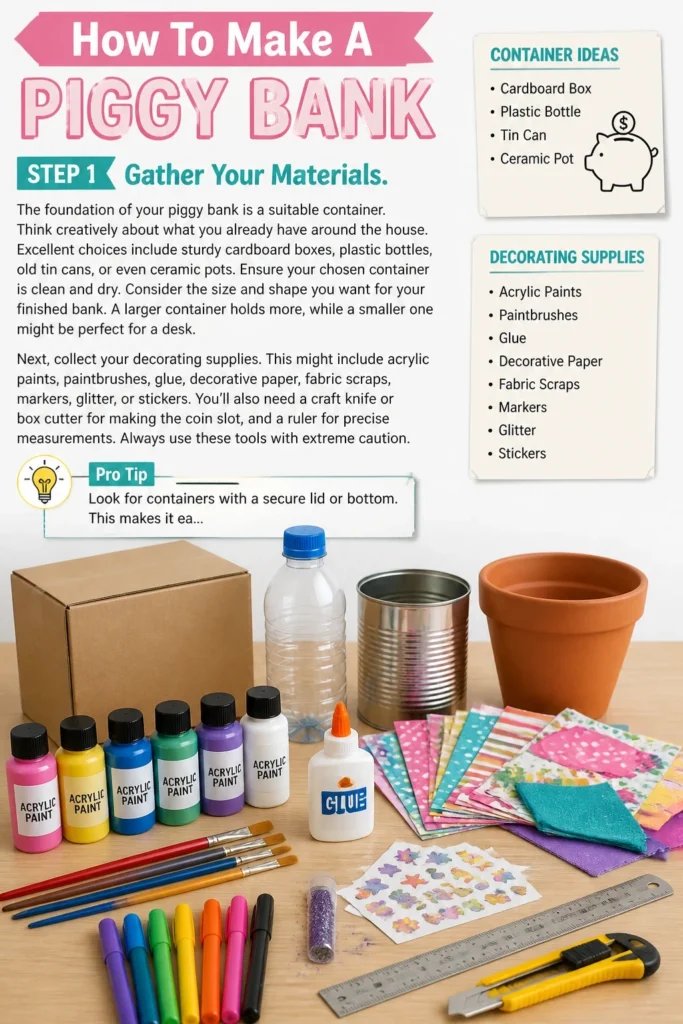
Excellent choices include sturdy cardboard boxes, plastic bottles, old tin cans, or even ceramic pots. Ensure your chosen container is clean and dry.
Consider the size and shape you want for your finished bank. A larger container holds more, while a smaller one might be perfect for a desk.
Next, collect your decorating supplies. This might include acrylic paints, paintbrushes, glue, decorative paper, fabric scraps, markers, glitter, or stickers.
You’ll also need a craft knife or box cutter for making the coin slot, and a ruler for precise measurements. Always use these tools with extreme caution.
Pro Tip: Look for containers with a secure lid or bottom. This makes it easier to retrieve money later or ensures your savings stay safe.
Step 2: Prepare Your Container
Thorough preparation ensures your decorations adhere well and last longer. Start by removing any labels or stickers from your container.
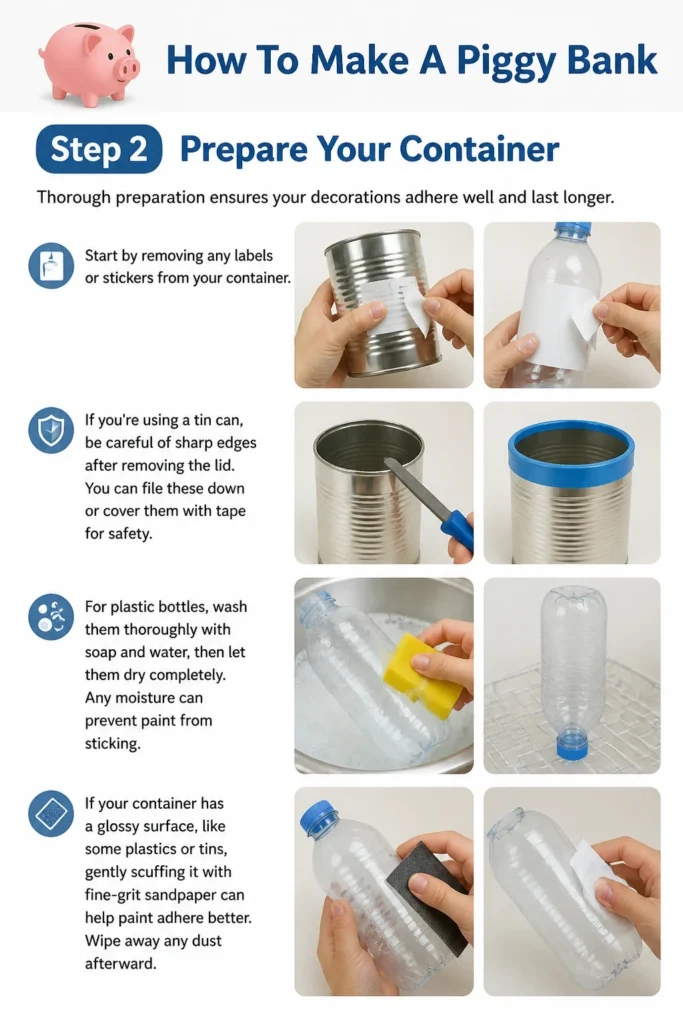
If you’re using a tin can, be careful of sharp edges after removing the lid. You can file these down or cover them with tape for safety.
For plastic bottles, wash them thoroughly with soap and water, then let them dry completely. Any moisture can prevent paint from sticking.
If your container has a glossy surface, like some plastics or tins, gently scuffing it with fine-grit sandpaper can help paint adhere better. Wipe away any dust afterward.
Step 3: Cut the Coin Slot
This is a crucial step that requires precision and care. Decide where you want your coin slot to be located, typically on the top or side of the container.
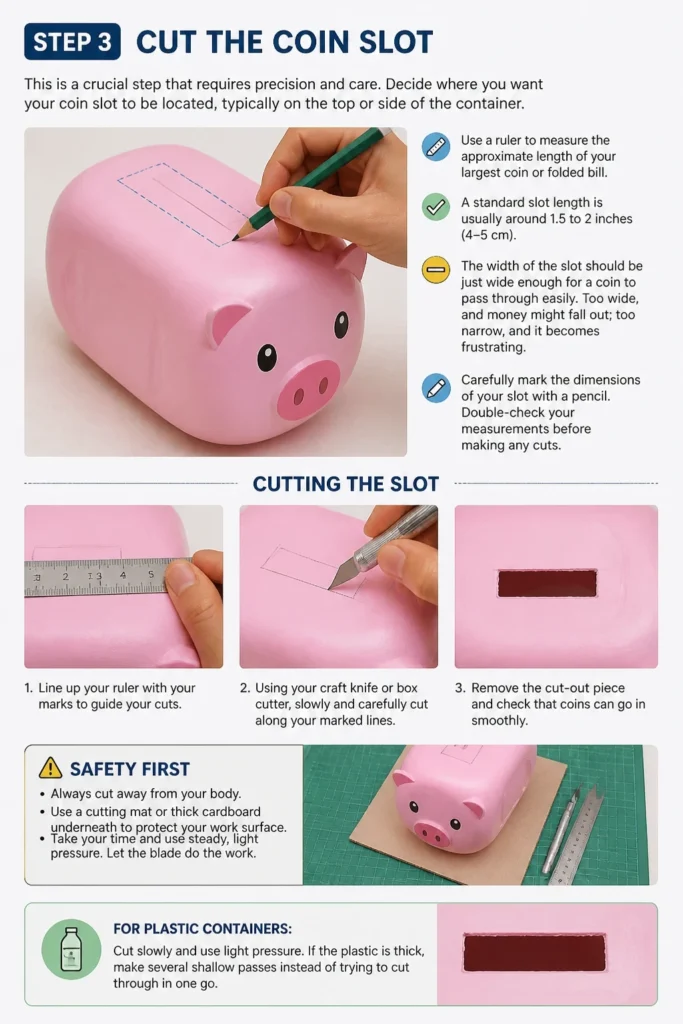
Use a ruler to measure the approximate length of your largest coin or folded bill. A standard slot length is usually around 1.5 to 2 inches (4-5 cm).
The width of the slot should be just wide enough for a coin to pass through easily. Too wide, and money might fall out; too narrow, and it becomes frustrating.
Carefully mark the dimensions of your slot with a pencil. Double-check your measurements before making any cuts.
Using your craft knife or box cutter, slowly and carefully cut along your marked lines. Always cut away from your body and use a cutting mat or thick cardboard underneath to protect your work surface.
For plastic containers, a heated knife can make cleaner cuts, but this requires extreme caution and good ventilation. Alternatively, make several light passes with a sharp knife.
Once cut, gently sand or file the edges of the slot to remove any rough or sharp areas. This makes it safer to use and gives a cleaner finish.
Step 4: Create a Retrieval Method (If Desired)
Think about how you’ll get your money out. Some piggy banks are designed to be broken open, but a reusable one is often more practical.
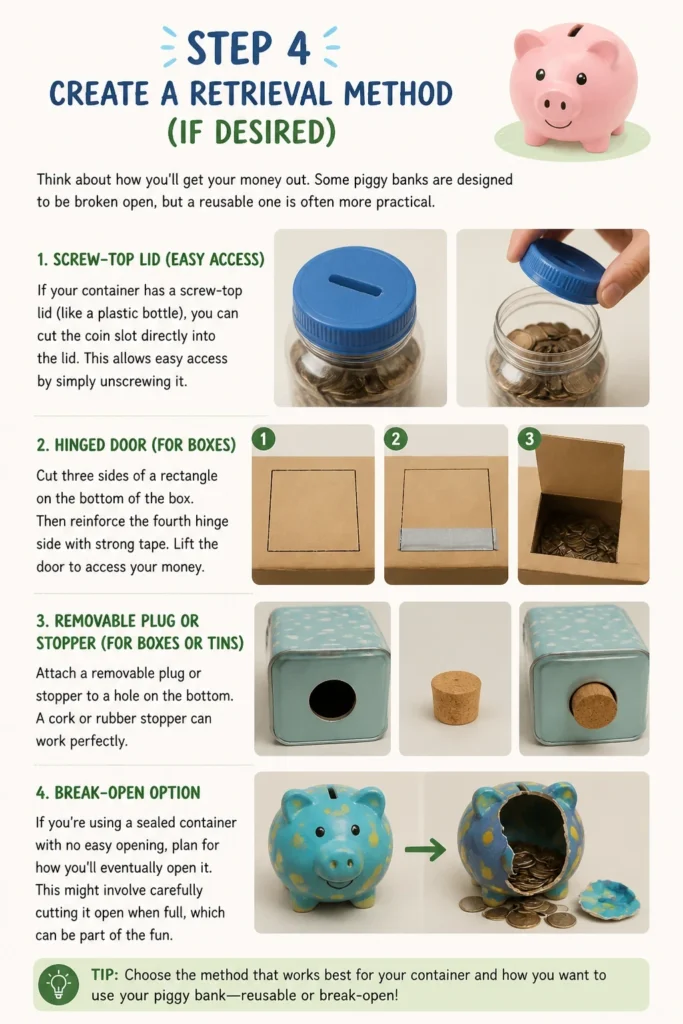
If your container has a screw-top lid (like a plastic bottle), you can cut the coin slot directly into the lid. This allows easy access by simply unscrewing it.
For boxes, you might create a small, hinged door on the bottom. Cut three sides of a rectangle, then reinforce the fourth “hinge” side with strong tape.
Another option for boxes or tins is to attach a removable plug or stopper to a hole on the bottom. A cork or rubber stopper can work perfectly.
If you’re using a sealed container with no easy opening, plan for how you’ll eventually open it. This might involve carefully cutting it open when full, which can be part of the fun.
Step 5: Prime and Base Coat Your Piggy Bank
A good base coat prepares your surface for vibrant decorations. If your container is a dark color or has patterns, priming helps achieve true color from your paints.
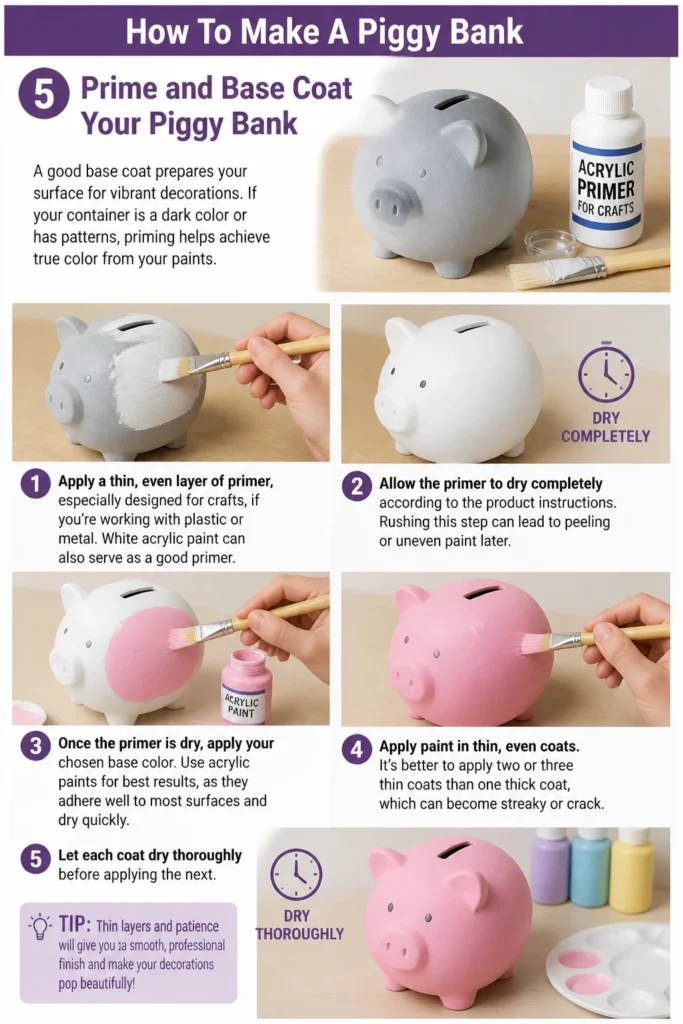
Apply a thin, even layer of primer, especially designed for crafts, if you’re working with plastic or metal. White acrylic paint can also serve as a good primer.
Allow the primer to dry completely according to the product instructions. Rushing this step can lead to peeling or uneven paint later.
Once the primer is dry, apply your chosen base color. Use acrylic paints for best results, as they adhere well to most surfaces and dry quickly.
Apply paint in thin, even coats. It’s better to apply two or three thin coats than one thick coat, which can become streaky or crack.
Let each coat dry thoroughly before applying the next. This prevents smudging and ensures a smooth finish.
Pro Tip: Use painter’s tape to mask off any areas you want to keep clean or create crisp lines for your design.
Step 6: Decorate Your Piggy Bank
Now comes the most exciting part: bringing your piggy bank to life! Let your creativity flow and personalize it to your taste.
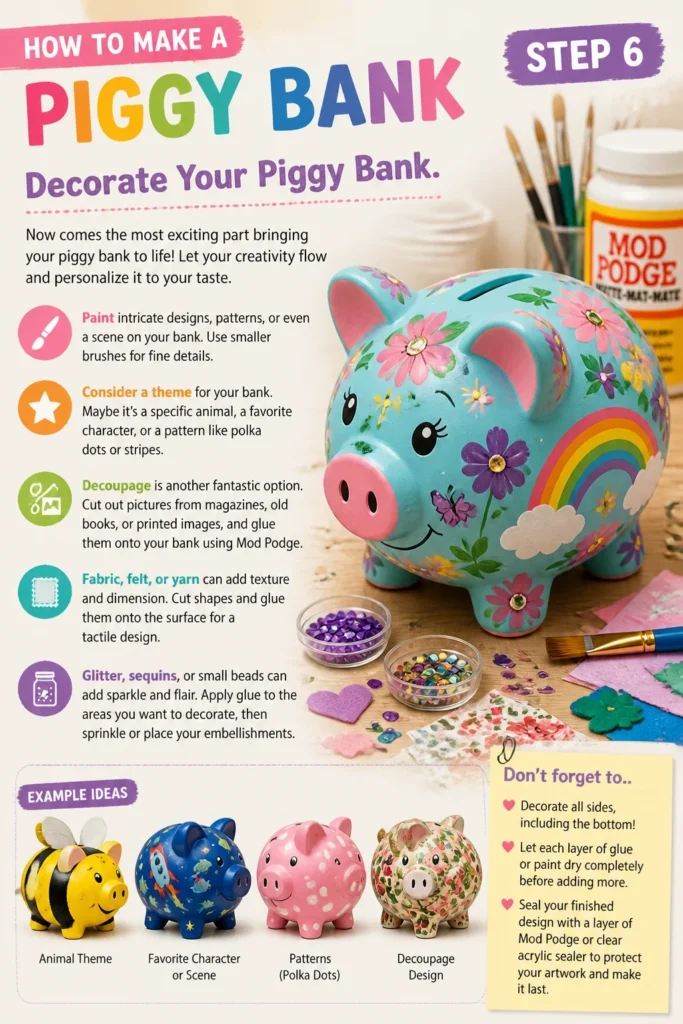
You can paint intricate designs, patterns, or even a scene on your bank. Use smaller brushes for fine details.
Consider a theme for your bank. Maybe it’s a specific animal, a favorite character, or a pattern like polka dots or stripes.
Decoupage is another fantastic option. Cut out pictures from magazines, old books, or printed images, and glue them onto your bank using Mod Podge.
Fabric scraps, felt, or yarn can add texture and dimension. Cut shapes and glue them onto the surface for a tactile design.
Glitter, sequins, or small beads can add sparkle and flair. Apply glue to the areas you want to decorate, then sprinkle or place your embellishments.
Don’t forget to write your name, the purpose of the savings (e.g., “Vacation Fund,” “New Bike”), or a motivational message on the bank.
Ensure all decorative elements are securely glued down. Loose pieces might fall off over time.
Step 7: Apply a Protective Finish
Once your decorations are completely dry, seal your piggy bank to protect your artwork and make it more durable.
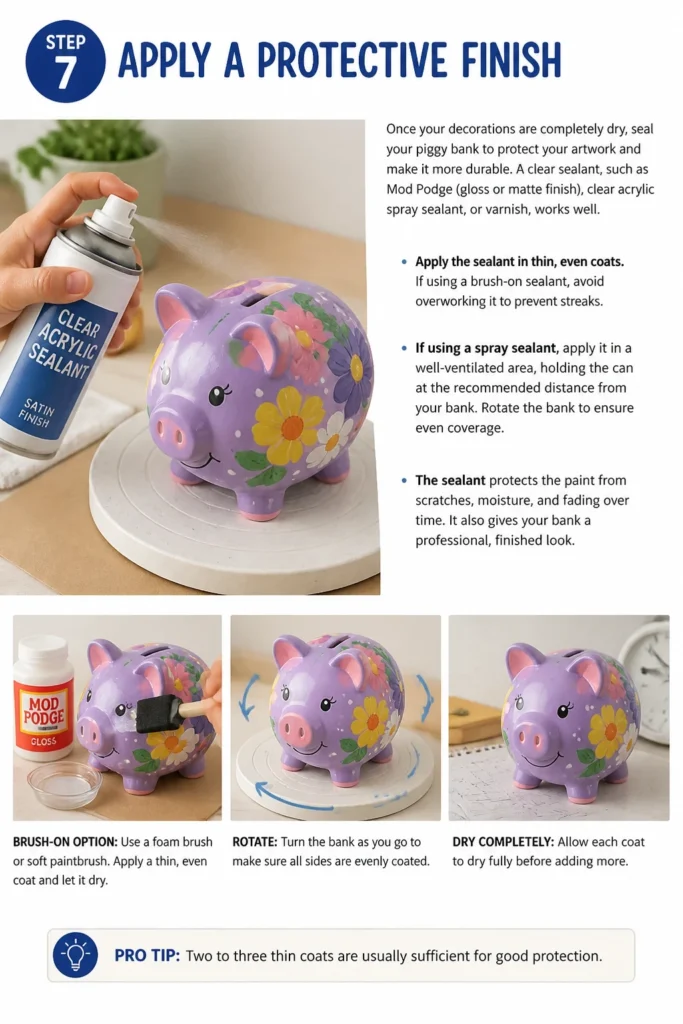
A clear sealant, such as Mod Podge (gloss or matte finish), clear acrylic spray sealant, or varnish, works well.
Apply the sealant in thin, even coats. If using a brush-on sealant, avoid overworking it to prevent streaks.
If using a spray sealant, apply it in a well-ventilated area, holding the can at the recommended distance from your bank. Rotate the bank to ensure even coverage.
The sealant protects the paint from scratches, moisture, and fading over time. It also gives your bank a professional, finished look.
Allow each coat of sealant to dry completely before applying additional coats. Two to three thin coats are usually sufficient for good protection.
Step 8: Let It Dry Completely
Patience is key at this stage. Your piggy bank needs ample time to dry thoroughly before it’s ready for use.
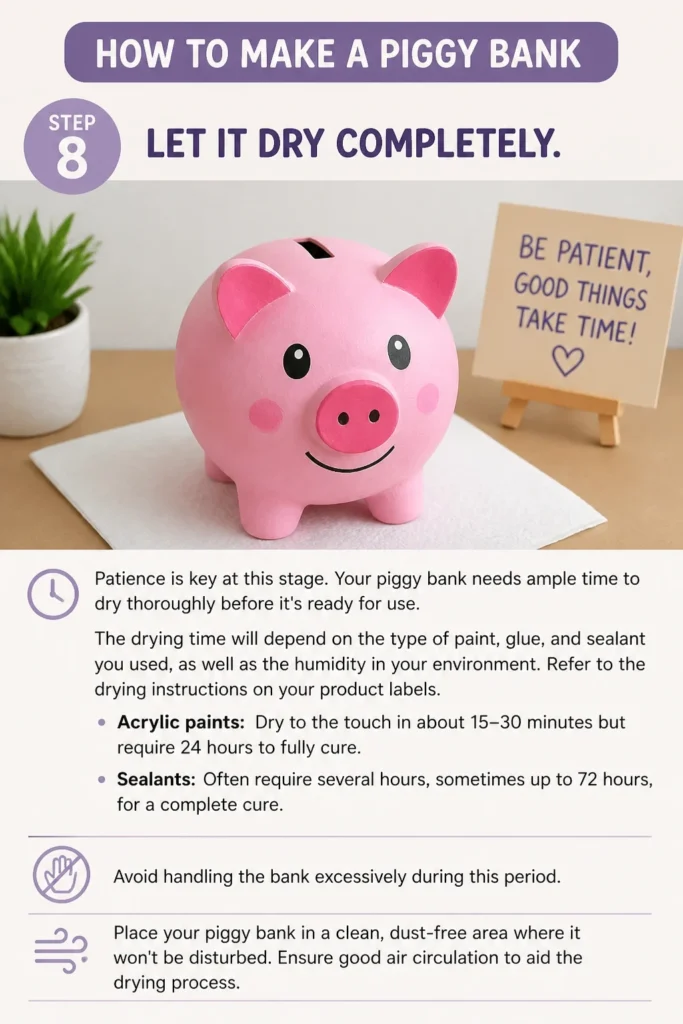
The drying time will depend on the type of paint, glue, and sealant you used, as well as the humidity in your environment.
Refer to the drying instructions on your product labels. Generally, acrylic paints dry to the touch in about 15-30 minutes but require 24 hours to fully cure.
Sealants often require several hours, sometimes up to 72 hours, for a complete cure. Avoid handling the bank excessively during this period.
Place your piggy bank in a clean, dust-free area where it won’t be disturbed. Ensure good air circulation to aid the drying process.
Step 9: Start Saving!
Congratulations! Your personalized piggy bank is now complete and ready for action. It’s time to put it to its intended use.
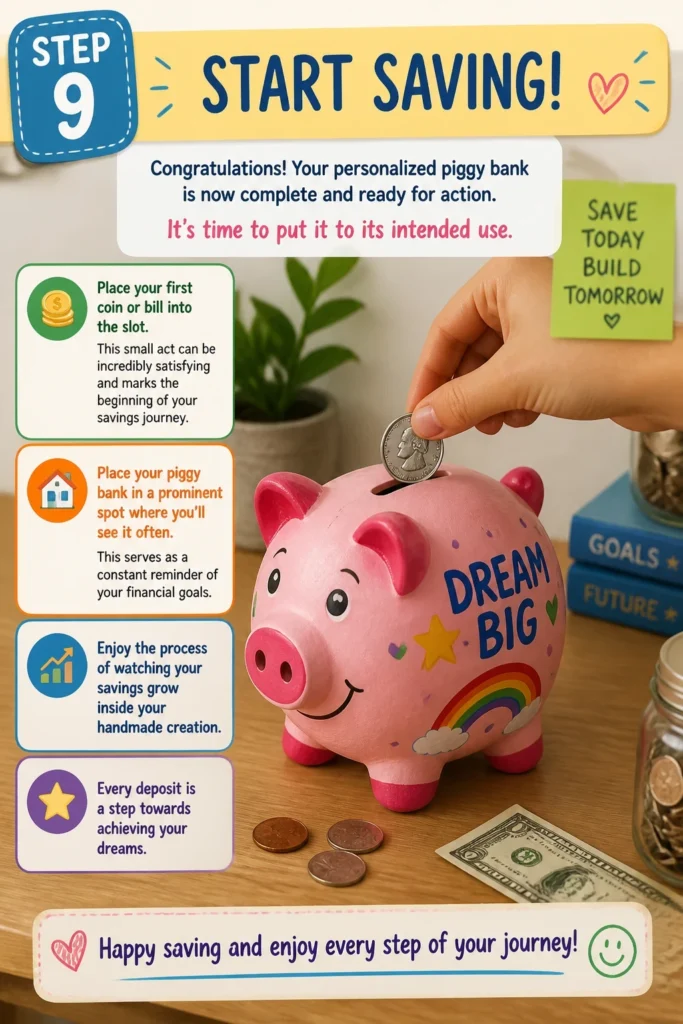
Place your first coin or bill into the slot. This small act can be incredibly satisfying and marks the beginning of your savings journey.
Place your piggy bank in a prominent spot where you’ll see it often. This serves as a constant reminder of your financial goals.
Enjoy the process of watching your savings grow inside your handmade creation. Every deposit is a step towards achieving your dreams.
Common Mistakes to Avoid
Rushing the Drying Process
Many crafters get excited and try to apply the next layer of paint or sealant before the previous one is fully dry. This often leads to smudged designs, uneven textures, or paint peeling off later. Always allow ample drying time between coats and for the final cure to ensure durability and a professional finish.
Using Unsuitable Materials
Choosing a flimsy container or craft supplies not meant for the surface can lead to disappointment. A thin cardboard box might collapse under the weight of coins, and regular paper glue won’t hold fabric to plastic. Select sturdy containers and use paints and adhesives specifically designed for your chosen materials to ensure longevity.
Making the Coin Slot Incorrectly
A coin slot that is too small will frustrate you when trying to deposit money, while one that is too large might allow coins to easily fall out if the bank tips over. Measure carefully and test with various coins and folded bills before committing to the final cut. Always smooth the edges to prevent cuts and snags.
Forgetting a Retrieval Method
Unless your intention is to smash the piggy bank once it’s full, overlooking a way to get the money out can be a significant oversight. Plan for a removable stopper, a hinged door, or a screw-top lid. This makes your piggy bank reusable and more practical for ongoing savings goals.
Troubleshooting
Paint Peeling or Chipping
If your paint is peeling or chipping, it often indicates poor adhesion to the surface. This can happen if the container wasn’t properly cleaned, if a primer wasn’t used on slick surfaces like plastic or metal, or if the surface was still wet or oily. To fix this, gently sand the affected area, clean it thoroughly, apply a suitable primer, and then repaint.
Coin Slot Edges are Rough
Rough or sharp edges on your coin slot can be a safety hazard and make deposits difficult. This usually occurs from an imprecise cut or not filing down the edges. Use a small file, sandpaper, or even an emery board to carefully smooth out all the edges. You can also line the slot with a thin strip of strong tape or fabric for a softer finish.
Money Gets Stuck Inside
Sometimes, coins or bills might get lodged in awkward positions inside the bank, especially if the interior is uneven or has internal protrusions. Try gently shaking the bank to dislodge the money. For persistent issues, a long pair of tweezers or a thin stick can often reach in and maneuver the stuck items. Consider adding a smooth lining to the interior of your bank during construction to prevent this.
Key Takeaways
- Choosing a sturdy, clean container is fundamental for a durable piggy bank.
- Accurate cutting and smoothing of the coin slot are essential for both function and safety.
- Proper surface preparation, including cleaning and priming, ensures paint and decorations adhere well.
- Personalizing your piggy bank with paint, paper, or fabric makes it uniquely yours and more motivating.
- Applying a protective sealant extends the life of your artwork and makes the bank more resilient.
- Allowing ample drying time for all layers is crucial to prevent smudging and ensure durability.
- Plan for a money retrieval method, unless the bank is intended to be a one-time break-open design.
Frequently Asked Questions
What’s the best material for a piggy bank?
The “best” material depends on your preference for durability and ease of decoration. Sturdy plastic containers (like large soda bottles or detergent jugs) are excellent for durability and can be easily cut. Cardboard boxes offer a lightweight, easy-to-decorate surface, while tin cans provide robustness. Choose what you have and what suits your artistic vision.
How do I make the coin slot safe for kids?
Safety is paramount, especially for children’s projects. After cutting the slot, always use fine-grit sandpaper or a small file to smooth down any sharp edges. For extra protection, you can line the inside edges of the slot with hot glue or cover them with a thin strip of fabric or electrical tape. Supervise children closely when using cutting tools.
Can I make a piggy bank that opens and closes?
Absolutely! Many designs allow for repeated access. If using a plastic bottle, cut the slot into the screw-on lid. For boxes, you can create a small hinged door on the bottom secured with Velcro or a simple latch. Another option is to use a container with a removable bottom, like some coffee cans, and reinforce it with strong tape or a tight-fitting lid.
How long does it take for the paint to dry?
Acrylic paints typically dry to the touch within 15-30 minutes. However, they need about 24 hours to fully cure and harden. If you’re applying multiple coats or a sealant, always wait for each layer to be dry to the touch before applying the next, and allow the final protective finish to cure for at least 24-72 hours for maximum durability.
Our Top Recommended Finds
- Acrylic Paint Set: A diverse set of acrylic paints offers vibrant colors and good coverage for various surfaces. They dry quickly and are easy to clean up.
- Craft Knife or Box Cutter: An essential tool for precise and clean cuts, especially for the coin slot. Look for one with a comfortable grip and safety lock.
- Mod Podge (All-in-One Glue, Sealer, Finish): This versatile product acts as an adhesive for decoupage, a protective sealant, and a finish. It comes in gloss, matte, and satin options.
Your Savings Journey Starts Now
You’ve just created more than a simple container; you’ve crafted a personalized tool for financial growth.
This hands-on project is a powerful reminder that big goals start with small, consistent actions.
Now, place your unique piggy bank in a visible spot. Let it inspire you daily to contribute towards your dreams, one coin at a time.
Consider setting a specific savings goal for your new bank. Perhaps it’s for a special treat, a new hobby, or even contributing to a larger financial plan.
The satisfaction of watching your savings grow in a bank you made yourself is truly rewarding. Start filling it today!
Beginner-friendly templates, step-by-step guides,
and weekly project ideas in your inbox.