How To Make Paper Snowflakes Easy

Beginner-friendly templates, step-by-step guides,
and weekly project ideas in your inbox.
There’s a special kind of magic in seeing a perfectly cut paper snowflake unfold.
I remember making my first one in elementary school, utterly captivated by how a simple piece of paper transformed into something so intricate and beautiful.
This guide will share those easy techniques, ensuring your snowflakes turn out wonderfully every time.
Quick Overview
You’re about to create stunning, unique paper snowflakes that will add a touch of winter wonder to any space. It’s a surprisingly simple craft that yields impressive results.
- Time needed: 5-15 minutes per snowflake
- Difficulty: Beginner
- What you’ll need: Paper, scissors
Step-by-Step Instructions
Step 1: Gather Your Materials
Find a comfortable, well-lit space to work. You won’t need much, so a small table or desk is perfect.
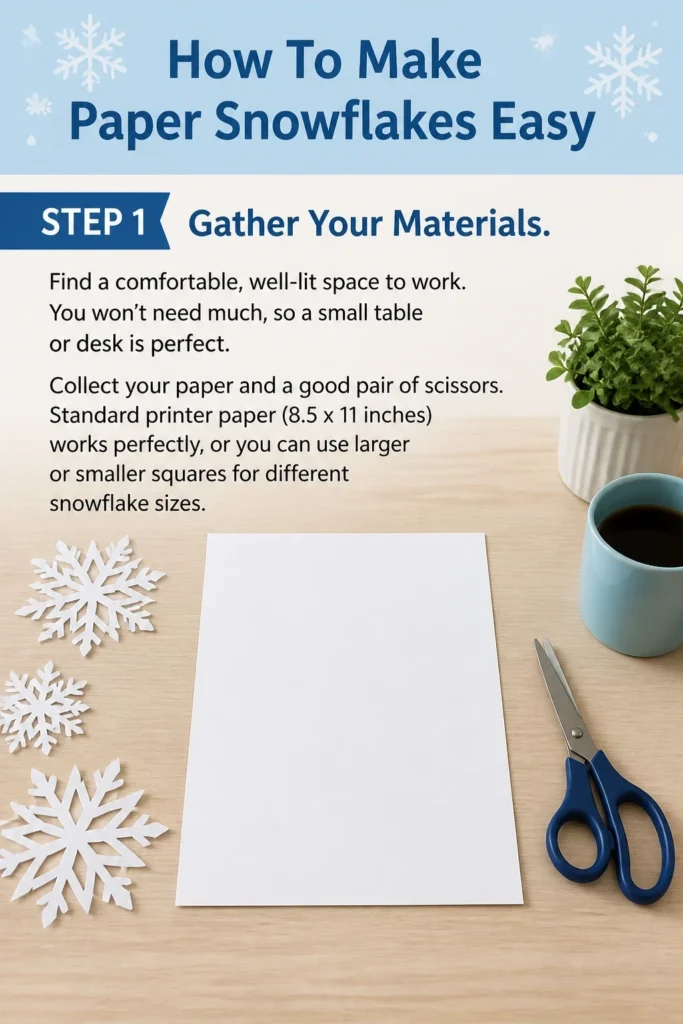
Collect your paper and a good pair of scissors. Standard printer paper (8.5 x 11 inches) works perfectly, or you can use larger or smaller squares for different snowflake sizes.
Step 2: Prepare Your Paper Square
Start with a square piece of paper. If you have rectangular paper, like standard printer paper, you’ll need to make it square first.
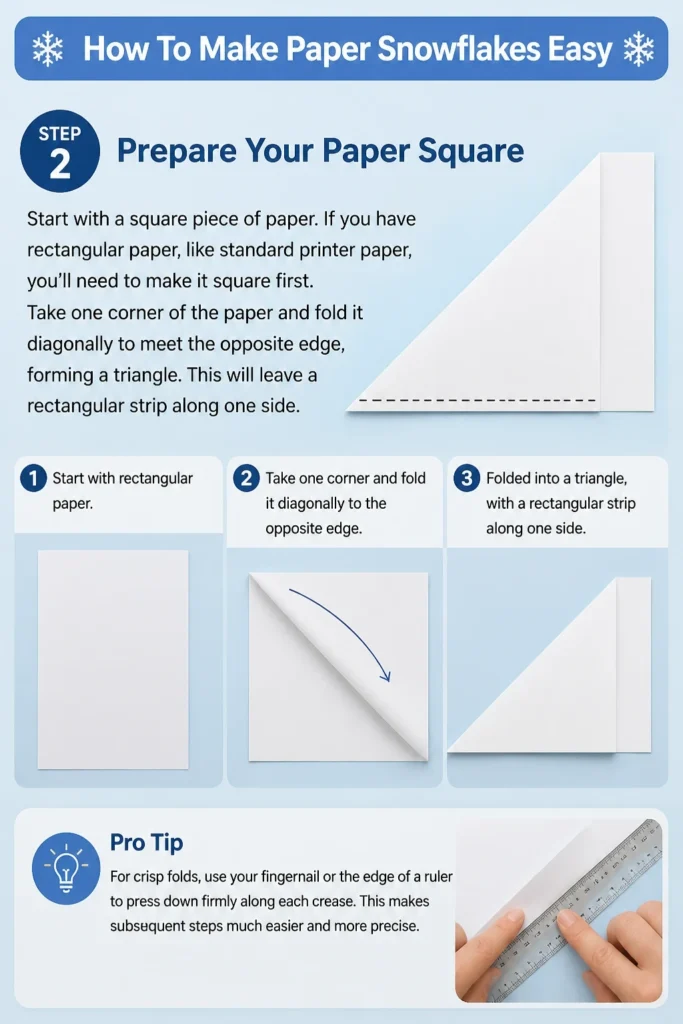
Take one corner of the paper and fold it diagonally to meet the opposite edge, forming a triangle. This will leave a rectangular strip along one side.
Pro Tip: For crisp folds, use your fingernail or the edge of a ruler to press down firmly along each crease. This makes subsequent steps much easier and more precise.
Step 3: Trim the Excess Paper
Cut off the rectangular strip of paper that remains after making your initial diagonal fold. You should now have a perfect square folded into a triangle.
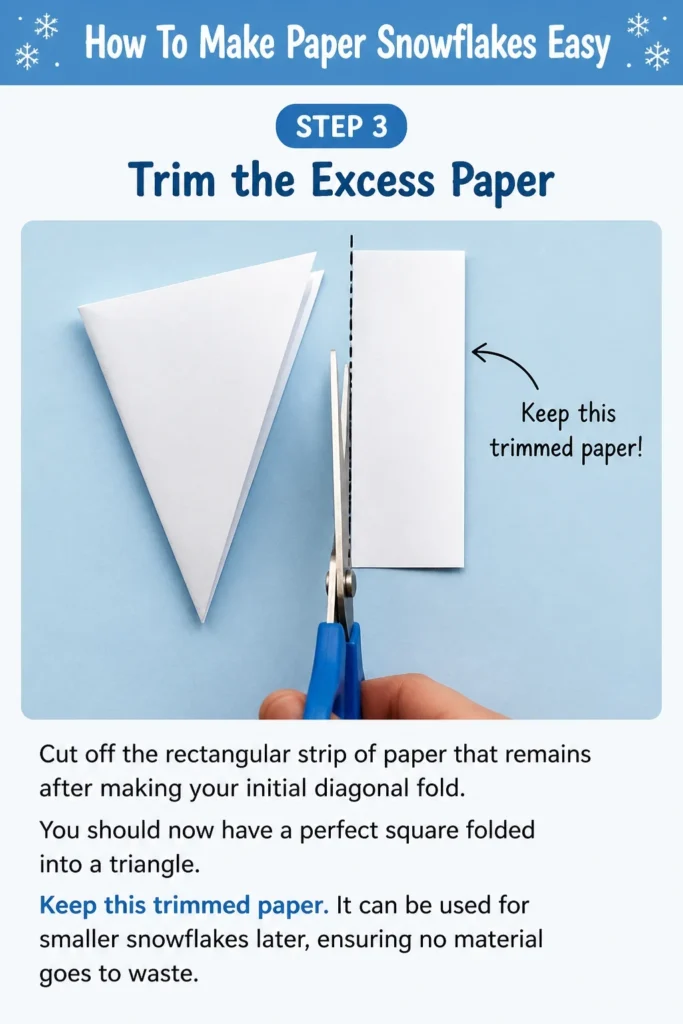
Keep this trimmed paper. It can be used for smaller snowflakes later, ensuring no material goes to waste.
Step 4: Fold Into a Smaller Triangle
Fold your large paper triangle in half again. Bring the longest side (the hypotenuse) of your current triangle together.
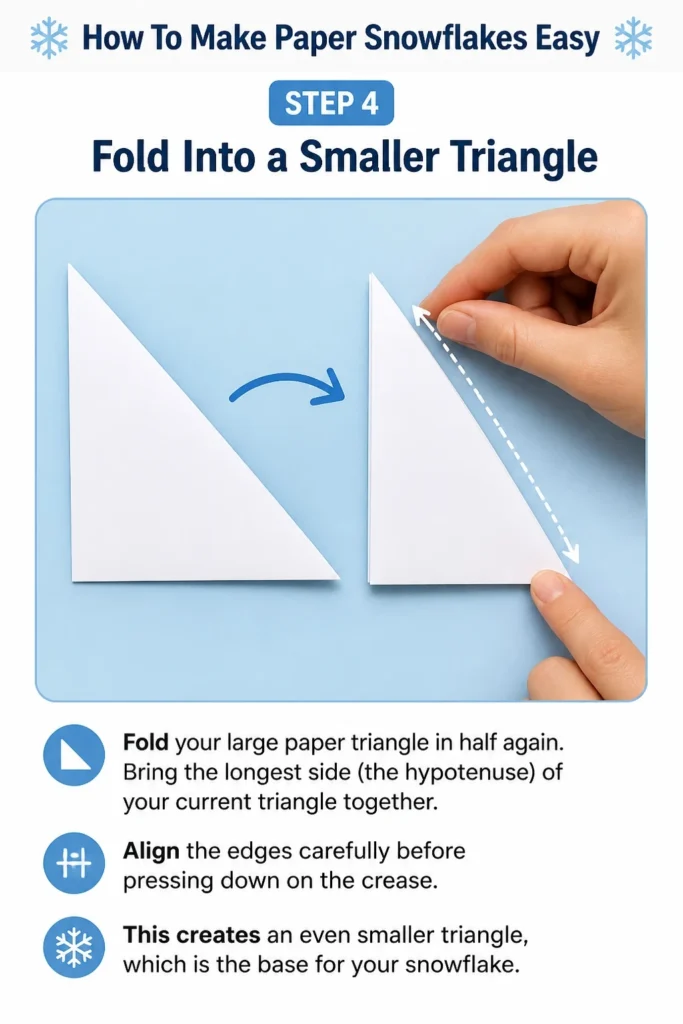
Align the edges carefully before pressing down on the crease. This creates an even smaller triangle, which is the base for your snowflake.
Step 5: Create the Cone Fold
This is where the unique snowflake shape begins to form. Imagine dividing your small triangle into three equal sections.
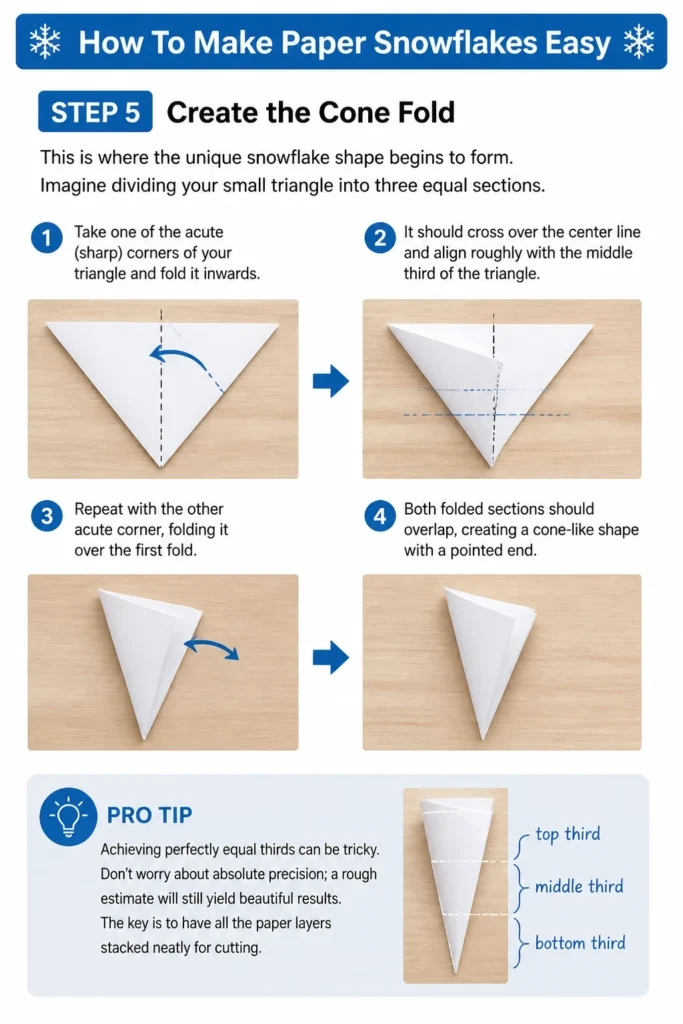
Take one of the acute (sharp) corners of your triangle and fold it inwards. It should cross over the center line and align roughly with the middle third of the triangle.
Repeat with the other acute corner, folding it over the first fold. Both folded sections should overlap, creating a cone-like shape with a pointed end.
Pro Tip: Achieving perfectly equal thirds can be tricky. Don’t worry about absolute precision; a rough estimate will still yield beautiful results. The key is to have all the paper layers stacked neatly for cutting.
Step 6: Trim the Top Edge
You’ll notice an uneven top edge where your folds overlap. This needs to be straightened to create a symmetrical snowflake.
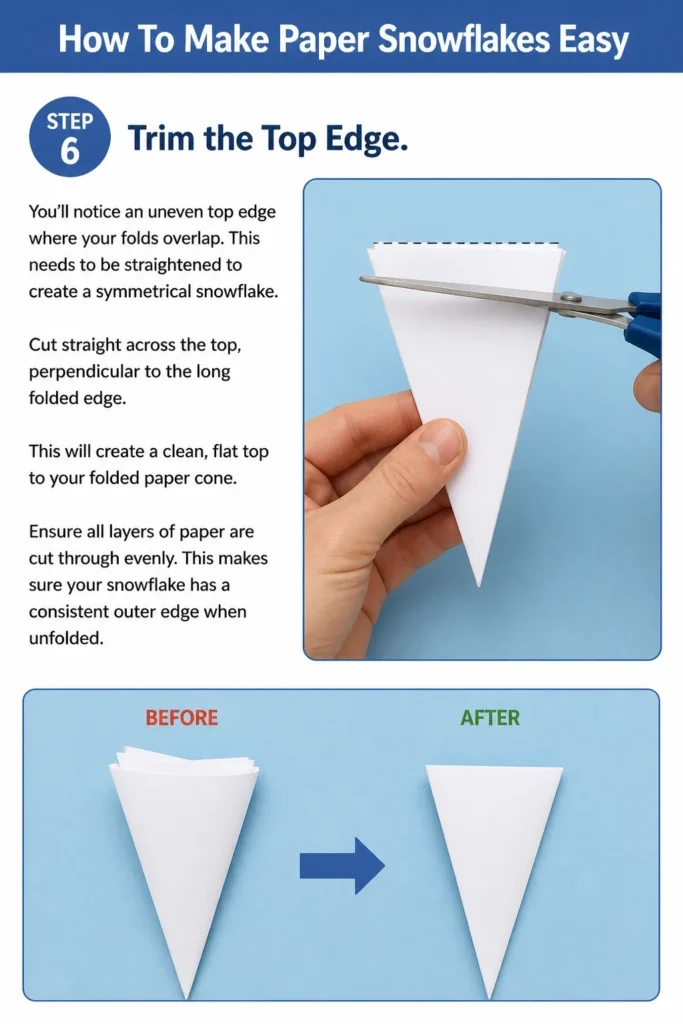
Cut straight across the top, perpendicular to the long folded edge. This will create a clean, flat top to your folded paper cone.
Ensure all layers of paper are cut through evenly. This makes sure your snowflake has a consistent outer edge when unfolded.
Step 7: Start Cutting Your Design
Now for the fun part: designing your snowflake! Remember, whatever you cut away will become a hole or an edge in your final design.
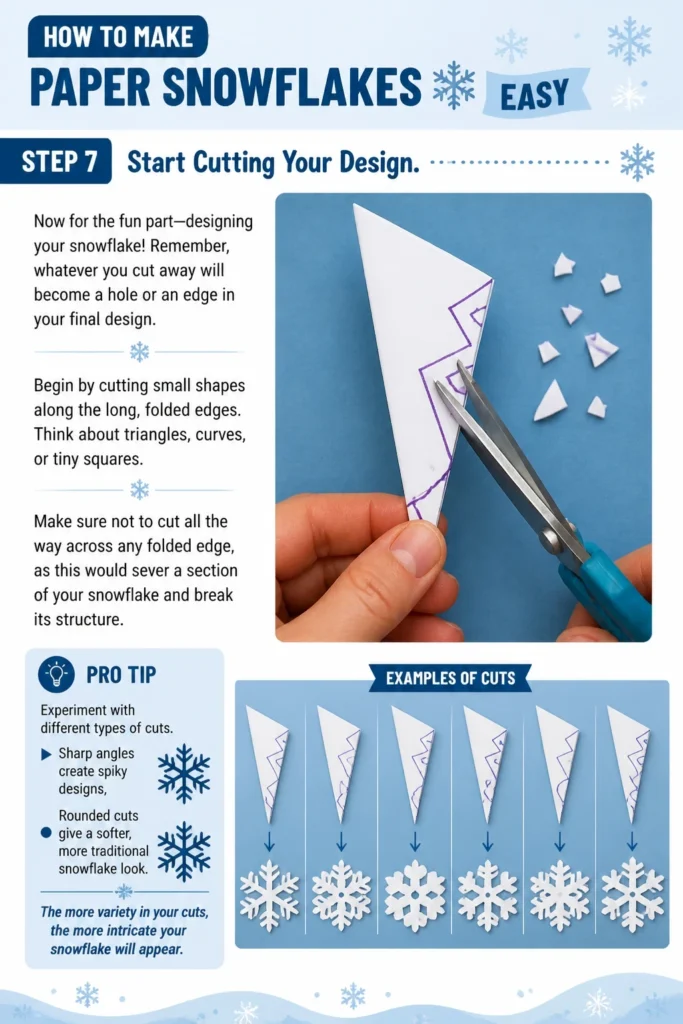
Begin by cutting small shapes along the long, folded edges. Think about triangles, curves, or tiny squares.
Make sure not to cut all the way across any folded edge, as this would sever a section of your snowflake and break its structure.
Pro Tip: Experiment with different types of cuts. Sharp angles create spiky designs, while rounded cuts give a softer, more traditional snowflake look. The more variety in your cuts, the more intricate your snowflake will appear.
Step 8: Cut the Pointed Tip
The pointed tip of your folded paper will become the center of your snowflake. How you cut this will define its central pattern.
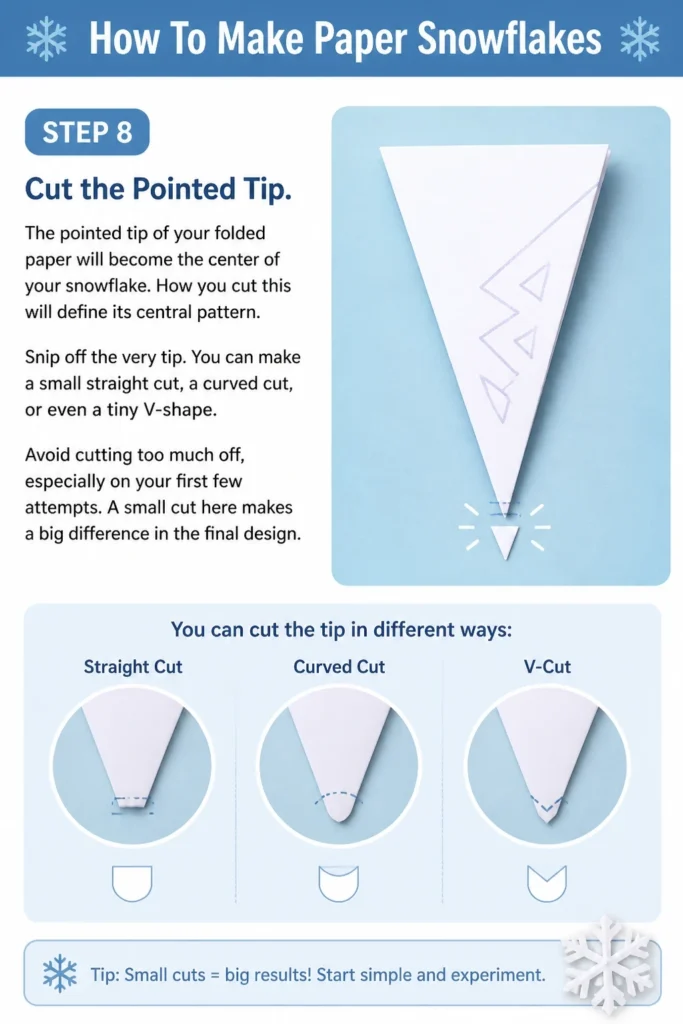
Snip off the very tip. You can make a small straight cut, a curved cut, or even a tiny V-shape.
Avoid cutting too much off, especially on your first few attempts. A small cut here makes a big difference in the final design.
Step 9: Add Internal Details
To really make your snowflake pop, add cuts into the body of the folded paper. These will create patterns within the snowflake’s arms.
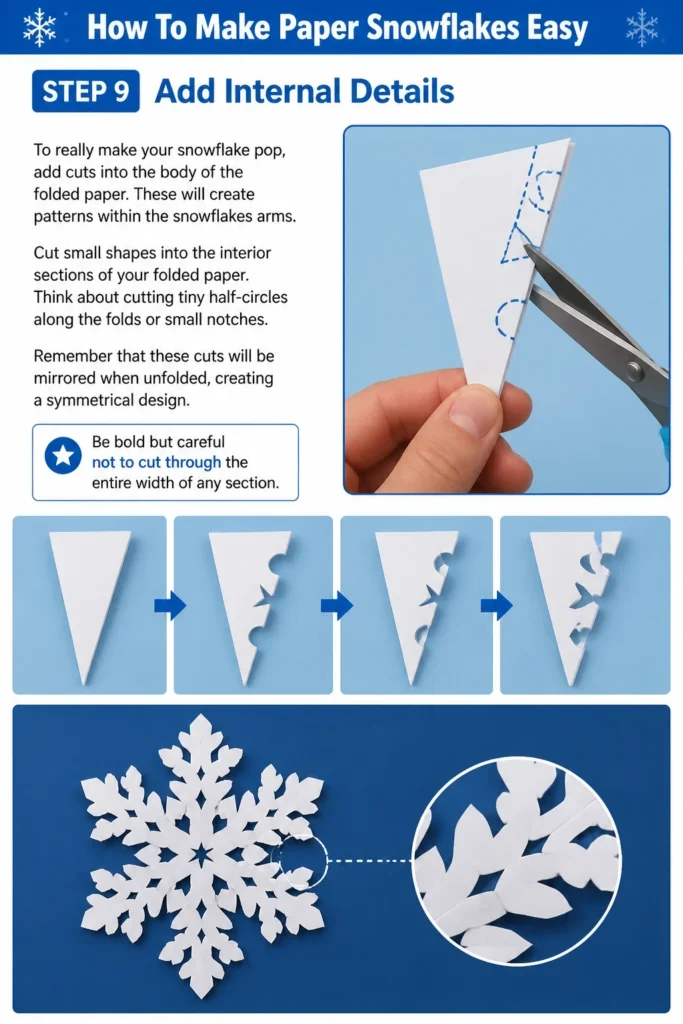
Cut small shapes into the interior sections of your folded paper. Think about cutting tiny half-circles along the folds or small notches.
Remember that these cuts will be mirrored when unfolded, creating a symmetrical design. Be bold but careful not to cut through the entire width of any section.
Step 10: Unfold Your Masterpiece
This is the moment of truth! Carefully unfold your paper. Take your time to avoid tearing any delicate sections.
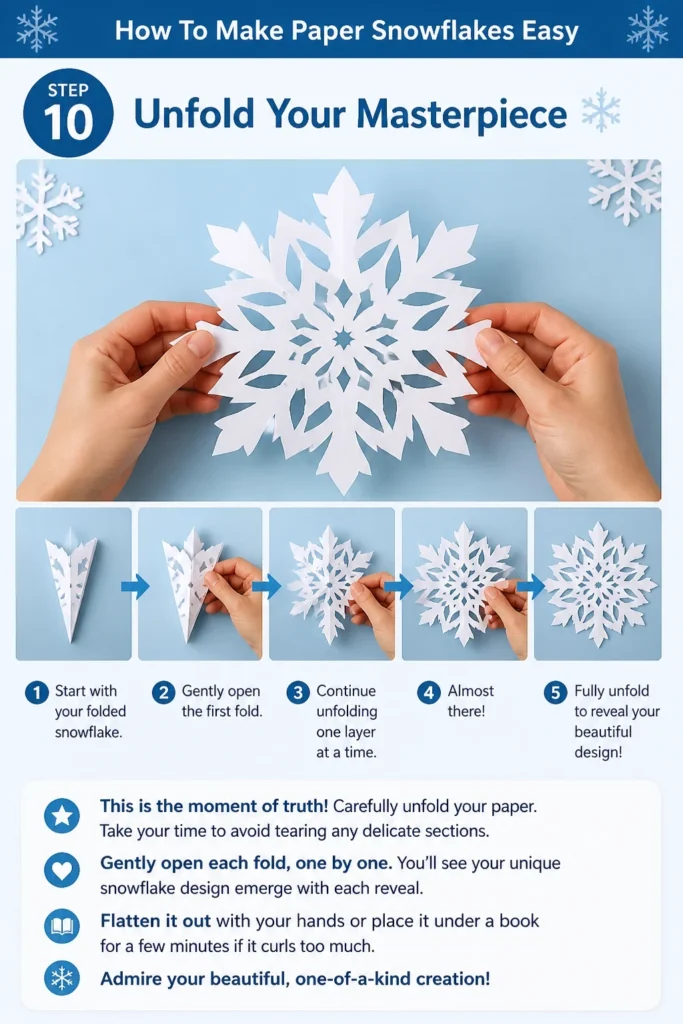
Gently open each fold, one by one. You’ll see your unique snowflake design emerge with each reveal.
Flatten it out with your hands or place it under a book for a few minutes if it curls too much. Admire your beautiful, one-of-a-kind creation!
Common Mistakes to Avoid
Cutting Too Much
It’s easy to get enthusiastic with the scissors and cut away too much paper. This can weaken the snowflake’s structure, causing it to tear when unfolded.
Always aim for smaller, more deliberate cuts, especially when you’re starting. You can always cut more, but you can’t add paper back once it’s gone. Err on the side of caution to maintain structural integrity.
Uneven Folds
If your initial folds aren’t precise, your snowflake might turn out asymmetrical or lopsided. This can be frustrating after all your careful cutting.
Take extra time during the folding stages to align edges perfectly before creasing. A little precision early on saves disappointment later and ensures a balanced, beautiful design.
Cutting Off the Folds Entirely
One common error is cutting entirely across a folded edge. If you cut completely through a main fold line, a section of your snowflake will detach, ruining the continuous pattern.
Always leave a small connection point along the main folds. Think of the folds as the “bones” of your snowflake; they need to remain intact to hold the design together.
Rushing the Unfolding Process
After all that careful cutting, it’s tempting to quickly pull your snowflake open. However, delicate paper can easily tear, especially if the cuts are intricate.
Gently unfold each section, one by one. If you encounter resistance, pause and gently ease the paper apart. Patience here ensures your masterpiece remains intact.
Troubleshooting
My Snowflake Tears When Unfolding
This often happens when cuts are too close to the main fold lines or too thin. Delicate sections are prone to ripping.
Next time, try making your cuts slightly thicker and ensure there’s enough paper left connecting the sections. Unfold very slowly and carefully, supporting the delicate parts.
My Snowflake Isn’t Symmetrical
Asymmetry usually stems from uneven initial folds or cuts that aren’t mirrored across the folded layers. The paper might not have been perfectly square to begin with.
Double-check your square at the beginning. Pay close attention to aligning edges during all folding steps. When cutting, try to visualize how your cuts will appear on all layers simultaneously.
My Snowflake Looks “Plain”
If your snowflake lacks intricate detail, it might be due to not enough cuts or cuts that are too simple. You might also be hesitant to cut into the interior sections.
Don’t be afraid to experiment with more complex shapes. Cut more deeply into the folded paper, add smaller notches, and vary the shapes of your cuts (triangles, curves, Vs). The more you cut, the more intricate the design becomes.
Key Takeaways
- Start with a perfect paper square for the best symmetrical results.
- Precise folding is crucial for an even and balanced snowflake design.
- Experiment with various cut shapes and sizes to create unique patterns.
- Avoid cutting completely through any main folded edges to maintain structural integrity.
- Unfold your finished snowflake slowly and gently to prevent tearing.
- Every snowflake is unique, so embrace imperfections and enjoy the creative process.
Frequently Asked Questions
What kind of paper is best for making snowflakes?
Standard printer paper (copy paper) is excellent for beginners because it’s readily available and easy to cut. Thinner paper, like tissue paper, creates very delicate snowflakes, while slightly thicker paper, like construction paper, is more durable but harder to cut precisely.
Can I use patterned or colored paper?
Absolutely! Patterned or colored paper can add another layer of visual interest to your snowflakes. Just be aware that intricate patterns might be overshadowed by the cuts, so a subtle pattern or solid color often works best to highlight the design.
How can I make really small or really large snowflakes?
To make small snowflakes, simply start with a smaller square of paper. For large snowflakes, use larger paper, such as 12×12 inch scrapbook paper or even a large sheet of butcher paper. The folding and cutting techniques remain the same, just scaled up or down.
How do I make a 6-pointed snowflake versus an 8-pointed one?
This guide primarily focuses on an 8-pointed snowflake, which is the result of the standard square folding method. To make a 6-pointed snowflake, you’ll need a slightly different folding technique for the initial cone, often involving specific angle measurements. It’s a bit more advanced but still very achievable with practice.
Our Top Recommended Finds
- Sharp Craft Scissors: A good pair of sharp, small-bladed scissors makes intricate cuts much easier and cleaner, reducing hand strain.
- Paper Trimmer: For perfectly square paper every time, a simple paper trimmer is invaluable, especially if you plan to make many snowflakes.
- Variety Pack of Paper: Experiment with different weights and colors of paper to see what effects you can achieve, from delicate tissue paper to sturdy cardstock.
Unfold Your Creativity Today
Creating paper snowflakes is more than just a craft; it’s a delightful way to bring a touch of winter magic indoors.
Each fold and snip is a step towards a unique piece of art, a testament to simple materials transforming into something beautiful.
So, grab your paper and scissors, and start crafting your own flurry of unique snowflakes. You might just discover your new favorite winter activity.
Once you’ve mastered these basic techniques, consider exploring more advanced snowflake designs or even trying them with different materials. The possibilities are as endless as the unique patterns of real snowflakes.
Beginner-friendly templates, step-by-step guides,
and weekly project ideas in your inbox.