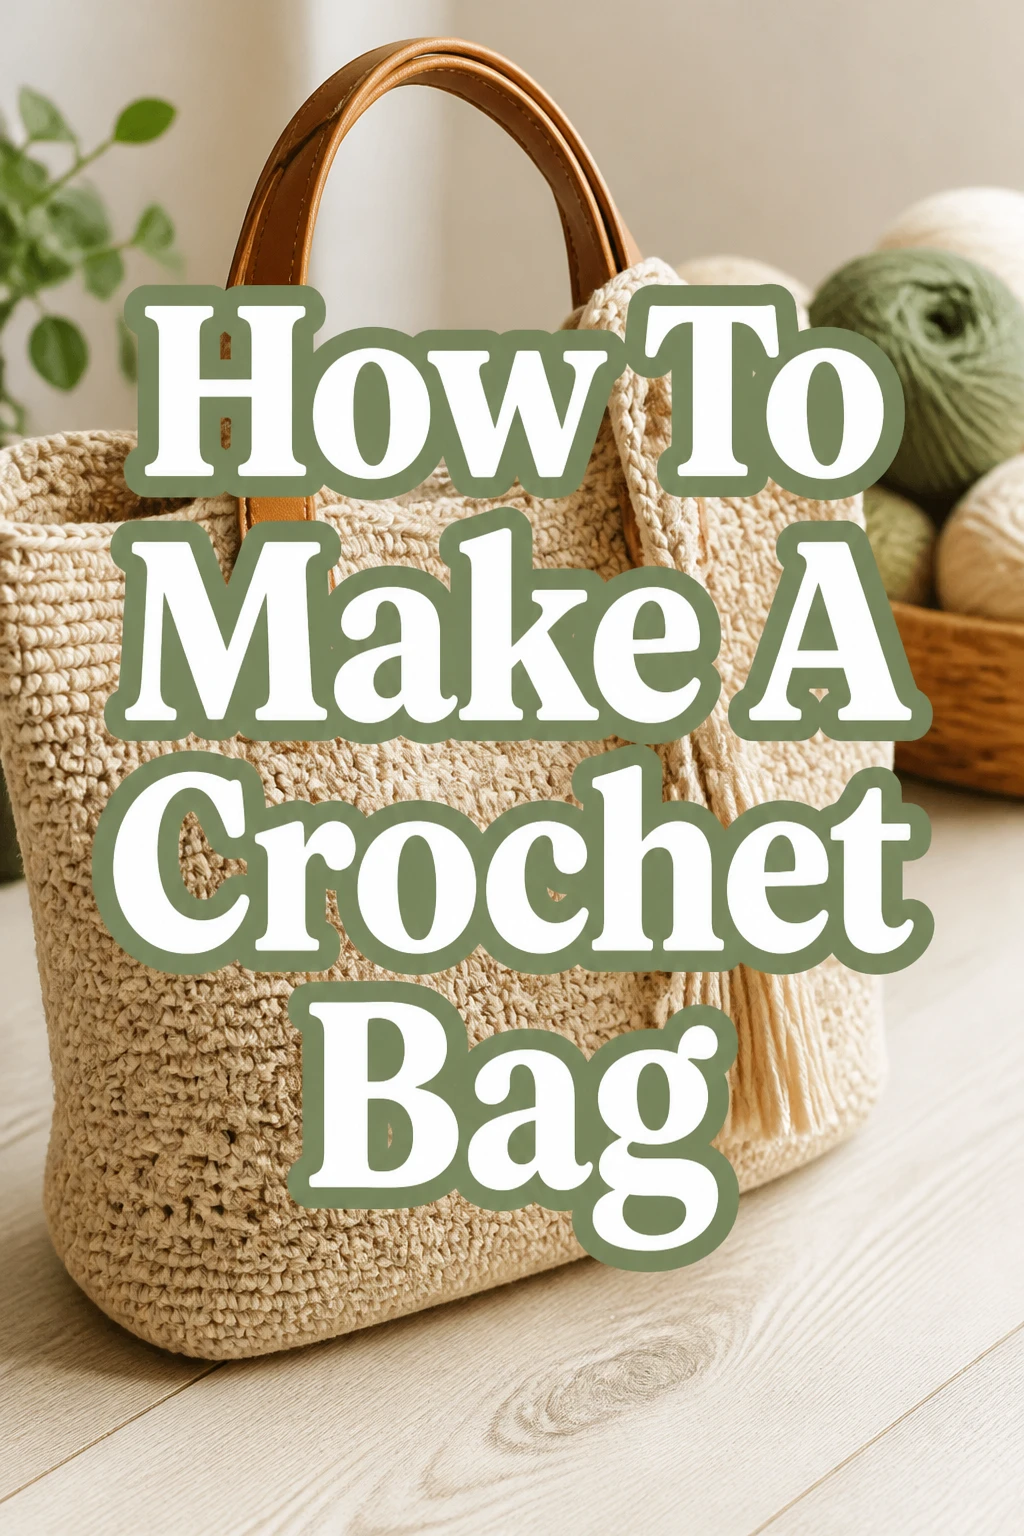
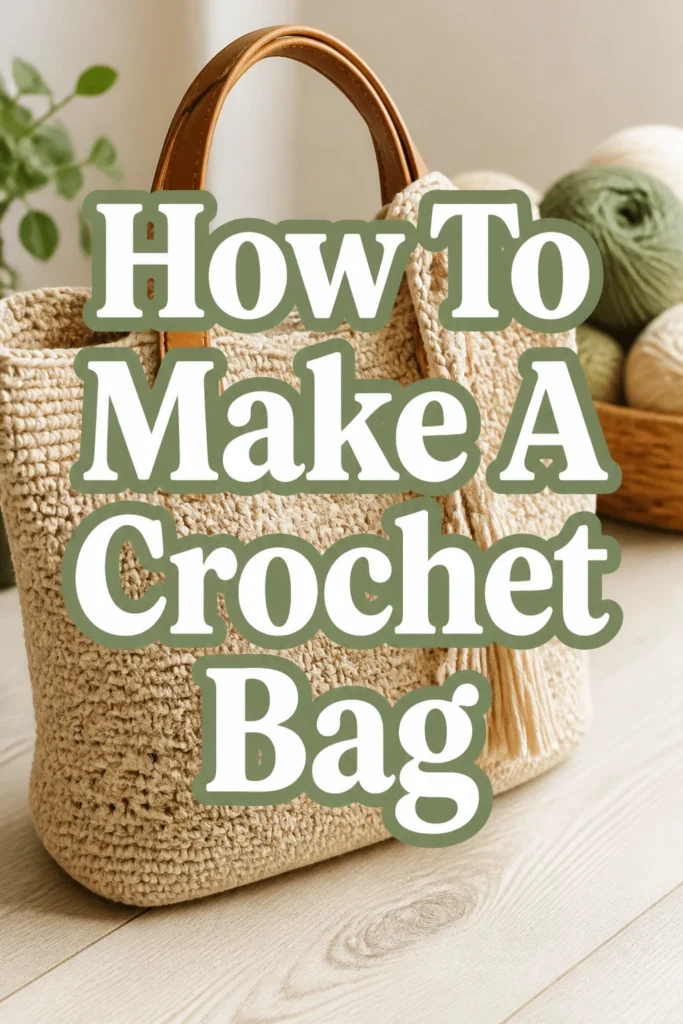
How To Make A Crochet Bag

Beginner-friendly templates, step-by-step guides,
and weekly project ideas in your inbox.
Crocheting a bag is a rewarding project, perfect for both beginners and experienced crafters. There’s something incredibly satisfying about creating a functional item with your own hands. I remember the joy of finishing my very first market bag, proud of every stitch.
This guide will walk you through each step, ensuring you build confidence with every loop and pull.
Quick Overview
This guide will empower you to create your very own stylish and practical crochet bag. You’ll learn essential techniques from start to finish.
- Time needed: 8-15 hours (spread over a few days)
- Difficulty: Beginner to Intermediate
- What you’ll need: Yarn, crochet hook, scissors, tapestry needle, stitch markers (optional)
Step-by-Step Instructions
Step 1: Gather Your Materials
Before you begin, ensure you have all the necessary supplies. Choosing the right yarn and hook is crucial for the success of your project.
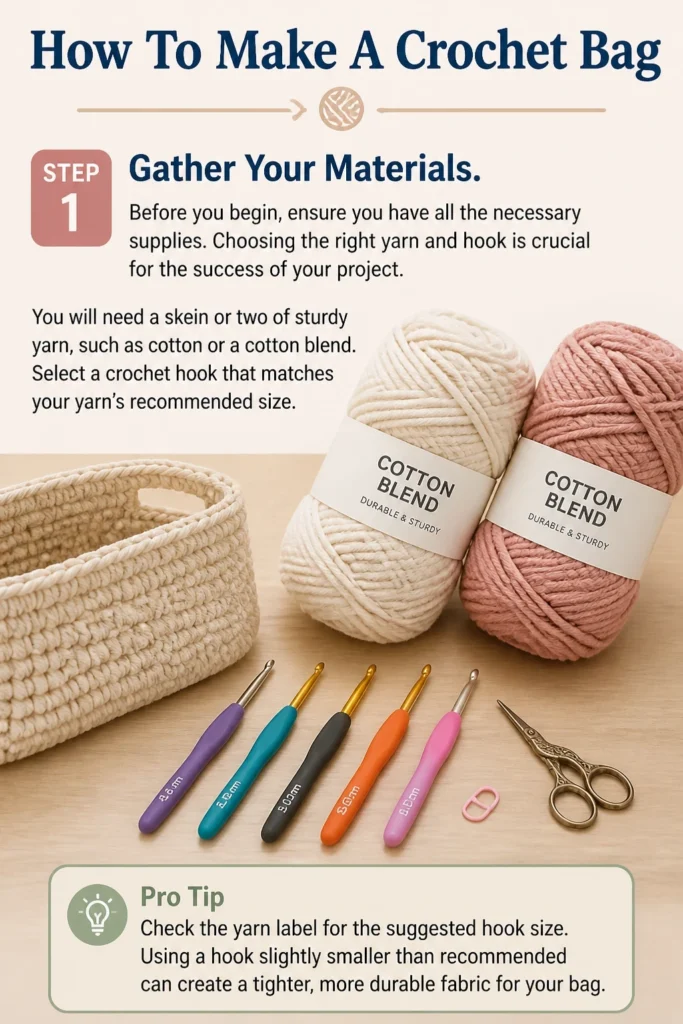
You will need a skein or two of sturdy yarn, such as cotton or a cotton blend. Select a crochet hook that matches your yarn’s recommended size.
Pro Tip: Check the yarn label for the suggested hook size. Using a hook slightly smaller than recommended can create a tighter, more durable fabric for your bag.
Step 2: Choose Your Bag Style and Stitch
For a first bag, a simple rectangular tote or a basic market bag is ideal. These shapes rely on straightforward stitch patterns.
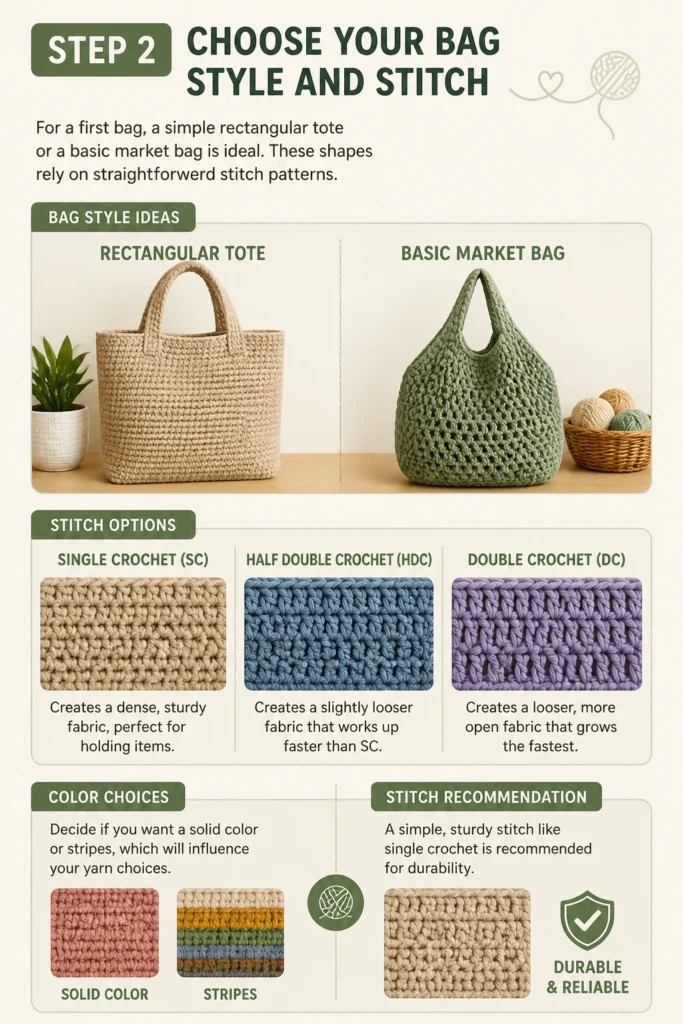
A single crochet (SC) stitch creates a dense, sturdy fabric, perfect for holding items. Half double crochet (HDC) or double crochet (DC) will make a looser, faster-to-grow fabric.
Decide if you want a solid color or stripes, which will influence your yarn choices. A simple, sturdy stitch like single crochet is recommended for durability.
Step 3: Create a Slip Knot and Foundation Chain
Every crochet project begins with a slip knot and a foundation chain. This forms the base of your bag.
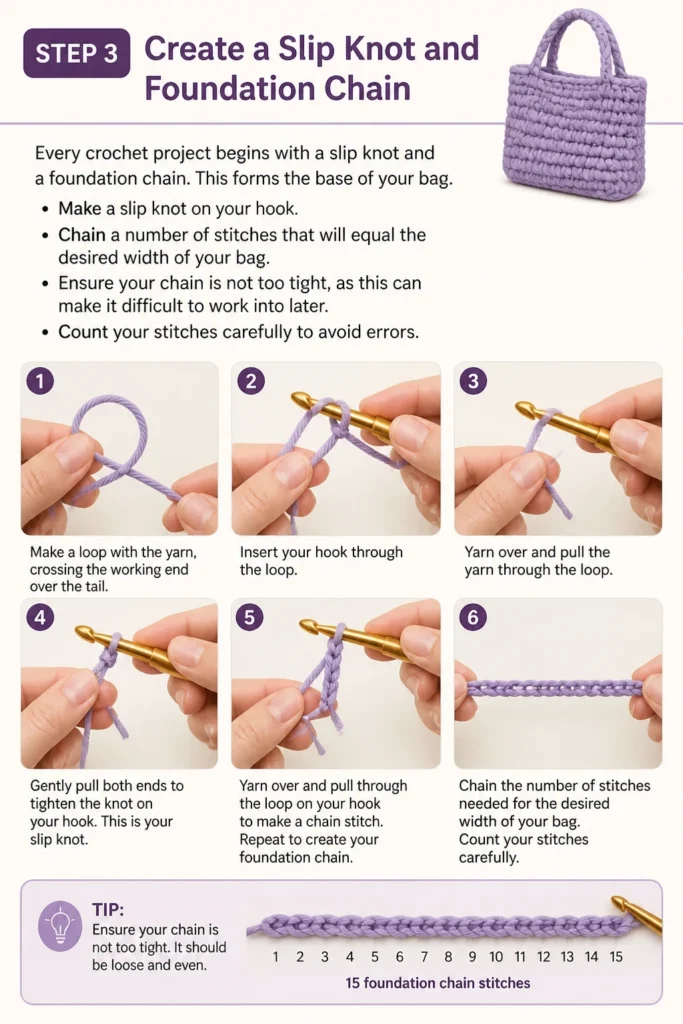
Make a slip knot on your hook. Chain a number of stitches that will equal the desired width of your bag.
Ensure your chain is not too tight, as this can make it difficult to work into later. Count your stitches carefully to avoid errors.
Step 4: Establish the Base of Your Bag
Once your foundation chain is complete, you will begin working rows to form the base. This can be done by working flat or in the round.
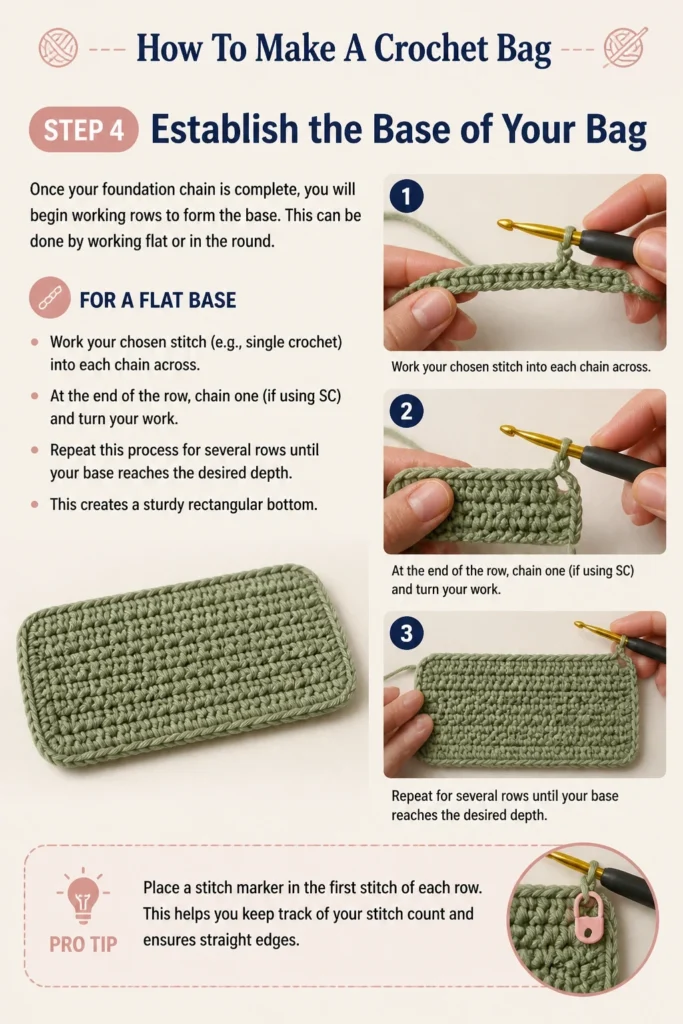
For a flat base, work your chosen stitch (e.g., single crochet) into each chain across. At the end of the row, chain one (if using SC) and turn your work.
Repeat this process for several rows until your base reaches the desired depth. This creates a sturdy rectangular bottom.
Pro Tip: Place a stitch marker in the first stitch of each row. This helps you keep track of your stitch count and ensures straight edges.
Step 5: Build the Sides of Your Bag
After establishing the base, you will begin working upwards to form the body of the bag. This can be done by joining your rows into a round.
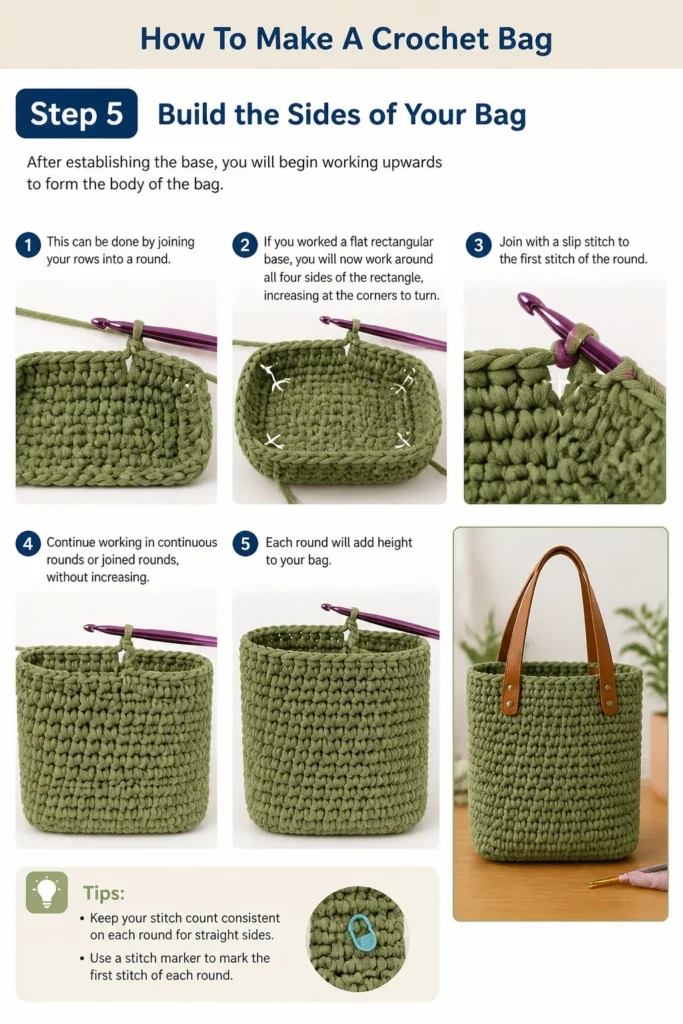
If you worked a flat rectangular base, you will now work around all four sides of the rectangle, increasing at the corners to turn. Join with a slip stitch to the first stitch of the round.
Continue working in continuous rounds or joined rounds, without increasing. Each round will add height to your bag.
Step 6: Continue Crocheting the Body
Keep working your chosen stitch in rounds until the bag reaches your preferred height. This is where your bag really starts to take shape.
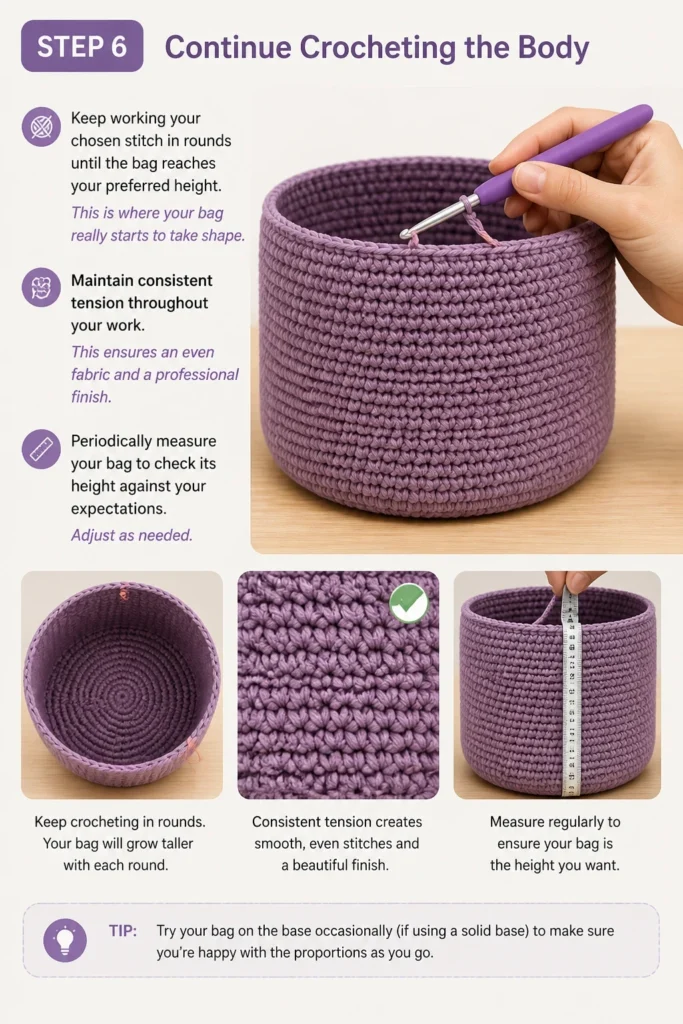
Maintain consistent tension throughout your work. This ensures an even fabric and a professional finish.
Periodically measure your bag to check its height against your expectations. Adjust as needed.
Step 7: Create the Strap
There are several ways to make a strap for your bag. A simple, sturdy strap can be crocheted directly onto the bag or made separately and sewn on.
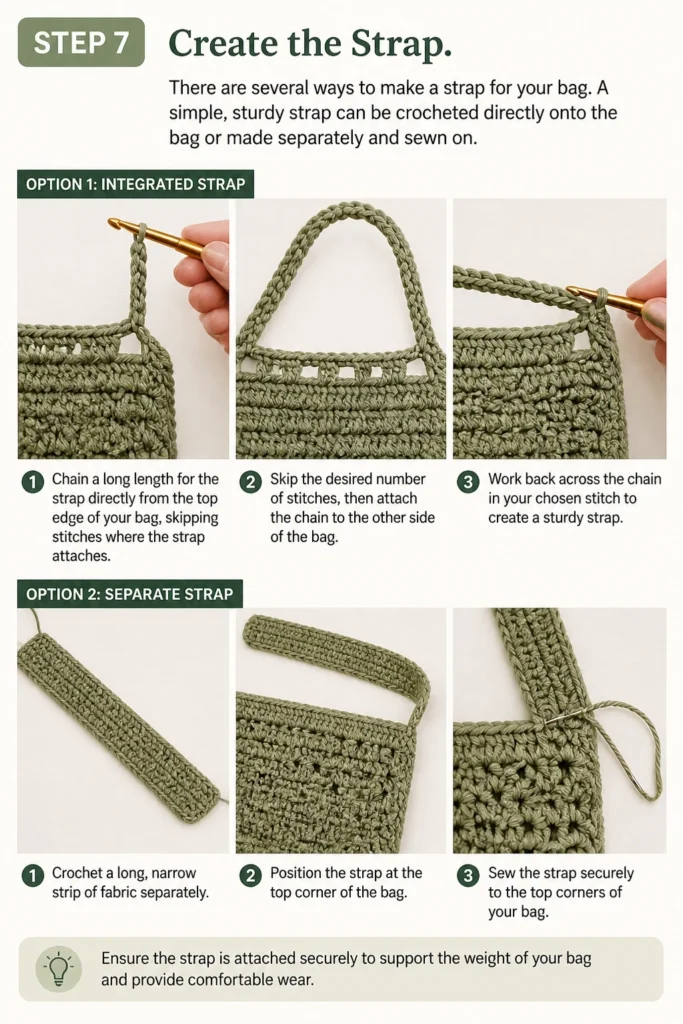
For an integrated strap, chain a long length for the strap directly from the top edge of your bag, skipping stitches where the strap attaches. Then, work back across the chain in your chosen stitch.
Alternatively, crochet a long, narrow strip of fabric separately. This strip can then be securely sewn to the top corners of your bag.
Step 8: Finish and Weave in Ends
Once your bag has reached the desired height and the strap is attached, it’s time for the finishing touches. This makes your bag look neat and complete.
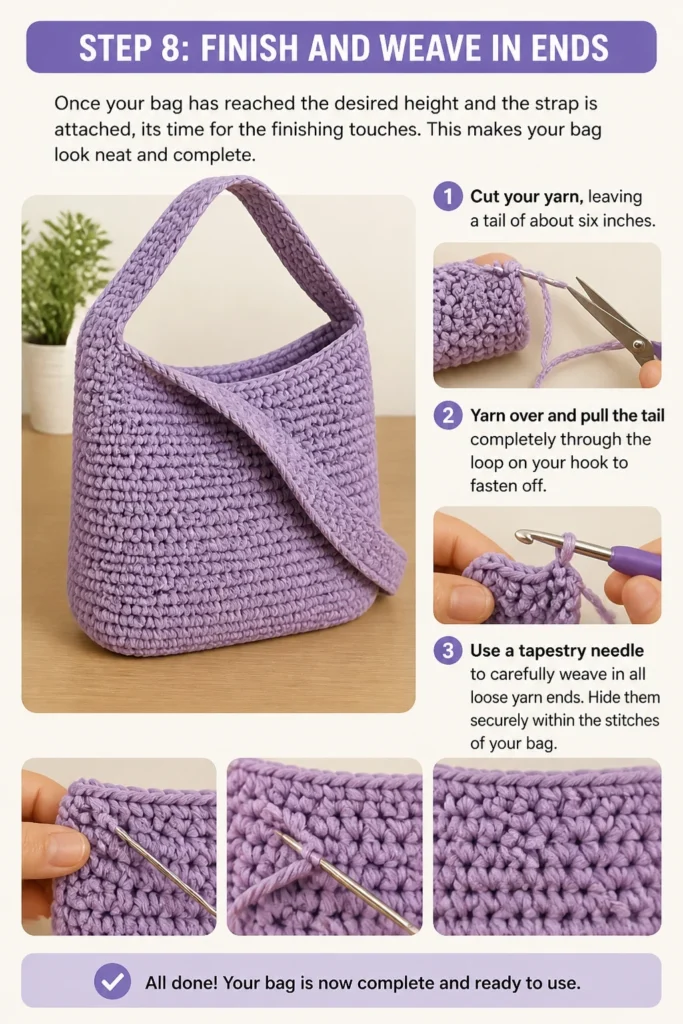
Cut your yarn, leaving a tail of about six inches. Yarn over and pull the tail completely through the loop on your hook to fasten off.
Use a tapestry needle to carefully weave in all loose yarn ends. Hide them securely within the stitches of your bag.
Common Mistakes to Avoid
Inconsistent Tension
Working with inconsistent tension is a common issue for new crocheters. This leads to an uneven fabric with tight and loose spots, making your bag look lumpy or misshapen. Practice maintaining a steady grip on your yarn and hook to ensure your stitches are uniform in size.
Skipping Stitches or Adding Extra Stitches
Losing or gaining stitches can cause your project to become wider on one side or taper unexpectedly. Always count your stitches at the end of each row or round, especially in the beginning. Stitch markers can be incredibly helpful for marking the first and last stitch.
Too Loose a Foundation Chain
A foundation chain that is too loose can make the bottom of your bag floppy and lack structure. Conversely, a chain that is too tight can make it hard to work into and cause the bottom to pucker. Aim for a chain that is firm but flexible, practicing different tensions to find what works best.
Not Weaving in Ends Properly
Leaving loose ends or weaving them in too shallowly can result in your bag unraveling over time. Take the time to weave ends securely into the fabric of your bag in several directions. This hides them effectively and prevents unraveling, ensuring your hard work lasts.
Troubleshooting
Bag Sides Are Slanting
If your bag sides start to slant, it usually indicates that you are either consistently skipping the first or last stitch, or adding an extra stitch. Double-check your stitch count at the end of every row or round. Use stitch markers to clearly identify the beginning and end of your work.
Bag Base is Curling
A curling base often means your tension is too tight, or you haven’t chained enough stitches for your desired width. Try loosening your grip on the yarn slightly. If starting over, make your foundation chain a bit longer or use a slightly larger hook for the base rows.
Strap Feels Flimsy
If your crocheted strap feels too thin or stretchy, it might not hold up well with use. Consider making the strap wider by adding more stitches to its foundation chain. You can also reinforce it by working an extra row of single crochet around the edges of the strap.
Key Takeaways
- Start with sturdy yarn: Cotton or cotton blends create durable bags.
- Master basic stitches: Single crochet offers a dense, strong fabric.
- Consistent tension is key: Ensures an even and professional finish.
- Count your stitches: Prevents slanting sides and irregular shapes.
- Weave in ends securely: Crucial for the longevity of your handmade bag.
- Don’t be afraid to experiment: Once you have the basics, try different stitches and shapes.
Frequently Asked Questions
What is the best yarn for a crochet bag?
The best yarn for a crochet bag is typically a sturdy, non-stretchy fiber. Cotton, cotton blends, or even some acrylics work well because they hold their shape and resist stretching. Avoid very fine or super stretchy yarns for structured bags.
How do I make my crochet bag stiffer?
To make your crochet bag stiffer, you can use a smaller hook size than recommended for your yarn. This creates a denser fabric. Alternatively, you can line your bag with fabric or use a stiff interfacing for added structure.
Can I wash my crochet bag?
Most crochet bags can be washed, but always check your yarn label for specific care instructions. Cotton and acrylic bags are often machine washable on a gentle cycle with cold water. Lay flat to dry to help maintain the bag’s shape.
How do I add a lining to my crochet bag?
Adding a lining involves sewing a fabric insert that matches the shape of your bag. You can either hand-sew it to the inside top edge of your finished crochet bag or machine-sew it if you’re comfortable with a sewing machine. This adds durability and prevents small items from slipping through stitches.
Our Top Recommended Finds
- Ergonomic Crochet Hook Set: Comfortable handles reduce hand fatigue, making long crocheting sessions more enjoyable.
- Cotton Worsted Weight Yarn: A versatile and durable choice, perfect for bags that need to hold their shape and withstand daily use.
- Large Eye Tapestry Needles: Essential for weaving in yarn ends neatly and securely, ensuring a professional finish for your bag.
Start Your Crochet Bag Journey Today
Creating your own crochet bag is a fulfilling and practical endeavor. You now have the steps and insights to begin your project with confidence.
Embrace the process, enjoy the rhythm of the stitches, and personalize your bag to reflect your unique style. Consider trying a market bag next, or perhaps a small clutch for evenings out.
Grab your hook and yarn, and let your creativity flow. There’s no better time to begin making something beautiful and functional with your own hands.
Beginner-friendly templates, step-by-step guides,
and weekly project ideas in your inbox.