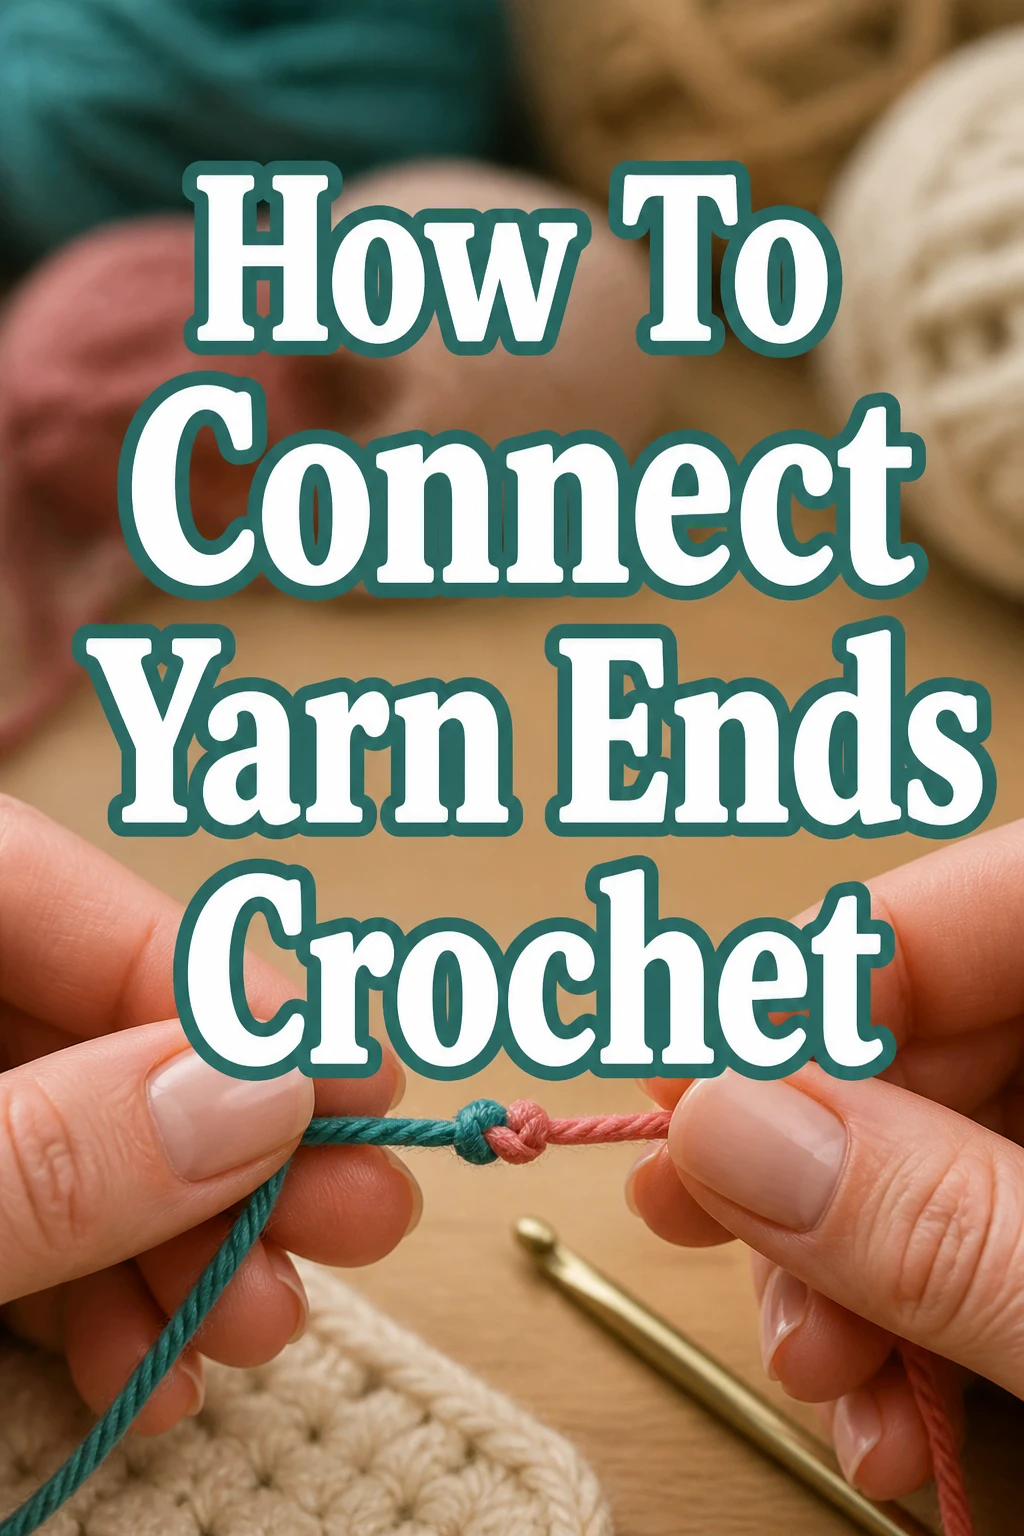
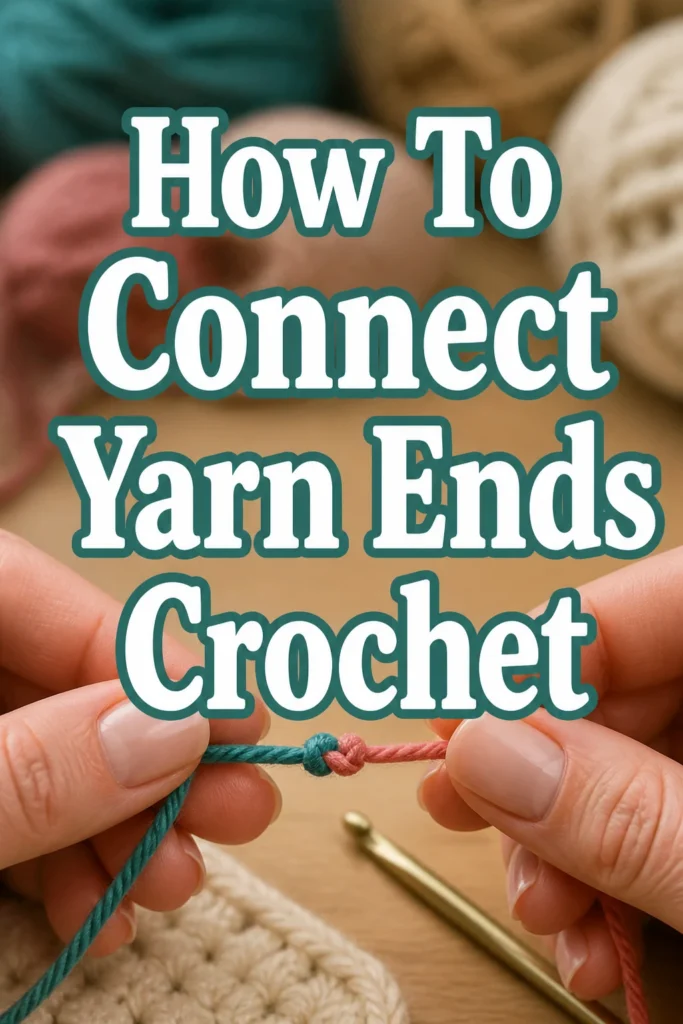
How To Connect Yarn Ends Crochet

Beginner-friendly templates, step-by-step guides,
and weekly project ideas in your inbox.
I remember the sinking feeling of finishing a beautiful scarf only to have it unravel after the first wash because I simply tied a basic knot.
After years of experimenting with every technique in the book, I have discovered the most secure ways to ensure your hard work stays together forever.
This guide shares those professional secrets so you can crochet with total confidence in your project’s durability.
Quick Overview
Connecting yarn ends is a fundamental skill that separates beginners from seasoned pros, ensuring your garments and blankets are both beautiful and structural.
In this guide, you will learn how to master the Magic Knot, the Russian Join, and the Braided Join to handle any yarn type you encounter.
- Time needed: 5 to 15 minutes depending on the method chosen.
- Difficulty: Beginner to Intermediate.
- What you’ll need: Two ends of yarn, sharp scissors, a tapestry needle, and a bit of patience.
Step-by-Step Instructions
Step 1: Assess Your Yarn Fiber
Identify the material of your yarn before choosing a connection method, as different fibers respond better to specific techniques.
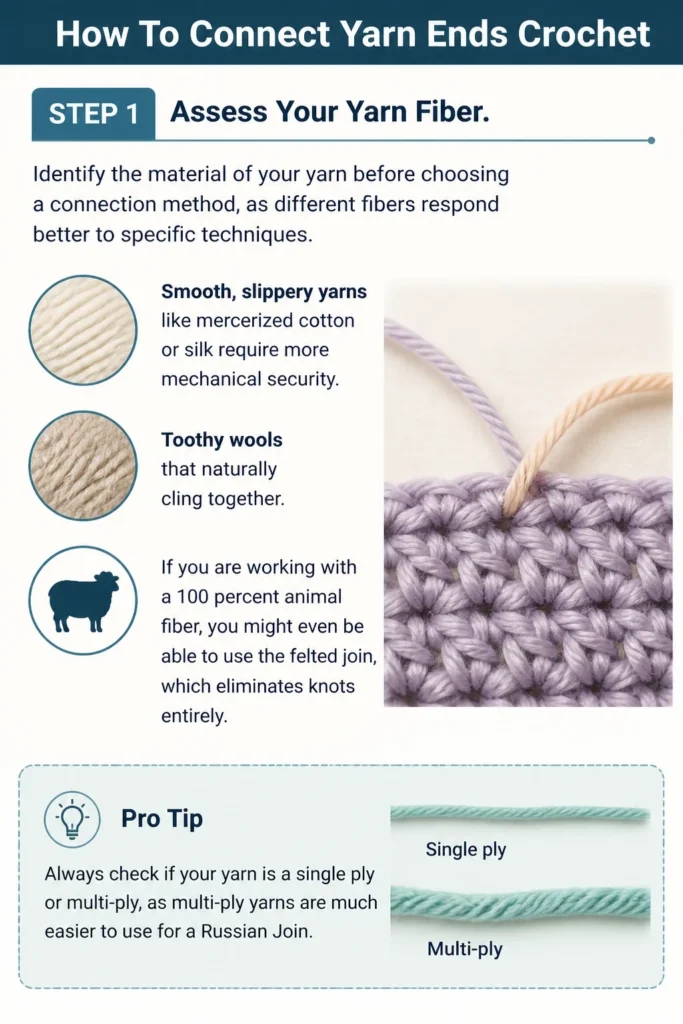
Smooth, slippery yarns like mercerized cotton or silk require more mechanical security than “toothy” wools that naturally cling together.
If you are working with a 100 percent animal fiber, you might even be able to use the felted join, which eliminates knots entirely.
Pro Tip: Always check if your yarn is a single ply or multi-ply, as multi-ply yarns are much easier to use for a Russian Join.
Step 2: Prepare the Magic Knot Alignment
Lay the two ends of yarn horizontally on a flat surface, pointing toward each other with about four inches of overlap.
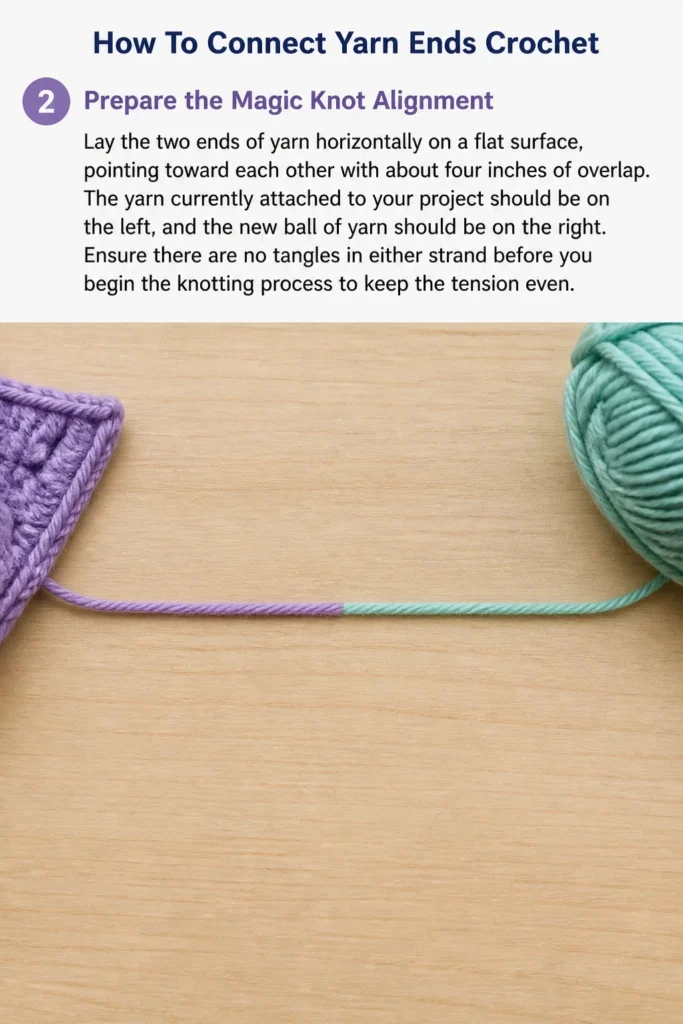
The yarn currently attached to your project should be on the left, and the new ball of yarn should be on the right.
Ensure there are no tangles in either strand before you begin the knotting process to keep the tension even.
Step 3: Tie the First Overhand Knot
Take the end of the new yarn (right side) and wrap it over and under the old yarn (left side) to create a simple loop.
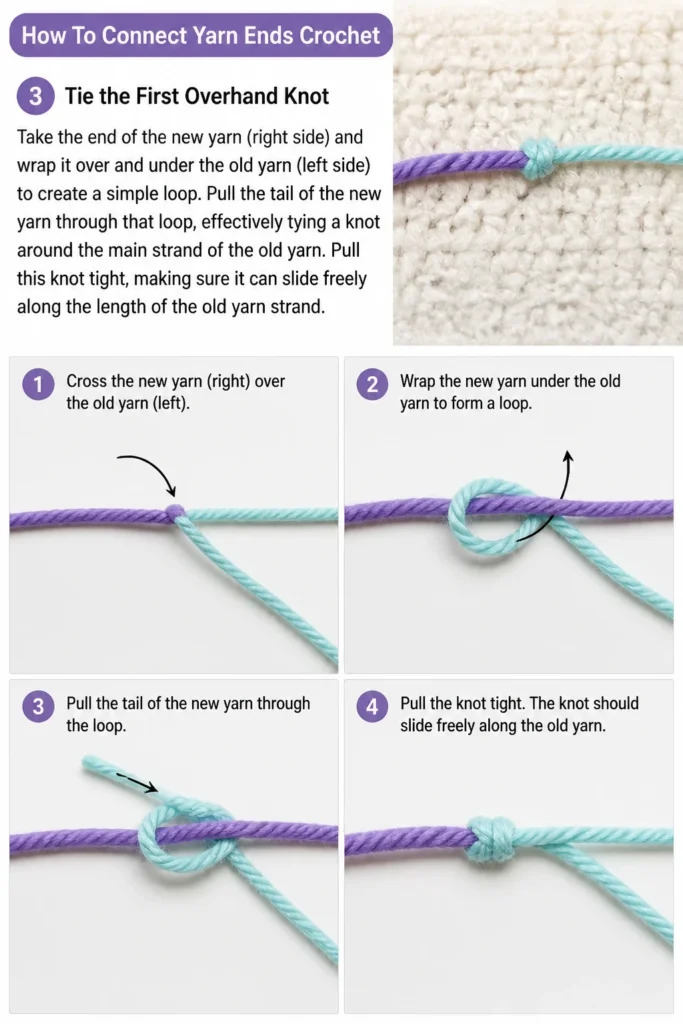
Pull the tail of the new yarn through that loop, effectively tying a knot around the main strand of the old yarn.
Pull this knot tight, making sure it can slide freely along the length of the old yarn strand.
Step 4: Tie the Second Overhand Knot
Repeat the process by taking the tail of the old yarn and tying it around the main strand of the new yarn.
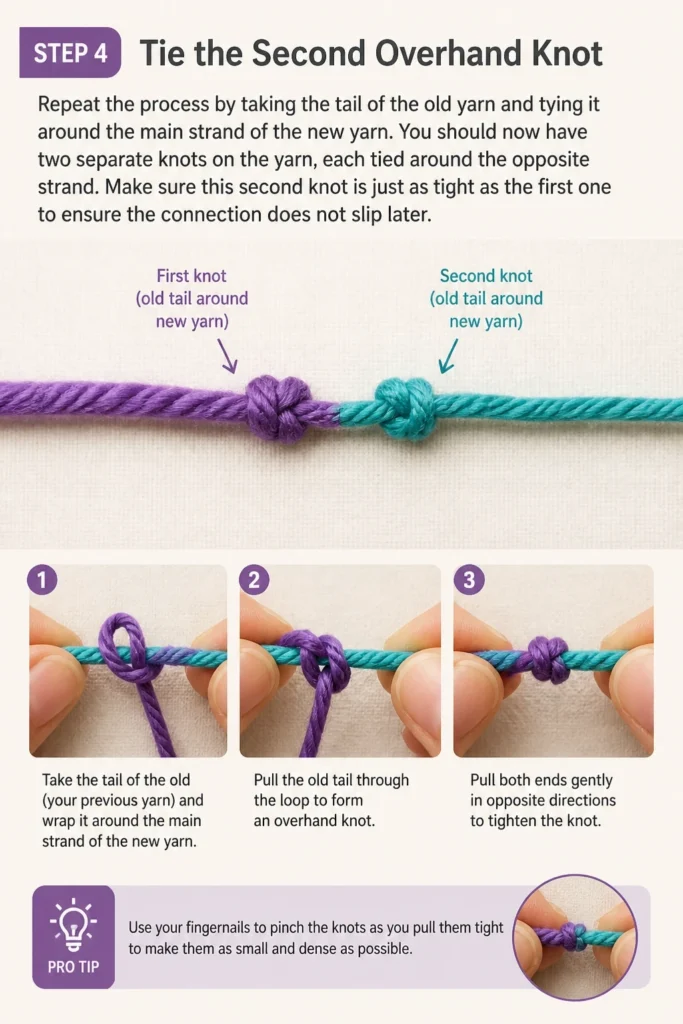
You should now have two separate knots on the yarn, each tied around the opposite strand.
Make sure this second knot is just as tight as the first one to ensure the connection does not slip later.
Pro Tip: Use your fingernails to pinch the knots as you pull them tight to make them as small and dense as possible.
Step 5: Pull the Knots Together
Grip the two main strands of yarn (not the short tails) and pull them firmly in opposite directions.
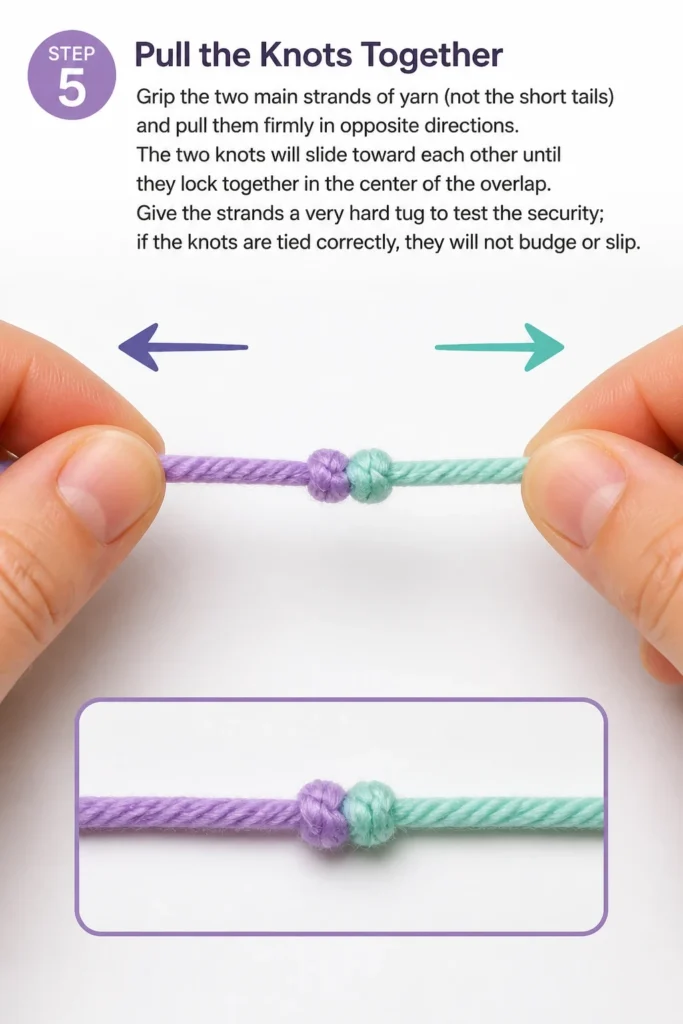
The two knots will slide toward each other until they lock together in the center of the overlap.
Give the strands a very hard tug to test the security; if the knots are tied correctly, they will not budge or slip.
Step 6: Trim the Excess Tails
Use your sharpest scissors to cut the short yarn tails as close to the knot as humanly possible.
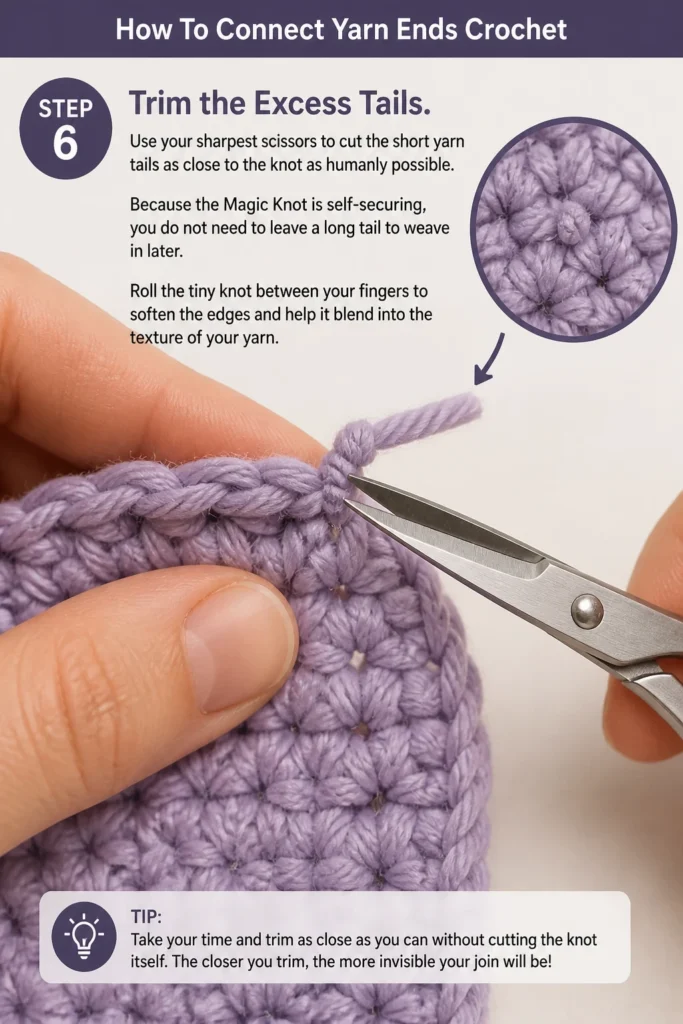
Because the Magic Knot is self-securing, you do not need to leave a long tail to weave in later.
Roll the tiny knot between your fingers to soften the edges and help it blend into the texture of your yarn.
Step 7: Execute the Russian Join for Wool
Thread about six inches of your old yarn end into a sharp tapestry needle if you prefer a knotless connection.
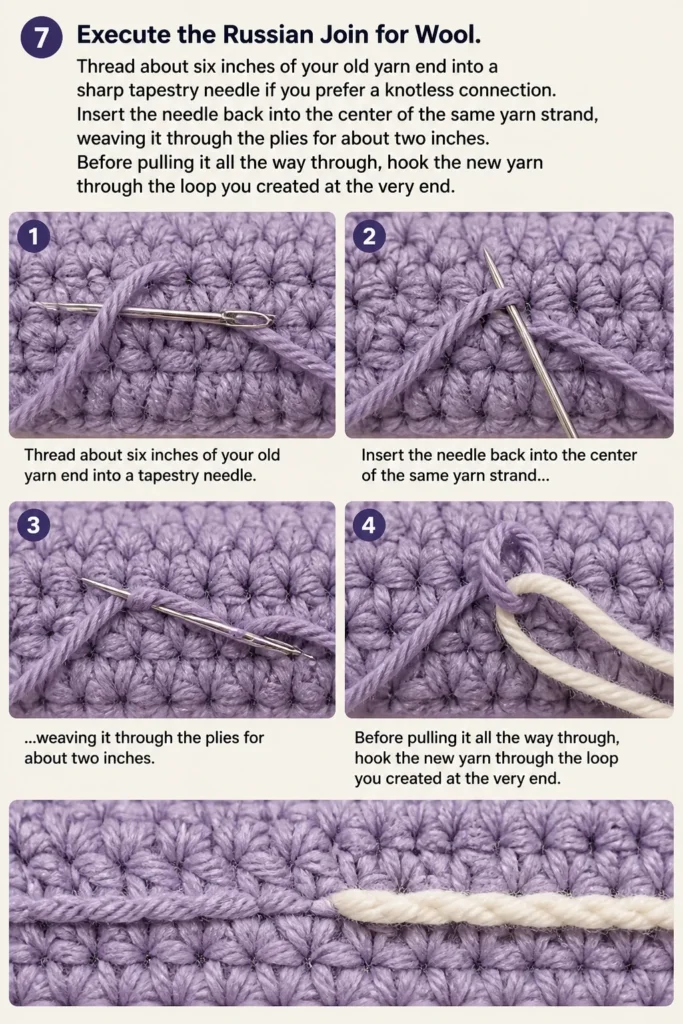
Insert the needle back into the center of the same yarn strand, weaving it through the plies for about two inches.
Before pulling it all the way through, hook the new yarn through the loop you created at the very end.
Step 8: Lock the New Yarn in Place
Pull the needle through the old yarn, trapping the new yarn strand inside the woven section.
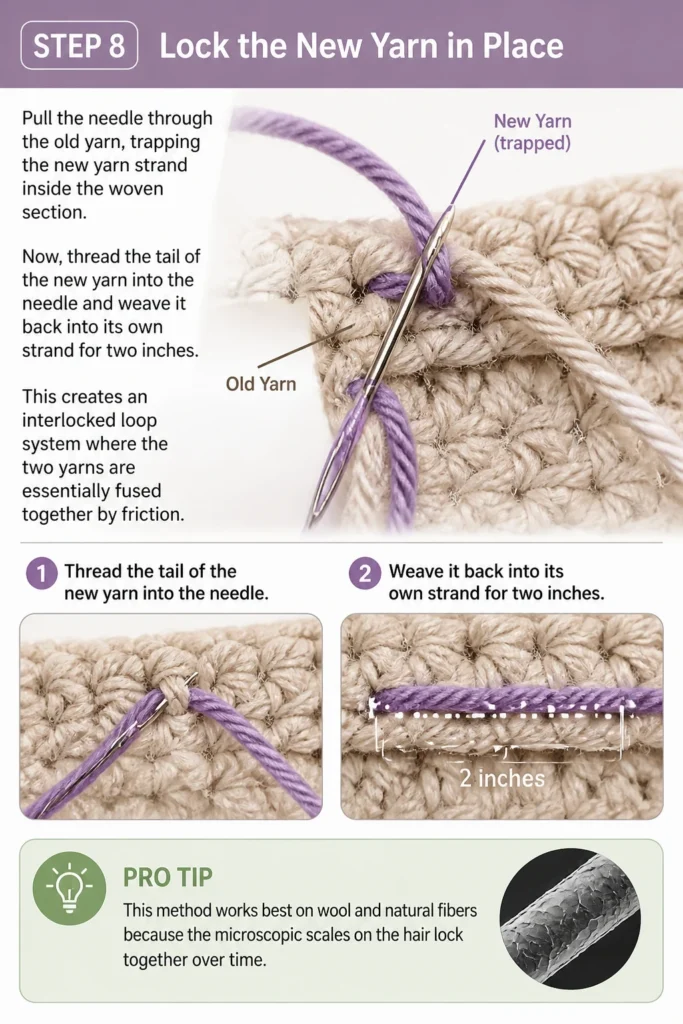
Now, thread the tail of the new yarn into the needle and weave it back into its own strand for two inches.
This creates an interlocked loop system where the two yarns are essentially fused together by friction.
Pro Tip: This method works best on wool and natural fibers because the microscopic scales on the hair lock together over time.
Step 9: Smooth the Joined Section
Gently tug on both ends of the join to even out the tension and remove any bunching or lumps.
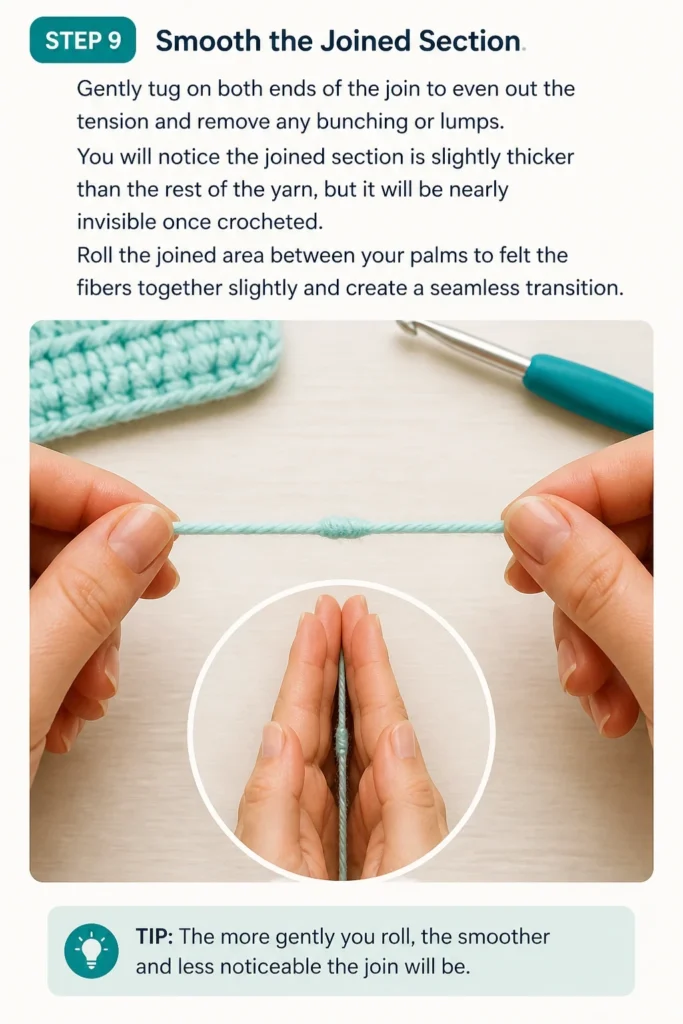
You will notice the joined section is slightly thicker than the rest of the yarn, but it will be nearly invisible once crocheted.
Roll the joined area between your palms to felt the fibers together slightly and create a seamless transition.
Step 10: Incorporate the Join into Your Stitches
Resume your crochet project, paying close attention as the joined section reaches your hook.
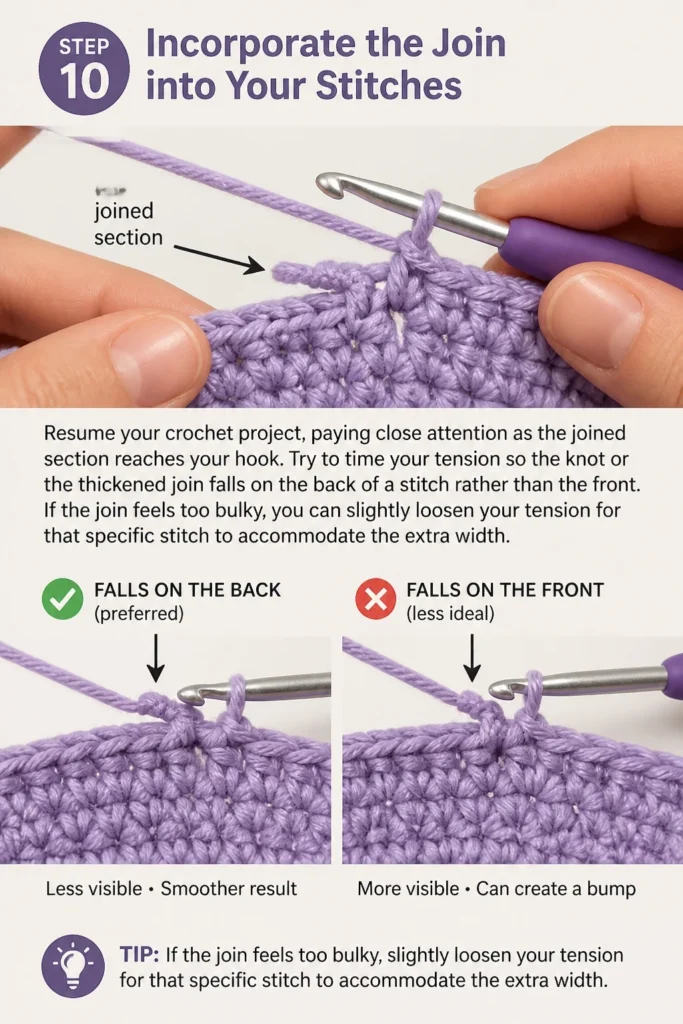
Try to time your tension so the knot or the thickened join falls on the back of a stitch rather than the front.
If the join feels too bulky, you can slightly loosen your tension for that specific stitch to accommodate the extra width.
Common Mistakes to Avoid
Using the Magic Knot on Slippery Synthetic Yarn
While the Magic Knot is incredibly strong for most fibers, it can occasionally fail on very smooth, round 100 percent polyester or silk yarns.
The lack of friction in these fibers allows the knot to slowly untie itself under the pressure of repeated washing or stretching.
For these specific materials, it is always safer to leave long tails and weave them in multiple directions with a tapestry needle.
Trimming Tails Too Early
A common error is cutting the yarn tails before the knot has been fully tightened and stress-tested.
If you trim the ends and then pull the main strands, the knot might tighten further, causing the cut ends to disappear into the knot and potentially slip out.
Always give the join a final, aggressive pull before you bring the scissors anywhere near your work.
Creating Too Much Bulk in Fine Lace
When working with lace weight yarn or thread, a Russian Join can create a noticeable lump that ruins the delicate drape of the fabric.
Beginners often try to use the same heavy-duty joins for every project regardless of the yarn weight.
For lace, the best approach is usually a simple color change method where you weave the ends into the denser parts of the pattern later.
Troubleshooting
The Magic Knot Slipped Out
If your knot came undone, it usually means one of the two overhand knots was not tied around the opposite strand correctly.
It is also possible that the yarn was too slippery or the tails were trimmed so close that the fibers frayed out of the knot.
To fix this, undo the surrounding stitches and redo the connection using a longer overlap or a different method like the Russian Join.
The Join is Visible on the Right Side of the Work
Sometimes a knot or a thickened join ends up right on the front of a prominent stitch, which can be distracting in flat patterns.
If this happens, you can unravel a few stitches and adjust your tension to move the join to a less visible location.
Alternatively, you can use a crochet hook to gently poke the knot toward the “wrong side” or the inside of the project.
The Yarn Frayed During the Russian Join
If your yarn is loosely plied, the needle might split the individual fibers and cause them to fuzz or break during the weaving process.
This often happens if you use a needle that is too sharp or if you try to weave through too short of a section.
Try using a blunt-tipped tapestry needle and increase the length of the weave to distribute the tension more evenly across the fibers.
Key Takeaways
- Match the method to the fiber: Use Magic Knots for acrylic and cotton, and Russian Joins for wool and animal fibers.
- Test every connection: Give your joined yarn a firm tug before continuing to ensure it can withstand the tension of crocheting.
- Mind the bulk: Be aware of how the thickness of a join will affect the look of your stitches, especially in fine or lacy projects.
- Precision trimming is vital: Only trim tails after the knot is fully seated and tested to prevent unraveling.
- Practice makes permanent: Spend a few minutes practicing these joins on scrap yarn before applying them to a major project.
- Security over speed: Taking an extra minute to secure a join properly will save hours of repair work in the future.
Frequently Asked Questions
Is the Magic Knot really permanent?
In most cases, yes, the Magic Knot is considered a permanent join that can survive years of use and machine washing. However, its success depends entirely on how tightly the knots are pulled and the friction level of the yarn fiber used.
Can I use fabric glue on my yarn joins?
While some crafters use a tiny drop of washable fabric glue for extra security, it can often make the yarn feel crunchy or hard in that spot. It is generally better to rely on mechanical joins like the ones described in this guide for a softer, more professional finish.
What is the best way to connect yarn when changing colors?
When changing colors for a stripe or pattern, the most seamless method is to pull the new color through the last two loops of the final stitch of the old color. This creates a clean line and allows you to weave in the tails along the color boundary for a hidden finish.
How long should the tails be if I choose to weave them in?
If you are not using a knot or a join, you should leave at least six to eight inches of tail for both the old and new yarn. This gives you enough length to weave the ends in multiple directions, which is the only way to truly secure yarn that isn’t knotted.
Our Top Recommended Finds
- Bent-Tip Tapestry Needles: These make weaving into plies and stitches much easier than traditional straight needles because the angle helps you pick up the yarn.
- Micro-Tip Embroidery Scissors: Having a very small, sharp pair of scissors allows you to trim yarn tails extremely close to the knot without accidentally snipping your project.
- Digital Row Counter: While not for joining yarn specifically, keeping track of your rows helps you plan exactly where your yarn joins will fall in the pattern.
Master Your Crochet Connections Today
Now that you have the tools to connect your yarn ends like a professional, your projects will have a level of polish and durability you never thought possible.
Take a moment to grab some scrap yarn and practice the Magic Knot and the Russian Join until the movements feel like second nature.
Once you have mastered these techniques, consider exploring more advanced topics like invisible color changes or complex stitch textures to further elevate your craft.
Beginner-friendly templates, step-by-step guides,
and weekly project ideas in your inbox.