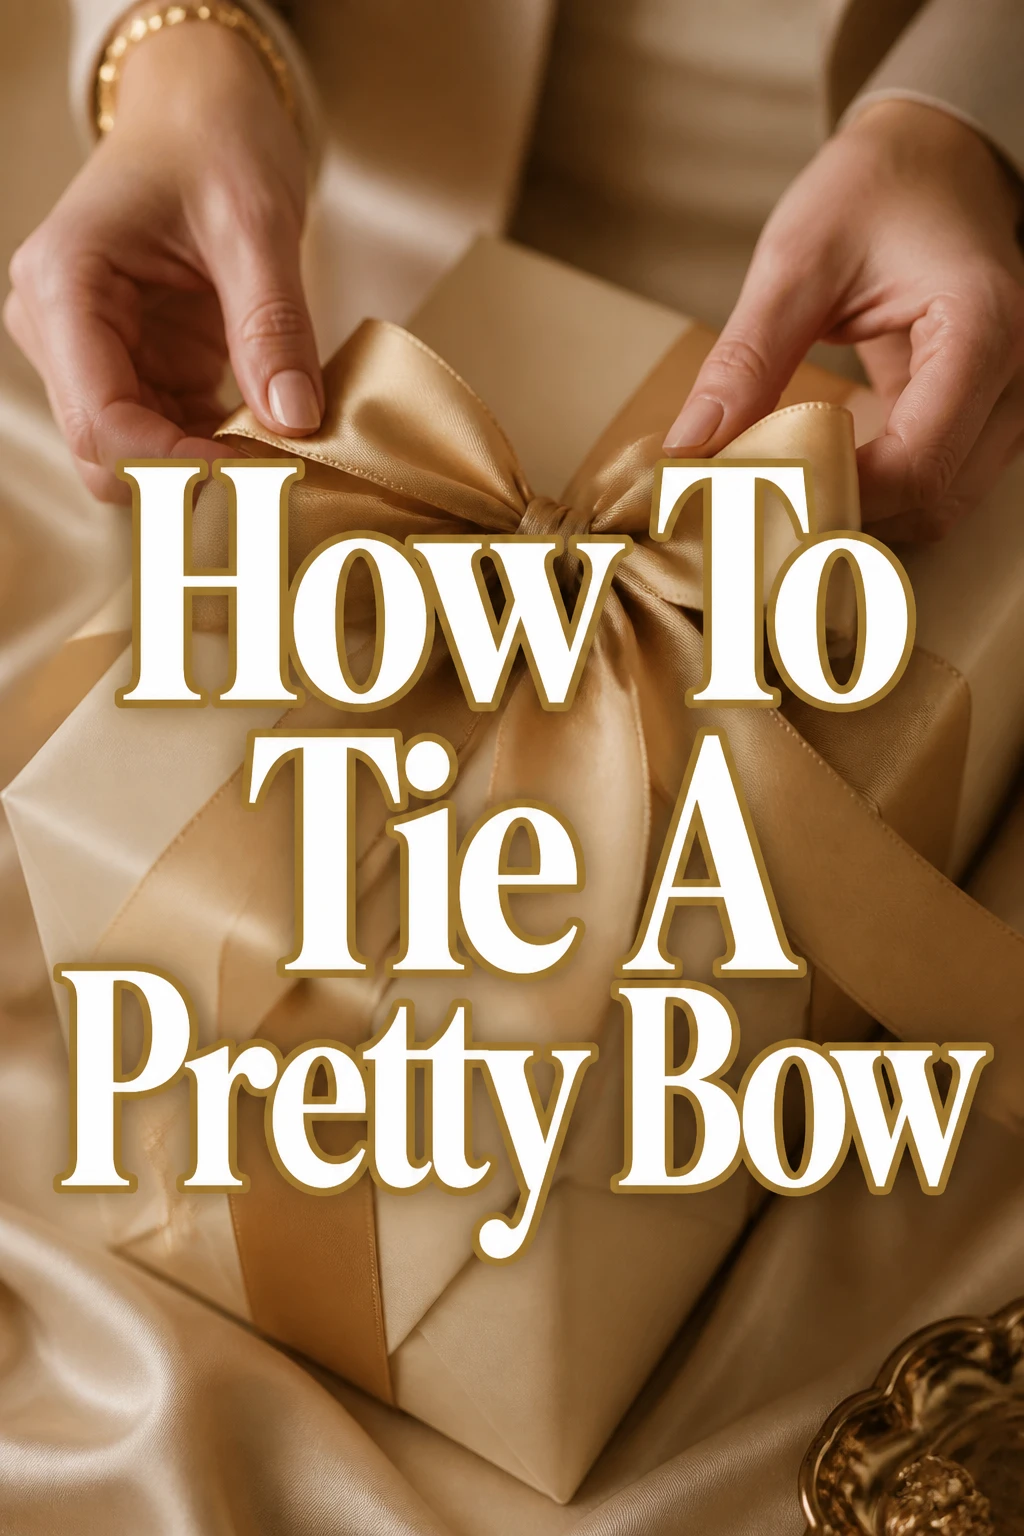
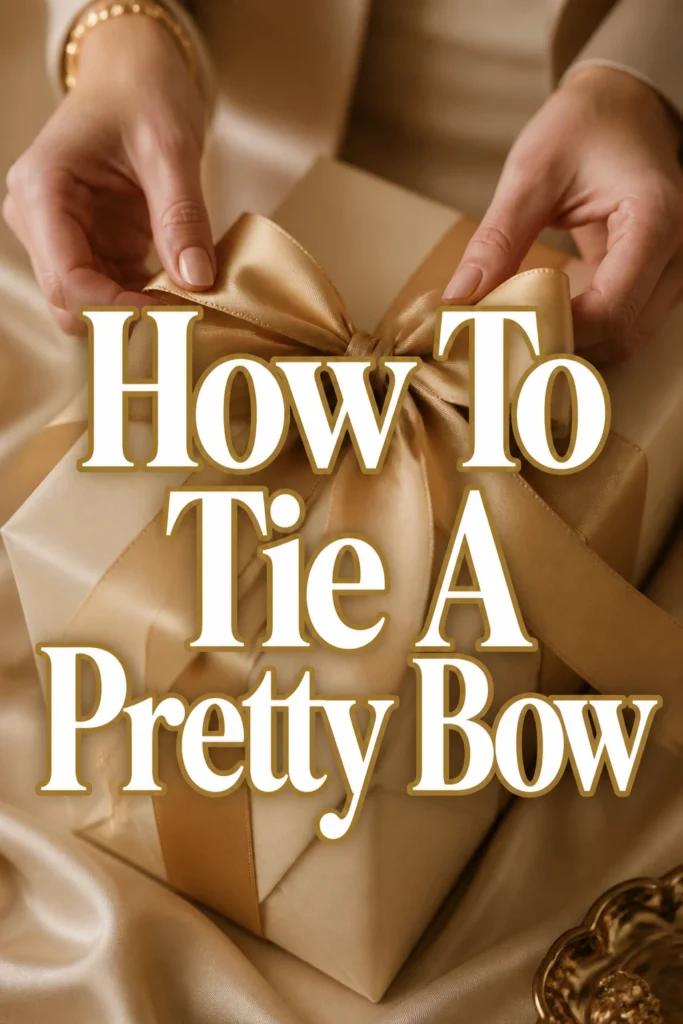
How To Tie A Pretty Bow

Beginner-friendly templates, step-by-step guides,
and weekly project ideas in your inbox.
A perfectly tied bow is the final touch that turns a simple gift into a thoughtful gesture.
I spent years working in a high-end stationery shop where I tied hundreds of bows every single day for discerning clients.
This guide shares the professional techniques I learned to ensure your loops are even and your knots are crisp every time.
Quick Overview
Tying a bow is a foundational skill that applies to gift wrapping, floral arrangements, and fashion. Once you master the tension and the “flip” of the ribbon, you can create beautiful results with any material.
- Time needed: 5 to 10 minutes for practice
- Difficulty: Beginner
- What you’ll need: High-quality ribbon, sharp fabric scissors, and a steady surface.
Step 1: Select Your Ribbon Material
Choose a ribbon that suits your specific project and skill level.
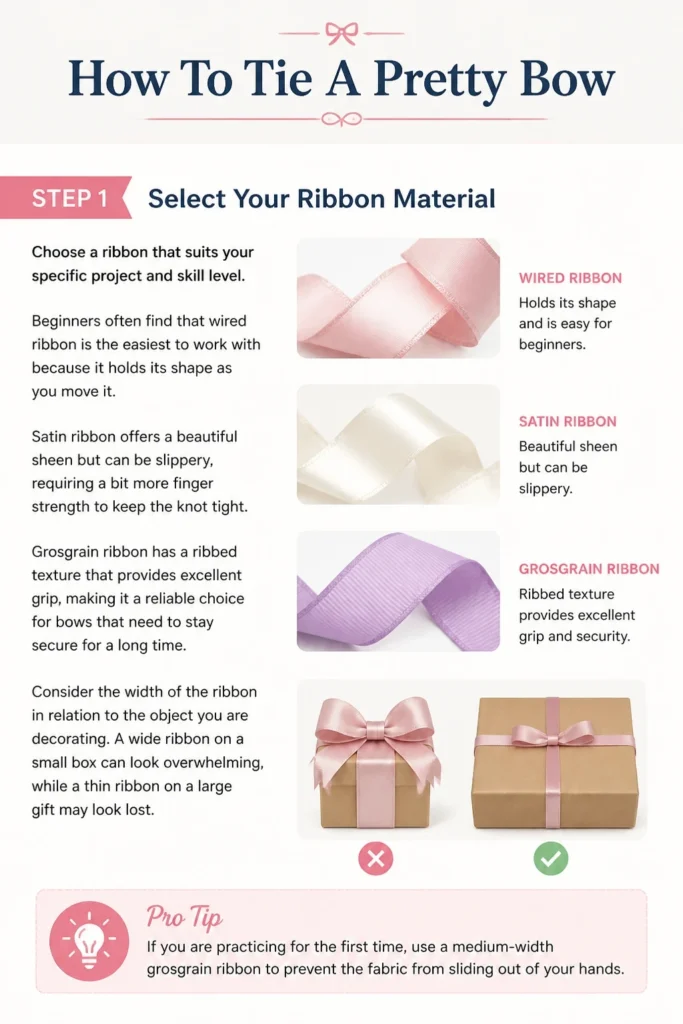
Beginners often find that wired ribbon is the easiest to work with because it holds its shape as you move it.
Satin ribbon offers a beautiful sheen but can be slippery, requiring a bit more finger strength to keep the knot tight.
Grosgrain ribbon has a ribbed texture that provides excellent grip, making it a reliable choice for bows that need to stay secure for a long time.
Consider the width of the ribbon in relation to the object you are decorating.
A wide ribbon on a small box can look overwhelming, while a thin ribbon on a large gift may look lost.
Pro Tip: If you are practicing for the first time, use a medium-width grosgrain ribbon to prevent the fabric from sliding out of your hands.
Step 2: Measure and Cut the Length
Estimate the amount of ribbon you need by wrapping it loosely around your object or project area.
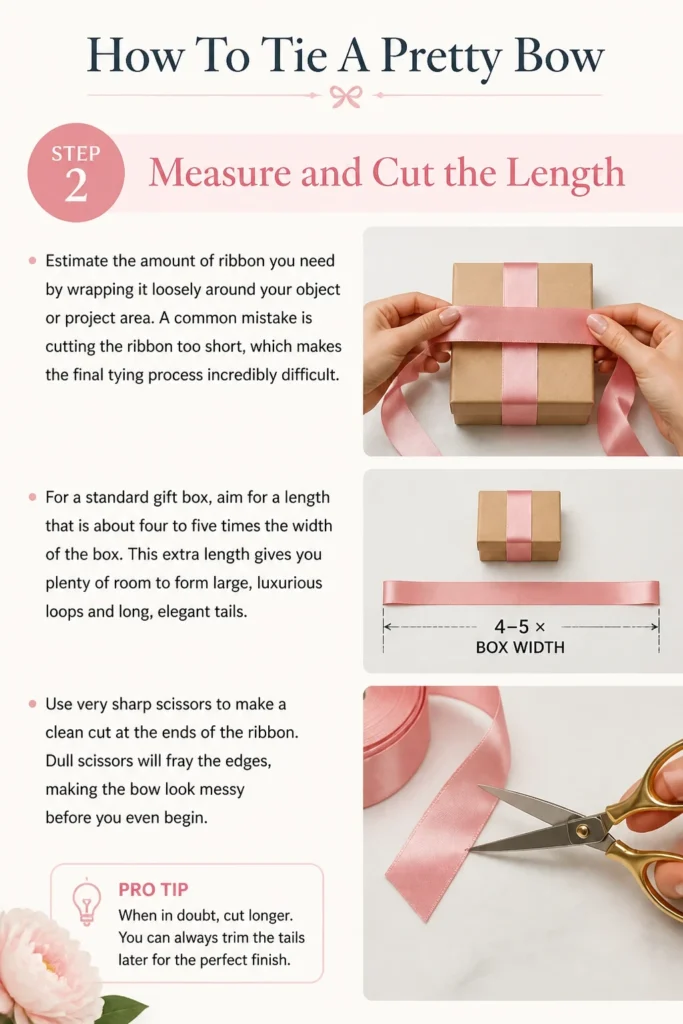
A common mistake is cutting the ribbon too short, which makes the final tying process incredibly difficult.
For a standard gift box, aim for a length that is about four to five times the width of the box.
This extra length gives you plenty of room to form large, luxurious loops and long, elegant tails.
Use very sharp scissors to make a clean cut at the ends of the ribbon.
Dull scissors will fray the edges, making the bow look messy before you even begin.
Step 3: Create the Foundation Knot
Lay the ribbon flat across the top of your package or surface.
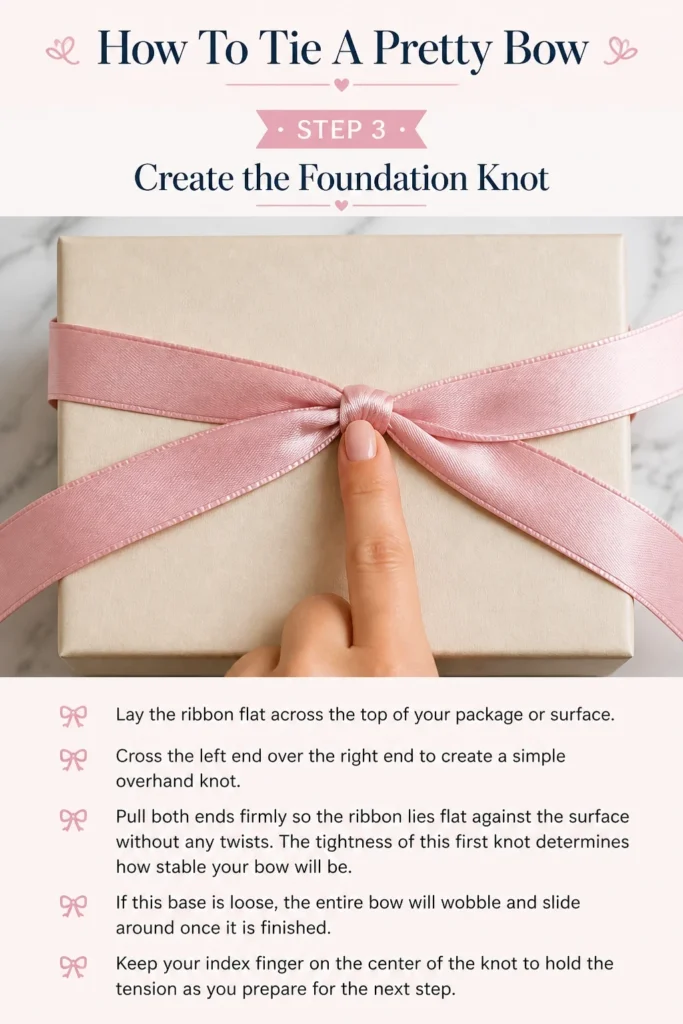
Cross the left end over the right end to create a simple overhand knot.
Pull both ends firmly so the ribbon lies flat against the surface without any twists.
The tightness of this first knot determines how stable your bow will be.
If this base is loose, the entire bow will wobble and slide around once it is finished.
Keep your index finger on the center of the knot to hold the tension as you prepare for the next step.
Step 4: Form the First Loop
Fold one side of the ribbon into a loop, often referred to as a “bunny ear.”
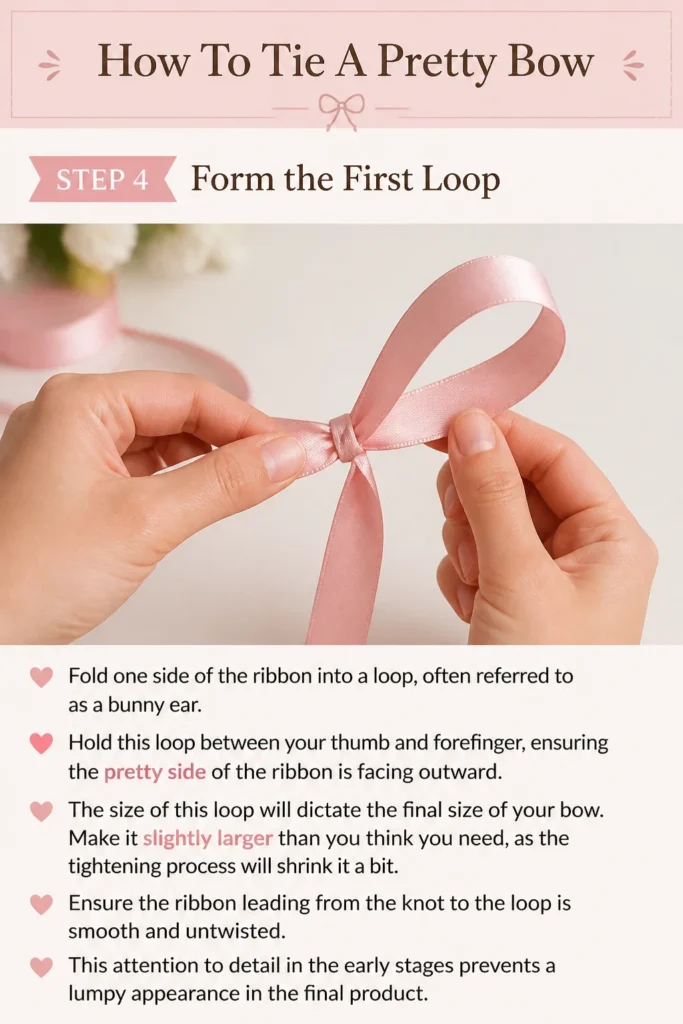
Hold this loop between your thumb and forefinger, ensuring the “pretty” side of the ribbon is facing outward.
The size of this loop will dictate the final size of your bow.
Make it slightly larger than you think you need, as the tightening process will shrink it a bit.
Ensure the ribbon leading from the knot to the loop is smooth and untwisted.
This attention to detail in the early stages prevents a lumpy appearance in the final product.
Step 5: Wrap the Center
Take the free end of the ribbon and wrap it over the front of the loop you just created.
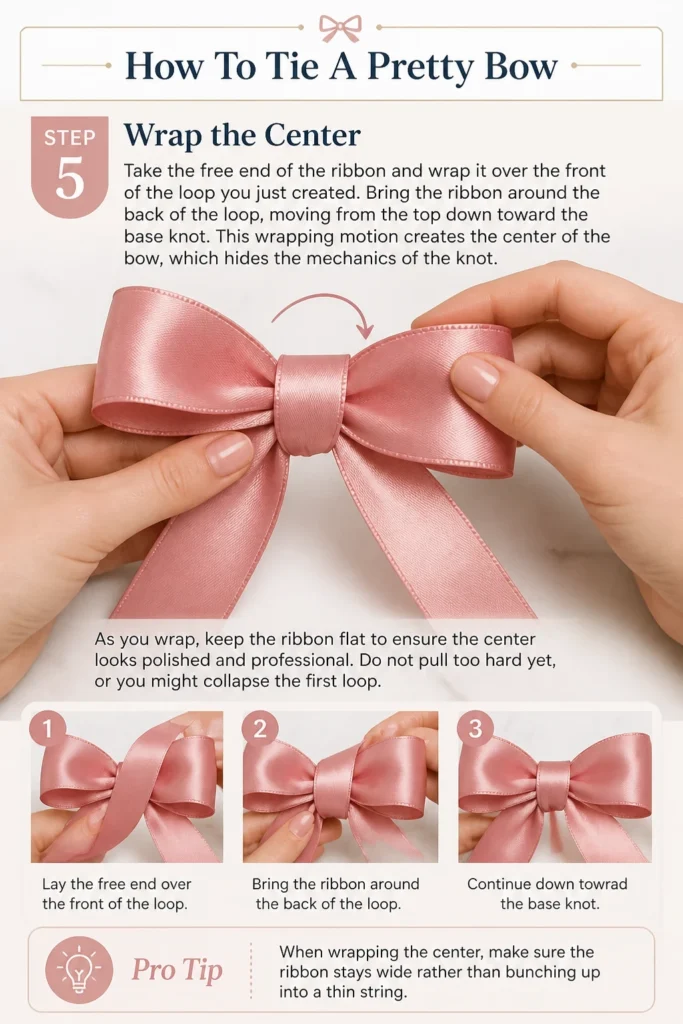
Bring the ribbon around the back of the loop, moving from the top down toward the base knot.
This wrapping motion creates the “center” of the bow, which hides the mechanics of the knot.
As you wrap, keep the ribbon flat to ensure the center looks polished and professional.
Do not pull too hard yet, or you might collapse the first loop.
Pro Tip: When wrapping the center, make sure the ribbon stays wide rather than bunching up into a thin string.
Step 6: Push the Second Loop Through
Locate the small opening or “tunnel” created by the wrap you just made.
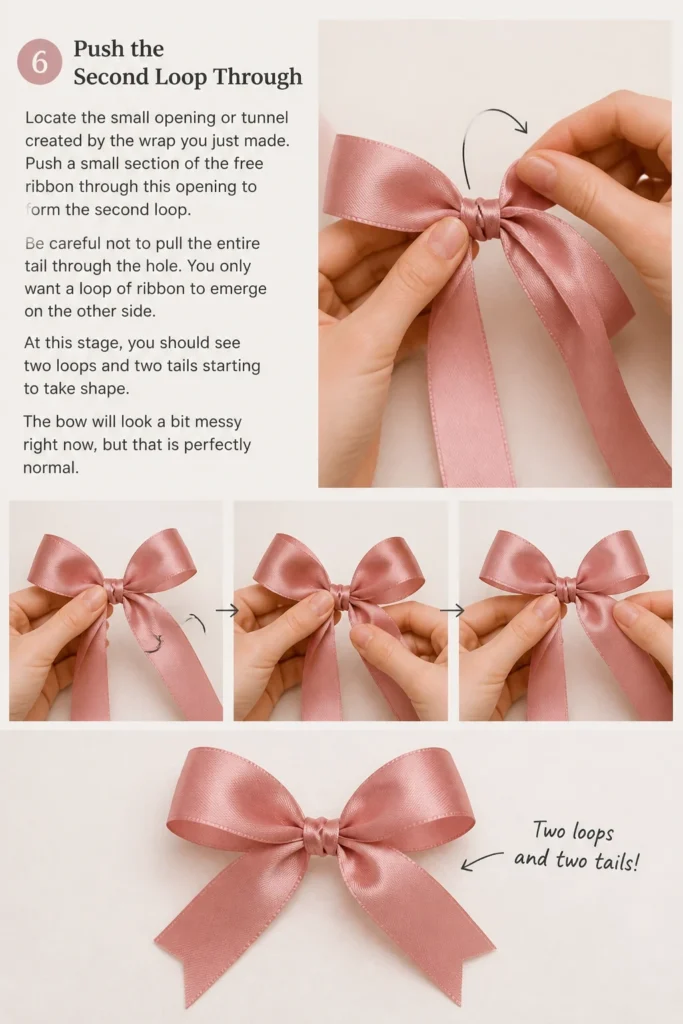
Push a small section of the free ribbon through this opening to form the second loop.
Be careful not to pull the entire tail through the hole.
You only want a loop of ribbon to emerge on the other side.
At this stage, you should see two loops and two tails starting to take shape.
The bow will look a bit messy right now, but that is perfectly normal.
Step 7: Tighten and Balance
Grasp both loops firmly and pull them away from each other simultaneously.
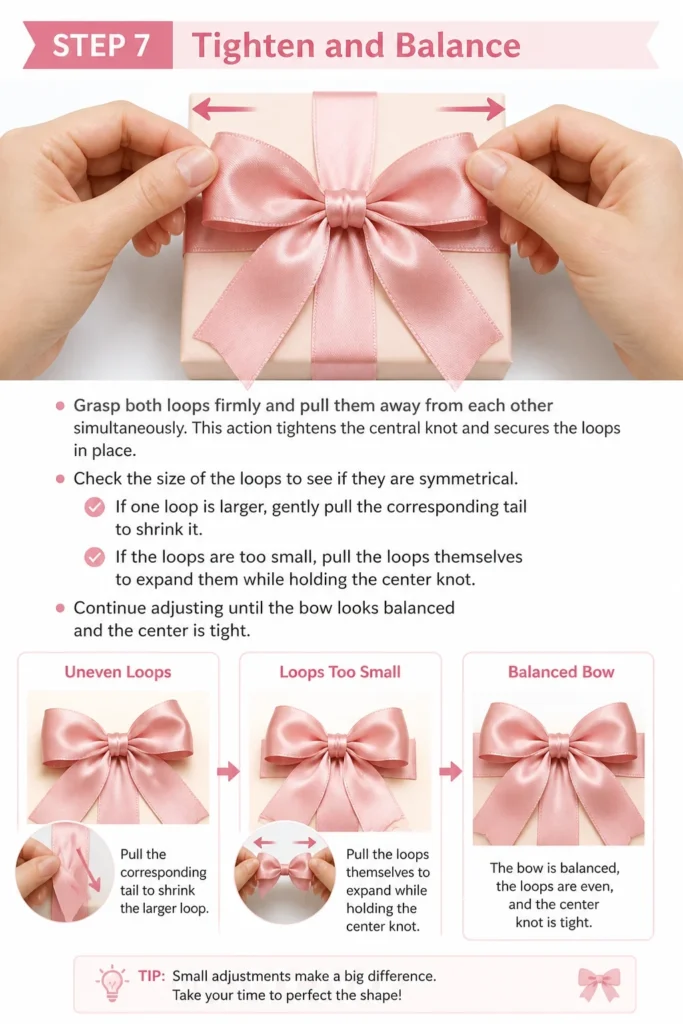
This action tightens the central knot and secures the loops in place.
Check the size of the loops to see if they are symmetrical.
If one loop is larger, gently pull the corresponding tail to shrink it.
If the loops are too small, pull the loops themselves to expand them while holding the center knot.
Continue adjusting until the bow looks balanced and the center is tight.
Step 8: Shape the Loops
Insert your fingers into the loops to fluff them out and give them volume.
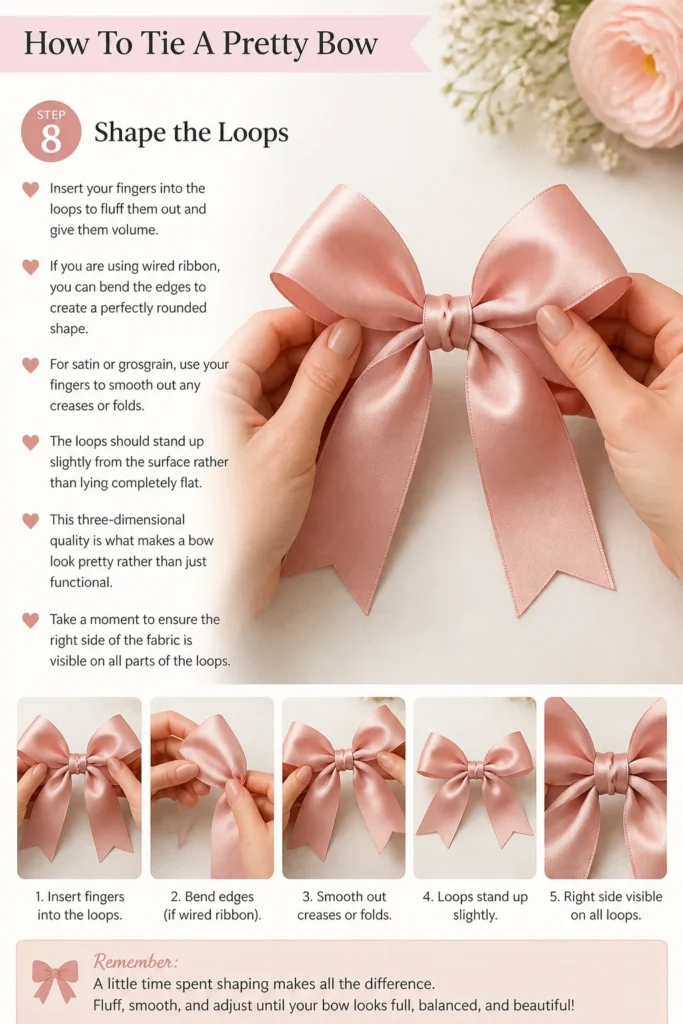
If you are using wired ribbon, you can bend the edges to create a perfectly rounded shape.
For satin or grosgrain, use your fingers to smooth out any creases or folds.
The loops should stand up slightly from the surface rather than lying completely flat.
This three-dimensional quality is what makes a bow look “pretty” rather than just functional.
Take a moment to ensure the “right” side of the fabric is visible on all parts of the loops.
Step 9: Trim the Tails
Cut the ends of the ribbon tails to give the bow a finished look.
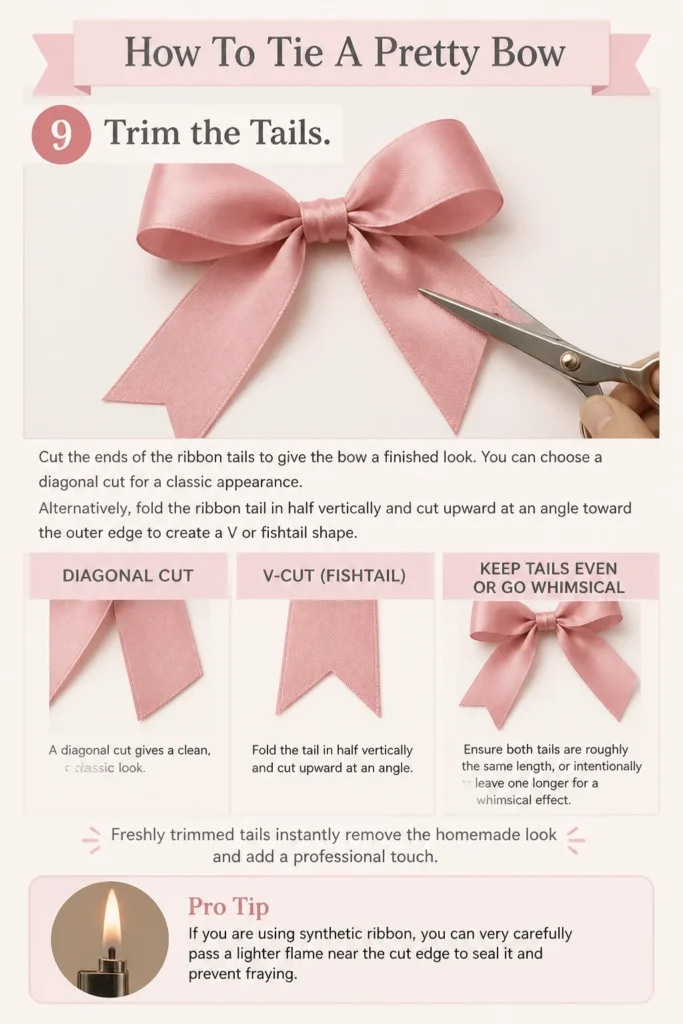
You can choose a diagonal cut for a classic appearance.
Alternatively, fold the ribbon tail in half vertically and cut upward at an angle toward the outer edge to create a “V” or “fishtail” shape.
Ensure both tails are roughly the same length, or intentionally leave one longer for a whimsical effect.
Freshly trimmed tails instantly remove the “homemade” look and add a professional touch.
Always use a single, smooth motion with your scissors to avoid jagged edges.
Pro Tip: If you are using synthetic ribbon, you can very carefully pass a lighter flame near the cut edge to seal it and prevent fraying.
Step 10: Final Positioning
Rotate the bow if it has shifted during the tying process.
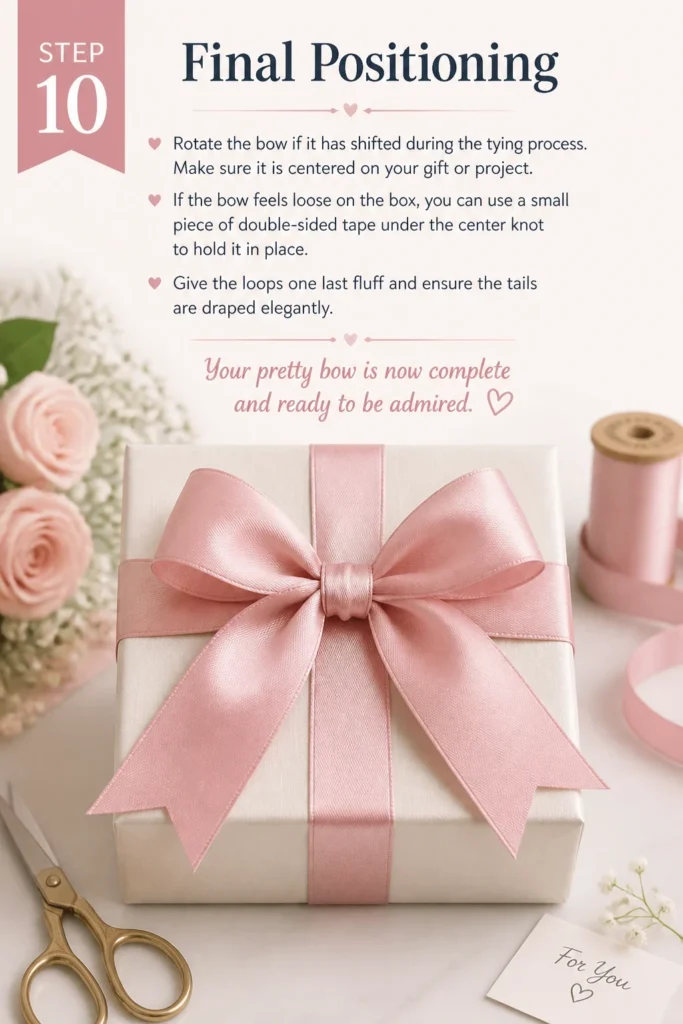
Make sure it is centered on your gift or project.
If the bow feels loose on the box, you can use a small piece of double-sided tape under the center knot to hold it in place.
Give the loops one last fluff and ensure the tails are draped elegantly.
Your pretty bow is now complete and ready to be admired.
Common Mistakes to Avoid
Using Too Much Tension
While a tight knot is important, pulling the loops too hard can distort the fabric. This often results in a center knot that looks pinched and loops that look thin and strained. Focus on a firm center but keep the loops relaxed for a fuller appearance.
Ignoring the Ribbon Direction
Many ribbons have a “right” side and a “wrong” side. If you aren’t careful during the twisting and looping process, the dull underside of the ribbon might end up facing forward. Always watch the fabric as you pull it through the knot to ensure the shiny or patterned side remains visible.
Cutting Tails Too Early
Trimming the ribbon before the bow is fully tied and tightened is a recipe for disaster. You may find that after adjusting the loops, one tail has become much shorter than the other. Always wait until the very end to make your final decorative cuts.
Neglecting the Scale
A tiny bow on a giant box looks like an afterthought, while a massive bow can hide the beauty of the wrapping paper. Try to match the width of your ribbon and the size of your loops to the dimensions of the item you are decorating. Consistency in scale creates a much more pleasing visual harmony.
Troubleshooting
The Bow is Upside Down
If your loops are pointing toward the bottom and the tails are pointing toward the top, you likely started your knot from the wrong direction. You can often fix this without untying the whole thing by simply rotating the entire ribbon structure 180 degrees. If the ribbon is attached to a box, you may need to flip the box or untie and reverse your first cross-over step.
Floppy or Limp Loops
This usually happens when the ribbon material is too soft for the size of the bow you are trying to make. If your satin ribbon won’t stay upright, try making the loops smaller so they have more structural integrity. For future projects, look for ribbons with a higher thread count or a wired edge to provide the necessary support.
The Center Knot is Bulky
A bulky center usually means the ribbon twisted or folded over itself several times inside the knot. Untie the loops and flatten the ribbon completely before trying again. Ensure that when you wrap the center, the ribbon stays wide and flat as it passes over the first loop.
Key Takeaways
- Select a ribbon with enough “body” to hold a shape, such as grosgrain or wired varieties.
- Always cut more ribbon than you think you need to allow for easy manipulation.
- The foundation knot must be tight and secure to prevent the bow from sliding.
- Adjust loop size and tail length only after the central knot is firmly tightened.
- Finish the look with clean, angled, or fishtail cuts using very sharp scissors.
- Use your fingers to fluff and shape the loops for a professional, three-dimensional finish.
Frequently Asked Questions
What is the best ribbon for a beginner?
Wired ribbon is widely considered the best choice for those just starting out. The thin wire along the edges allows you to manipulate the shape of the loops and keeps them from collapsing. This makes the learning process much less frustrating as you master the basic movements.
How do I stop my ribbon from fraying?
Fraying occurs when the woven fibers of the ribbon begin to unravel at the cut end. Using sharp scissors is the first line of defense. For long-term durability, you can apply a tiny amount of clear nail polish or a specialized fray-check liquid to the very edge of the cut.
How long should the tails be?
Tail length is largely a matter of personal preference, but a good rule of thumb is to make them slightly longer than the width of the loops. This creates a balanced, “waterfall” effect. If the bow is for a tall gift, longer tails can add a sense of elegance and drama.
Can I reuse ribbon from old gifts?
Yes, you can certainly reuse ribbon if it is in good condition. If the ribbon is wrinkled, you can often smooth it out using a clothes iron on a very low heat setting. Just be careful with synthetic ribbons, as they can melt if the iron is too hot.
Our Top Recommended Finds
- Professional Fabric Scissors: A dedicated pair of sharp shears will ensure your ribbon ends are crisp and free of frays.
- Wired Satin Ribbon: This offers the beauty of satin with the ease of wire, making it perfect for creating sturdy, pretty bows.
- Double-Sided Craft Tape: This is helpful for securing the base of your bow to a gift box so it doesn’t shift during transport.
Mastering Your New Skill
Now that you know the secrets to tying a pretty bow, the best way to improve is through consistent practice.
Try experimenting with different textures like velvet or organza to see how the material changes the final look.
You can also explore adding embellishments like small sprigs of greenery or decorative bells to the center of your bows.
Start practicing on small gifts or even the back of a chair today to build your muscle memory.
Beginner-friendly templates, step-by-step guides,
and weekly project ideas in your inbox.