
How To Make Glue At Home

Beginner-friendly templates, step-by-step guides,
and weekly project ideas in your inbox.
Making your own glue at home is surprisingly simple and incredibly satisfying.
I’ve personally relied on homemade pastes for countless craft projects and quick fixes when store-bought options weren’t available.
This guide shares practical, tested methods to create reliable adhesive from everyday items in your kitchen.

Quick Overview
You’re about to learn how to transform common household ingredients into effective, budget-friendly glue.
We’ll cover two primary methods: a versatile flour-based paste and a robust casein glue made from milk.
Both are excellent for various projects, from paper crafts to minor repairs.
- Time needed: 15-30 minutes (active preparation), plus cooling time
- Difficulty: Beginner
- What you’ll need: Flour, water, salt, milk, vinegar, baking soda, pots, bowls, whisks, strainers
Step-by-Step Instructions
Step 1: Gather Your Supplies
Before you begin, collect all the necessary ingredients and tools for your chosen glue method.
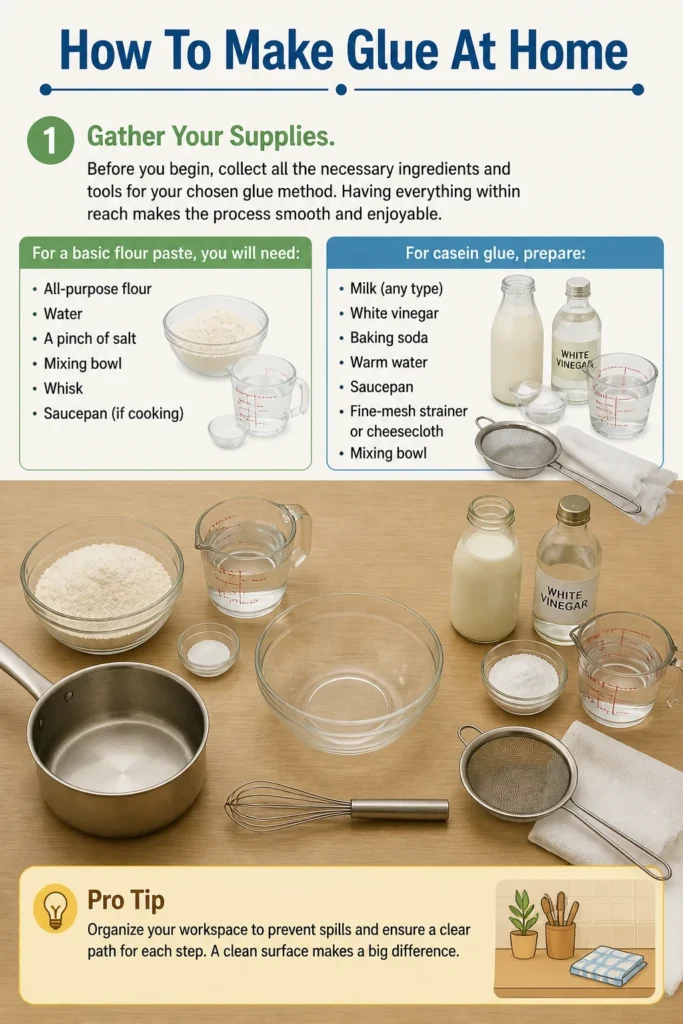
Having everything within reach makes the process smooth and enjoyable.
For a basic flour paste, you will need all-purpose flour, water, and a pinch of salt. You’ll also want a mixing bowl, a whisk, and a saucepan if you plan to cook it.
For casein glue, prepare milk (any type), white vinegar, baking soda, and warm water. You’ll need a saucepan, a fine-mesh strainer or cheesecloth, and a mixing bowl.
Pro Tip: Organize your workspace to prevent spills and ensure a clear path for each step. A clean surface makes a big difference.
Step 2: Combine Dry Ingredients (Flour Paste Method)
If you’re making flour paste, measure out your dry ingredients first. For a good starting batch, use 1/2 cup of all-purpose flour.
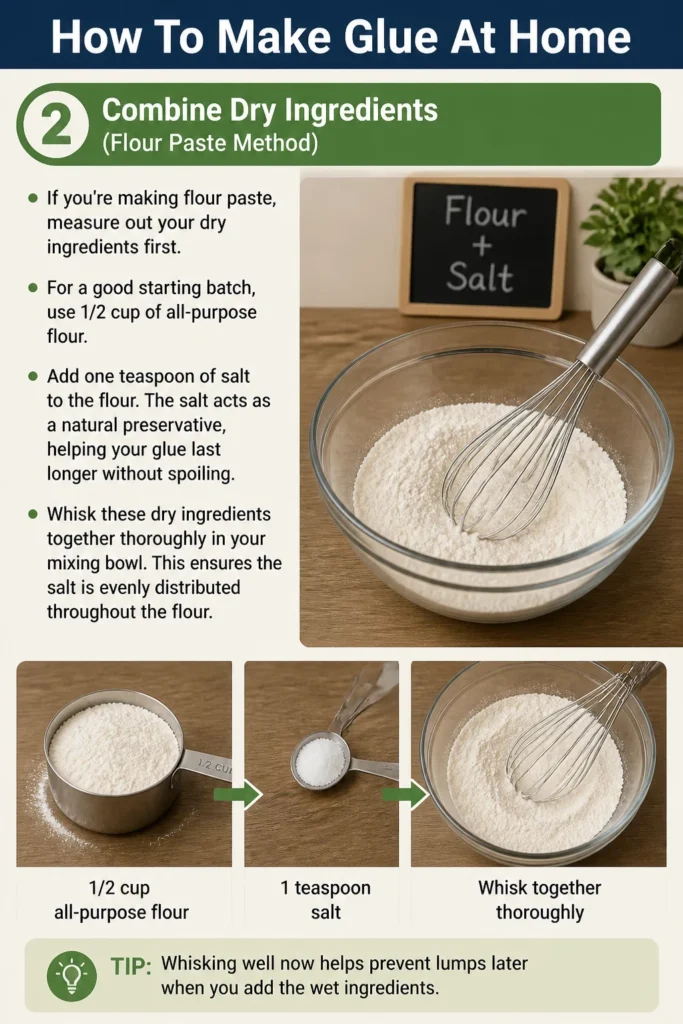
Add one teaspoon of salt to the flour. The salt acts as a natural preservative, helping your glue last longer without spoiling.
Whisk these dry ingredients together thoroughly in your mixing bowl. This ensures the salt is evenly distributed throughout the flour.
Step 3: Slowly Incorporate Water (Flour Paste Method)
Now, it’s time to introduce the water. Gradually pour in about 1/2 cup of cold water into your dry mixture.
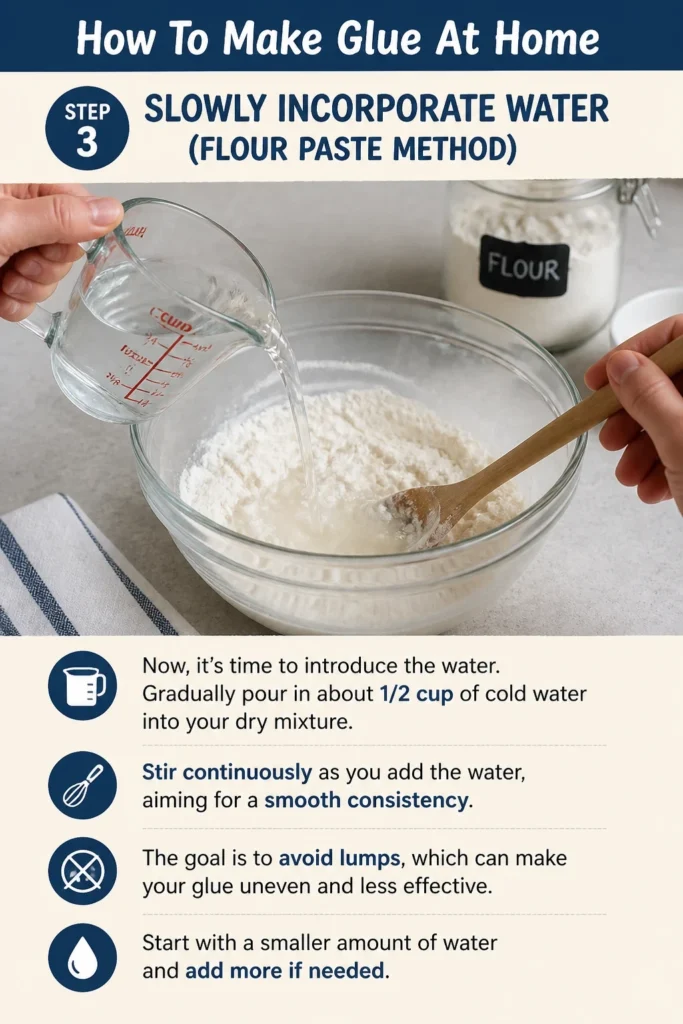
Stir continuously as you add the water, aiming for a smooth consistency.
The goal is to avoid lumps, which can make your glue uneven and less effective. Start with a smaller amount of water and add more if needed.
Step 4: Whisk to a Smooth Consistency (Flour Paste Method)
Continue whisking until the mixture is completely smooth and free of lumps. It should resemble a thick pancake batter.
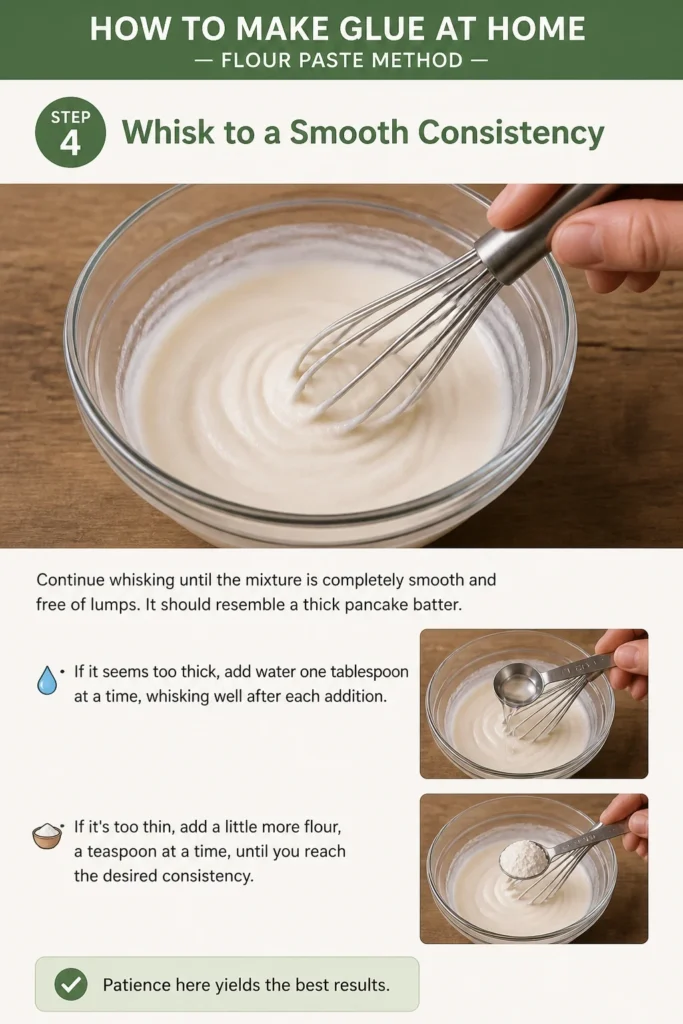
If it seems too thick, add water one tablespoon at a time, whisking well after each addition.
If it’s too thin, add a little more flour, a teaspoon at a time, until you reach the desired consistency. Patience here yields the best results.
Step 5: Cook for Enhanced Strength (Flour Paste Method – Optional but Recommended)
For a stronger, more durable flour paste, transfer your mixture to a saucepan. Heat it over medium-low heat.
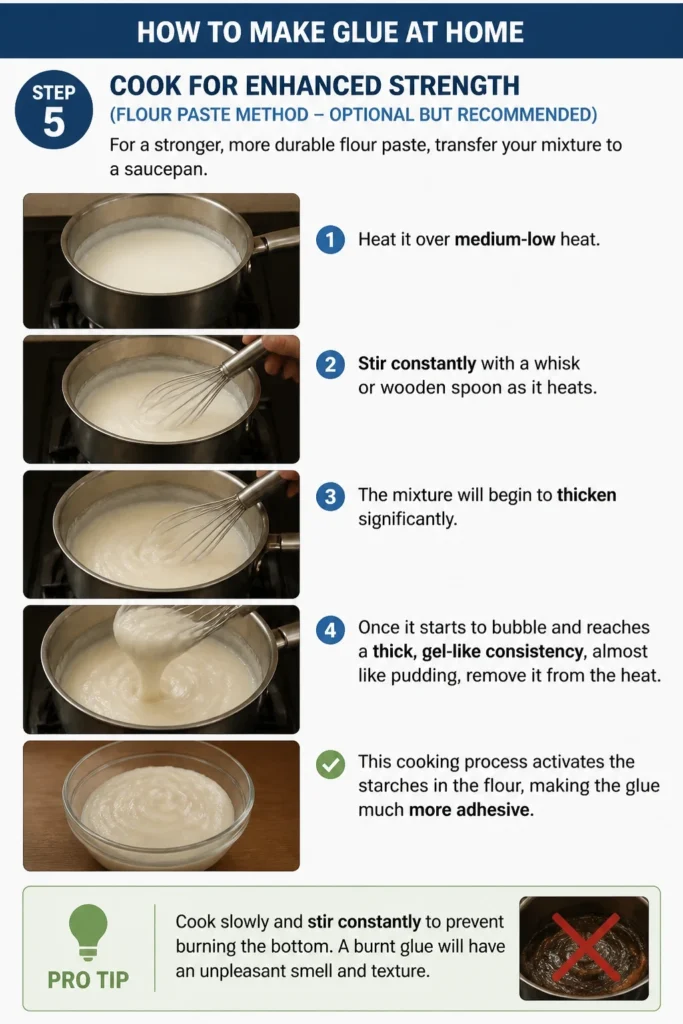
Stir constantly with a whisk or wooden spoon as it heats. The mixture will begin to thicken significantly.
Once it starts to bubble and reaches a thick, gel-like consistency, almost like pudding, remove it from the heat. This cooking process activates the starches in the flour, making the glue much more adhesive.
Pro Tip: Cook slowly and stir constantly to prevent burning the bottom. A burnt glue will have an unpleasant smell and texture.
Step 6: Cool and Prepare for Use (Flour Paste Method)
After cooking (or if you opted not to cook it), allow the glue to cool completely. Warm glue can be too runny and less effective.
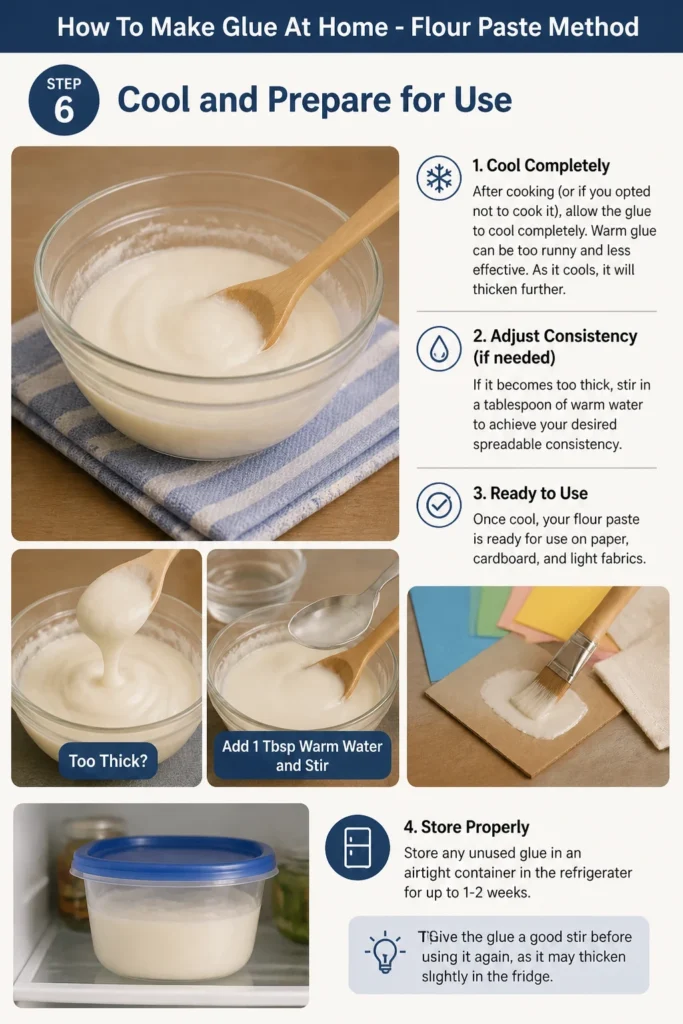
As it cools, it will thicken further. If it becomes too thick, stir in a tablespoon of warm water to achieve your desired spreadable consistency.
Once cool, your flour paste is ready for use on paper, cardboard, and light fabrics. Store any unused glue in an airtight container in the refrigerator for up to 1-2 weeks.
Step 7: Heat Milk Gently (Casein Glue Method)
For a stronger, water-resistant casein glue, begin by pouring one cup of milk into a saucepan. Any type of milk works, but whole milk often yields more curds.
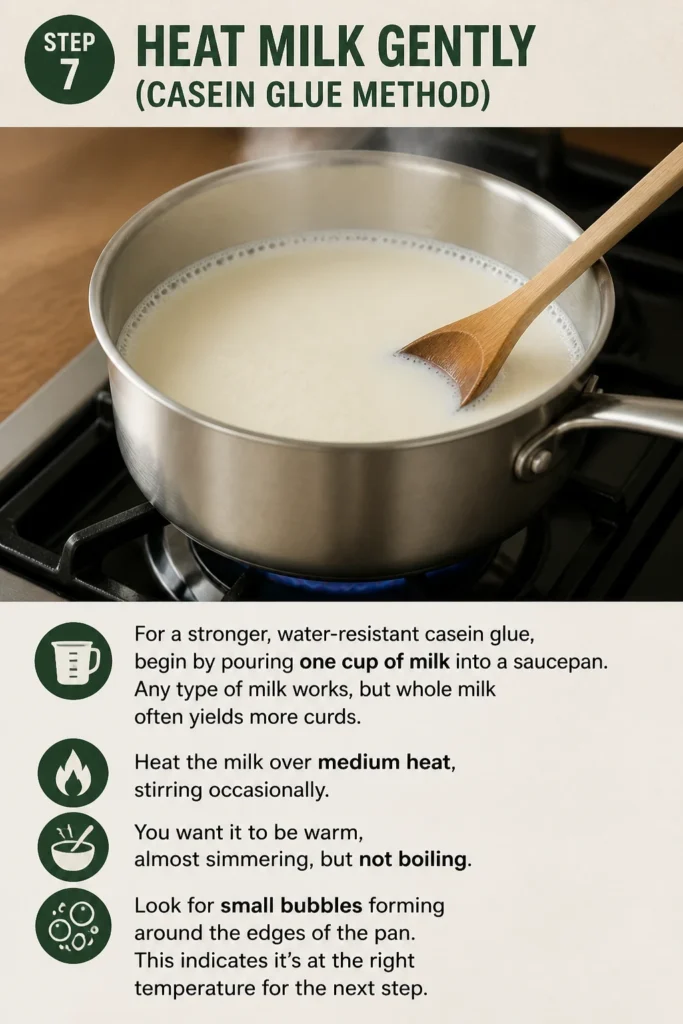
Heat the milk over medium heat, stirring occasionally. You want it to be warm, almost simmering, but not boiling.
Look for small bubbles forming around the edges of the pan. This indicates it’s at the right temperature for the next step.
Step 8: Add Vinegar to Curdle (Casein Glue Method)
Once the milk is warm, remove it from the heat. Pour in about two tablespoons of white vinegar.
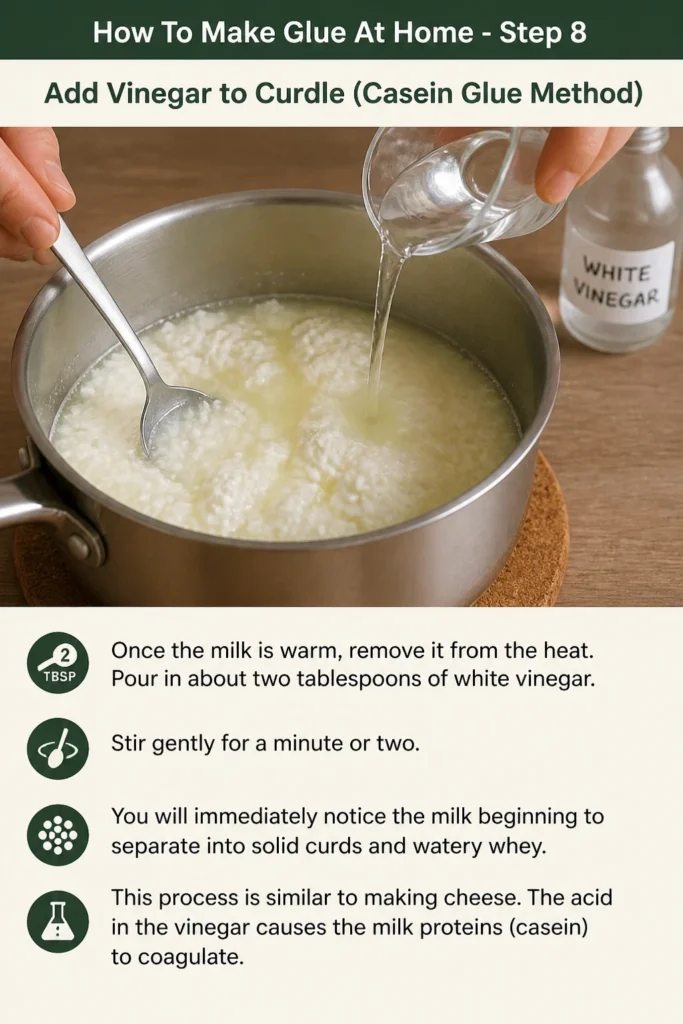
Stir gently for a minute or two. You will immediately notice the milk beginning to separate into solid curds and watery whey.
This process is similar to making cheese. The acid in the vinegar causes the milk proteins (casein) to coagulate.
Step 9: Strain the Curds (Casein Glue Method)
Place a fine-mesh strainer or a colander lined with cheesecloth over a bowl. Pour the curdled milk mixture into the strainer.
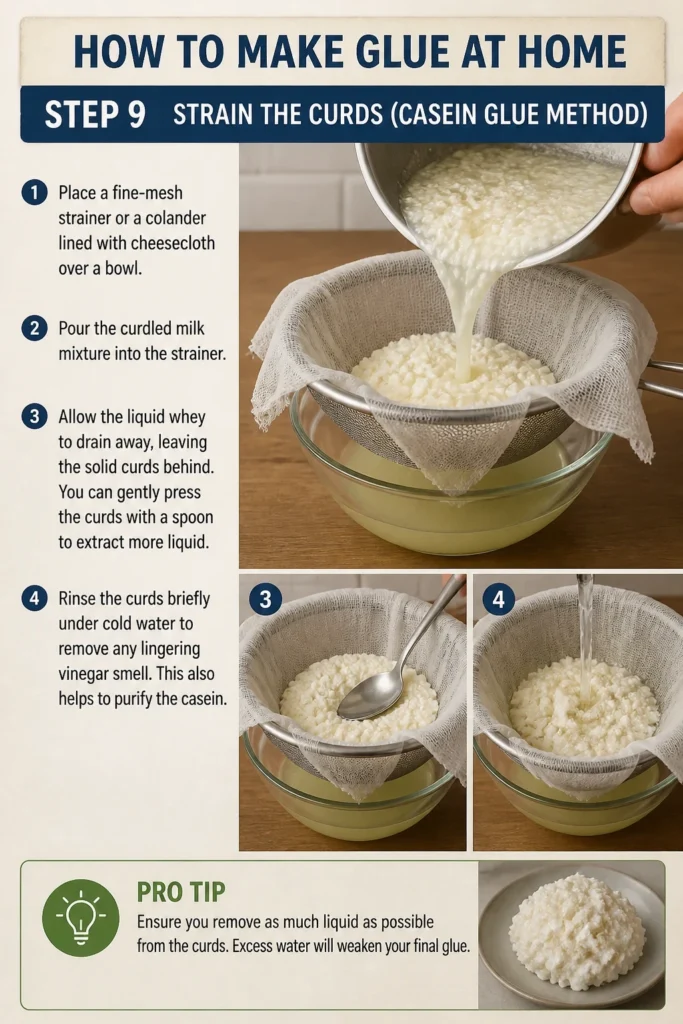
Allow the liquid whey to drain away, leaving the solid curds behind. You can gently press the curds with a spoon to extract more liquid.
Rinse the curds briefly under cold water to remove any lingering vinegar smell. This also helps to purify the casein.
Pro Tip: Ensure you remove as much liquid as possible from the curds. Excess water will weaken your final glue.
Step 10: Mix Curds with Baking Soda and Water (Casein Glue Method)
Transfer the strained curds to a clean mixing bowl. Add 1/2 teaspoon of baking soda to the curds.
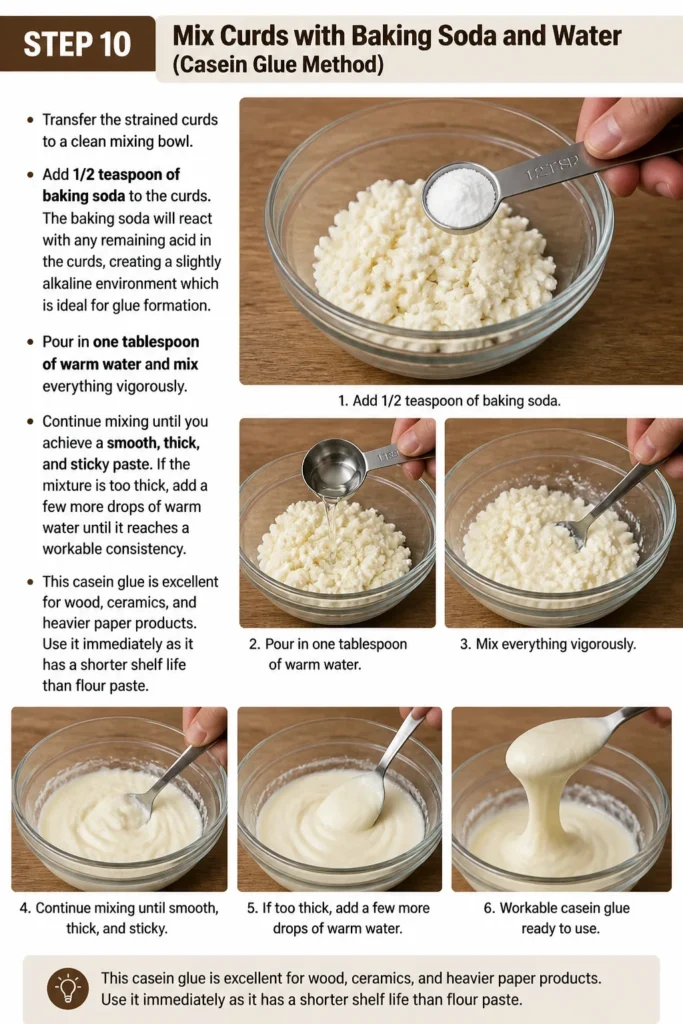
The baking soda will react with any remaining acid in the curds, creating a slightly alkaline environment which is ideal for glue formation.
Pour in one tablespoon of warm water and mix everything vigorously. Continue mixing until you achieve a smooth, thick, and sticky paste.
If the mixture is too thick, add a few more drops of warm water until it reaches a workable consistency. This casein glue is excellent for wood, ceramics, and heavier paper products. Use it immediately as it has a shorter shelf life than flour paste.
Common Mistakes to Avoid
Using Cold Water for Cooked Flour Paste
Many recipes suggest adding cold water directly to hot flour, which can create instant lumps. These lumps are incredibly difficult to whisk out, resulting in a grainy, ineffective glue. Always mix flour with cold water first to form a smooth slurry before heating, or gradually add warm water to dry flour while whisking.
Not Straining Casein Curds Properly
Leaving too much whey in your casein curds will result in a weak, watery glue that lacks adhesive power. It’s crucial to press out as much liquid as possible, even rinsing them gently. The drier the curds, the stronger your final glue will be once activated.
Overheating or Burning Flour Paste
When cooking flour paste, high heat or infrequent stirring can cause the mixture to burn at the bottom of the pan. This introduces a bitter smell and dark specks into your glue, making it unsuitable for most projects. Always use medium-low heat and stir continuously to ensure even cooking and prevent scorching.
Storing Glue Incorrectly
Homemade glues, especially those made from food products, are perishable. Storing them in open containers or at room temperature will lead to mold growth and spoilage very quickly. Always use an airtight container and refrigerate your glue to extend its shelf life. Even then, plan to use it within a week or two.
Troubleshooting
My Flour Paste is Lumpy
This usually happens when water is added too quickly or when the mixture isn’t whisked thoroughly from the start. To fix it, you can try pressing the glue through a fine-mesh strainer or a cheesecloth to remove the lumps. For future batches, always create a smooth slurry of flour and cold water before adding more liquid or heat.
My Glue Isn’t Sticky Enough
If your glue lacks adhesive power, it might be too thin or the ingredients weren’t properly activated. For flour paste, try cooking it longer to thicken it and activate more starches. For casein glue, ensure you removed enough whey from the curds and that the baking soda reaction was complete. You might need to add a tiny bit more baking soda if the curds still feel acidic.
My Glue Has Molded Quickly
Homemade glues are organic and will eventually mold. Rapid molding often indicates improper storage or insufficient preservation. Ensure you’re storing the glue in an airtight container in the refrigerator. For flour paste, adding salt helps, but it won’t prevent mold indefinitely. Always make smaller batches for immediate use.
Key Takeaways
- Homemade glue is a cost-effective and readily available alternative to commercial adhesives.
- Flour paste is ideal for paper and light crafts, while casein glue offers stronger adhesion for more robust materials.
- Proper mixing and cooking (for flour paste) are crucial for achieving a smooth, effective consistency.
- Thoroughly straining casein curds ensures a strong, water-resistant glue.
- Always store homemade glues in airtight containers in the refrigerator to maximize their shelf life.
- Be mindful of spoilage; homemade glues have a limited lifespan compared to store-bought versions.
Frequently Asked Questions
Can I use whole wheat flour for flour paste?
Yes, you can use whole wheat flour, but it might result in a slightly grittier texture and a darker color. All-purpose flour generally yields a smoother, lighter-colored paste which is often preferred for crafts. Experiment to see which texture you prefer for your specific projects.
How long does homemade glue last?
Flour paste, when stored in an airtight container in the refrigerator, can last for 1 to 2 weeks. Casein glue has a shorter shelf life, typically only a few days, even refrigerated, due to the milk proteins. It’s always best to make smaller batches and use them quickly.
Is homemade glue safe for children?
Yes, both flour paste and casein glue are generally considered non-toxic and safe for children’s crafts, as they are made from food-grade ingredients. However, supervision is always recommended to prevent ingestion, especially with casein glue which contains baking soda and vinegar residues.
Can I make homemade glue waterproof?
Traditional flour paste is not waterproof; it will dissolve if exposed to moisture. Casein glue offers some water resistance due to the nature of the milk proteins, but it is not fully waterproof. For truly waterproof applications, commercial glues are usually necessary.
Our Top Recommended Finds
- Whisk Set: Essential for achieving smooth, lump-free mixtures for both glue types.
- Fine-Mesh Strainer: Perfect for removing lumps from flour paste or straining curds for casein glue.
- Airtight Food Containers: Crucial for proper storage of your homemade glues, extending their freshness.
Unleash Your Inner Craftsperson
You now possess the knowledge to create effective adhesives right in your kitchen.
This skill not only saves money but also provides a deeper understanding of the materials we use every day.
Don’t wait for a project to begin; gather your ingredients and make your first batch of homemade glue today.
Explore the possibilities, experiment with different applications, and discover the joy of crafting with your own handmade supplies.
Your next creative endeavor awaits, ready to be held together by your ingenuity.
Perhaps you’ll even try making homemade paint or paper next!
The world of DIY crafting is vast and rewarding.
Beginner-friendly templates, step-by-step guides,
and weekly project ideas in your inbox.