
How To Clean Gas Stove Top

Beginner-friendly templates, step-by-step guides,
and weekly project ideas in your inbox.
A sparkling clean gas stovetop makes your entire kitchen feel refreshed.
I’ve spent countless hours in the kitchen, and a grimy stovetop is always a challenge I’ve mastered.
This guide shares my proven methods to get yours gleaming again.

Quick Overview
You’re about to transform your gas stovetop from greasy to gleaming.
We will systematically tackle every part, ensuring a thorough clean without damage.
- Time needed: 1-2 hours (depending on grime level)
- Difficulty: Intermediate
- What you’ll need: Dish soap, degreaser, baking soda, white vinegar, microfiber cloths, sponges (non-abrasive), old toothbrush, plastic scraper, rubber gloves, spray bottle, paper towels.
Step-by-Step Instructions
Step 1: Gather Your Supplies and Prepare the Area
Before you begin, ensure you have all necessary cleaning agents and tools within reach.
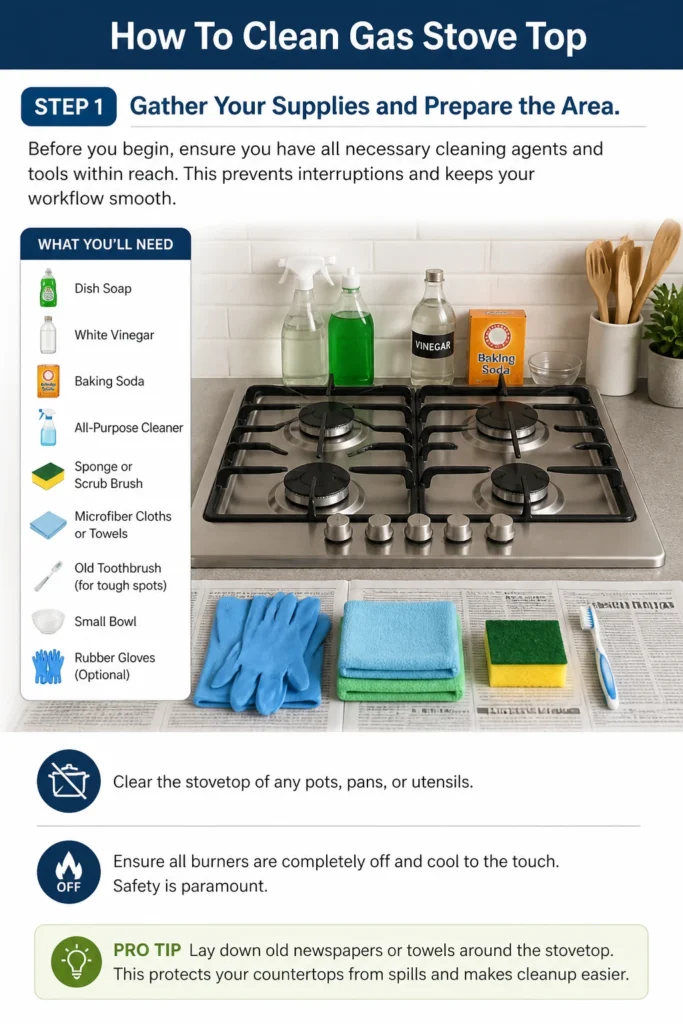
This prevents interruptions and keeps your workflow smooth.
- Collect all the items from the “What you’ll need” list.
- Clear the stovetop of any pots, pans, or utensils.
- Ensure all burners are completely off and cool to the touch. Safety is paramount.
Pro Tip: Lay down old newspapers or towels around the stovetop. This protects your countertops from spills and makes cleanup easier.
Step 2: Remove Grates and Burner Caps
These removable parts are often the dirtiest and benefit from soaking.
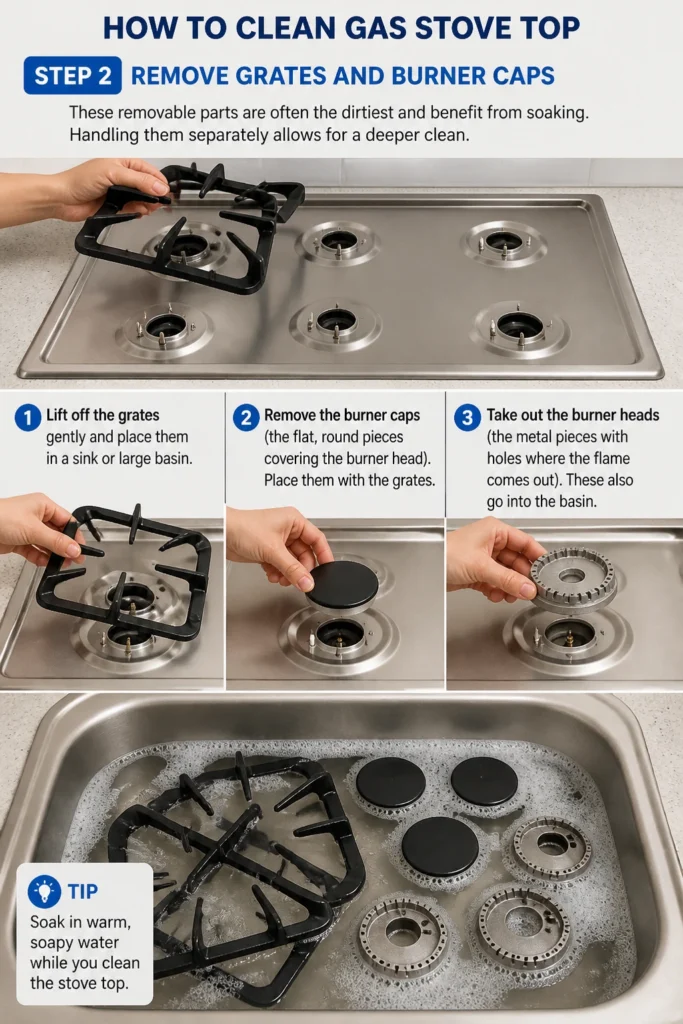
Handling them separately allows for a deeper clean.
- Lift off the grates gently and place them in a sink or large basin.
- Remove the burner caps (the flat, round pieces covering the burner head). Place them with the grates.
- Take out the burner heads themselves (the metal pieces with holes where the flame comes out). These also go into the basin.
Step 3: Soak and Pre-Treat Removable Parts
Soaking helps to loosen baked-on food and grease, making scrubbing much simpler.
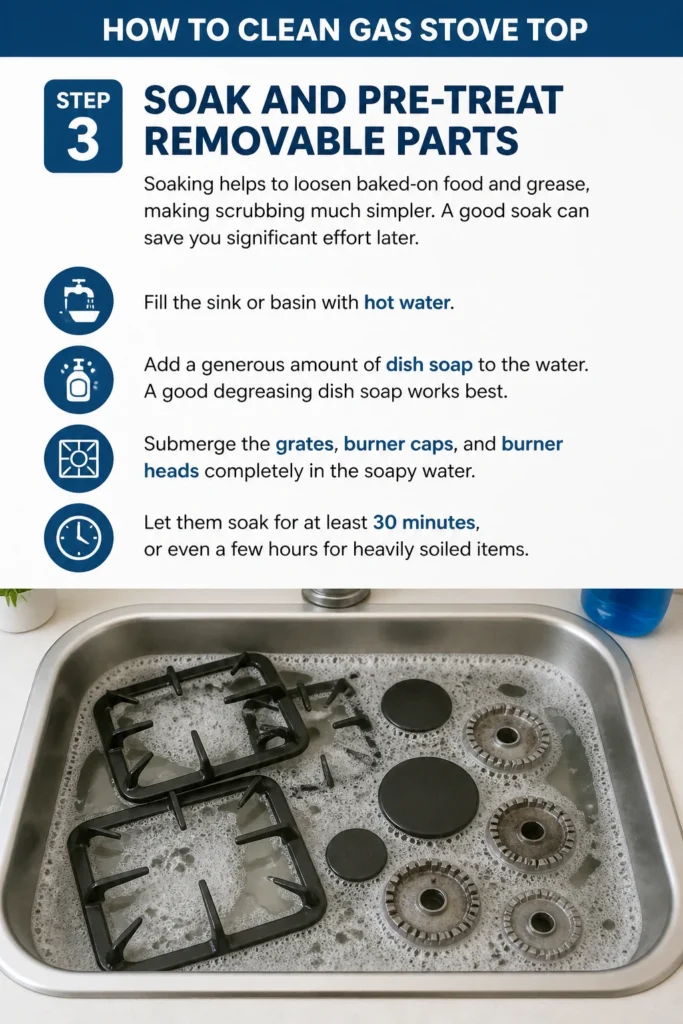
A good soak can save you significant effort later.
- Fill the sink or basin with hot water.
- Add a generous amount of dish soap to the water. A good degreasing dish soap works best.
- Submerge the grates, burner caps, and burner heads completely in the soapy water.
- Let them soak for at least 30 minutes, or even a few hours for heavily soiled items.
Step 4: Tackle Surface Spills and Loose Debris
While parts are soaking, focus on the stovetop surface itself.
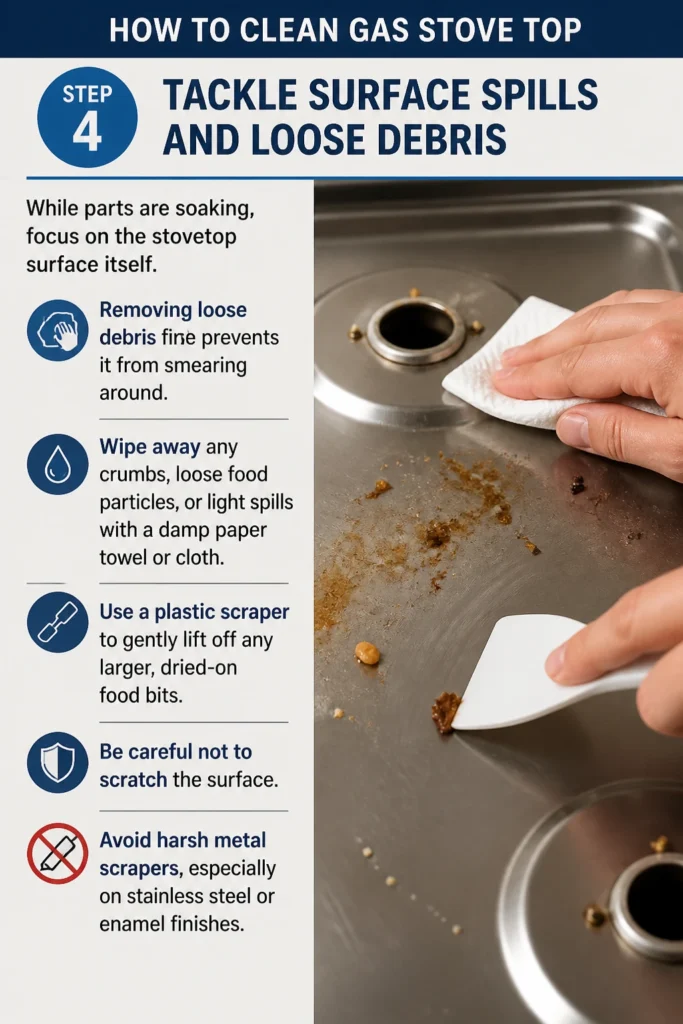
Removing loose debris first prevents it from smearing around.
- Wipe away any crumbs, loose food particles, or light spills with a damp paper towel or cloth.
- Use a plastic scraper to gently lift off any larger, dried-on food bits. Be careful not to scratch the surface.
- Avoid harsh metal scrapers, especially on stainless steel or enamel finishes.
Step 5: Apply a Cleaning Solution to the Stovetop Surface
Now it’s time to break down the stubborn grease and grime on the main surface.
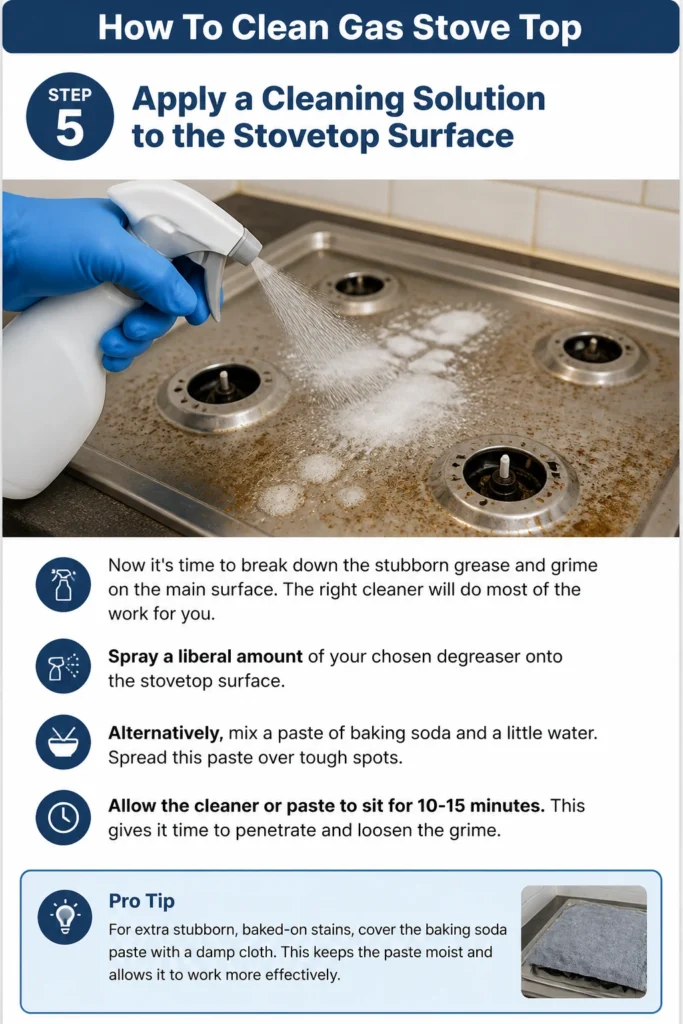
The right cleaner will do most of the work for you.
- Spray a liberal amount of your chosen degreaser onto the stovetop surface.
- Alternatively, mix a paste of baking soda and a little water. Spread this paste over tough spots.
- Allow the cleaner or paste to sit for 10-15 minutes. This gives it time to penetrate and loosen the grime.
Pro Tip: For extra stubborn, baked-on stains, cover the baking soda paste with a damp cloth. This keeps the paste moist and allows it to work more effectively.
Step 6: Scrub the Stovetop Surface
After the cleaner has had time to work, it’s time for some gentle scrubbing.
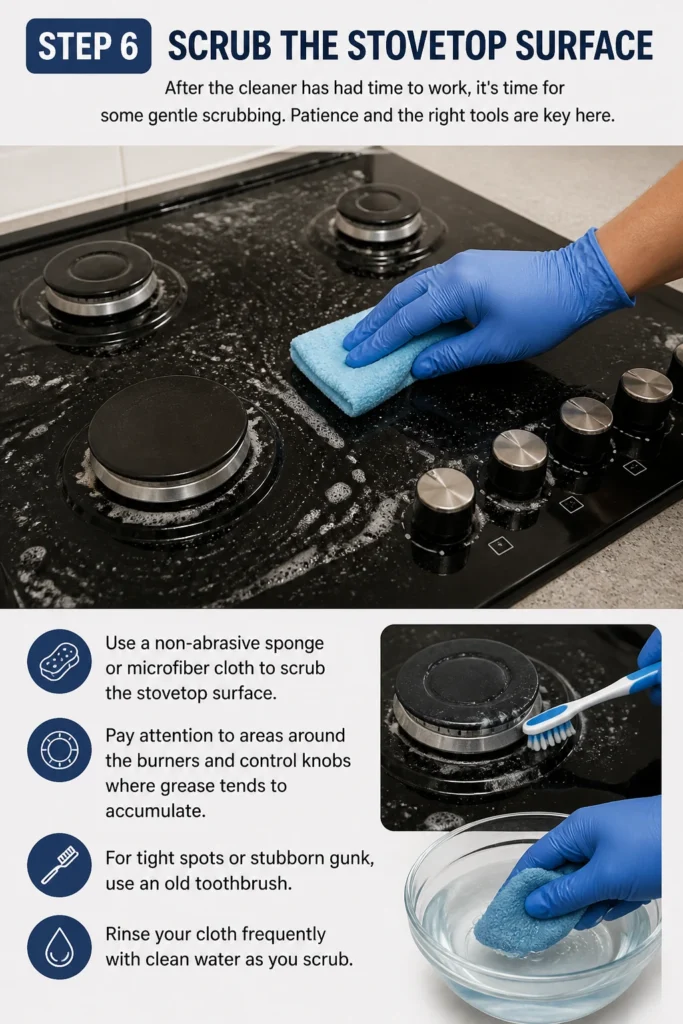
Patience and the right tools are key here.
- Use a non-abrasive sponge or microfiber cloth to scrub the stovetop surface.
- Pay attention to areas around the burners and control knobs where grease tends to accumulate.
- For tight spots or stubborn gunk, use an old toothbrush.
- Rinse your cloth frequently with clean water as you scrub.
Step 7: Clean the Soaked Removable Parts
Return to the grates, caps, and burner heads that have been soaking.
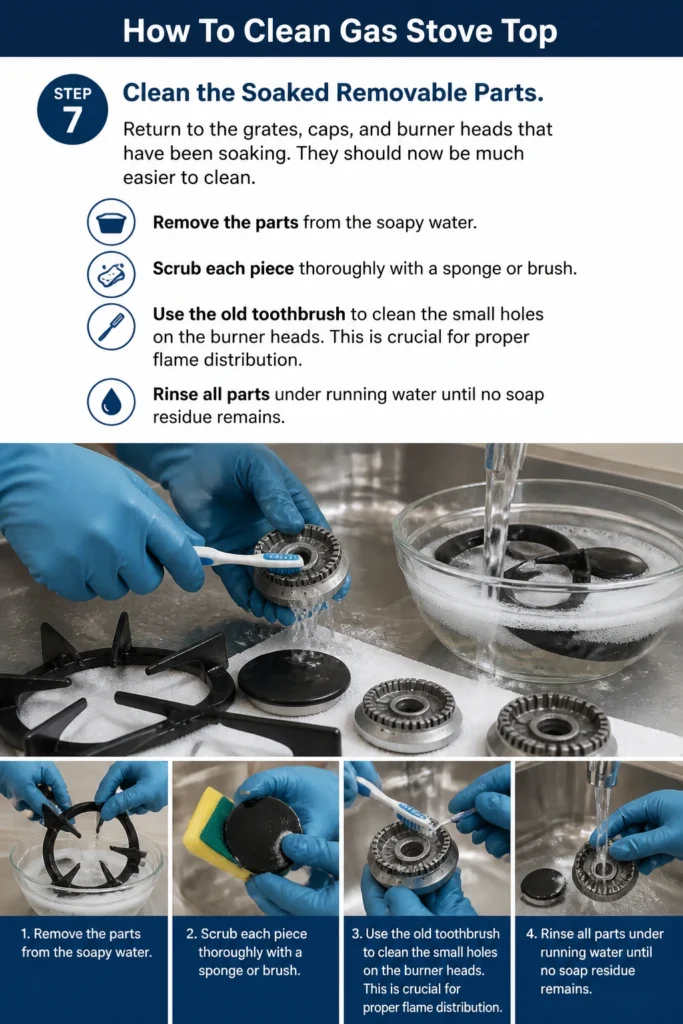
They should now be much easier to clean.
- Remove the parts from the soapy water.
- Scrub each piece thoroughly with a sponge or brush.
- Use the old toothbrush to clean the small holes on the burner heads. This is crucial for proper flame distribution.
- Rinse all parts under running water until no soap residue remains.
Step 8: Dry and Reassemble
Proper drying prevents water spots and ensures safe operation of your gas stove.
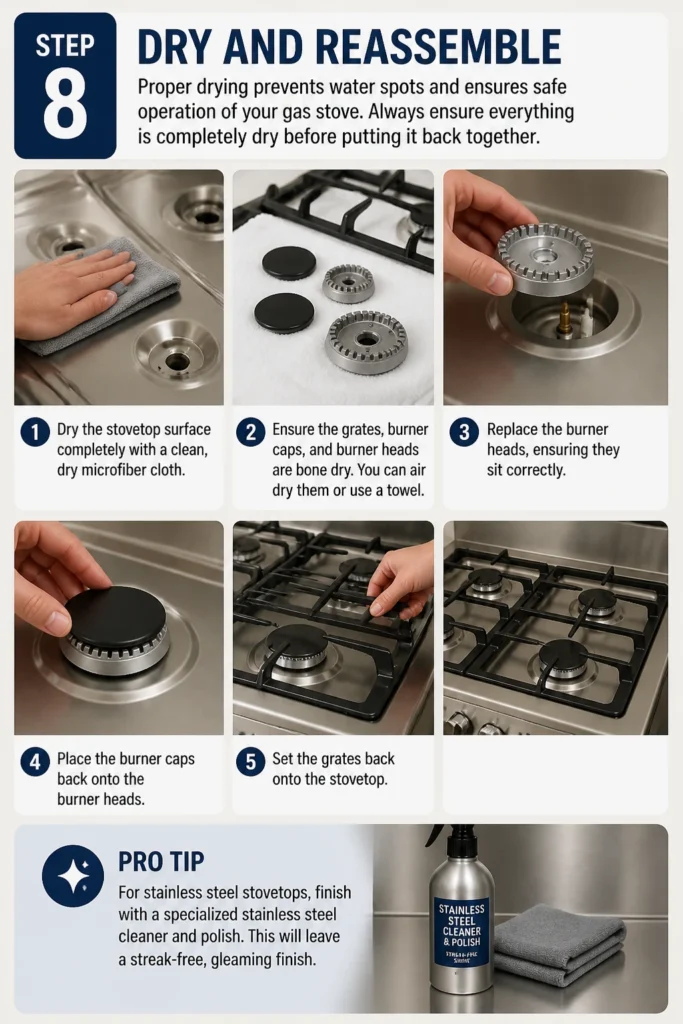
Always ensure everything is completely dry before putting it back together.
- Dry the stovetop surface completely with a clean, dry microfiber cloth.
- Ensure the grates, burner caps, and burner heads are bone dry. You can air dry them or use a towel.
- Replace the burner heads, ensuring they sit correctly.
- Place the burner caps back onto the burner heads.
- Set the grates back onto the stovetop.
Pro Tip: For stainless steel stovetops, finish with a specialized stainless steel cleaner and polish. This will leave a streak-free, gleaming finish.
Common Mistakes to Avoid
Using Abrasive Cleaners or Scrapers
Many people reach for steel wool or harsh scouring pads to tackle tough stains. This is a common mistake that can permanently scratch and damage the finish of your stovetop, whether it’s enamel, stainless steel, or porcelain. Always opt for non-abrasive sponges, microfiber cloths, or plastic scrapers to protect your appliance’s surface.
Ignoring Burner Holes
Failing to clean the tiny holes on the burner heads can lead to uneven flames, reduced efficiency, and even safety hazards. Food debris and grease can clog these orifices, causing the flame to sputter or become weak. Always use a small brush or an old toothbrush to clear these holes during your cleaning routine.
Not Drying Parts Thoroughly
Reassembling your stovetop while parts are still wet can lead to several problems. Water spots can form, especially on stainless steel, and moisture can also interfere with the proper ignition of your burners. Ensure all components, especially the burner heads and caps, are completely dry before putting them back in place to prevent issues and maintain appearance.
Overlooking Regular Maintenance
Waiting for severe grime to build up makes cleaning a much more arduous task. A common mistake is to only clean the stovetop when it’s visibly filthy, rather than performing quick wipe-downs after each use. Regular, light cleaning prevents food from baking onto the surface and significantly reduces the effort required for deep cleans.
Troubleshooting
Burner Not Igniting
If a burner isn’t igniting after cleaning, the most likely culprit is a wet or clogged igniter. Ensure the igniter electrode (the small white ceramic prong) is completely dry and free of debris. Gently wipe it with a dry cloth or use a small brush to clear any residue. Sometimes, simply allowing it to air dry for a bit longer can resolve the issue.
Uneven or Weak Flame
An uneven or weak flame usually indicates that the burner head ports are partially blocked. This can happen if food debris or cleaning solution residue clogs the small holes where the gas exits. Carefully remove the burner cap and head, and use a thin wire or an old toothbrush to clear each port. Make sure the burner head is properly seated when reassembling.
Water Spots or Streaks on Stainless Steel
Water spots or streaks often appear if the stovetop wasn’t dried immediately and thoroughly after cleaning, or if hard water was used. To fix this, re-wet the surface slightly with a clean, damp microfiber cloth, then immediately dry and buff with a separate, dry microfiber cloth. For persistent streaks, a specialized stainless steel cleaner and polish will often yield the best results, applied in the direction of the grain.
Key Takeaways
- Always ensure the stovetop is cool and burners are off before starting.
- Soaking removable parts significantly reduces scrubbing effort for baked-on grime.
- Use non-abrasive tools and cleaners to protect your stovetop’s finish.
- Thoroughly clean burner ports and igniters for optimal flame performance.
- Completely dry all components before reassembly to prevent issues and water spots.
- Regular, light cleaning after each use saves time and effort in the long run.
Frequently Asked Questions
Can I put gas stove grates in the dishwasher?
It depends on the grate material. Many cast iron grates are not dishwasher safe, as the harsh detergents and high heat can remove their seasoning, leading to rust. Enamel-coated grates or lighter metal grates might be dishwasher safe, but always check your stove’s manual first. Handwashing is generally the safest bet for longevity.
How often should I deep clean my gas stovetop?
For most households, a deep clean every 1-2 months is sufficient, depending on your cooking frequency and spill habits. However, it’s crucial to wipe down your stovetop after every use to prevent food from baking on and making deep cleans much harder. Address spills immediately to prevent stubborn stains.
What if I have really stubborn, burnt-on food?
For extremely stubborn burnt-on food, apply a thick paste of baking soda and a small amount of water directly onto the stain. Cover it with a damp cloth or plastic wrap to keep it moist, and let it sit for several hours, or even overnight. This extended soaking time allows the baking soda to break down the grime, making it much easier to scrape off with a plastic scraper.
Is vinegar safe for all stovetop surfaces?
White vinegar is generally safe for most stovetop surfaces, including stainless steel and enamel, and is excellent for cutting grease and dissolving hard water spots. However, it’s mildly acidic, so avoid using it on natural stone countertops nearby without proper sealing. Always dilute it with water for general cleaning and rinse thoroughly.
Our Top Recommended Finds
- Microfiber Cleaning Cloths: Essential for streak-free drying and gentle scrubbing without scratching.
- Heavy-Duty Degreaser Spray: Cuts through tough grease and oil quickly, reducing scrubbing time significantly.
- Plastic Scraper Set: Perfect for lifting baked-on food without damaging delicate stovetop surfaces.
Embrace Your Spotless Kitchen
You’ve now mastered the art of cleaning your gas stovetop.
Enjoy the satisfaction of a pristine cooking area that’s not only clean but also functions at its best.
Make this routine a regular part of your kitchen care.
Why not tackle the oven next and complete your kitchen’s transformation?
Beginner-friendly templates, step-by-step guides,
and weekly project ideas in your inbox.