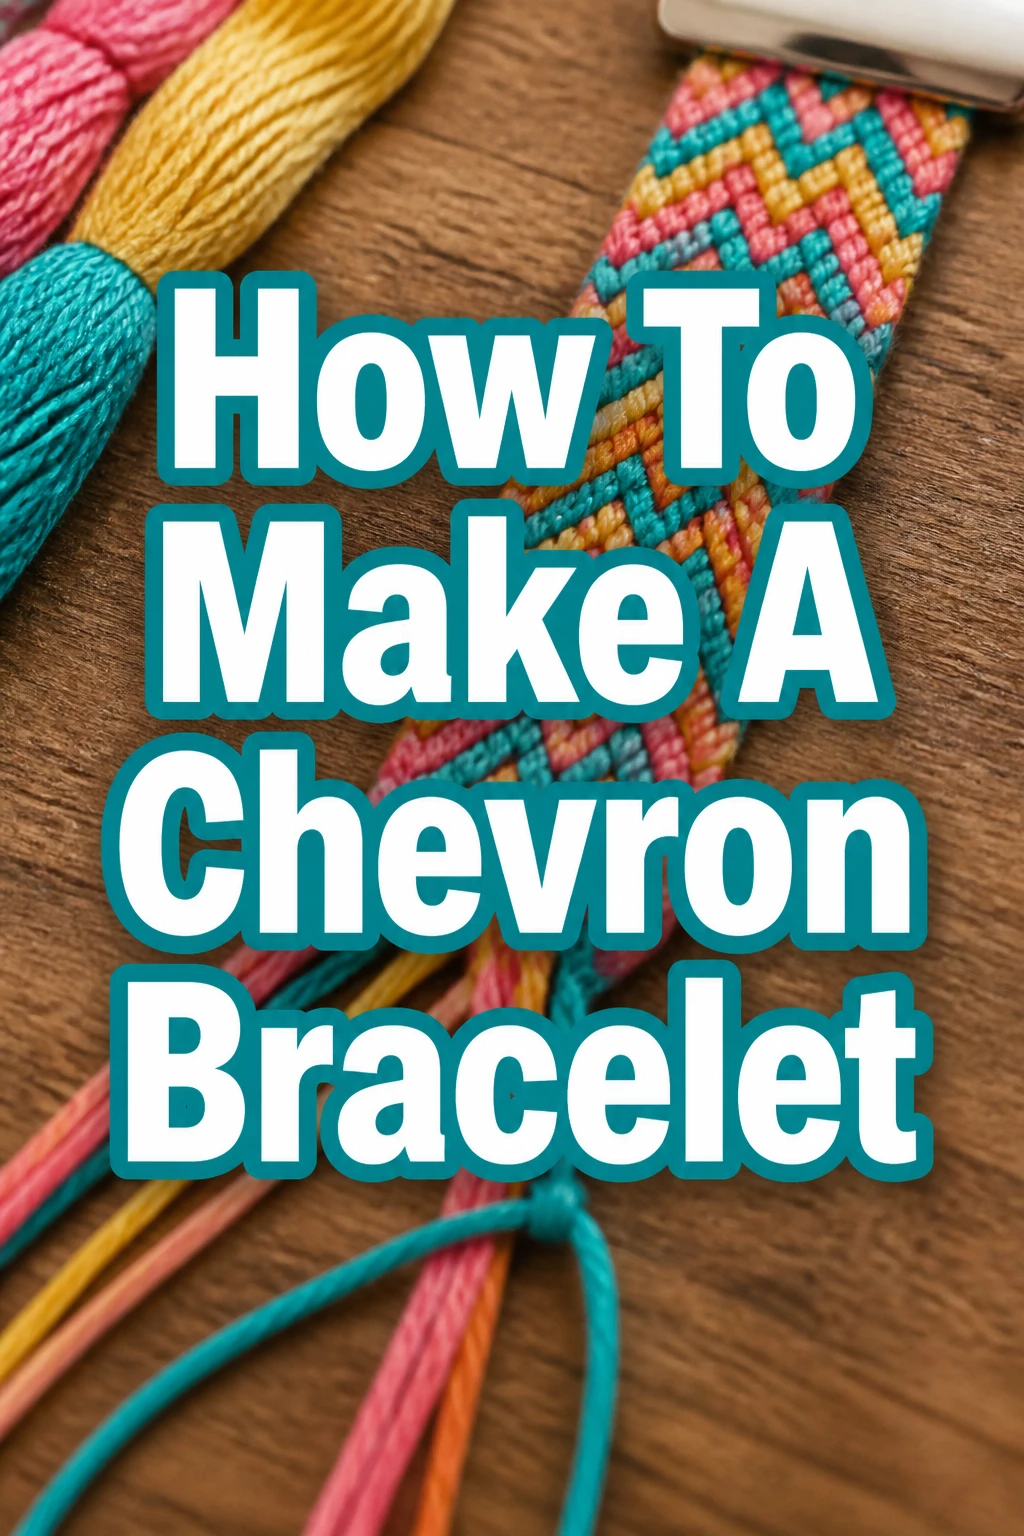
How To Make A Chevron Bracelet

Beginner-friendly templates, step-by-step guides,
and weekly project ideas in your inbox.
Making friendship bracelets is a classic hobby that transforms simple thread into a wearable piece of art.
I spent many childhood summers under a shady tree perfecting these knots until they were perfectly uniform.
This guide shares those years of experience to help you create a professional-looking chevron bracelet from scratch.
Quick Overview
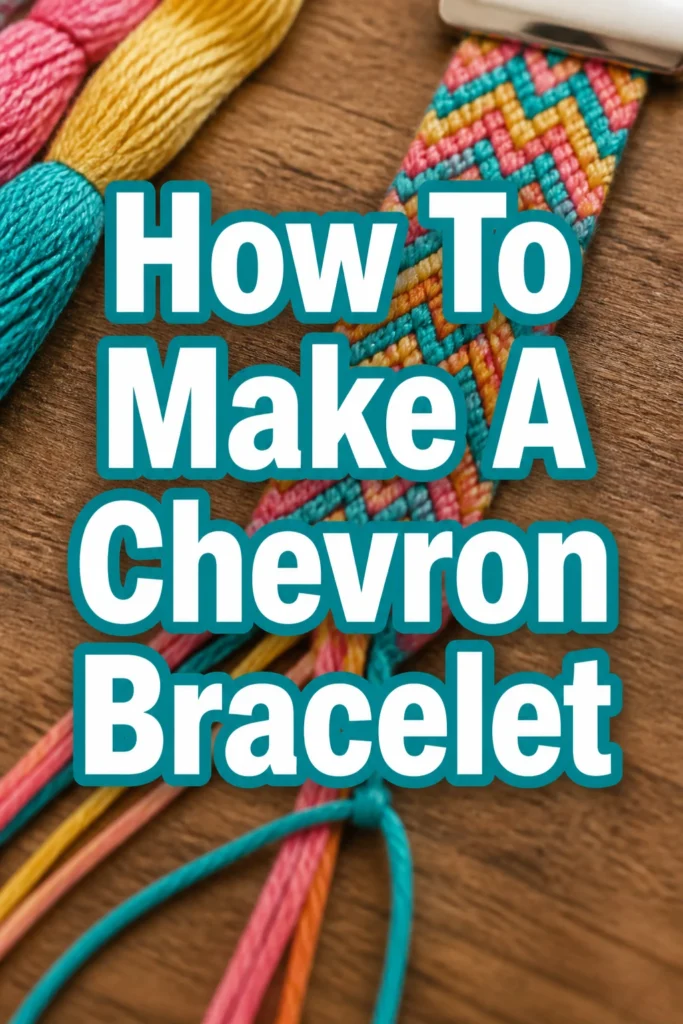
The chevron bracelet is a staple of the friendship bracelet world, known for its iconic V-shaped pattern.
While it looks intricate, it relies on mastering just two basic knots that you will repeat in a specific sequence.
- Time needed: 1 to 2 hours depending on desired length
- Difficulty: Beginner
- What you’ll need: Embroidery floss, scissors, masking tape or a clipboard, and a ruler
Step 1: Select Your Colors
Choose at least three different colors of embroidery floss to make the pattern visible.
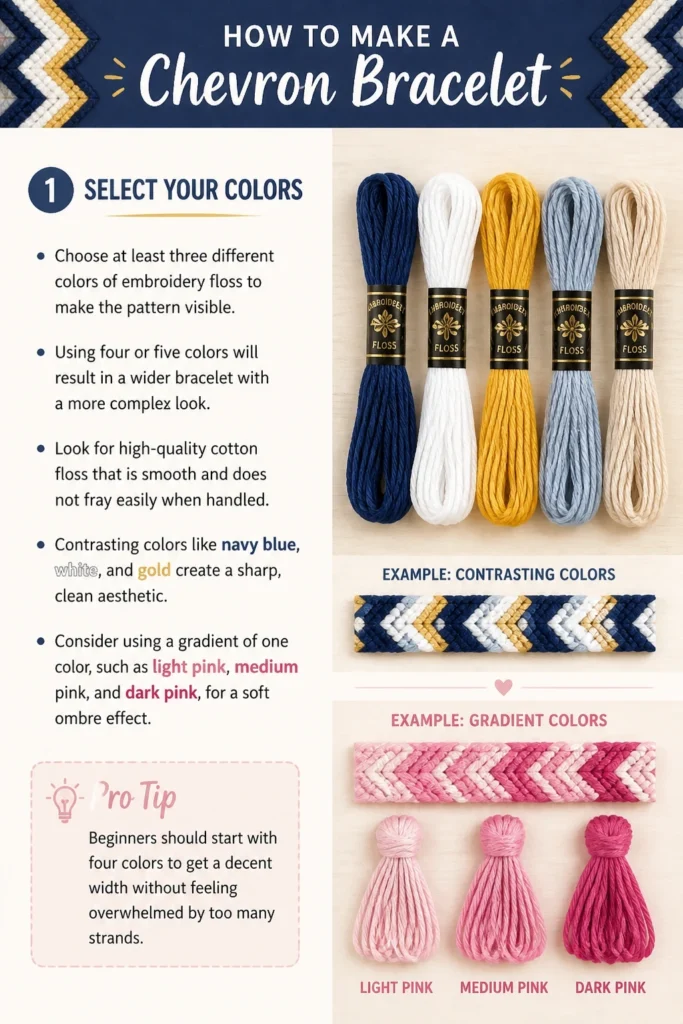
Using four or five colors will result in a wider bracelet with a more complex look.
Look for high-quality cotton floss that is smooth and does not fray easily when handled.
Contrasting colors like navy blue, white, and gold create a sharp, clean aesthetic.
Consider using a gradient of one color, such as light pink, medium pink, and dark pink, for a soft ombre effect.
Pro Tip: Beginners should start with four colors to get a decent width without feeling overwhelmed by too many strands.
Step 2: Measure and Cut the Thread
Pull a length of floss from your first color that is approximately 60 to 70 inches long.
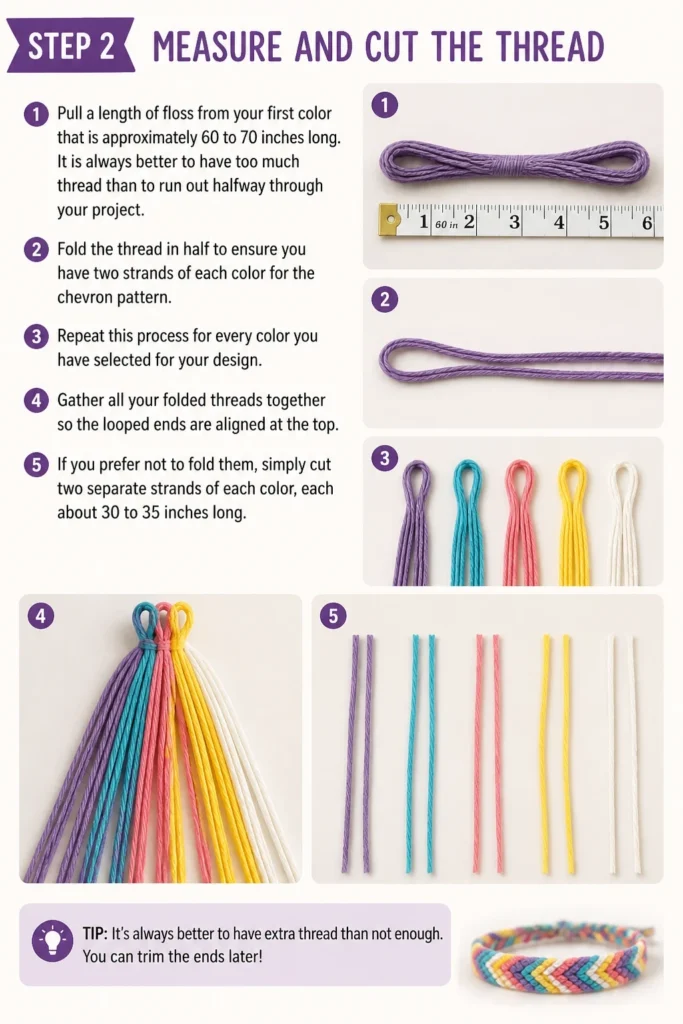
It is always better to have too much thread than to run out halfway through your project.
Fold the thread in half to ensure you have two strands of each color for the chevron pattern.
Repeat this process for every color you have selected for your design.
Gather all your folded threads together so the looped ends are aligned at the top.
If you prefer not to fold them, simply cut two separate strands of each color, each about 30 to 35 inches long.
Step 3: Secure the Top
Tie a simple overhand knot about an inch or two below the top of the bundle.
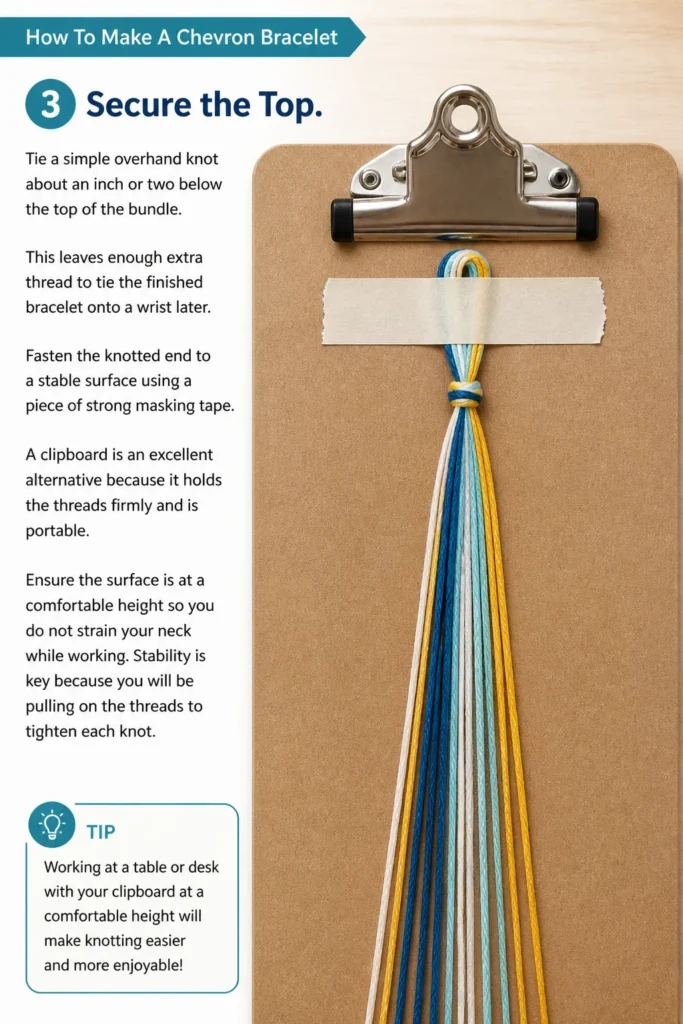
This leaves enough extra thread to tie the finished bracelet onto a wrist later.
Fasten the knotted end to a stable surface using a piece of strong masking tape.
A clipboard is an excellent alternative because it holds the threads firmly and is portable.
Ensure the surface is at a comfortable height so you do not strain your neck while working.
Stability is key because you will be pulling on the threads to tighten each knot.
Step 4: Arrange the Mirror Image
Separate your threads into two equal groups, one for the left side and one for the right.
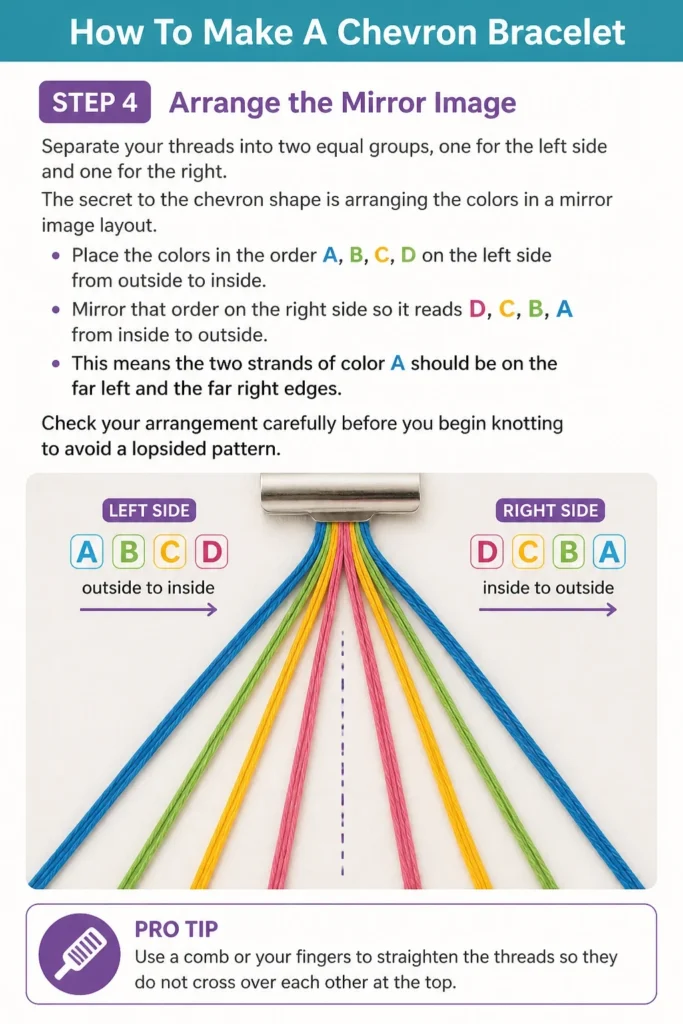
The secret to the chevron shape is arranging the colors in a mirror image layout.
Place the colors in the order A, B, C, D on the left side from outside to inside.
Mirror that order on the right side so it reads D, C, B, A from inside to outside.
This means the two strands of color A should be on the far left and the far right edges.
Check your arrangement carefully before you begin knotting to avoid a lopsided pattern.
Pro Tip: Use a comb or your fingers to straighten the threads so they do not cross over each other at the top.
Step 5: Master the Forward Knot
Pick up the outermost thread on the left side, which we will call the working strand.
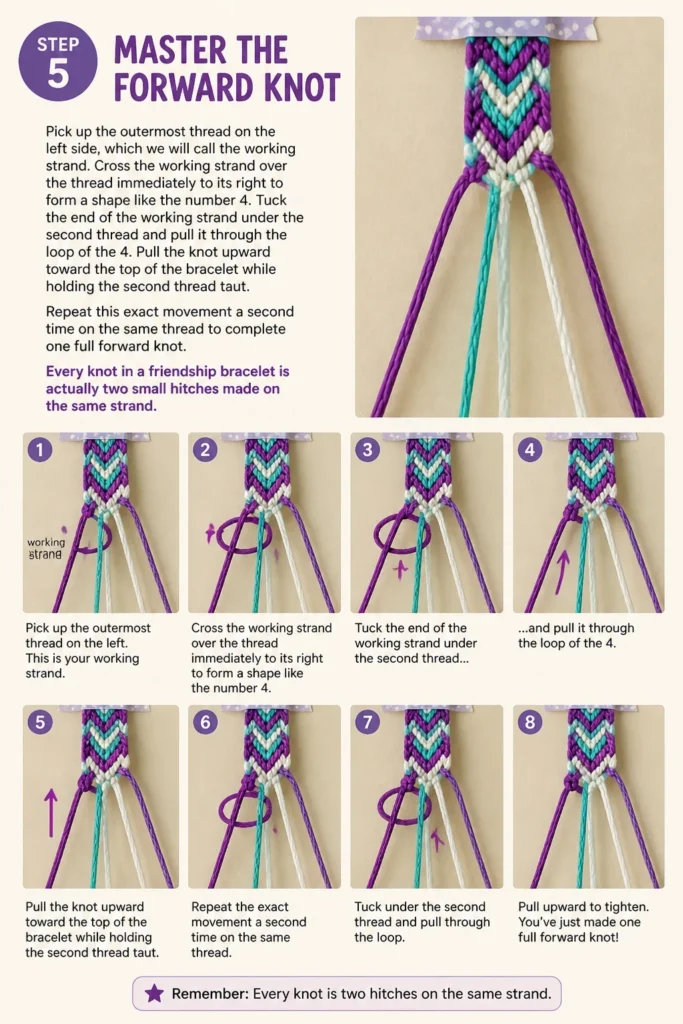
Cross the working strand over the thread immediately to its right to form a shape like the number 4.
Tuck the end of the working strand under the second thread and pull it through the loop of the 4.
Pull the knot upward toward the top of the bracelet while holding the second thread taut.
Repeat this exact movement a second time on the same thread to complete one full forward knot.
Every “knot” in a friendship bracelet is actually two small hitches made on the same strand.
Step 6: Complete the Left Half
Continue using that same outermost working strand to knot across all the threads on the left side.
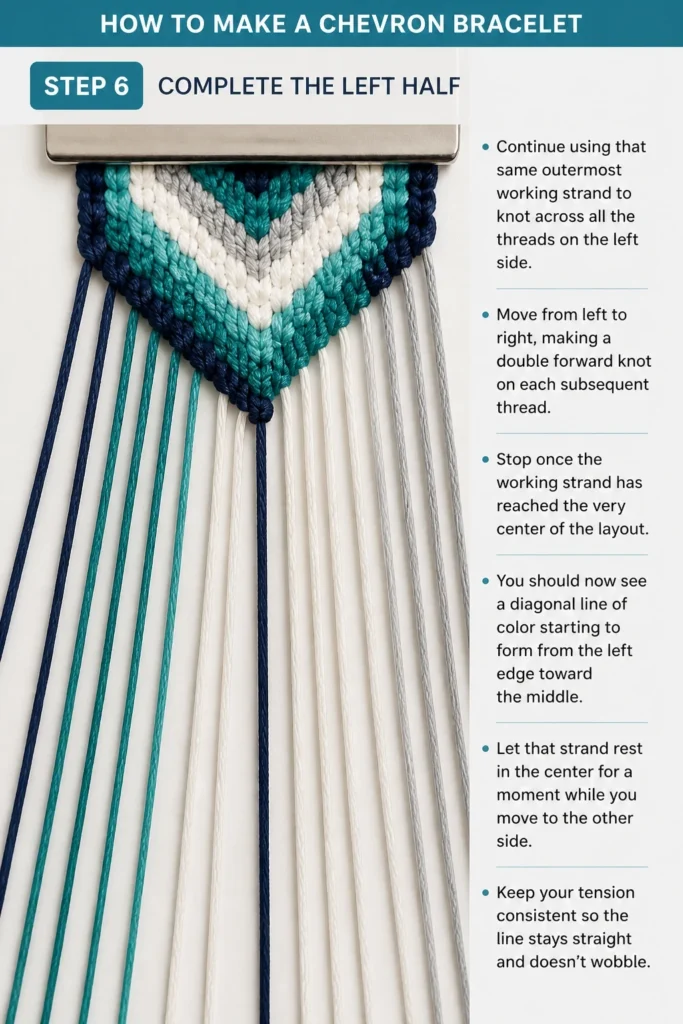
Move from left to right, making a double forward knot on each subsequent thread.
Stop once the working strand has reached the very center of the layout.
You should now see a diagonal line of color starting to form from the left edge toward the middle.
Let that strand rest in the center for a moment while you move to the other side.
Keep your tension consistent so the line stays straight and doesn’t wobble.
Step 7: Master the Backward Knot
Identify the outermost thread on the far right side to begin working the right half.
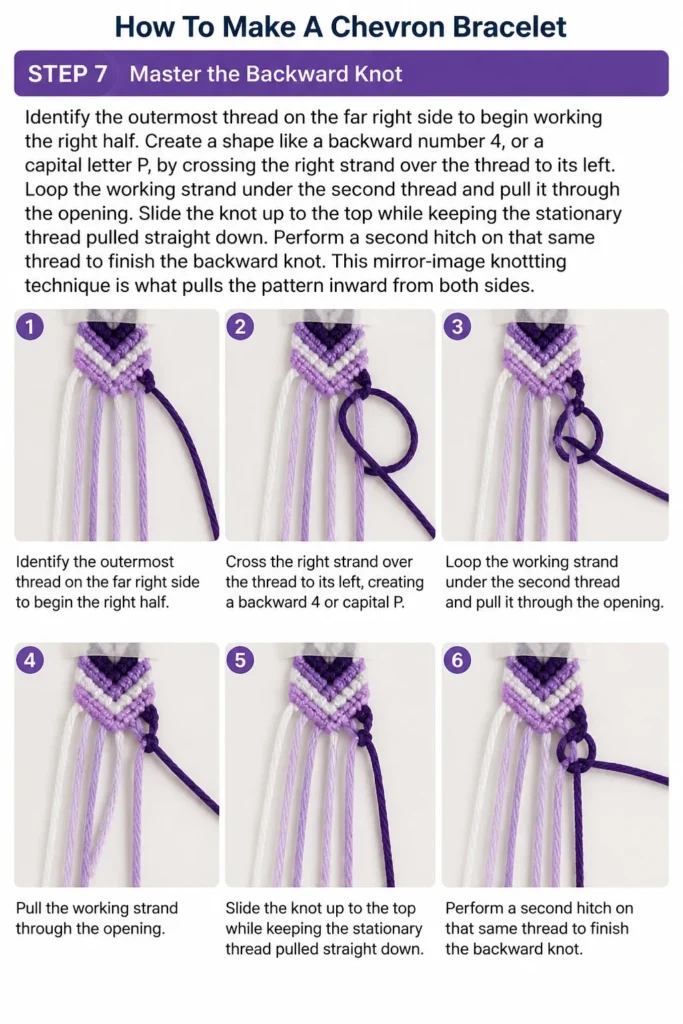
Create a shape like a backward number 4, or a capital letter P, by crossing the right strand over the thread to its left.
Loop the working strand under the second thread and pull it through the opening.
Slide the knot up to the top while keeping the stationary thread pulled straight down.
Perform a second hitch on that same thread to finish the backward knot.
This mirror-image knotting technique is what pulls the pattern inward from both sides.
Step 8: Complete the Right Half
Work your way from the far right edge toward the center using the same working strand.
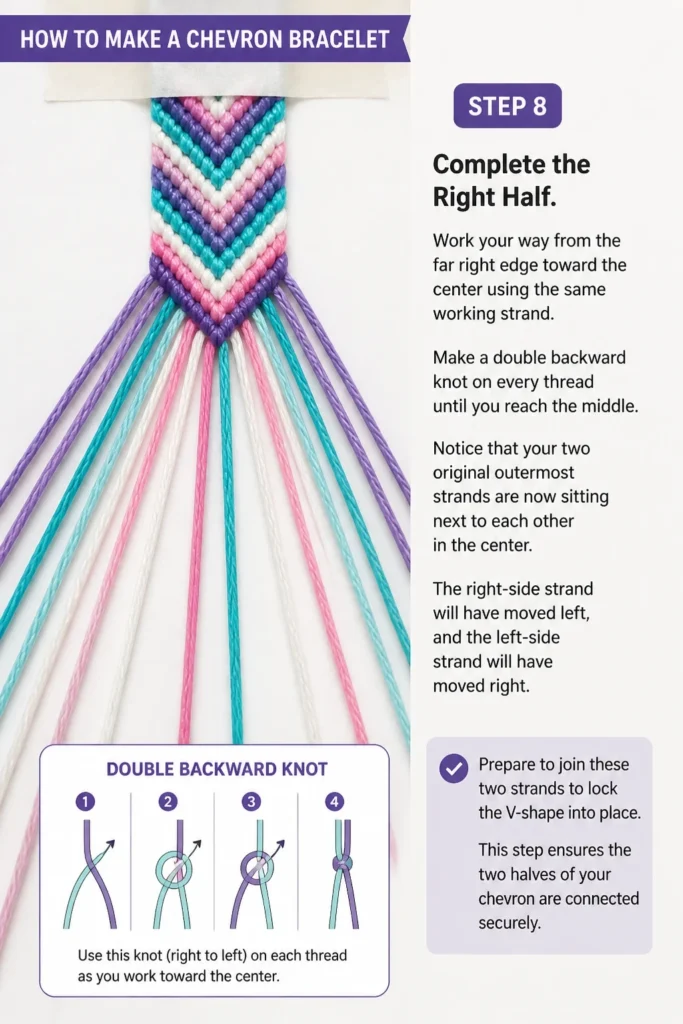
Make a double backward knot on every thread until you reach the middle.
Notice that your two original outermost strands are now sitting next to each other in the center.
The right-side strand will have moved left, and the left-side strand will have moved right.
Prepare to join these two strands to lock the V-shape into place.
This step ensures the two halves of your chevron are connected securely.
Step 9: Join the Center
Take the two strands that are now in the middle and tie them together.
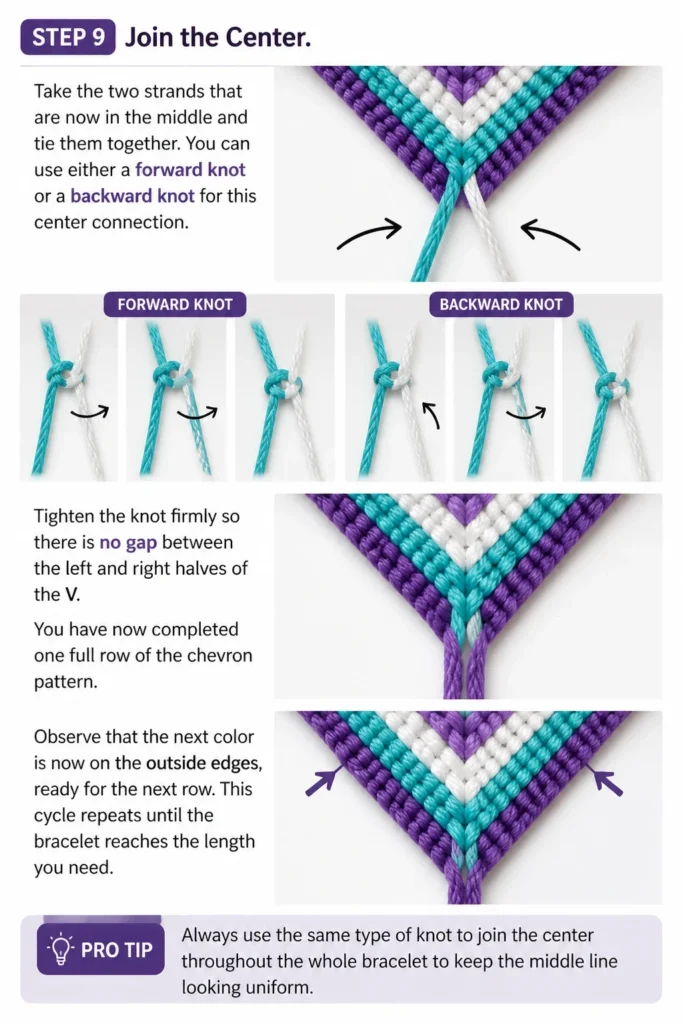
You can use either a forward knot or a backward knot for this center connection.
Tighten the knot firmly so there is no gap between the left and right halves of the V.
You have now completed one full row of the chevron pattern.
Observe that the next color is now on the outside edges, ready for the next row.
This cycle repeats until the bracelet reaches the length you need.
Pro Tip: Always use the same type of knot to join the center throughout the whole bracelet to keep the middle line looking uniform.
Step 10: Repeat and Finish
Start again at Step 5 using the new outermost colors on each side.
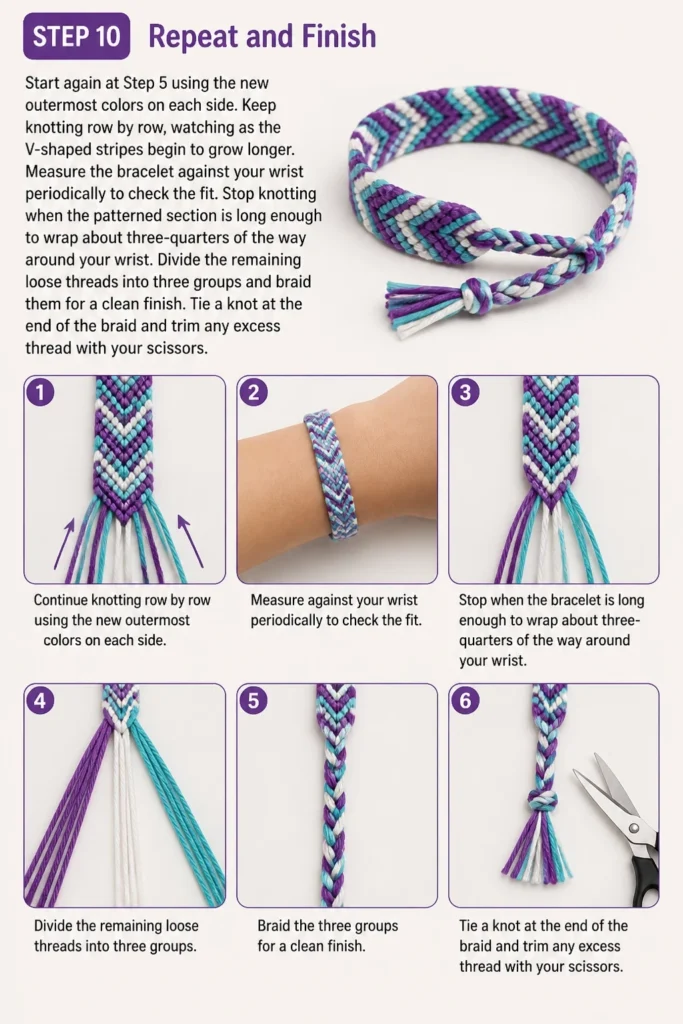
Keep knotting row by row, watching as the V-shaped stripes begin to grow longer.
Measure the bracelet against your wrist periodically to check the fit.
Stop knotting when the patterned section is long enough to wrap about three-quarters of the way around your wrist.
Divide the remaining loose threads into three groups and braid them for a clean finish.
Tie a knot at the end of the braid and trim any excess thread with your scissors.
Common Mistakes to Avoid
Inconsistent Knot Tension
If you pull some knots tighter than others, the edges of your bracelet will look wavy or distorted. Try to apply the same amount of pressure to every single hitch you make. If a row looks too loose, you can sometimes use a safety pin to gently tighten the loops before moving on.
Mixing Up the Thread Order
The chevron pattern relies entirely on the threads being in the correct sequence at the start of every row. If you grab the wrong thread from the middle of the pack, the V-shape will have a break in the color. Always lay your threads out flat and double-check their order before starting a new row.
Forgetting the Second Hitch
Each “knot” in this project must consist of two identical hitches. If you only do one hitch, the knot will be too small and the thread will likely flip to the wrong side. This mistake causes the bracelet to twist and prevents the color from showing up correctly on the front.
Troubleshooting
The Bracelet is Curling
Curling usually happens when your knots are significantly tighter than the tension of the interior threads. Try to relax your hands and don’t pull the knots with maximum force. You can also try pinning the finished part of the bracelet down more frequently to keep it flat as you work.
The V-Shape Looks Like a Straight Line
This occurs if you are using the same knot direction for the entire width of the bracelet instead of mirroring them. Remember that the left side must use forward knots and the right side must use backward knots. If they all go one way, you will end up with a candy stripe pattern instead of a chevron.
Running Out of One Color
If one strand becomes too short to continue, you can tie a new piece of thread onto the short end using a very small, tight knot. Try to position this knot so it stays on the backside of the bracelet. In the future, remember that the outermost colors in your starting layout often get used up slightly faster.
Key Takeaways
- The chevron pattern is created by mirroring colors on the left and right sides.
- Every knot is actually two small hitches made on the same strand of thread.
- Left-side threads move toward the center using forward knots (the 4-shape).
- Right-side threads move toward the center using backward knots (the P-shape).
- The two center threads must be knotted together to close the V-shape.
- Consistent tension is the most important factor for a professional finish.
Frequently Asked Questions
How many strings do I need for a thick bracelet?
To make a thicker bracelet, simply add more colors or use two strands of each color instead of one. A standard chevron usually uses 6 to 10 total strands. If you go beyond 12 strands, the bracelet may become difficult to manage for a beginner.
Can I use yarn instead of embroidery floss?
You can use yarn, but the resulting bracelet will be much chunkier and the knots will look less defined. Embroidery floss is preferred because its size allows for intricate detail and a flat profile. If you use yarn, choose a thin, non-fuzzy variety for the best results.
How do I make the bracelet adjustable?
Instead of tying it on with a permanent knot, you can create a loop at the beginning of the project. When you finish, divide the end threads into two braids. Feed one braid through the loop and tie it to the other braid to make it easy to take on and off.
What if I make a mistake and need to undo a knot?
You can use a safety pin or a tapestry needle to gently pick apart the hitches. Insert the point of the pin into the center of the knot and wiggle it until the thread loosens. Be careful not to snag or fray the floss while you are doing this.
Our Top Recommended Finds
- Variegated Embroidery Floss Pack: These threads change color along the strand, creating a multi-tonal chevron without needing to switch threads.
- Metal Clipboard: A sturdy clipboard provides the perfect tension and a flat surface for knotting anywhere, from the couch to the car.
- Thread Organizer Box: Keeping your floss separated by color prevents tangles and makes it much easier to plan your next design.
Expanding Your Bracelet Collection
Once you have mastered the chevron, you have the foundation for almost every other friendship bracelet pattern.
You can try the “border chevron” by adding a permanent color on the edges or explore the “diamond pattern” which is essentially two chevrons mirrored vertically.
The skills of maintaining tension and understanding knot directions are universal across this craft.
Grab your favorite colors and start your first row today to see how quickly the pattern emerges.
The more you practice, the faster your hands will move, and soon you will be creating complex designs for all your friends.
Beginner-friendly templates, step-by-step guides,
and weekly project ideas in your inbox.