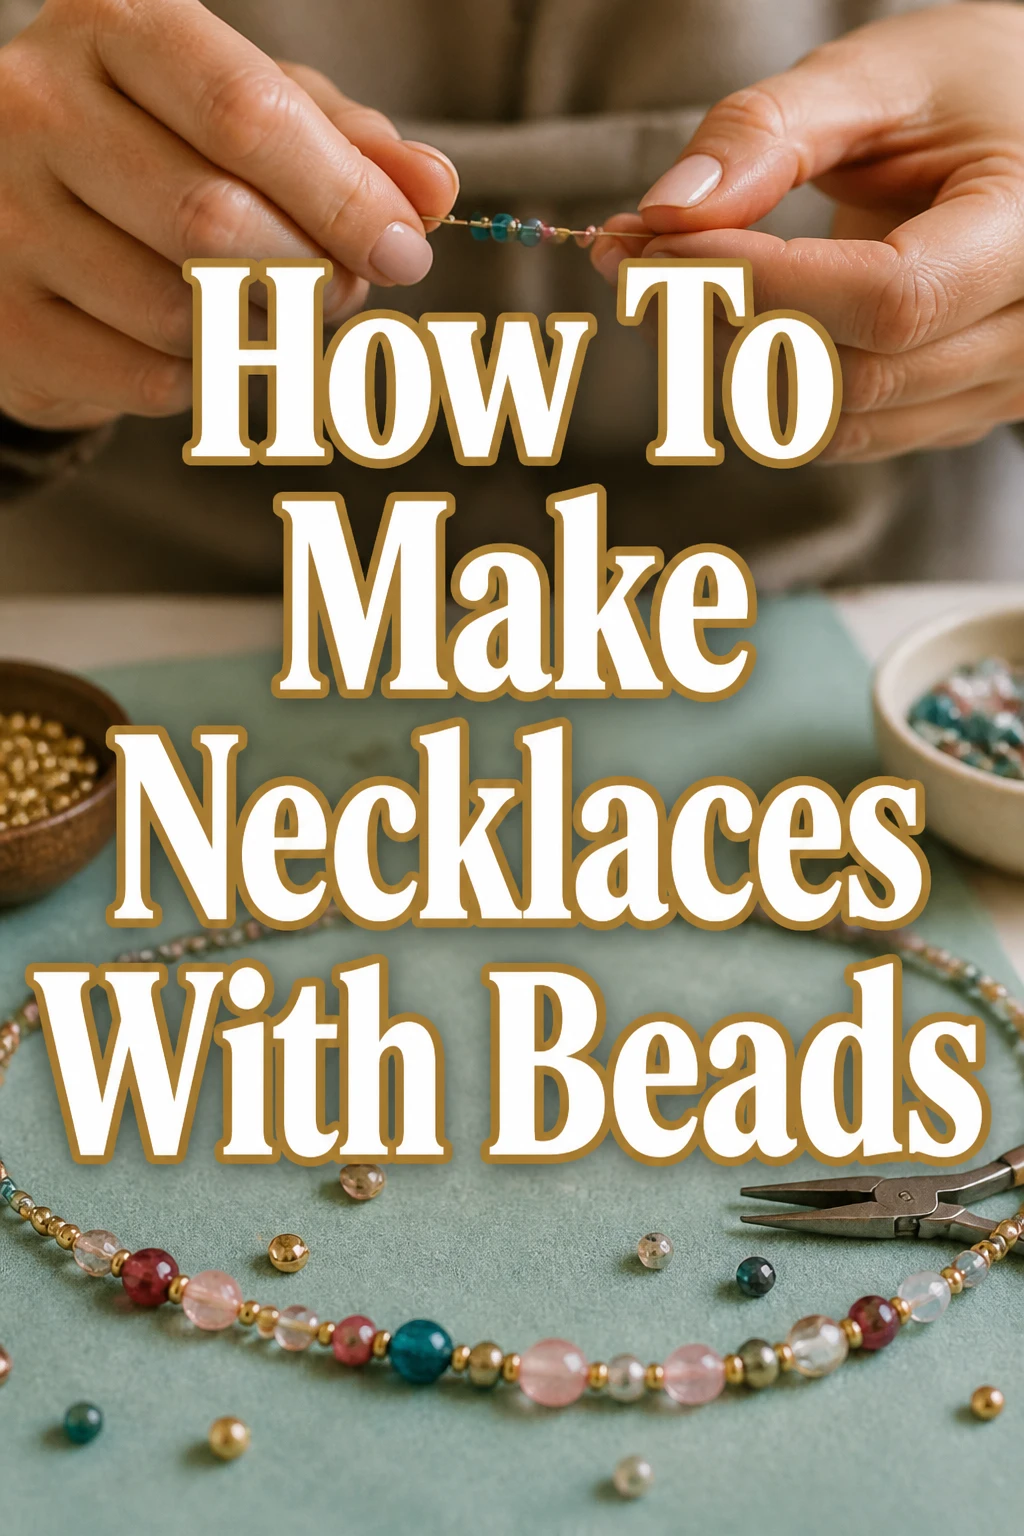
How To Make Necklaces With Beads

Beginner-friendly templates, step-by-step guides,
and weekly project ideas in your inbox.
There’s a special satisfaction that comes from creating something beautiful with your own hands.
I remember the joy of finishing my very first beaded necklace, a simple design that still holds a cherished place in my memory.
This guide will walk you through the process, sharing practical tips I’ve learned over years of beading, so you can craft stunning pieces with confidence.
Quick Overview
You’re about to embark on a creative journey, transforming simple beads into a wearable work of art.
By the end of this guide, you’ll have a beautifully crafted necklace and the skills to make many more.
- Time needed: 1-3 hours (depending on design complexity)
- Difficulty: Beginner
- What you’ll need: Beads, beading wire, crimp beads, a clasp, and basic jewelry tools
Step-by-Step Instructions
Step 1: Gather Your Materials and Tools
Collect all your chosen beads, beading wire, crimp beads, and a suitable clasp.
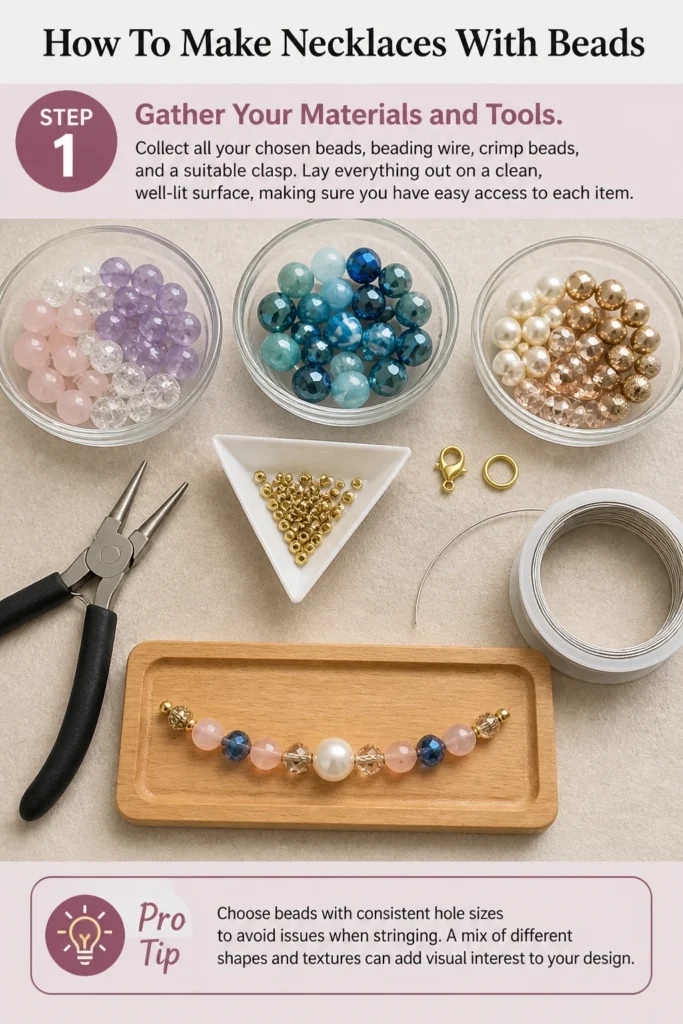
Lay everything out on a clean, well-lit surface, making sure you have easy access to each item.
Pro Tip: Choose beads with consistent hole sizes to avoid issues when stringing. A mix of different shapes and textures can add visual interest to your design.
Step 2: Plan Your Necklace Design
Arrange your beads in the desired order on a bead board or a soft towel.
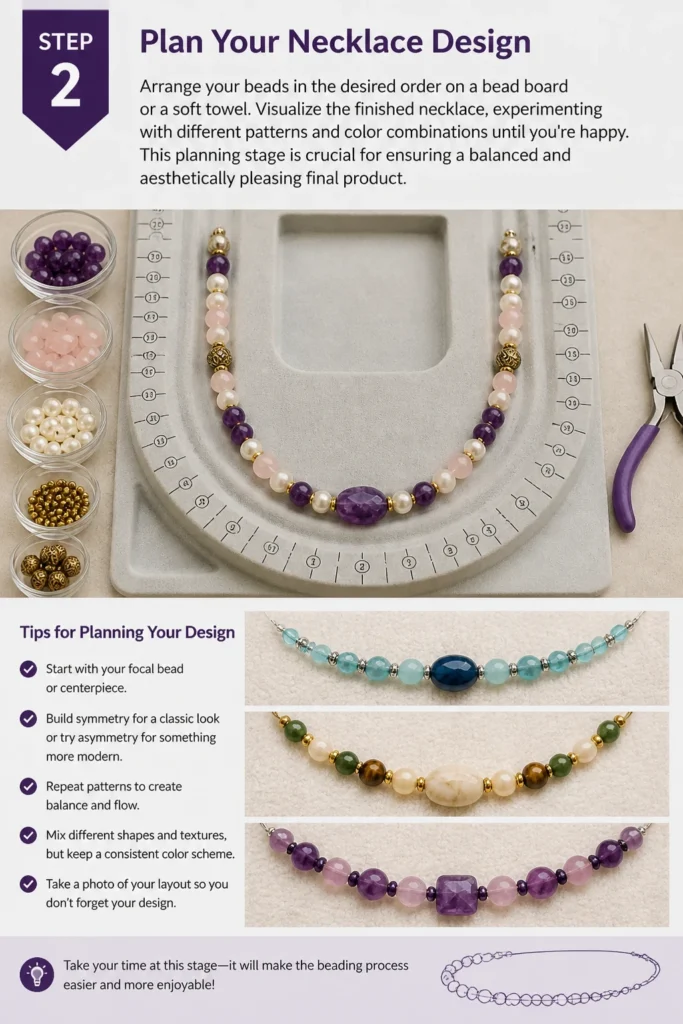
Visualize the finished necklace, experimenting with different patterns and color combinations until you’re happy.
This planning stage is crucial for ensuring a balanced and aesthetically pleasing final product.
Step 3: Cut Your Beading Wire
Measure the length you want your necklace to be, then add an extra 6-8 inches to this measurement.
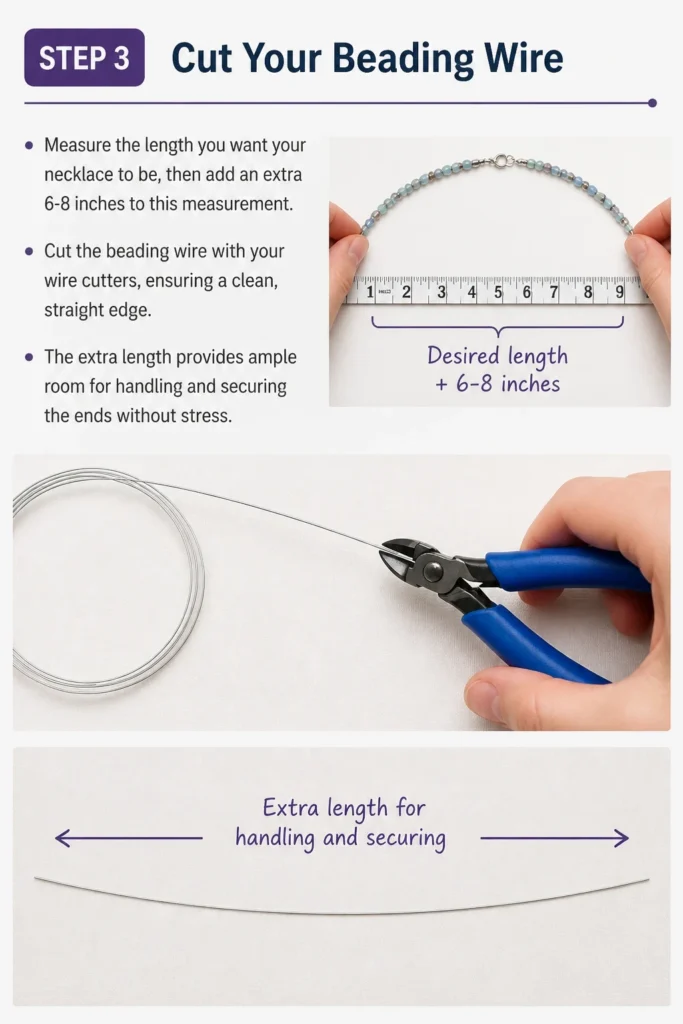
Cut the beading wire with your wire cutters, ensuring a clean, straight edge.
The extra length provides ample room for handling and securing the ends without stress.
Step 4: Attach the First Half of the Clasp
Thread one crimp bead onto one end of your beading wire, followed by one half of your clasp.
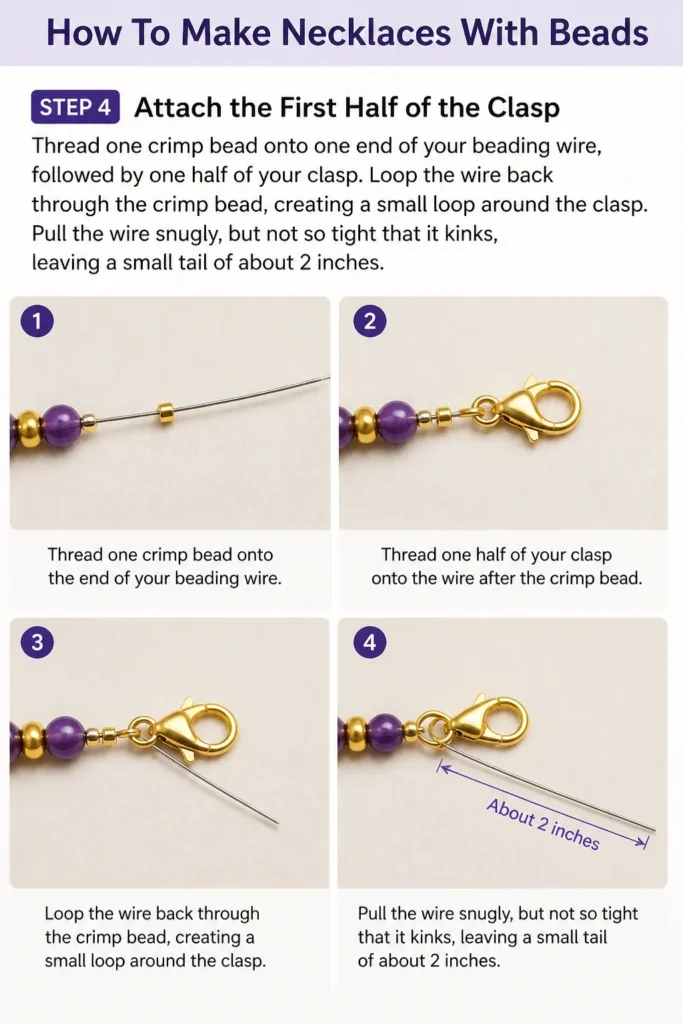
Loop the wire back through the crimp bead, creating a small loop around the clasp.
Pull the wire snugly, but not so tight that it kinks, leaving a small tail of about 2 inches.
Step 5: Secure the Crimp Bead
Position the crimp bead using your crimping pliers, ensuring it sits squarely within the designated notch.
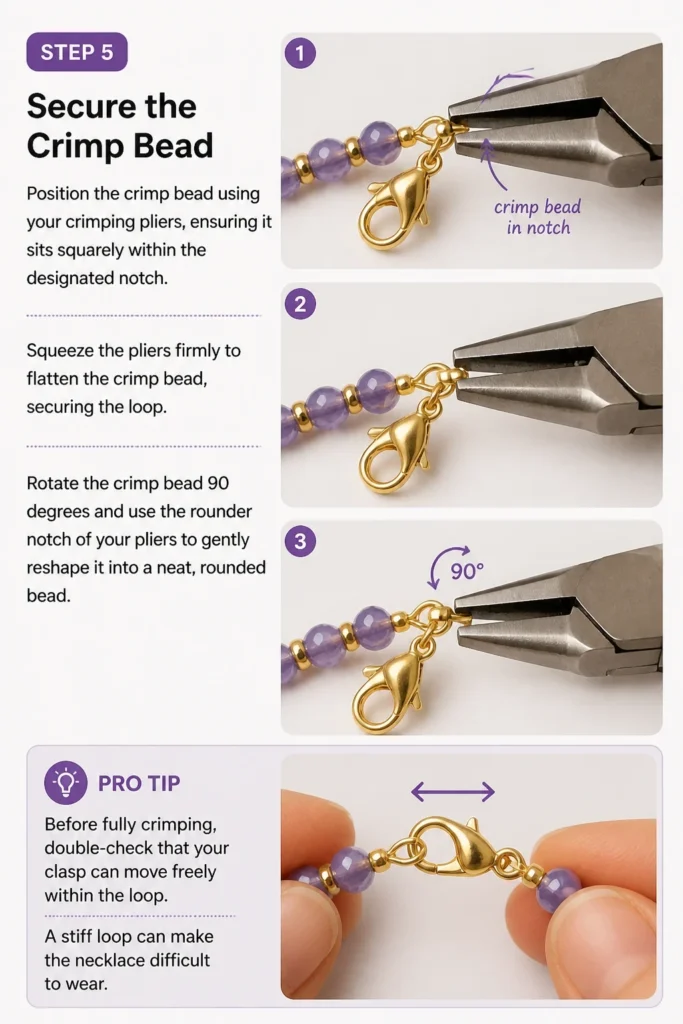
Squeeze the pliers firmly to flatten the crimp bead, securing the loop.
Rotate the crimp bead 90 degrees and use the rounder notch of your pliers to gently reshape it into a neat, rounded bead.
Pro Tip: Before fully crimping, double-check that your clasp can move freely within the loop. A stiff loop can make the necklace difficult to wear.
Step 6: String Your Beads
Begin stringing your beads onto the long end of the beading wire, following the design you planned in Step 2.
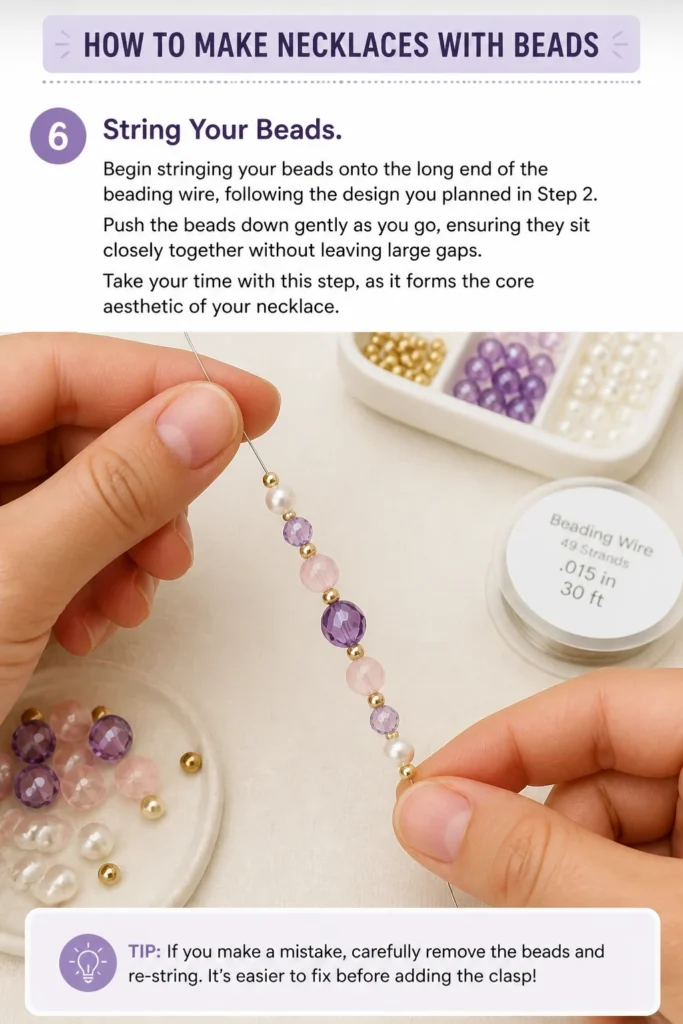
Push the beads down gently as you go, ensuring they sit closely together without leaving large gaps.
Take your time with this step, as it forms the core aesthetic of your necklace.
Step 7: Attach the Second Half of the Clasp
Thread another crimp bead onto the wire once all your beads are strung, followed by the second half of your clasp.
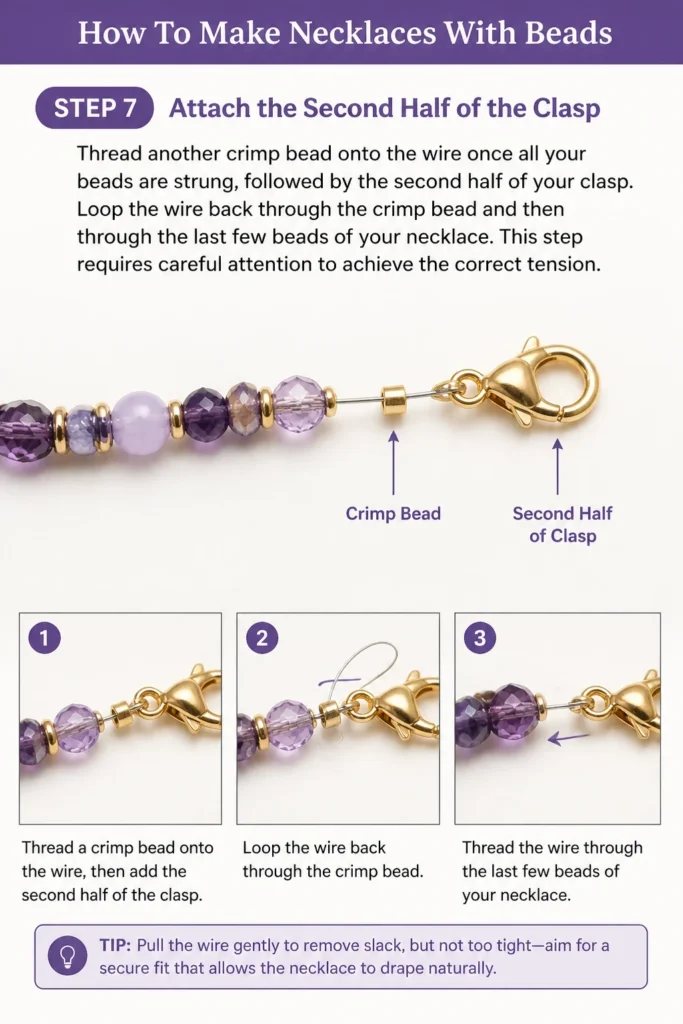
Loop the wire back through the crimp bead and then through the last few beads of your necklace.
This step requires careful attention to achieve the correct tension.
Step 8: Adjust Tension and Crimp
Pull the wire gently to remove any slack, ensuring the beads are snug but not overly tight.
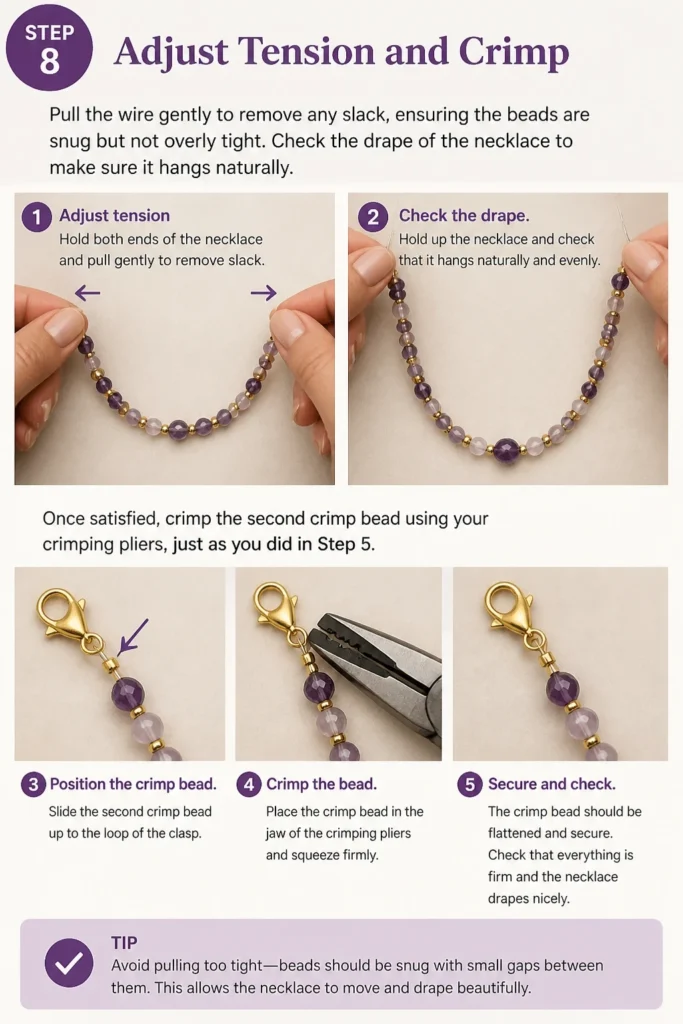
Check the drape of the necklace to make sure it hangs naturally.
Once satisfied, crimp the second crimp bead using your crimping pliers, just as you did in Step 5.
Step 9: Trim Excess Wire
Use your wire cutters to carefully trim any excess wire, making sure to cut as close to the crimp bead or the last bead as possible.
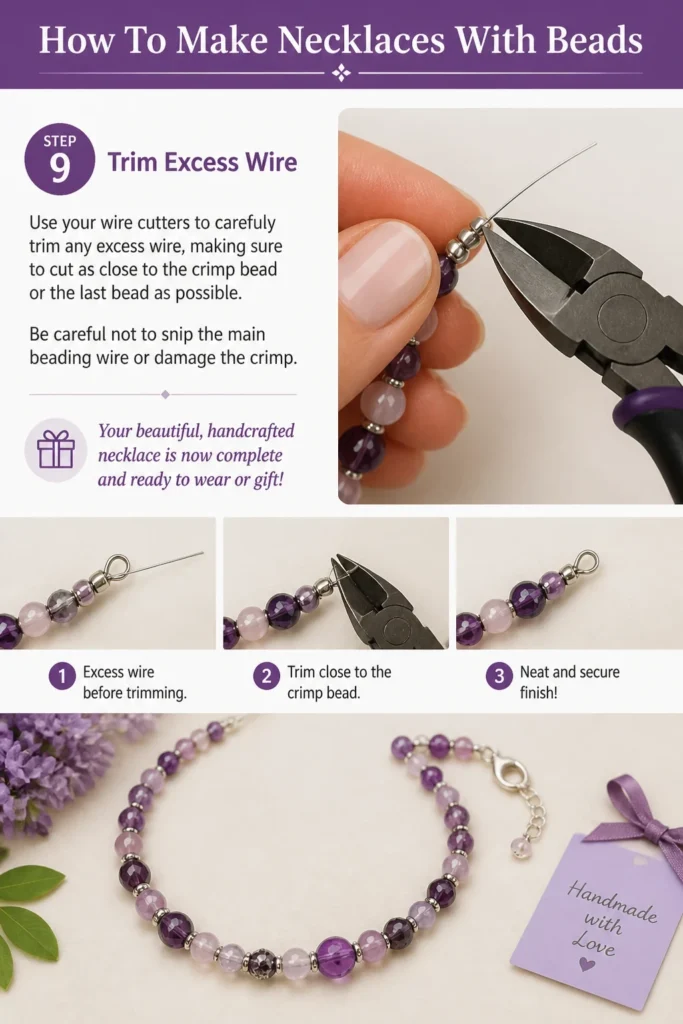
Be careful not to snip the main beading wire or damage the crimp.
Your beautiful, handcrafted necklace is now complete and ready to wear or gift!
Common Mistakes to Avoid
Using the Wrong Wire
Many beginners start with craft wire, which is often too stiff or not durable enough for necklaces. Craft wire can kink easily and may not hold the beads securely over time, leading to breakage.
Always opt for professional-grade beading wire, which is flexible, strong, and specifically designed for jewelry making. This ensures your necklace will last.
Incorrect Crimp Bead Placement
Placing the crimp bead too far from the clasp, or not looping the wire back through it correctly, can result in a weak connection. A poorly crimped bead is the most common point of failure for a handmade necklace.
Ensure the crimp bead is snug against the clasp, and the wire forms a tight, secure loop before flattening. Practice your crimping technique on scrap wire until you feel confident.
Over-tightening the Wire
Pulling the beading wire too tightly after stringing all the beads can cause the necklace to be stiff and uncomfortable. It can also put excessive strain on the wire, leading to premature breakage.
Leave a tiny bit of slack, just enough for the beads to move freely without large gaps. The necklace should have a natural, fluid drape when held.
Not Planning the Design
Stringing beads without a plan often leads to an unbalanced or unappealing design. You might find yourself constantly rearranging beads or feeling dissatisfied with the final look.
Always lay out your beads on a bead board or flat surface first. This allows you to visualize the pattern, adjust colors, and ensure a harmonious design before committing to stringing.
Troubleshooting
Necklace Feels Too Stiff
If your finished necklace feels rigid and doesn’t drape well, it’s likely that the beading wire was pulled too tightly during the final crimping step.
Unfortunately, this often means you’ll need to carefully cut off the crimp bead, remove the clasp, and re-string the last few beads. This time, ensure there’s a tiny bit of slack, allowing the beads to move slightly before you crimp the second end.
Beads Don’t Fit on the Wire
Sometimes, the holes in your chosen beads are too small for the beading wire you’re using. This is a common issue, especially with natural stone or very small seed beads.
Try a thinner gauge of beading wire. If the beads are still too tight, you might need to use a bead reamer to carefully enlarge the holes, or simply choose different beads that are compatible with your wire.
Clasp Doesn’t Close Properly
If your clasp isn’t connecting securely, it could be due to a few reasons. The jump ring on the clasp might be too small, or the clasp itself could be faulty.
First, inspect the clasp to ensure it’s not bent or broken. If it seems fine, try replacing the jump ring on the clasp with a slightly larger one. If the problem persists, the clasp itself might be defective and should be replaced.
Key Takeaways
- Preparation is key: Always gather all materials and plan your design before you start stringing.
- Invest in quality tools: Good crimping pliers and wire cutters make a significant difference in the final look and durability of your necklace.
- Master the crimp: Properly securing crimp beads is crucial for the longevity of your jewelry. Practice makes perfect.
- Tension matters: Avoid over-tightening the wire; a little slack ensures a comfortable and natural drape.
- Experiment and enjoy: Don’t be afraid to try different bead combinations and designs. The creative process is part of the fun.
- Learn from mistakes: Each attempt offers a learning opportunity, helping you refine your skills with every necklace you make.
Frequently Asked Questions
What type of beading wire is best for beginners?
For beginners, a multi-strand, nylon-coated beading wire like AccuFlex or Soft Flex is highly recommended. These wires are flexible, strong, and resistant to kinking, making them forgiving to work with.
How do I choose the right size crimp beads?
Crimp beads should be proportionate to your beading wire. A good rule of thumb is to use 2x2mm crimp beads for most standard beading wires (0.015-0.019 inch diameter). Ensure the wire can pass through the crimp bead twice without difficulty.
Can I use fishing line instead of beading wire?
While fishing line might seem like a cheap alternative, it’s generally not recommended for necklaces. Fishing line can stretch, become brittle over time, and is prone to kinking, which will compromise the durability and appearance of your finished piece.
How do I make my necklace adjustable?
To make a necklace adjustable, you can incorporate an extender chain at the clasp. This is a short length of chain with larger links, allowing the clasp to attach at various points along the chain, giving the wearer more options for length.
Our Top Recommended Finds
- Quality Beading Pliers Set: A good set including round-nose, chain-nose, and crimping pliers will cover all your basic jewelry-making needs.
- Bead Board: Essential for planning your designs, it has channels for measuring and arranging beads before stringing.
- Multi-Strand Beading Wire: Look for a reputable brand known for its strength and flexibility, often coated for extra durability.
Your Next Creative Project Awaits
Now that you’ve crafted your first beaded necklace, a world of creative possibilities opens up.
Consider exploring different bead types, experimenting with multiple strands, or even trying your hand at matching earrings or bracelets.
Don’t let your newfound skills lie dormant; pick up some new beads today and continue your journey in the wonderful craft of jewelry making.
Beginner-friendly templates, step-by-step guides,
and weekly project ideas in your inbox.