How To Make Homemade Lip Gloss

Beginner-friendly templates, step-by-step guides,
and weekly project ideas in your inbox.
There’s something uniquely satisfying about creating beauty products with your own hands.
I remember my first batch of homemade lip gloss – a simple, nourishing blend that felt so much better than anything store-bought.
This guide shares that hands-on experience, making it easy for you to craft your own perfect lip gloss at home.
Quick Overview
You are about to embark on a fun and creative project. By the end of this guide, you will have beautiful, custom-made lip gloss that nourishes your lips.
- Time needed: 45-75 minutes (including cooling time)
- Difficulty: Beginner
- What you’ll need: Carrier oils, a wax, a butter, flavorings, colorants, and small containers.
Step-by-Step Instructions
Step 1: Gather Your Essential Supplies
Before you begin, it is important to have all your ingredients and tools ready. This makes the entire process smoother and more enjoyable.
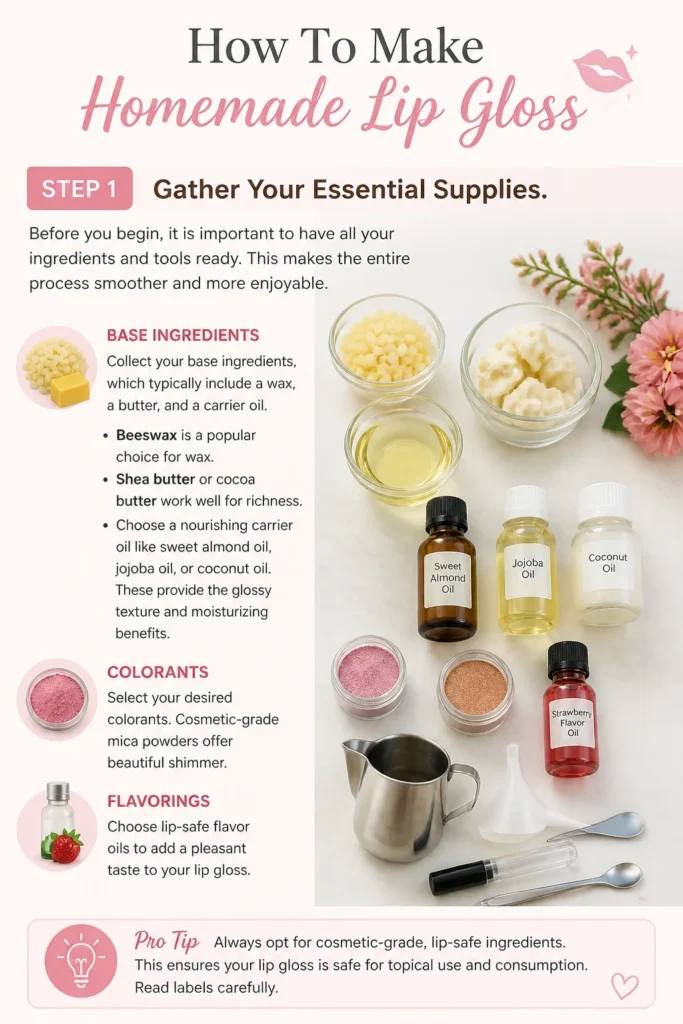
Collect your base ingredients, which typically include a wax, a butter, and a carrier oil. Beeswax is a popular choice for wax, while shea butter or cocoa butter work well for richness.
Choose a nourishing carrier oil like sweet almond oil, jojoba oil, or coconut oil. These provide the glossy texture and moisturizing benefits.
Select your desired flavorings and colorants. Cosmetic-grade mica powders offer beautiful shimmer, and lip-safe flavor oils add a pleasant taste.
Pro Tip: Always opt for cosmetic-grade, lip-safe ingredients. This ensures your lip gloss is safe for topical use and consumption. Read labels carefully.
Step 2: Sanitize Your Workspace and Tools
Hygiene is crucial when making any product for personal use. A clean environment prevents contamination and extends the shelf life of your lip gloss.
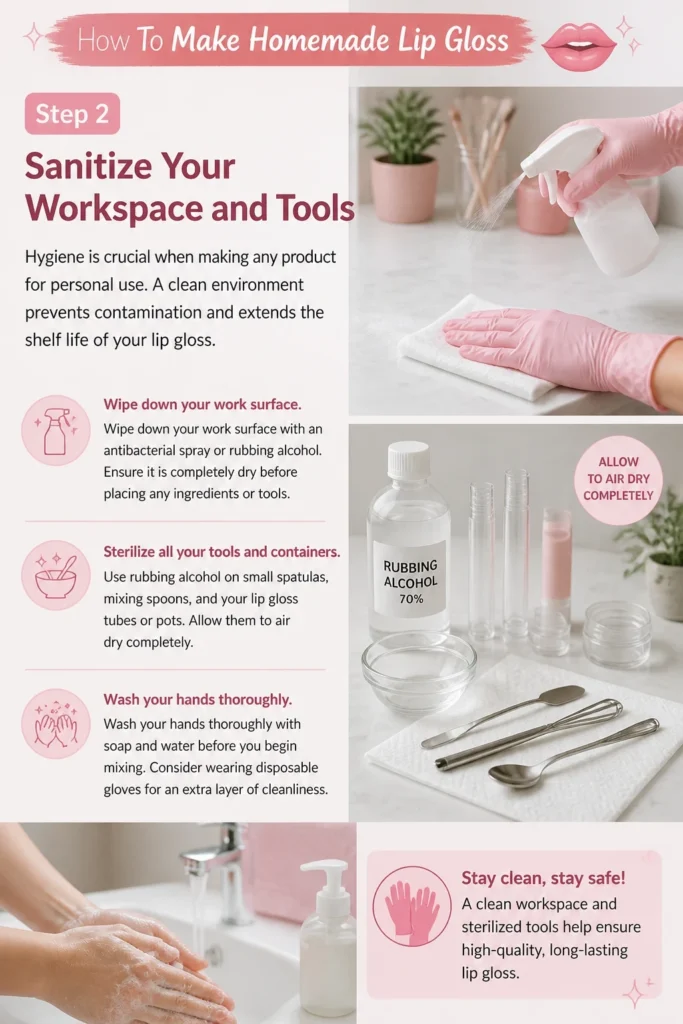
Wipe down your work surface with an antibacterial spray or rubbing alcohol. Ensure it is completely dry before placing any ingredients or tools.
Sterilize all your tools and containers. Use rubbing alcohol on small spatulas, mixing spoons, and your lip gloss tubes or pots. Allow them to air dry completely.
Wash your hands thoroughly with soap and water before you begin mixing. Consider wearing disposable gloves for an extra layer of cleanliness.
Step 3: Measure and Prepare Base Ingredients
Accurate measurements are key to achieving the right consistency. Use a kitchen scale for precision, especially with waxes and butters.
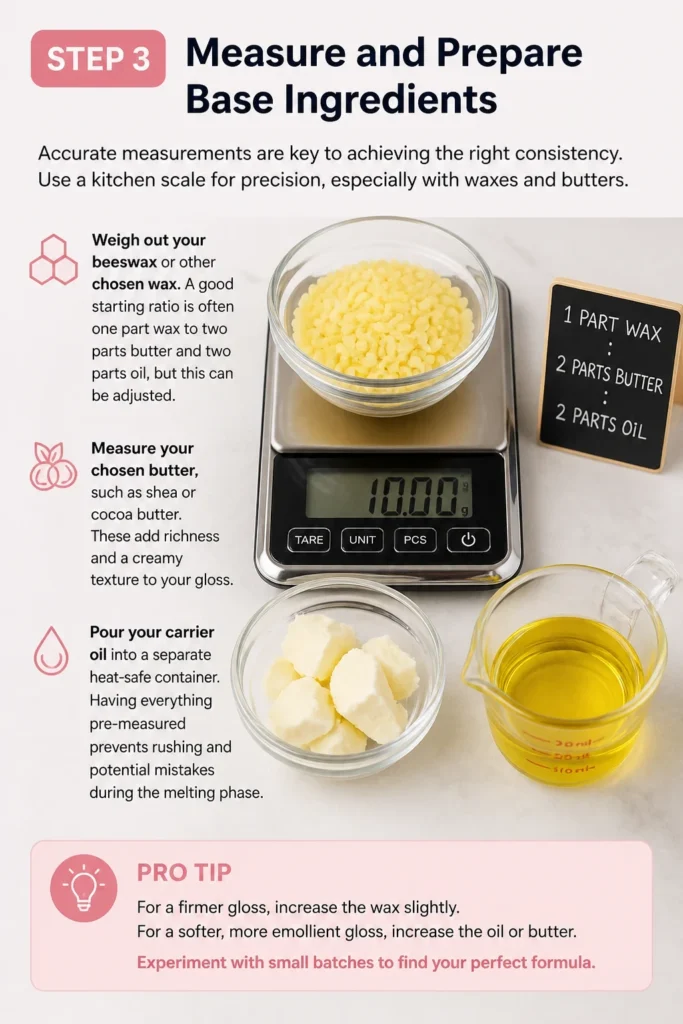
Weigh out your beeswax or other chosen wax. A good starting ratio is often one part wax to two parts butter and two parts oil, but this can be adjusted.
Measure your chosen butter, such as shea or cocoa butter. These add richness and a creamy texture to your gloss.
Pour your carrier oil into a separate heat-safe container. Having everything pre-measured prevents rushing and potential mistakes during the melting phase.
Pro Tip: For a firmer gloss, increase the wax slightly. For a softer, more emollient gloss, increase the oil or butter. Experiment with small batches to find your perfect formula.
Step 4: Gently Melt the Solid Ingredients
A double boiler method is the safest and most effective way to melt your ingredients without burning them. Direct heat can degrade the beneficial properties of oils and butters.
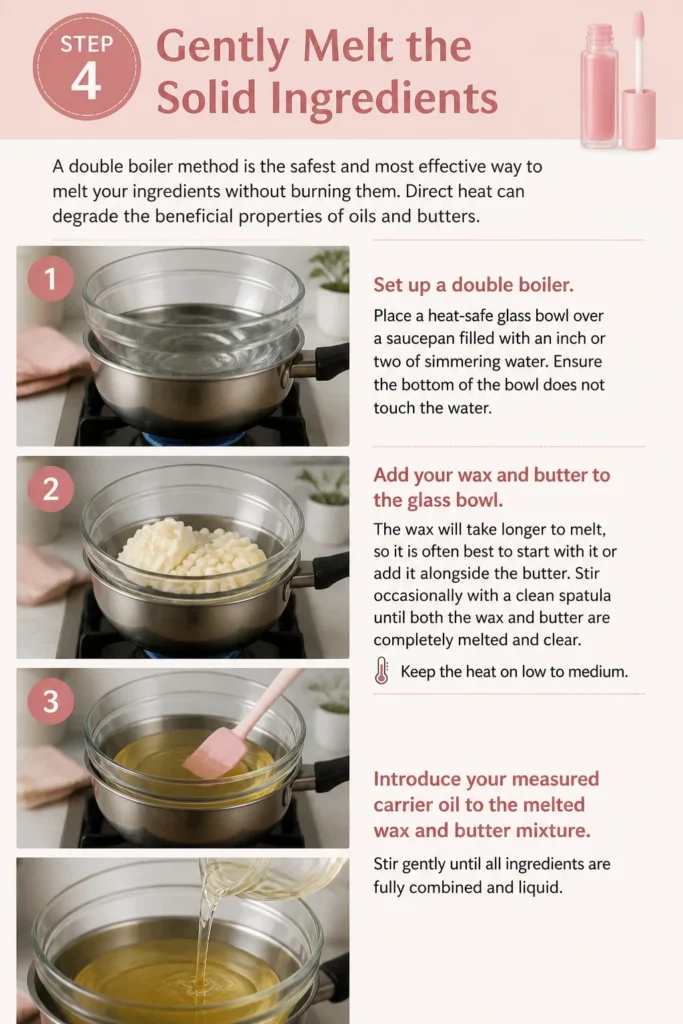
Set up a double boiler. Place a heat-safe glass bowl over a saucepan filled with an inch or two of simmering water. Ensure the bottom of the bowl does not touch the water.
Add your wax and butter to the glass bowl. The wax will take longer to melt, so it is often best to start with it or add it alongside the butter.
Stir occasionally with a clean spatula until both the wax and butter are completely melted and clear. Keep the heat on low to medium.
Introduce your measured carrier oil to the melted wax and butter mixture. Stir gently until all ingredients are fully combined and liquid.
Step 5: Incorporate Flavor and Color
This is where your lip gloss truly comes to life. Add flavor and color while the mixture is still warm and liquid.
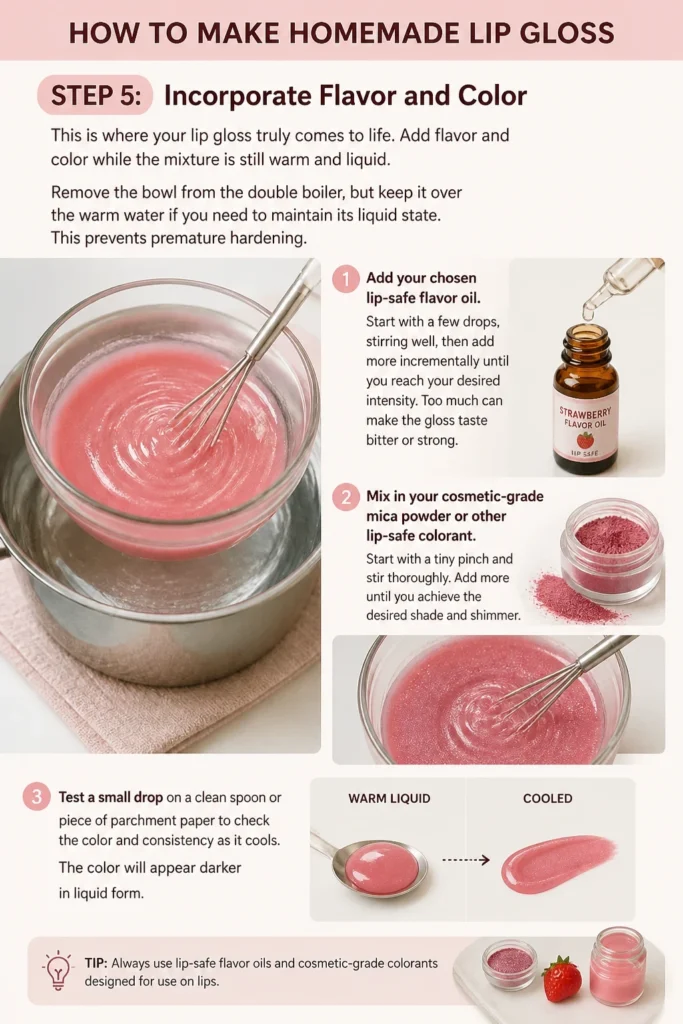
Remove the bowl from the double boiler, but keep it over the warm water if you need to maintain its liquid state. This prevents premature hardening.
Add your chosen lip-safe flavor oil. Start with a few drops, stirring well, then add more incrementally until you reach your desired intensity. Too much can make the gloss taste bitter or strong.
Mix in your cosmetic-grade mica powder or other lip-safe colorant. Start with a tiny pinch and stir thoroughly. Add more until you achieve the desired shade and shimmer.
Test a small drop on a clean spoon or piece of parchment paper to check the color and consistency as it cools. The color will appear darker in liquid form.
Step 6: Fill Your Lip Gloss Containers
Working quickly and carefully is important during this step, as the mixture will begin to solidify as it cools.
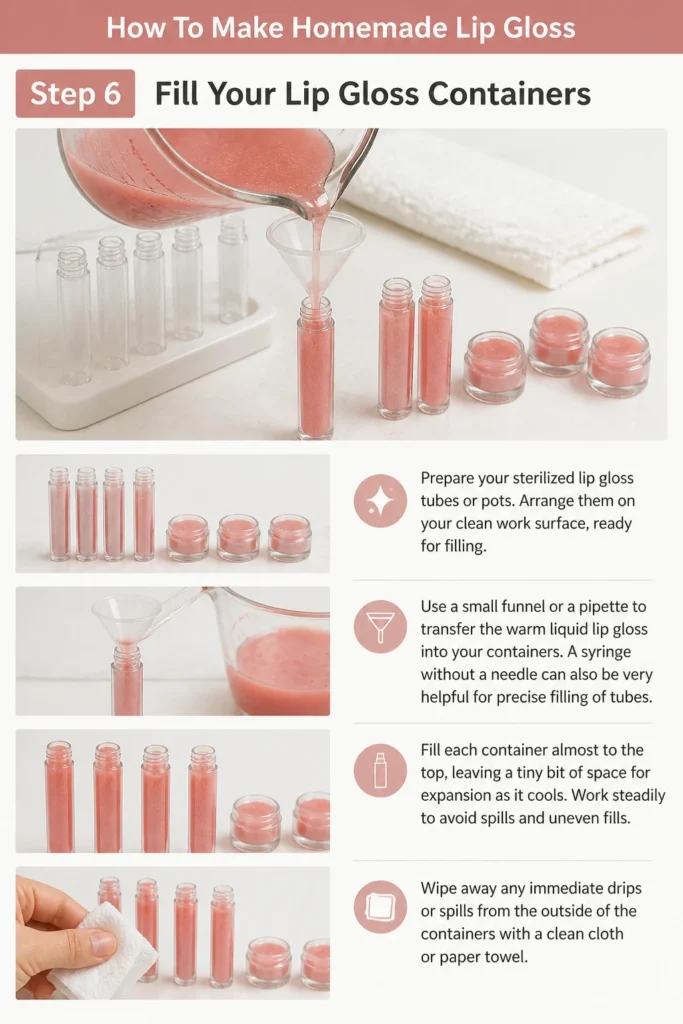
Prepare your sterilized lip gloss tubes or pots. Arrange them on your clean work surface, ready for filling.
Use a small funnel or a pipette to transfer the warm liquid lip gloss into your containers. A syringe without a needle can also be very helpful for precise filling of tubes.
Fill each container almost to the top, leaving a tiny bit of space for expansion as it cools. Work steadily to avoid spills and uneven fills.
Wipe away any immediate drips or spills from the outside of the containers with a clean cloth or paper towel.
Step 7: Allow to Cool and Set Completely
Patience is a virtue here. Proper cooling ensures your lip gloss sets correctly and achieves its final texture.
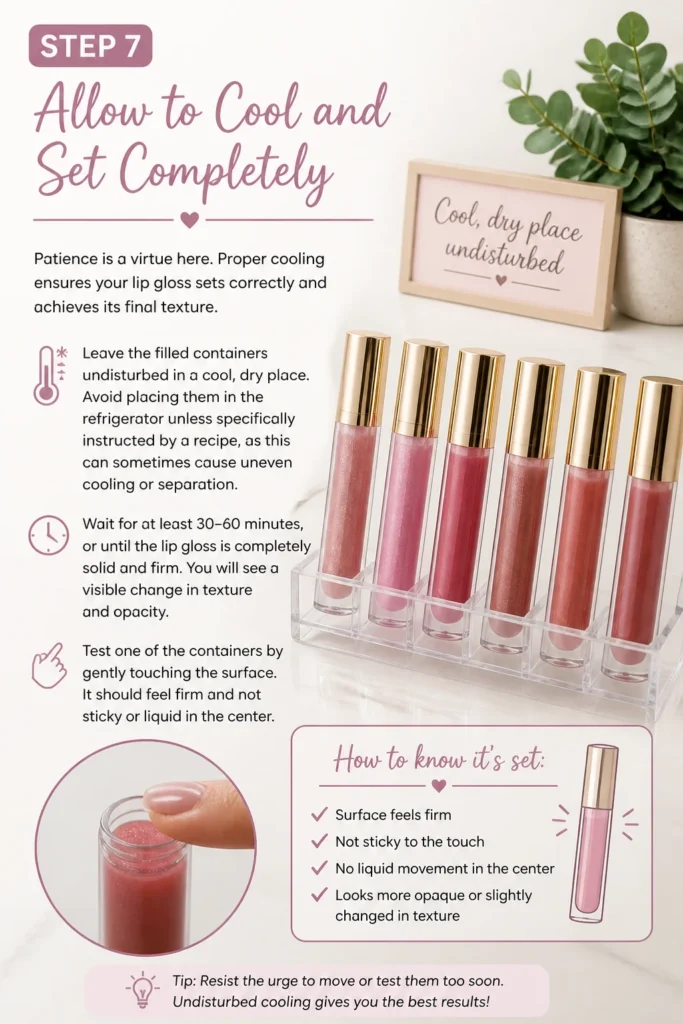
Leave the filled containers undisturbed in a cool, dry place. Avoid placing them in the refrigerator unless specifically instructed by a recipe, as this can sometimes cause uneven cooling or separation.
Wait for at least 30-60 minutes, or until the lip gloss is completely solid and firm. You will see a visible change in texture and opacity.
Test one of the containers by gently touching the surface. It should feel firm and not sticky or liquid in the center.
Step 8: Cap, Label, and Store Your Creation
The final touches make your homemade lip gloss ready for use and help you keep track of your creations.
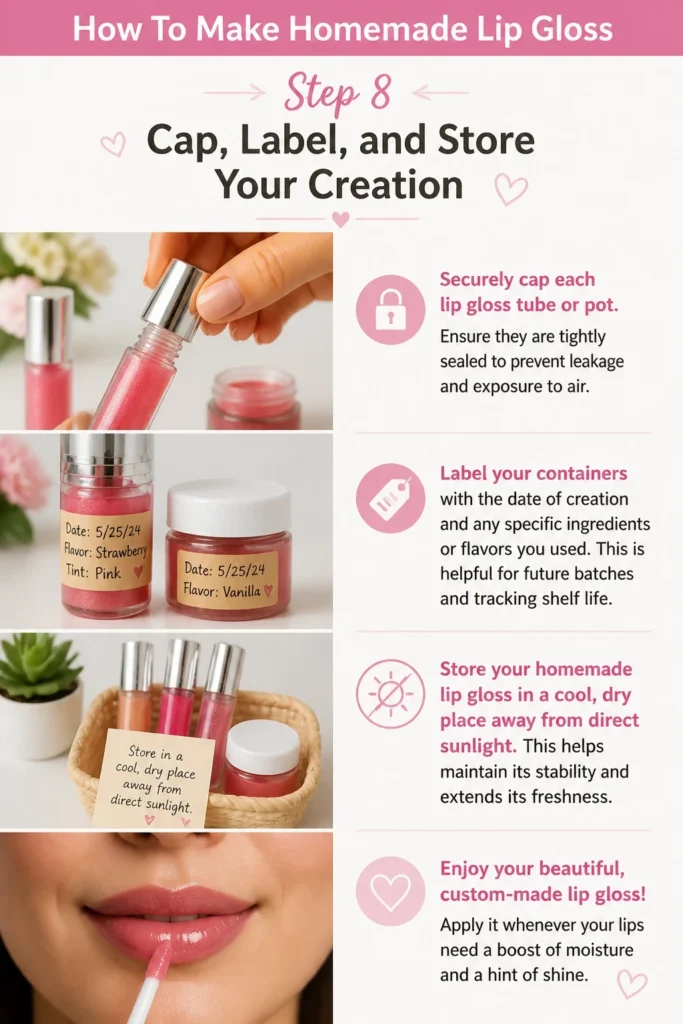
Securely cap each lip gloss tube or pot. Ensure they are tightly sealed to prevent leakage and exposure to air.
Label your containers with the date of creation and any specific ingredients or flavors you used. This is helpful for future batches and tracking shelf life.
Store your homemade lip gloss in a cool, dry place away from direct sunlight. This helps maintain its stability and extends its freshness.
Enjoy your beautiful, custom-made lip gloss! Apply it whenever your lips need a boost of moisture and a hint of shine.
Common Mistakes to Avoid
Overheating Ingredients
Applying too much direct heat or boiling your ingredients can degrade their beneficial properties. This includes the vitamins and antioxidants in your oils and butters.
Always use a double boiler method with gentle, simmering water. This ensures a slow, even melt that preserves the integrity of your ingredients.
Incorrect Ratios
Using too much wax can result in a hard, difficult-to-apply gloss. Too much oil or butter can make it overly soft, greasy, or prone to separation.
Start with a tested recipe’s ratios and make small adjustments. A digital kitchen scale provides the most accurate measurements for consistent results.
Skipping Sterilization
Neglecting to sterilize your tools and containers introduces bacteria. This significantly reduces the shelf life of your lip gloss and can lead to contamination.
Always clean and sterilize all equipment with rubbing alcohol or by boiling. Allow everything to dry completely before use.
Adding Too Much Liquid Flavor
While tempting to add a lot of flavor, excessive amounts of liquid flavor oils can affect the consistency of your gloss. It can make it thinner or cause separation.
Start with a few drops of lip-safe flavor oil and add gradually. Test the flavor strength as you go, remembering a little often goes a long way.
Troubleshooting
Gloss is Too Oily/Thin
If your finished lip gloss feels too liquid or greasy, it likely has too much oil or not enough wax. This can happen if ratios are off or if your environment is very warm.
Gently remelt your batch in the double boiler. Add a small amount of extra wax (e.g., 1/4 teaspoon per batch) and stir until fully dissolved. Repour and cool to test the new consistency.
Gloss is Too Hard/Waxy
A lip gloss that is too firm, difficult to apply, or feels waxy on the lips indicates an excess of wax. This can make it uncomfortable to wear.
Remelt the batch in the double boiler. Add a small amount of extra carrier oil (e.g., 1/2 teaspoon per batch) and stir well. Test the consistency after cooling and adjust if needed.
Separation in the Container
Sometimes you might notice oils separating from the solid base, especially if the gloss was cooled too quickly or ingredients weren’t fully emulsified. This can also happen with certain oil and butter combinations over time.
Remelt the gloss completely in the double boiler, ensuring all ingredients are fully liquid and well combined. Stir continuously for a few minutes before removing from heat. Pour into containers and allow to cool slowly and undisturbed at room temperature.
Key Takeaways
- Always use cosmetic-grade, lip-safe ingredients for safety and best results.
- Sterilization of tools and containers is critical for hygiene and extending shelf life.
- The double boiler method is essential for gently melting ingredients without degradation.
- Accurate measurement of wax, butter, and oil determines the final consistency.
- Introduce flavor and color gradually, testing small amounts as you go.
- Allow the finished lip gloss to cool completely and undisturbed for proper setting.
Frequently Asked Questions
How long does homemade lip gloss last?
Homemade lip gloss typically lasts between 6 months to 1 year. This can vary depending on the freshness of your ingredients and proper sterilization practices. Always store it in a cool, dark place to maximize its shelf life.
Can I use essential oils for flavor?
Some essential oils are safe for lip products, but many are not. It is critical to only use essential oils specifically labeled as lip-safe or food-grade and to use them in very low concentrations. Always research thoroughly before adding any essential oil to your lip gloss.
What if I don’t have beeswax?
Candelilla wax or carnauba wax are excellent vegan alternatives to beeswax. They offer similar hardening properties, though their melting points and required amounts might differ slightly. You may need to adjust your recipe accordingly.
Is it safe to use food coloring?
While some food colorings are technically food-safe, they are not always ideal for lip gloss. Food colorings are water-based and can cause oil-based lip gloss to separate or become streaky. Cosmetic-grade mica powders or iron oxides are specifically designed for lip products and provide superior results.
Our Top Recommended Finds
- Double Boiler Set: Essential for safely melting waxes and butters without burning. Look for one with a heat-resistant glass bowl.
- Lip Gloss Tubes or Pots: Clean, empty containers are a must. Opt for clear tubes with wands or small, decorative pots for easy application.
- Digital Kitchen Scale: Provides precise measurements for ingredients, ensuring consistent results in your lip gloss batches.
Unleash Your Inner Lip Gloss Artisan
Creating your own lip gloss is more than just a craft; it’s an invitation to personalize your beauty routine. You control the ingredients, the scent, and the color, crafting a product that is uniquely yours.
Imagine the satisfaction of applying a gloss made with your favorite nourishing oils and a scent that uplifts you.
Don’t wait to experience this creative joy. Gather your supplies today and transform simple ingredients into your new favorite lip essential.
Beginner-friendly templates, step-by-step guides,
and weekly project ideas in your inbox.