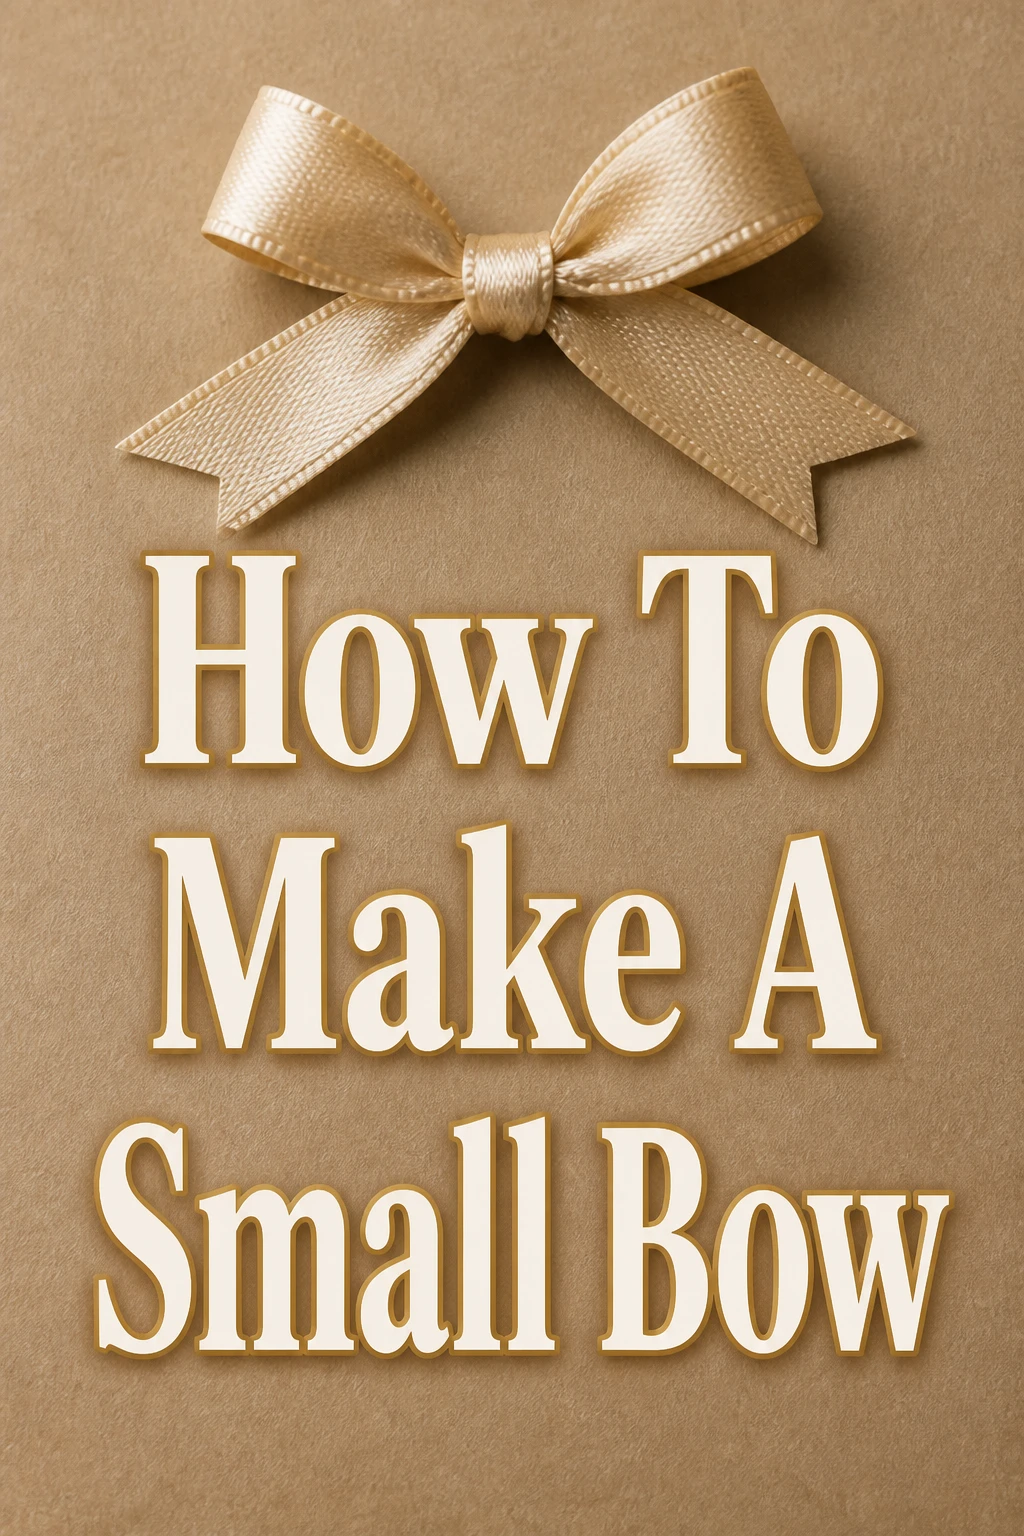
How To Make A Small Bow

Beginner-friendly templates, step-by-step guides,
and weekly project ideas in your inbox.
There’s a special satisfaction in adding a handmade touch to a gift or craft project.
I remember struggling with my first few bows, ending up with lopsided messes.
But with a few simple techniques, you can create beautiful, perfectly shaped small bows every time.
Quick Overview
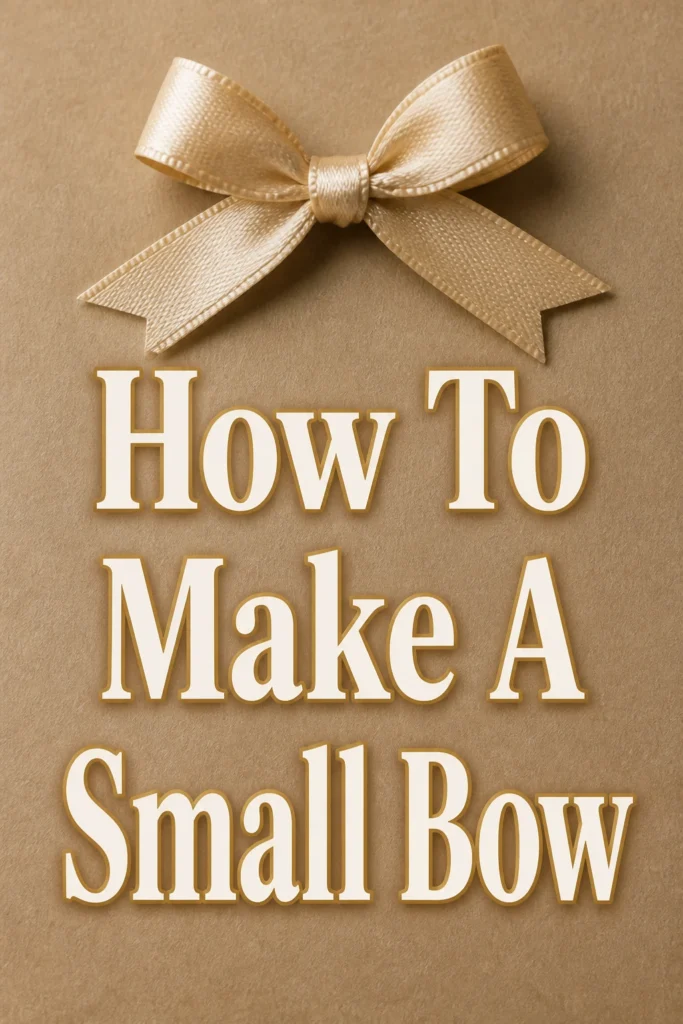
This guide will walk you through creating charming small bows, perfect for gifts, hair accessories, or decorative accents.
You’ll learn the essential steps to transform a simple ribbon into an elegant flourish.
- Time needed: 10-20 minutes
- Difficulty: Beginner
- What you’ll need: Ribbon, sharp scissors, floral wire or strong thread, ruler.
Step-by-Step Instructions
Step 1: Gather Your Materials
Before you begin, collect all the necessary tools and supplies. Having everything within reach makes the process smoother and more enjoyable.
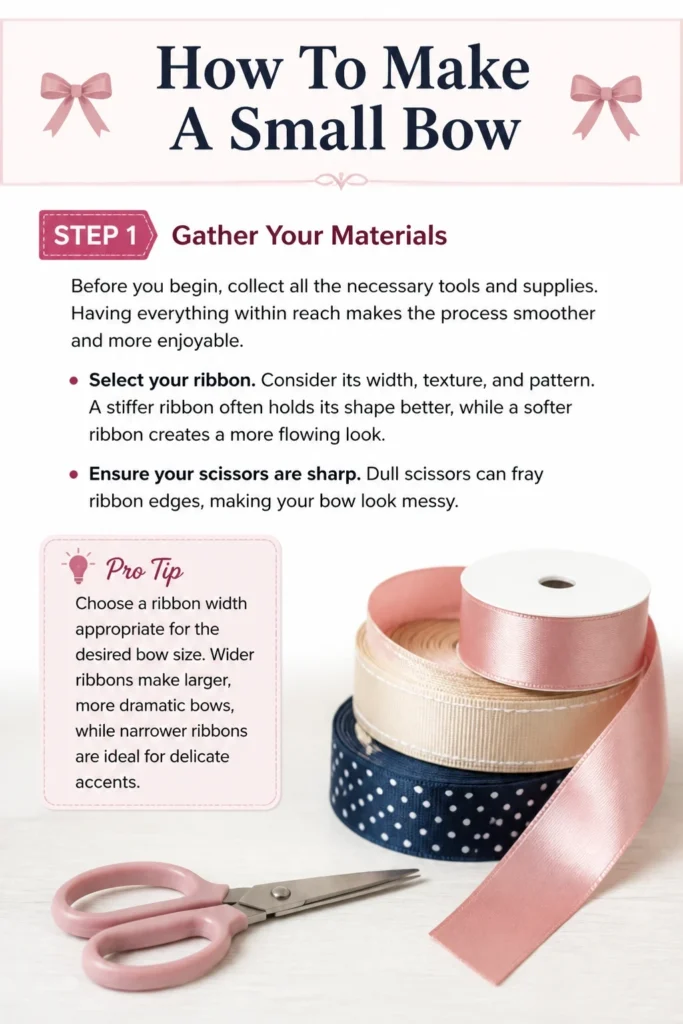
Select your ribbon. Consider its width, texture, and pattern. A stiffer ribbon often holds its shape better, while a softer ribbon creates a more flowing look.
Ensure your scissors are sharp. Dull scissors can fray ribbon edges, making your bow look messy.
Pro Tip: Choose a ribbon width appropriate for the desired bow size. Wider ribbons make larger, more dramatic bows, while narrower ribbons are ideal for delicate accents.
Step 2: Measure and Cut Your Ribbon
The length of ribbon you need depends on the size of the bow you want to create. For a small bow, start with a segment that gives you enough room to work.
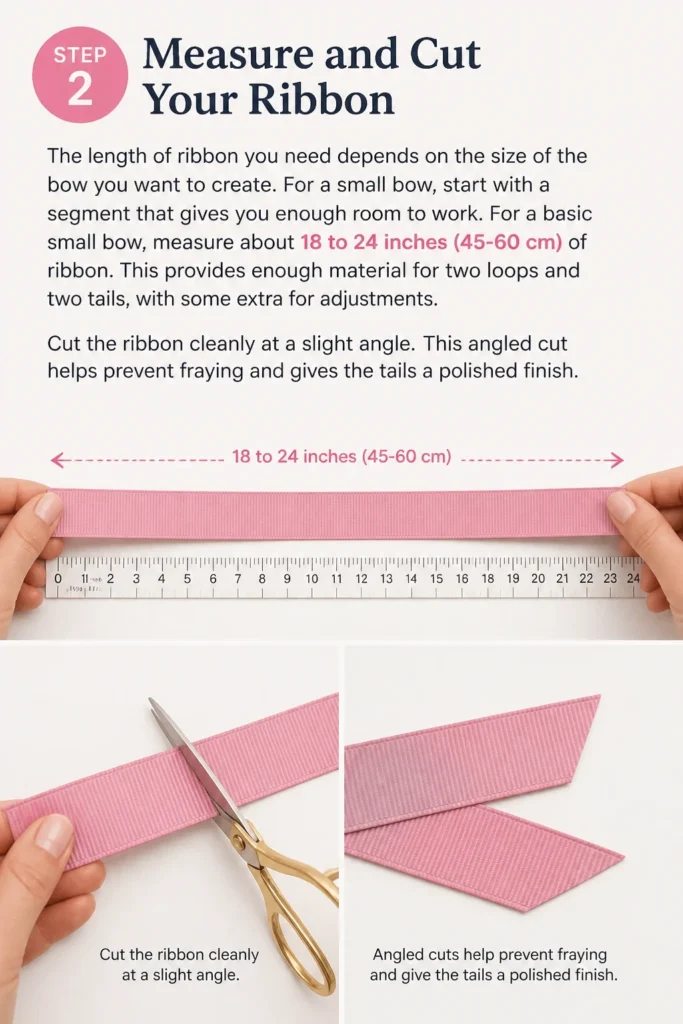
For a basic small bow, measure about 18 to 24 inches (45-60 cm) of ribbon. This provides enough material for two loops and two tails, with some extra for adjustments.
Cut the ribbon cleanly at a slight angle. This angled cut helps prevent fraying and gives the tails a polished finish.
Step 3: Form the Basic Loops
Now, you’ll create the foundation of your bow. Hold one end of the ribbon in your non-dominant hand.
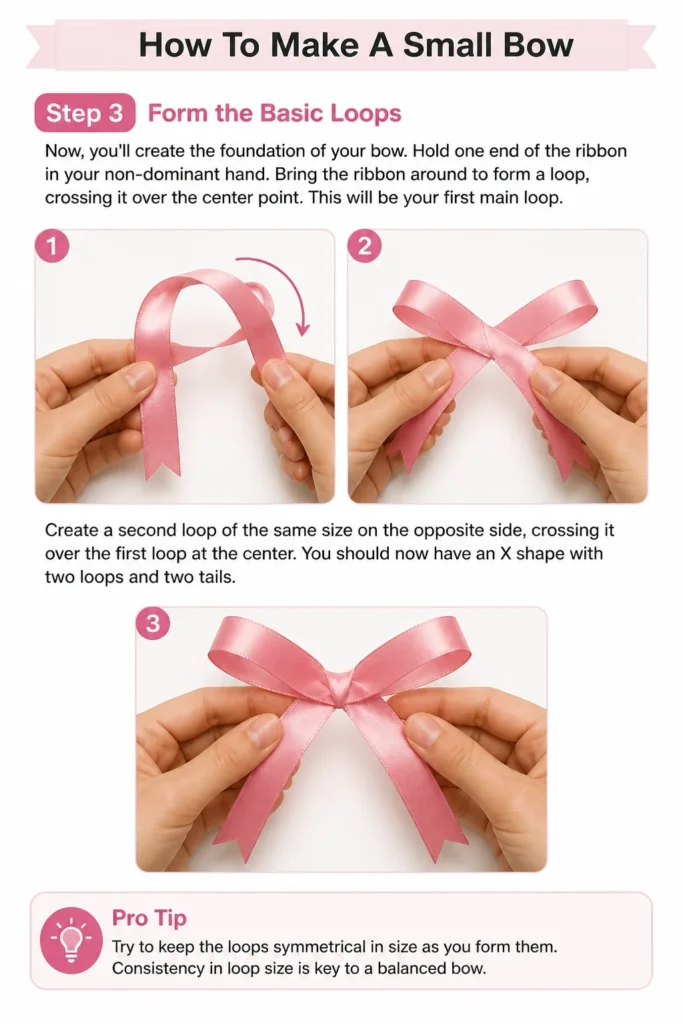
Bring the ribbon around to form a loop, crossing it over the center point. This will be your first main loop.
Create a second loop of the same size on the opposite side, crossing it over the first loop at the center. You should now have an “X” shape with two loops and two tails.
Pro Tip: Try to keep the loops symmetrical in size as you form them. Consistency in loop size is key to a balanced bow.
Step 4: Cinch the Center
With your loops formed, it’s time to secure the center. This step is crucial for holding the bow’s shape.
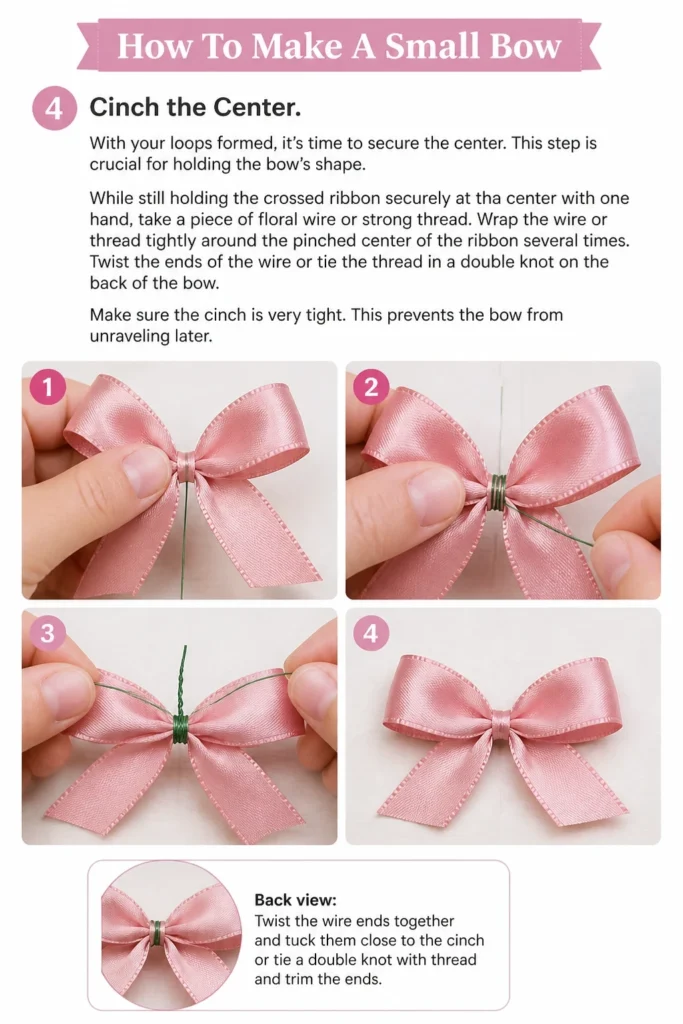
While still holding the crossed ribbon securely at the center with one hand, take a piece of floral wire or strong thread.
Wrap the wire or thread tightly around the pinched center of the ribbon several times. Twist the ends of the wire or tie the thread in a double knot on the back of the bow.
Make sure the cinch is very tight. This prevents the bow from unraveling later.
Step 5: Add a Center Wrap (Optional)
A center wrap adds a professional touch and hides the securing wire or thread. This step makes your bow look more finished.
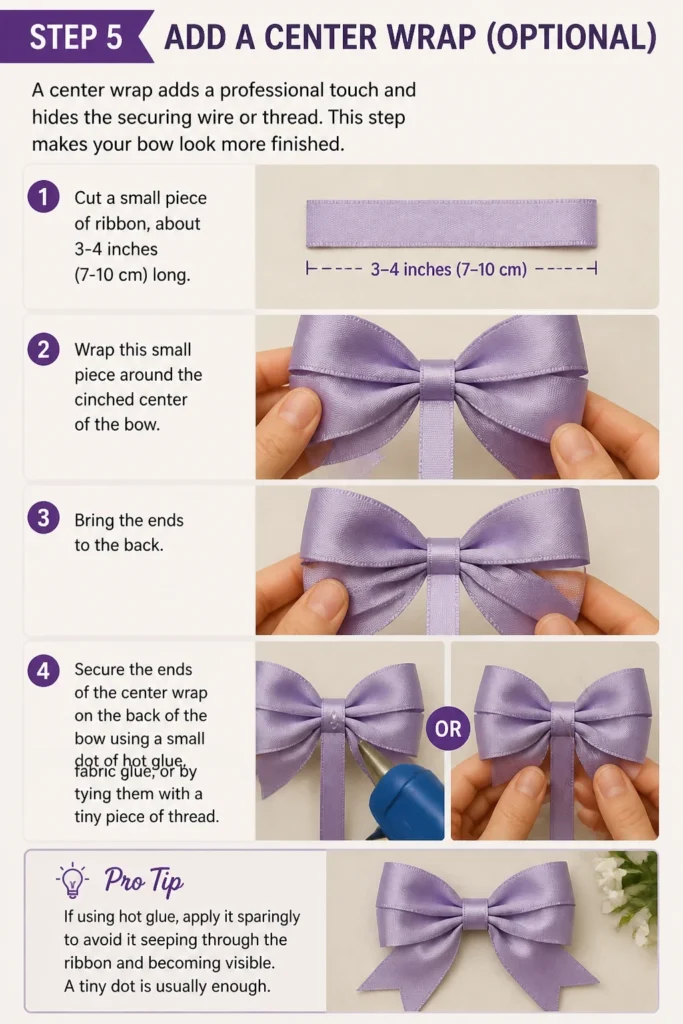
Cut a small piece of ribbon, about 3-4 inches (7-10 cm) long. This piece should be the same width as your bow ribbon or slightly narrower for contrast.
Wrap this small piece around the cinched center of the bow. Bring the ends to the back.
Secure the ends of the center wrap on the back of the bow using a small dot of hot glue, fabric glue, or by tying them with a tiny piece of thread.
Pro Tip: If using hot glue, apply it sparingly to avoid it seeping through the ribbon and becoming visible. A tiny dot is usually enough.
Step 6: Trim the Tails
The tails of your bow are just as important as the loops for a polished appearance. Adjust their length and shape to your liking.
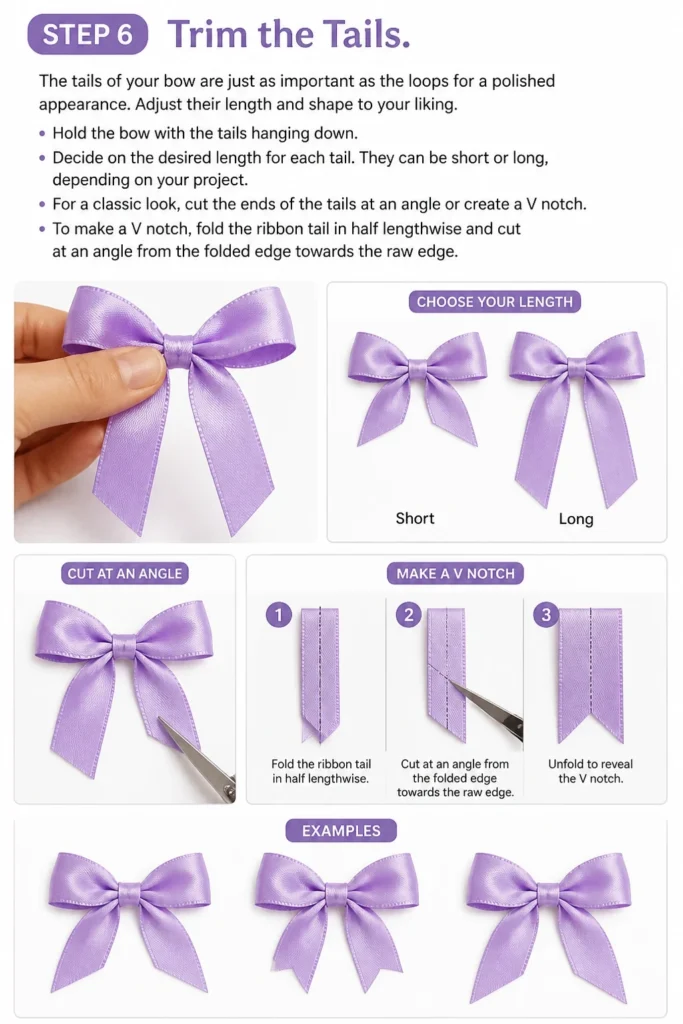
Hold the bow with the tails hanging down. Decide on the desired length for each tail. They can be short or long, depending on your project.
For a classic look, cut the ends of the tails at an angle or create a “V” notch. To make a “V” notch, fold the ribbon tail in half lengthwise and cut at an angle from the folded edge towards the raw edge.
Step 7: Fluff and Shape Your Bow
This is where your bow truly comes to life. Adjust each loop to give your bow volume and symmetry.
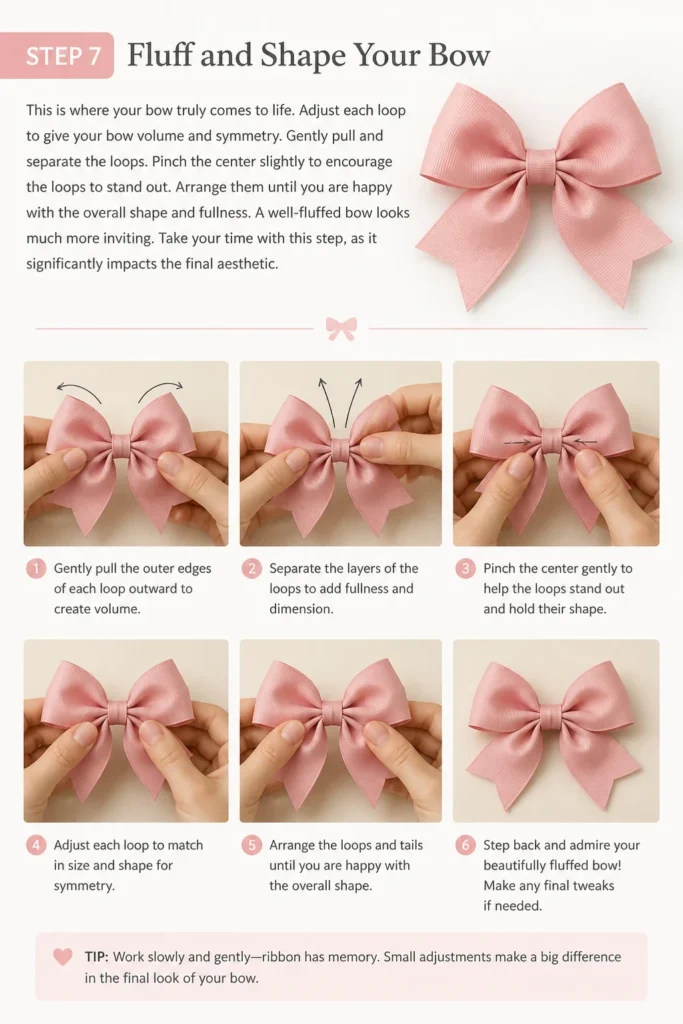
Gently pull and separate the loops. Pinch the center slightly to encourage the loops to stand out.
Arrange them until you are happy with the overall shape and fullness. A well-fluffed bow looks much more inviting.
Take your time with this step, as it significantly impacts the final aesthetic.
Step 8: Attach Your Bow
Your small bow is now ready to adorn its chosen item. There are several ways to attach it securely.
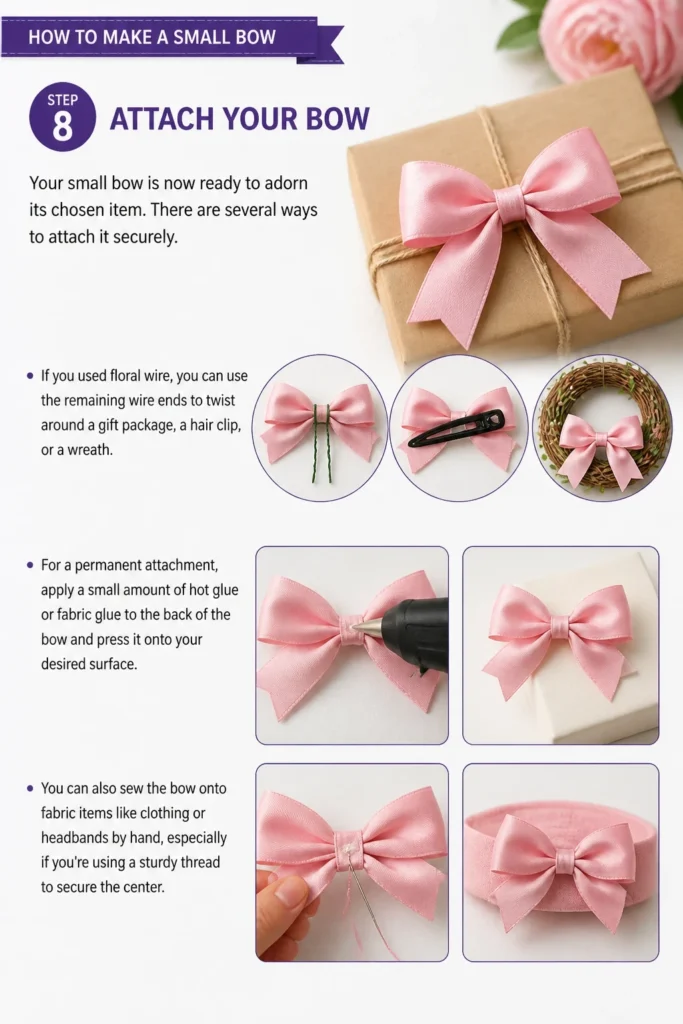
If you used floral wire, you can use the remaining wire ends to twist around a gift package, a hair clip, or a wreath.
For a permanent attachment, apply a small amount of hot glue or fabric glue to the back of the bow and press it onto your desired surface.
You can also sew the bow onto fabric items like clothing or headbands by hand, especially if you’re using a sturdy thread to secure the center.
Common Mistakes to Avoid
Using Dull Scissors
Dull scissors can ruin your ribbon before you even start. They will chew and fray the edges, leading to a messy, unprofessional-looking bow.
Always use sharp scissors specifically designated for fabric or crafts. This ensures clean, crisp cuts that make your bow look polished.
Not Cinching the Center Tightly Enough
A loose center is the most common reason bows fall apart or lose their shape. If the center isn’t secured firmly, the loops will sag and shift.
Ensure you wrap your wire or thread very tightly around the center of the ribbon. Give it several twists or a strong double knot to hold everything in place.
Uneven Loop Sizes
Bows with loops of different sizes look lopsided and unbalanced. This instantly detracts from the bow’s visual appeal.
Pay close attention as you form each loop, striving for symmetry. Hold them up and compare their sizes before you cinch the center to make any necessary adjustments.
Overuse of Glue
While glue can be helpful for securing a center wrap or attaching the bow, using too much can seep through the ribbon, creating hard, visible spots. It can also make the bow stiff and unappealing.
If using glue, apply very small, precise dots. Less is often more when it comes to adhesives on delicate materials like ribbon.
Troubleshooting
My Bow Looks Flat and Lifeless
A flat bow often results from not properly fluffing the loops after securing the center. The ribbon might also be too soft to hold its shape well.
To fix this, gently pull and separate each loop, encouraging them to stand out. You can also carefully scrunch the center of the bow to add more volume. Next time, consider using a wired ribbon or a stiffer fabric ribbon.
The Ribbon Tails Keep Fraying
Fraying tails are common, especially with certain ribbon materials like satin or grosgrain. This can happen if the ribbon wasn’t cut cleanly or if it’s handled too much.
To prevent fraying, always use very sharp scissors for a clean cut. For persistent fraying, you can apply a tiny drop of clear nail polish or a fabric sealant to the very ends of the cut ribbon. Heat-sealing the ends with a quick pass over a flame (carefully and quickly for synthetic ribbons) also works.
My Bow Keeps Slipping Off My Project
If your bow isn’t staying attached, the adhesive might not be strong enough for the surface, or the method of attachment isn’t suitable.
Re-evaluate your attachment method. For gifts, tying with wire is very secure. For fabric, sewing is best. If using glue, ensure the surface is clean and dry. For heavier bows, consider using a stronger adhesive or reinforcing with a few hand stitches.
Key Takeaways
- Start with the Right Materials: Sharp scissors and appropriate ribbon are fundamental for a beautiful bow.
- Measure Carefully: Ribbon length dictates bow size and tail length, so plan accordingly.
- Symmetry is Key: Strive for evenly sized loops to create a balanced and appealing bow.
- Cinch Tightly: A firmly secured center prevents your bow from losing its shape and falling apart.
- Fluff for Volume: Don’t skip the fluffing step; it brings your bow to life and adds dimension.
- Practice Makes Perfect: Your first bow might not be flawless, but each attempt improves your technique.
Frequently Asked Questions
What type of ribbon is best for making small bows?
Wired ribbon is excellent for beginners because it holds its shape beautifully and is easy to manipulate. Grosgrain ribbon is also a good choice as it’s sturdy and less prone to fraying. Satin and sheer ribbons are lovely for delicate bows but can be trickier to work with due to their slippery nature.
Can I make bows without floral wire or thread?
While wire or thread provides the most secure cinch, you can sometimes use a very thin strip of the same ribbon material or even a small rubber band to secure the center temporarily. However, for lasting bows, a strong, thin material like wire or good quality thread is highly recommended.
How do I make a multi-loop bow?
To create a multi-loop bow, you simply continue forming loops back and forth after your initial two, before cinching the center. Each time you bring the ribbon across the middle, you’re adding another layer of loops. Ensure each new pair of loops is roughly the same size as the previous ones for a full, symmetrical look.
Is hot glue essential for making bows?
Hot glue is very convenient for securing center wraps or attaching bows quickly, but it’s not always essential. You can secure center wraps by tying or sewing. For attaching bows, strong fabric glue, sewing, or simply tying the bow onto the item are all viable alternatives depending on your project.
Our Top Recommended Finds
- Assorted Wired Ribbon Pack: Great for beginners, offering various colors and widths, and easy to shape.
- Sharp Fabric Scissors: Essential for clean cuts, preventing fraying, and ensuring a professional finish.
- Floral Wire Spool: Provides a strong, discreet way to cinch the center of your bows securely.
Unleash Your Inner Crafter
Now that you know the simple steps, there’s nothing holding you back from adding a touch of handmade charm to your world.
Imagine the delight of gifting a beautifully wrapped present, adorned with a bow you crafted yourself.
Grab some ribbon, find your scissors, and start creating your first perfect small bow today!
Beginner-friendly templates, step-by-step guides,
and weekly project ideas in your inbox.