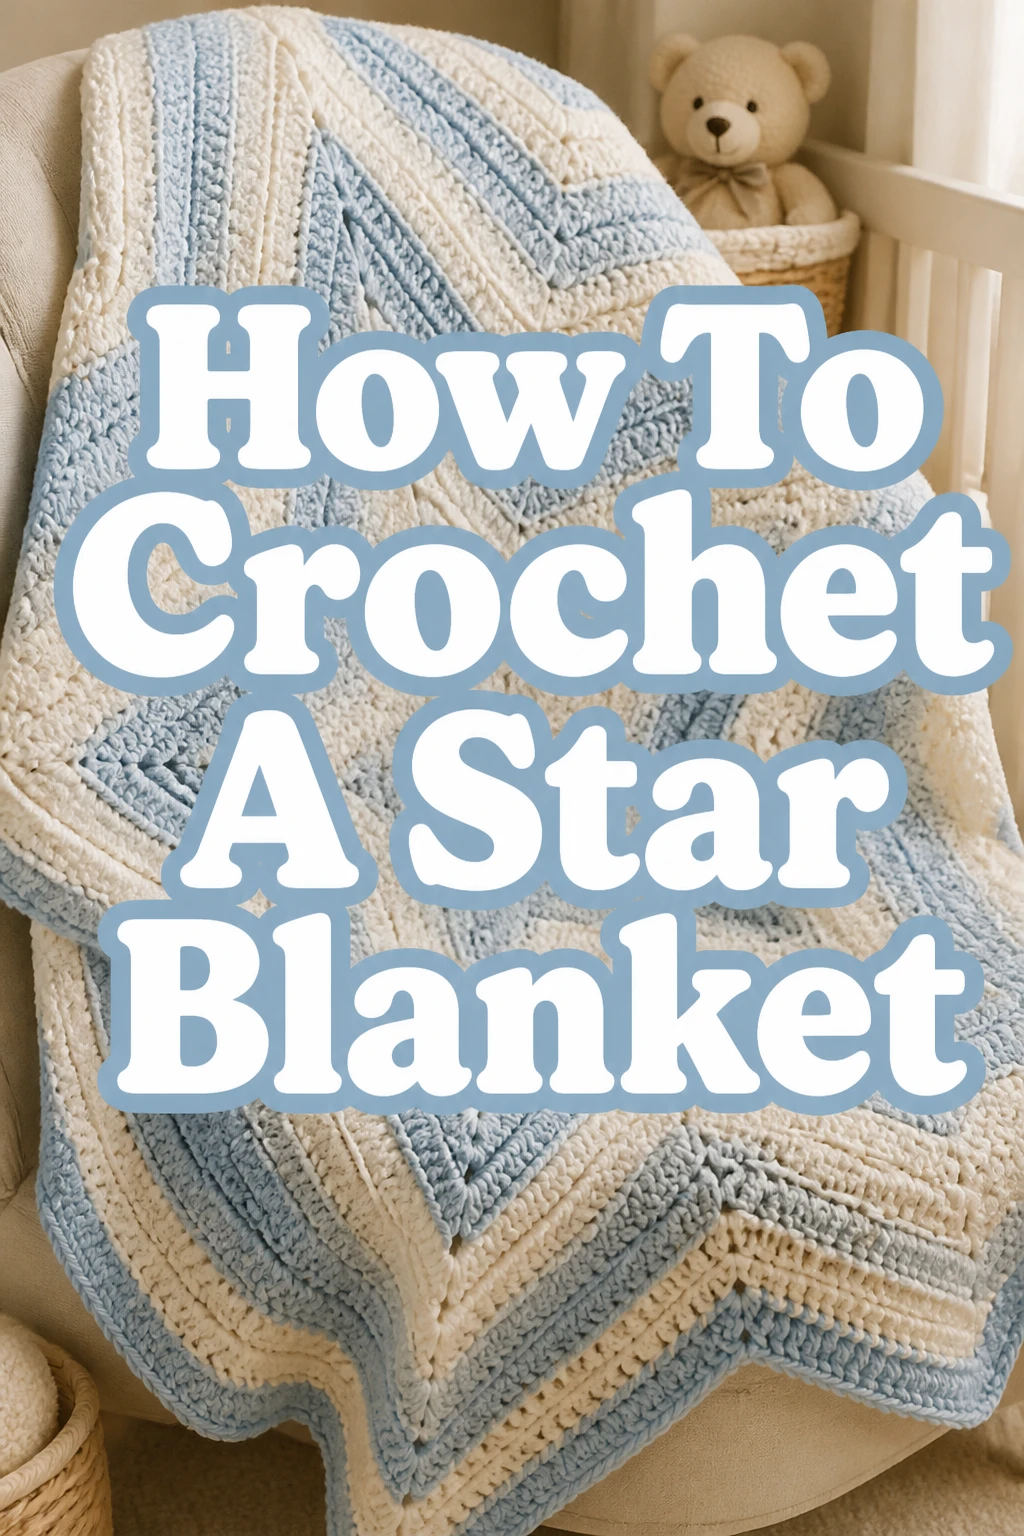
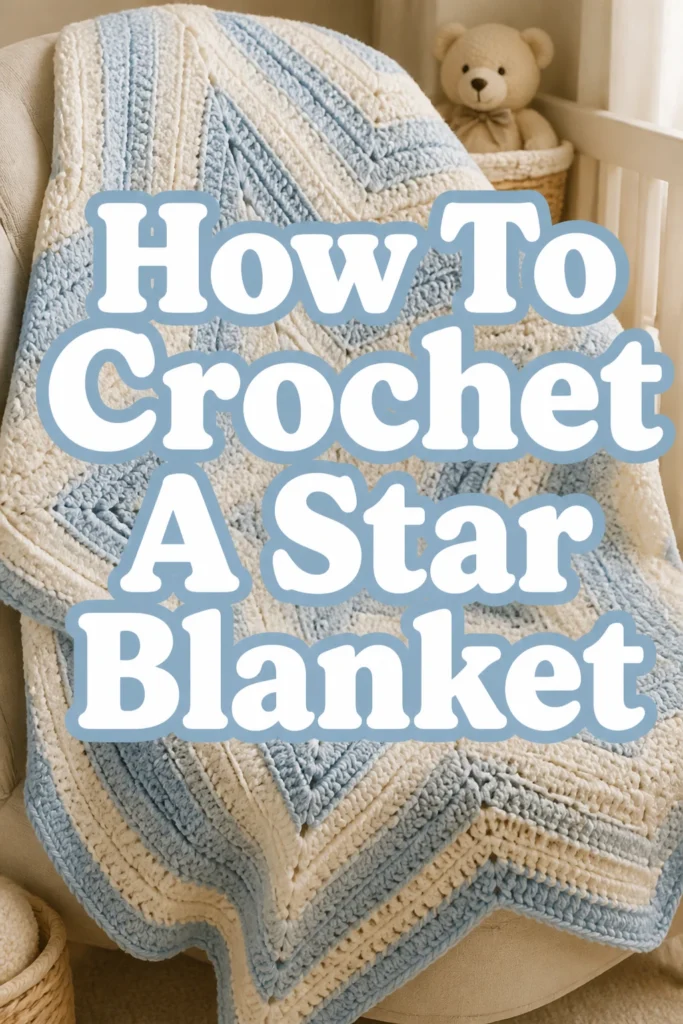
How To Crochet A Star Blanket

Beginner-friendly templates, step-by-step guides,
and weekly project ideas in your inbox.
There’s a special kind of warmth that comes from a handmade blanket.
Creating a star blanket is not only a rewarding project but also results in a stunning piece perfect for gifting or snuggling.
Having crocheted several of these myself, I can guide you through each stitch with practical advice and confidence.
Quick Overview
You’re about to embark on a beautiful journey to craft a unique star-shaped blanket.
This guide will walk you through every stage, from selecting your yarn to the final finishing touches.
- Time needed: 20-40 hours (depending on size and speed)
- Difficulty: Intermediate
- What you’ll need: Yarn, crochet hook, scissors, yarn needle, stitch markers
Step-by-Step Instructions
Step 1: Gather Your Materials
Before you begin, ensure you have all your supplies ready and within reach.
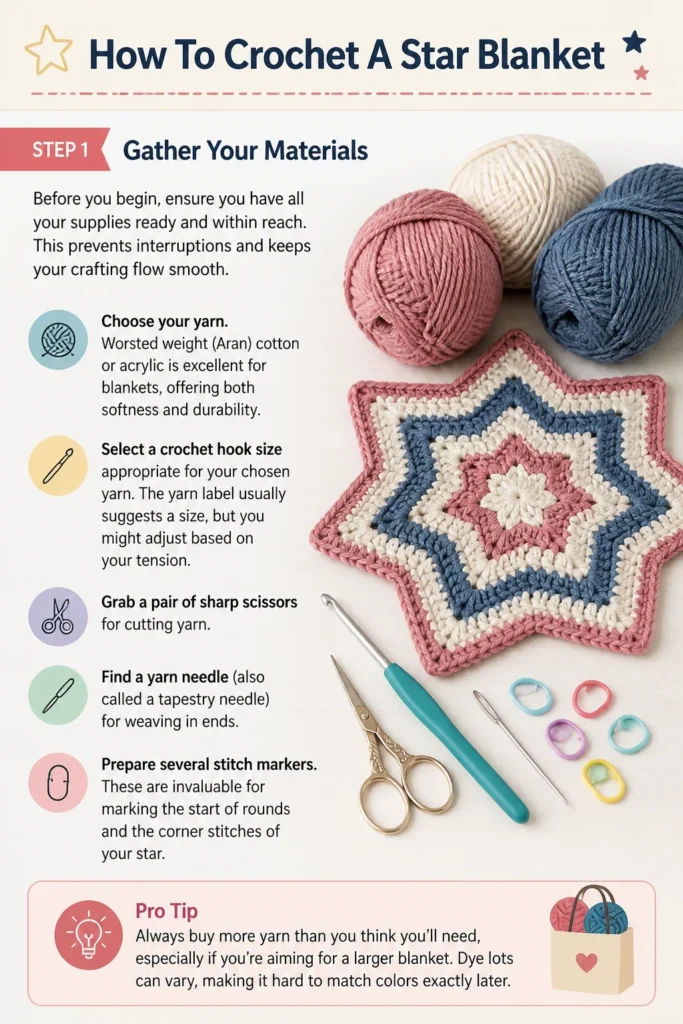
This prevents interruptions and keeps your crafting flow smooth.
- Choose your yarn. Worsted weight (Aran) cotton or acrylic is excellent for blankets, offering both softness and durability.
- Select a crochet hook size appropriate for your chosen yarn. The yarn label usually suggests a size, but you might adjust based on your tension.
- Grab a pair of sharp scissors for cutting yarn.
- Find a yarn needle (also called a tapestry needle) for weaving in ends.
- Prepare several stitch markers. These are invaluable for marking the start of rounds and the corner stitches of your star.
Pro Tip: Always buy more yarn than you think you’ll need, especially if you’re aiming for a larger blanket. Dye lots can vary, making it hard to match colors later.
Step 2: Master the Magic Ring Foundation
The magic ring creates a tight, neat center for your star, preventing a hole in the middle.
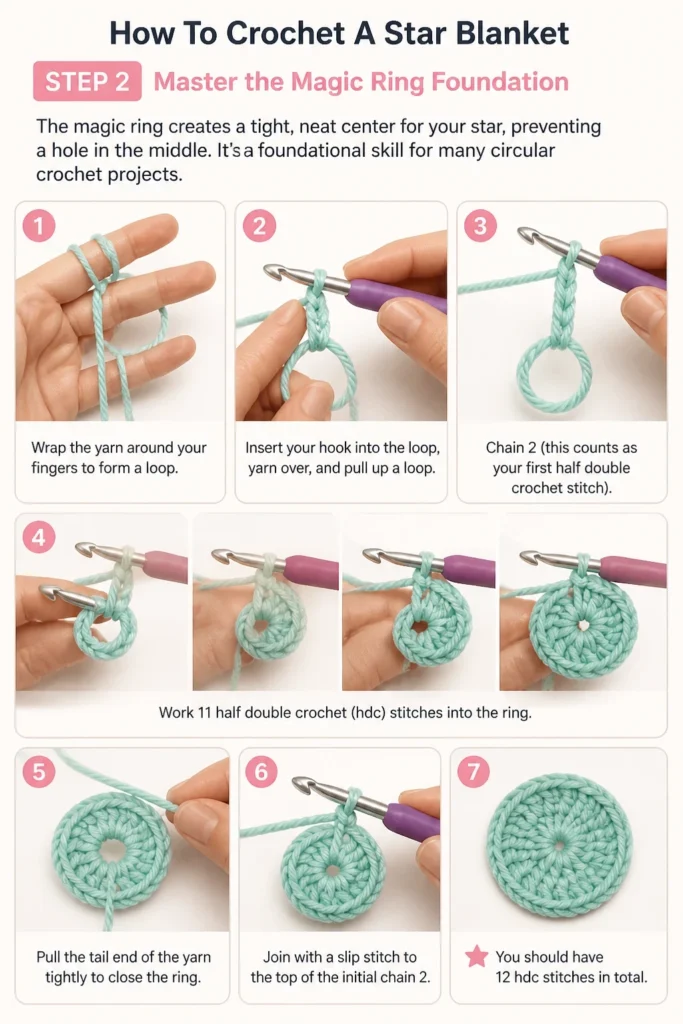
It’s a foundational skill for many circular crochet projects.
- Wrap the yarn around your fingers to form a loop.
- Insert your hook into the loop, yarn over, and pull up a loop.
- Chain 2 (this counts as your first half double crochet stitch).
- Work 11 half double crochet (hdc) stitches into the ring.
- Pull the tail end of the yarn tightly to close the ring.
- Join with a slip stitch to the top of the initial chain 2. You should have 12 hdc stitches in total.
Step 3: Establish the First Round of Star Points
This round sets the stage for the distinct points of your star blanket.
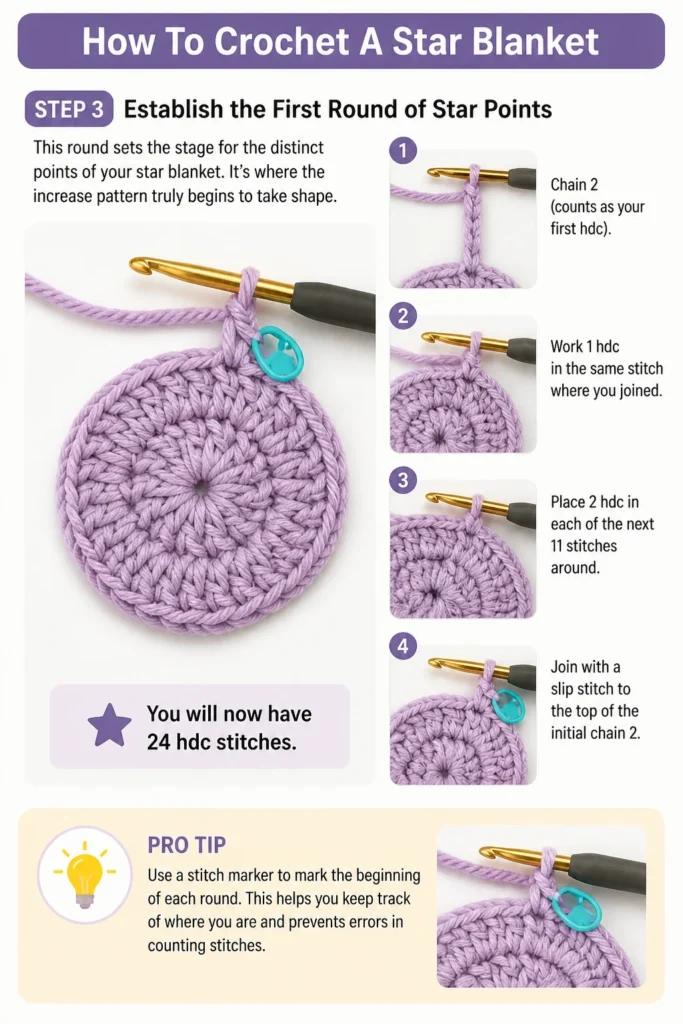
It’s where the increase pattern truly begins to take shape.
- Chain 2 (counts as your first hdc).
- Work 1 hdc in the same stitch where you joined.
- Place 2 hdc in each of the next 11 stitches around.
- Join with a slip stitch to the top of the initial chain 2. You will now have 24 hdc stitches.
Pro Tip: Use a stitch marker to mark the beginning of each round. This helps you keep track of where you are and prevents errors in counting stitches.
Step 4: Define the Star Points
Now you’ll create the increases that form the six distinct points of your star.
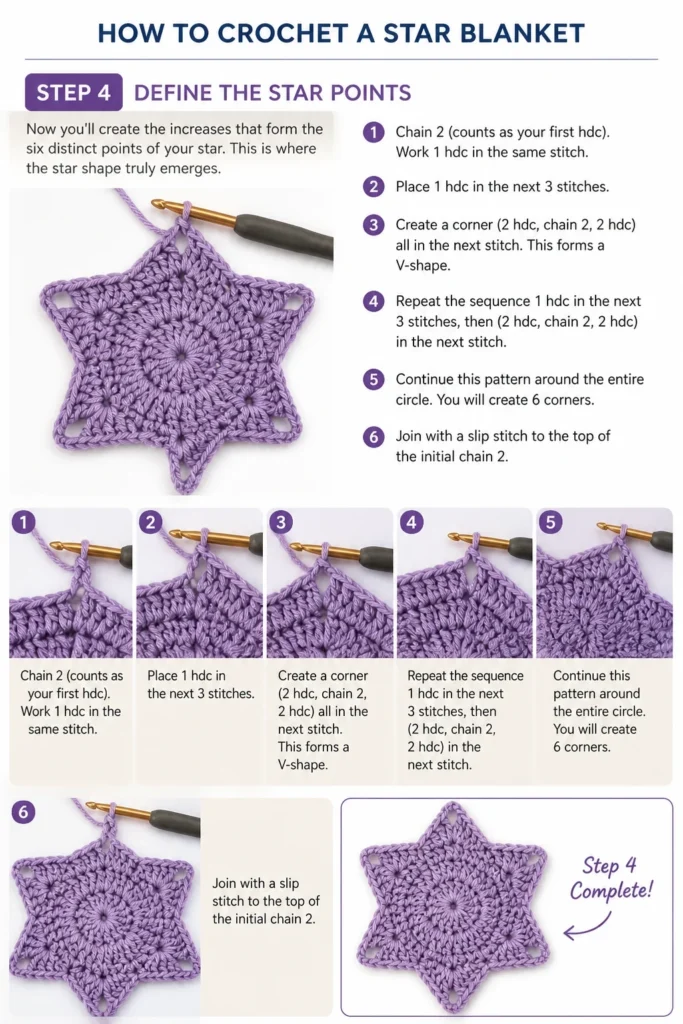
This is where the star shape truly emerges.
- Chain 2 (counts as your first hdc).
- Work 1 hdc in the same stitch.
- Place 1 hdc in the next 3 stitches.
- Create a corner: (2 hdc, chain 2, 2 hdc) all in the next stitch. This forms a V-shape.
- Repeat the sequence: 1 hdc in the next 3 stitches, then (2 hdc, chain 2, 2 hdc) in the next stitch.
- Continue this pattern around the entire circle. You will create 6 corners.
- Join with a slip stitch to the top of the initial chain 2.
Step 5: Grow Your Star Blanket
This is the main repeating pattern that will make your star blanket larger.
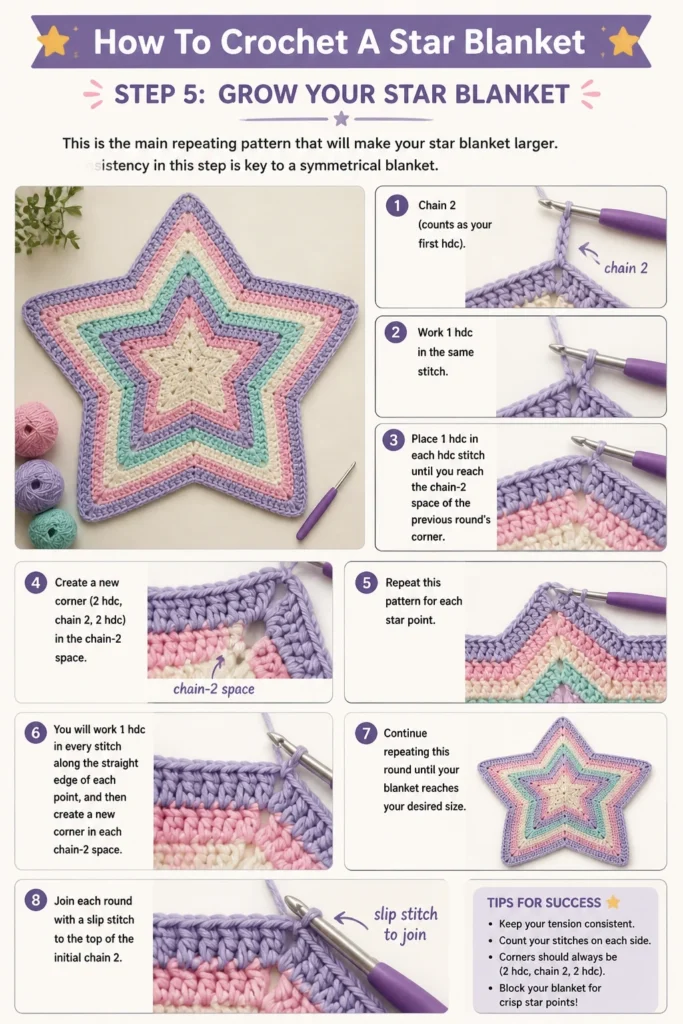
Consistency in this step is key to a symmetrical blanket.
- Chain 2 (counts as your first hdc).
- Work 1 hdc in the same stitch.
- Place 1 hdc in each hdc stitch until you reach the chain-2 space of the previous round’s corner.
- Create a new corner: (2 hdc, chain 2, 2 hdc) in the chain-2 space.
- Repeat this pattern for each star point. You will work 1 hdc in every stitch along the straight edge of each point, and then create a new corner in each chain-2 space.
- Continue repeating this round until your blanket reaches your desired size.
- Join each round with a slip stitch to the top of the initial chain 2.
Step 6: Seamless Color Changes
Changing colors can add visual interest and depth to your star blanket.
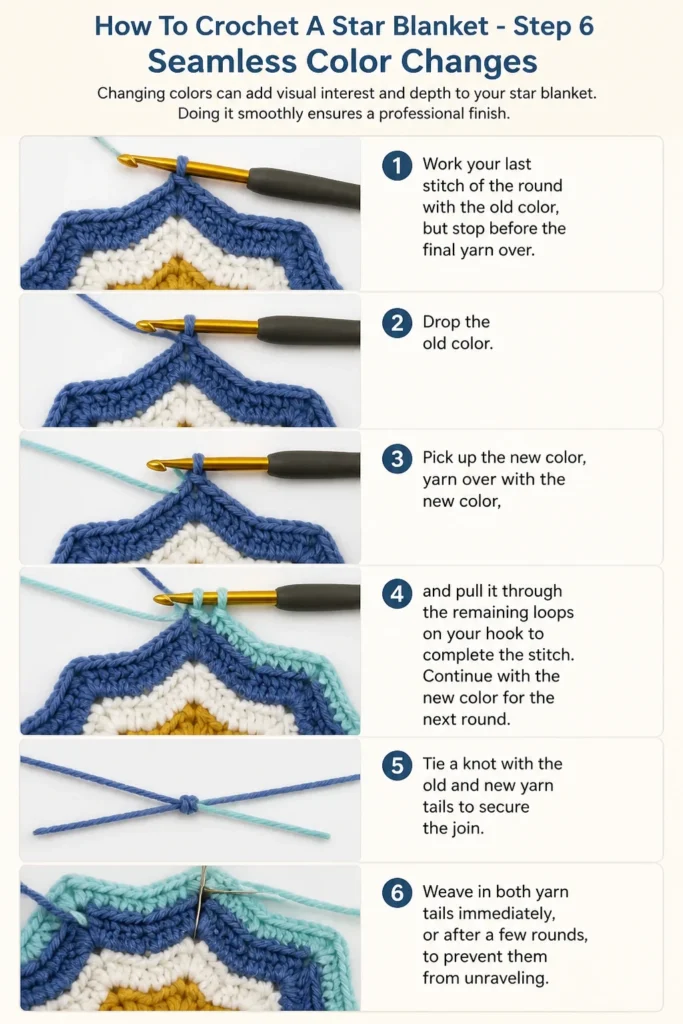
Doing it smoothly ensures a professional finish.
- Work your last stitch of the round with the old color, but stop before the final yarn over.
- Drop the old color.
- Pick up the new color, yarn over with the new color, and pull it through the remaining loops on your hook to complete the stitch.
- Continue with the new color for the next round.
- Tie a knot with the old and new yarn tails to secure the join.
- Weave in both yarn tails immediately, or after a few rounds, to prevent them from unraveling.
Step 7: Weave in All Ends
This often-dreaded but crucial step ensures your blanket is neat and durable.
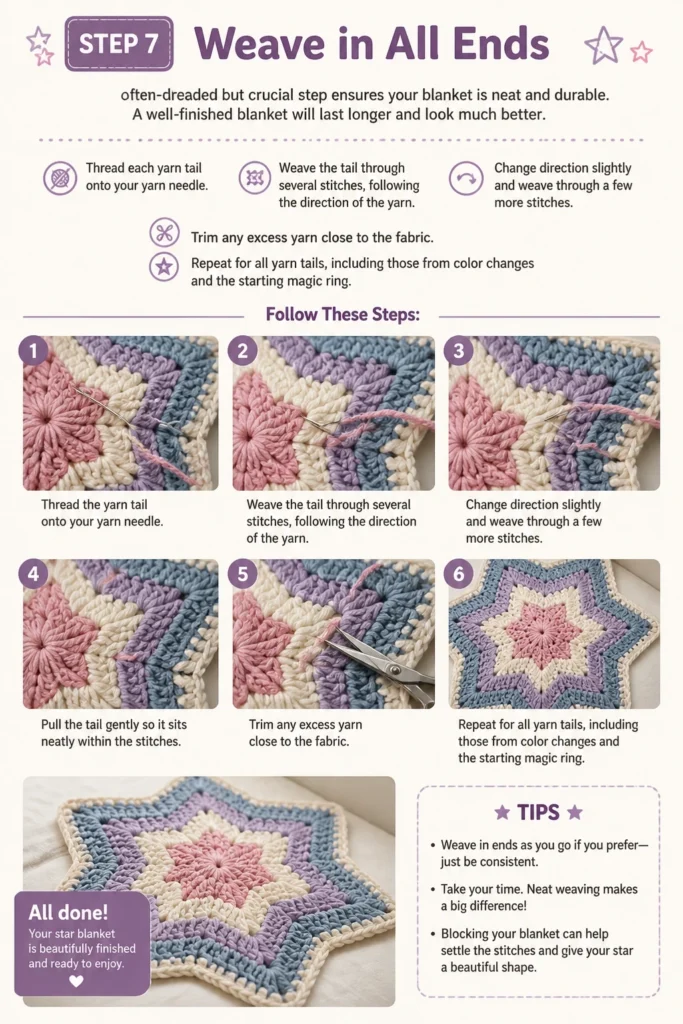
A well-finished blanket will last longer and look much better.
- Thread each yarn tail onto your yarn needle.
- Weave the tail through several stitches, following the direction of the yarn.
- Change direction slightly and weave through a few more stitches.
- Trim any excess yarn close to the fabric.
- Repeat for all yarn tails, including those from color changes and the starting magic ring.
Step 8: Add an Optional Border
A border can give your star blanket a polished, finished look.
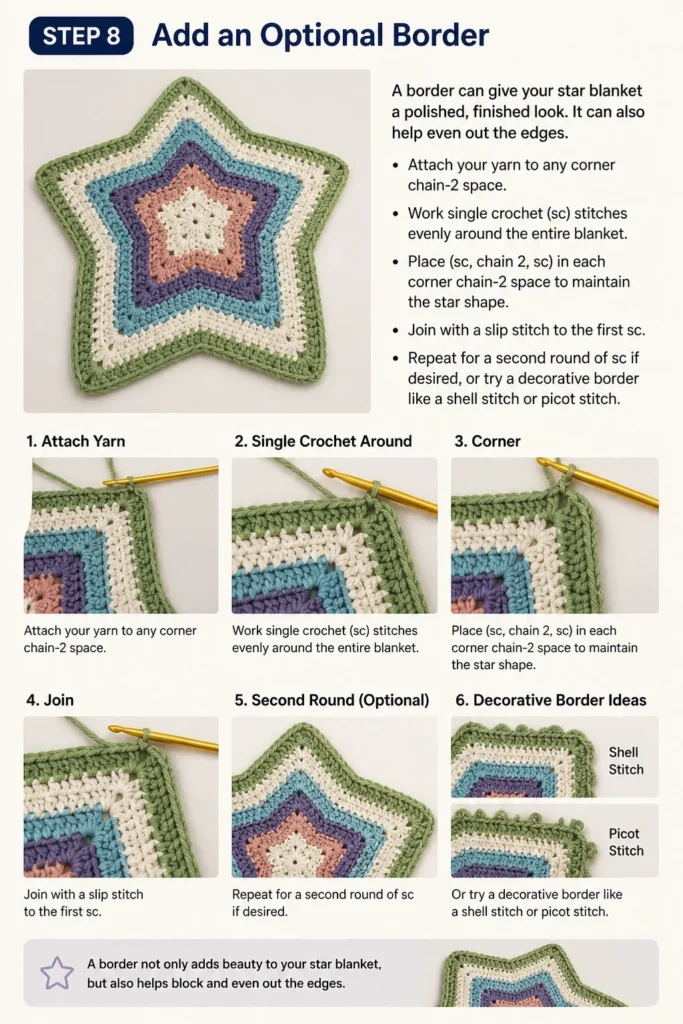
It can also help even out the edges.
- Attach your yarn to any corner chain-2 space.
- Work single crochet (sc) stitches evenly around the entire blanket.
- Place (sc, chain 2, sc) in each corner chain-2 space to maintain the star shape.
- Join with a slip stitch to the first sc.
- Repeat for a second round of sc if desired, or try a decorative border like a shell stitch or picot stitch.
Step 9: Block Your Blanket
Blocking is the process of shaping and setting your crochet work.
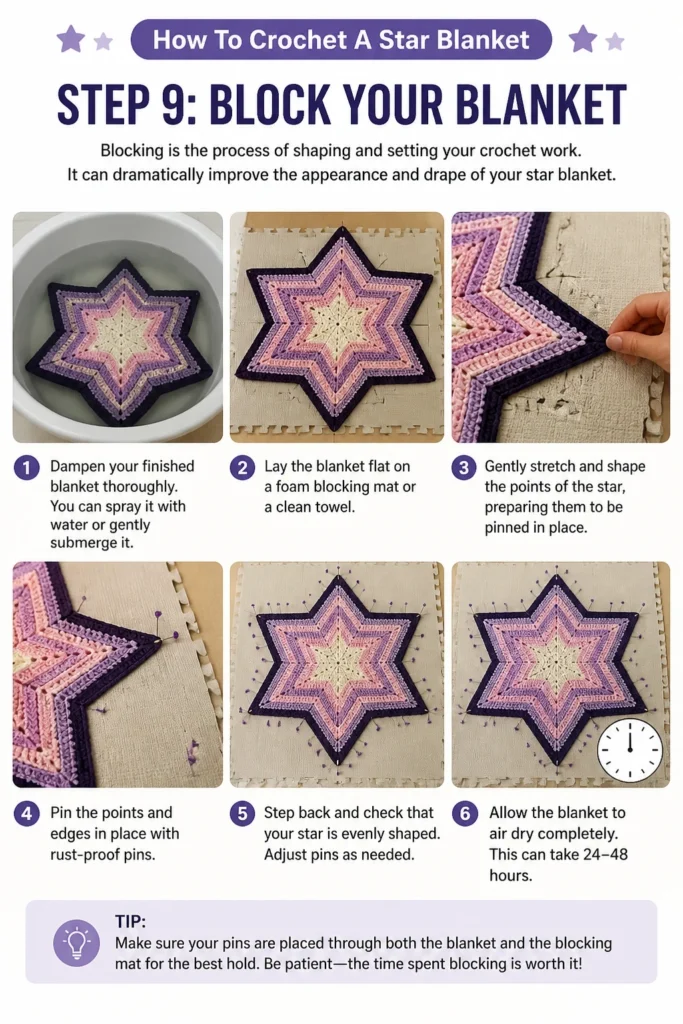
It can dramatically improve the appearance and drape of your star blanket.
- Dampen your finished blanket thoroughly. You can spray it with water or gently submerge it.
- Lay the blanket flat on a foam blocking mat or a clean towel.
- Gently stretch and shape the points of the star, pinning them in place with rust-proof pins.
- Allow the blanket to air dry completely. This can take 24-48 hours.
Step 10: Enjoy Your Creation
Your beautiful star blanket is now complete and ready to be loved.
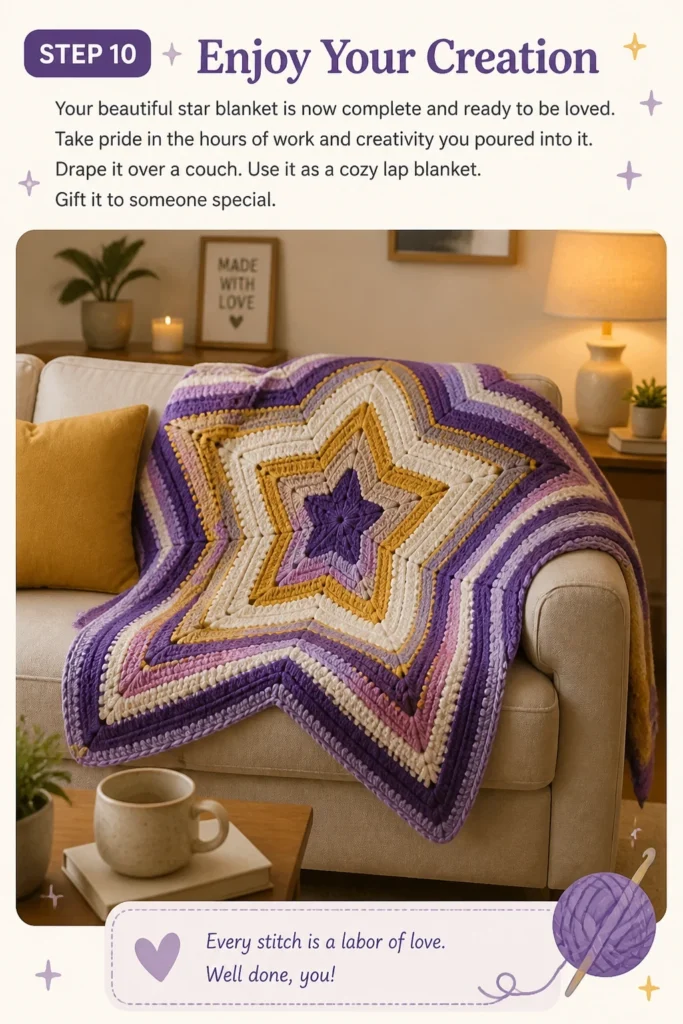
Take pride in the hours of work and creativity you poured into it.
- Drape it over a couch.
- Use it as a cozy lap blanket.
- Gift it to someone special.
Common Mistakes to Avoid
Incorrect Stitch Count
Missing or adding stitches, especially in the early rounds, can throw off the symmetry of your star.
Always count your stitches at the end of each round to ensure you have the correct number before moving on.
Uneven Tension
If your stitches are too tight in some areas and too loose in others, your blanket might pucker or wave.
Practice maintaining consistent tension throughout your work; it improves with experience.
Forgetting Corner Increases
The star shape relies entirely on the increases made in the chain-2 spaces at each point.
If you forget these increases, your blanket will start to curl or become a hexagon instead of a star.
Skipping Weaving in Ends
Leaving loose ends or poorly woven ends can lead to your blanket unraveling over time.
Take the time to weave in all ends securely and neatly to ensure the longevity of your beautiful creation.
Troubleshooting
Blanket is Ruffling or Wavy
This usually indicates too many stitches or too loose tension.
Try going down a hook size, or carefully recount your stitches to ensure you haven’t added extra increases between corners.
Blanket is Cupping or Curling
A cupping blanket suggests you don’t have enough stitches or your tension is too tight.
Consider going up a hook size, or double-check that you are consistently making the correct increases at each corner.
Star Points Aren’t Defined
If your star doesn’t look pointy, you might be missing the chain-2 in your corner increases.
The chain-2 creates the space that pulls the stitches into a distinct point; ensure you’re including it in every corner increase.
Key Takeaways
- A magic ring provides a neat, hole-free center for your star blanket.
- Consistent counting and stitch markers are crucial for maintaining the star’s six points.
- The corner increase (2 hdc, chain 2, 2 hdc) is the secret to the star shape.
- Practice even tension for a beautifully flat and symmetrical blanket.
- Weave in all ends meticulously for a durable and professional finish.
- Blocking your finished blanket enhances its shape and overall appearance.
Frequently Asked Questions
Can I use different types of yarn?
Yes, you can. Just be aware that different yarn weights will result in different blanket sizes and drape. Adjust your hook size accordingly and always do a small swatch to check your gauge.
How do I make the blanket bigger or smaller?
To make it bigger, simply continue repeating the increase rounds (Step 5) until it reaches your desired size. To make it smaller, stop at an earlier round. The pattern is endlessly repeatable.
What if my stitches look messy?
Crochet takes practice. Don’t be discouraged if your first few rounds aren’t perfect. Your stitches will become more even and consistent with more practice. Focus on consistent tension and correct stitch placement.
Is this pattern suitable for beginners?
While the magic ring and half double crochet are beginner-friendly, keeping track of the increases for the star points can be challenging for absolute beginners. It’s best for ambitious beginners or those with some basic crochet experience.
Your Next Creative Adventure Awaits
You’ve just created a stunning star blanket, a true testament to your skill and patience.
This project builds a strong foundation for many other intricate crochet designs.
Consider exploring other geometric blanket patterns like hexagons or squares, or even trying a different stitch pattern for a new texture.
Pick up your hook and yarn today, and let your next creative journey begin!
Our Top Recommended Finds
- Ergonomic Crochet Hook Set: A comfortable grip reduces hand fatigue, allowing for longer crafting sessions.
- Large Skeins of Worsted Weight Yarn: Reduces the number of joins and ensures consistent dye lots for bigger projects.
- Blocking Mats with Grid Lines: These mats make it easier to measure and pin your blanket accurately for perfect shaping.
Beginner-friendly templates, step-by-step guides,
and weekly project ideas in your inbox.