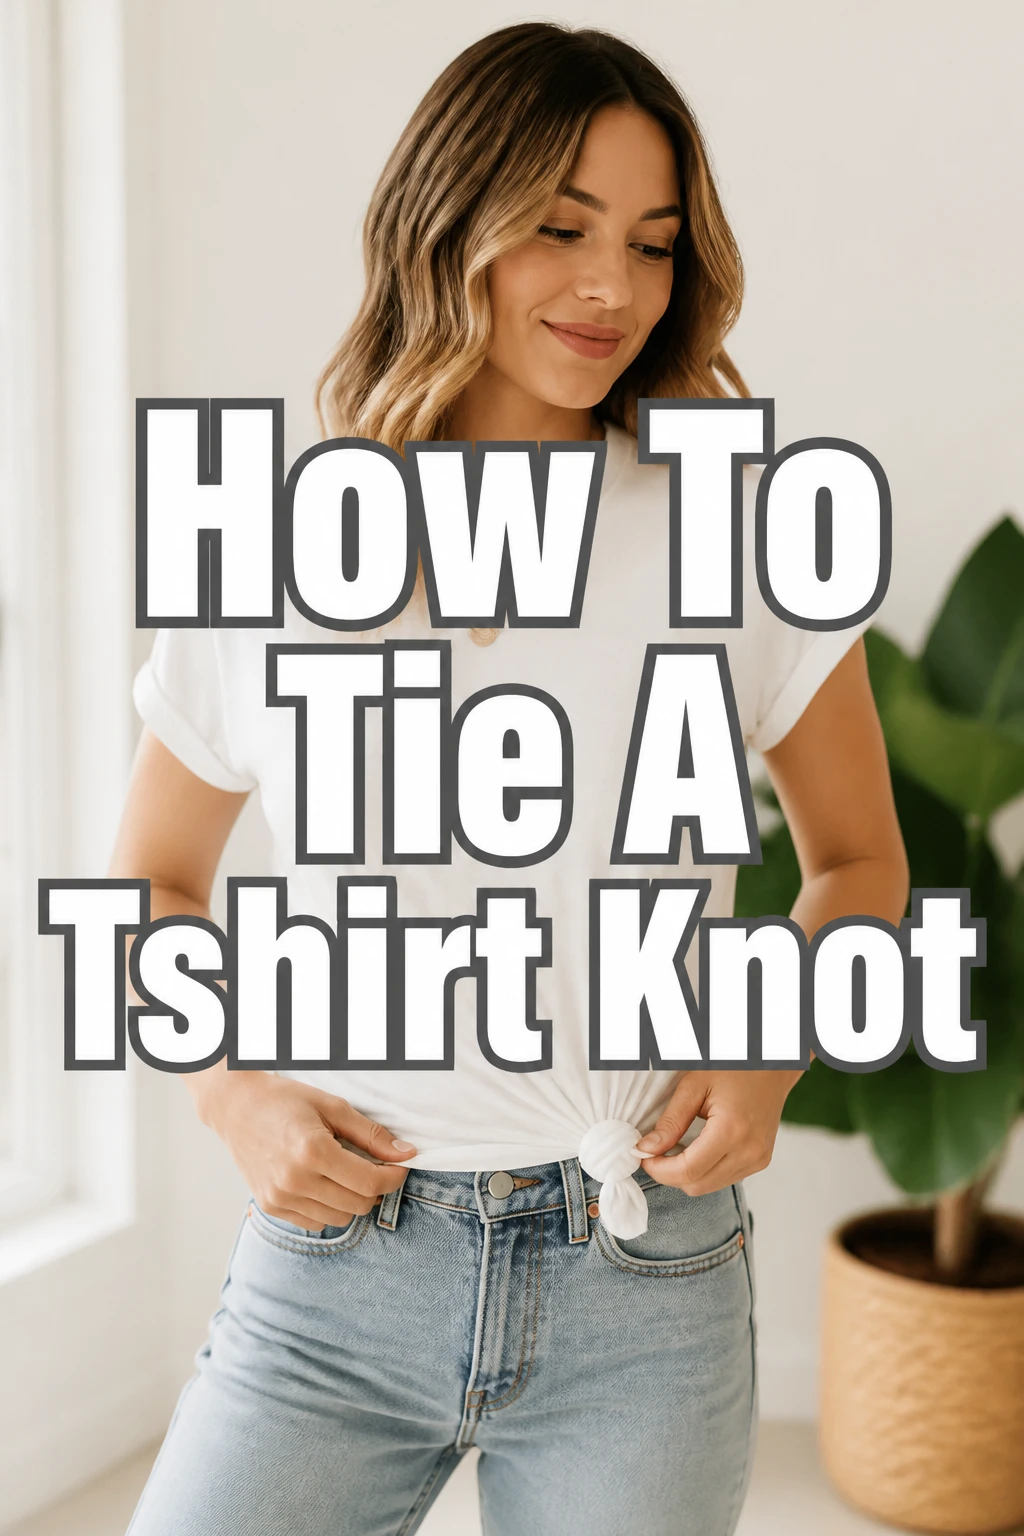
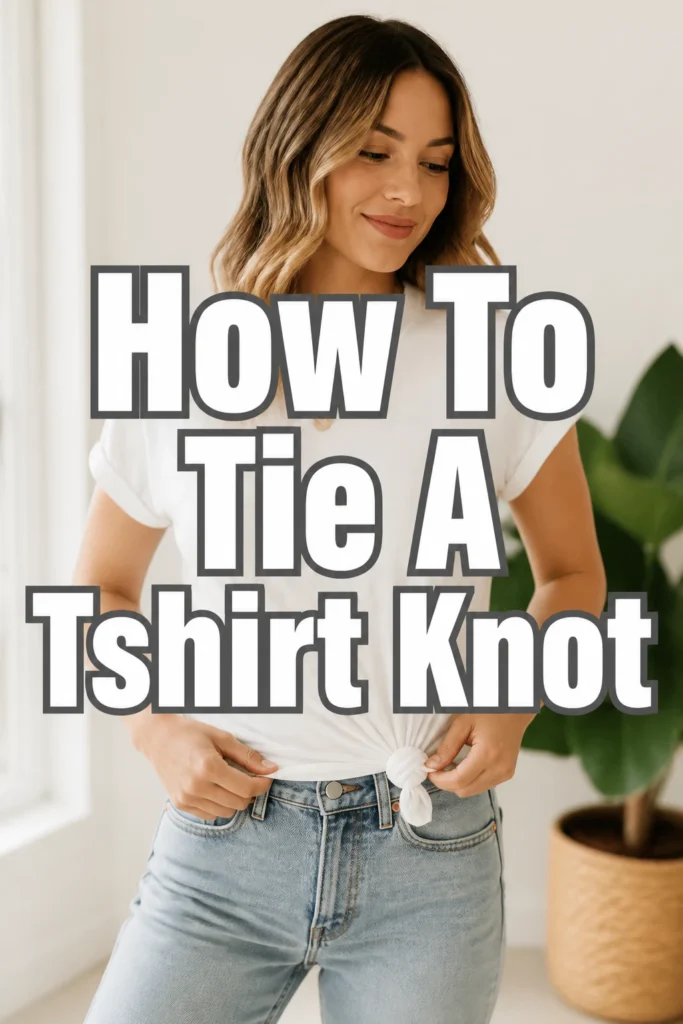
How To Tie A Tshirt Knot

Beginner-friendly templates, step-by-step guides,
and weekly project ideas in your inbox.
T-shirt knots are a simple yet transformative styling trick. They can instantly elevate your look, add shape, and give a relaxed garment a fresh new vibe.
I’ve been experimenting with T-shirt knots for years, finding ways to make them look effortless and stay put. This guide shares all my best techniques and insights.
You’re about to discover how easy it is to master this versatile fashion hack, adding a touch of personal flair to any outfit.
Quick Overview
You’ll learn several popular T-shirt knot styles, giving your favorite tops a custom, flattering fit. Get ready to transform your wardrobe with minimal effort.
- Time needed: 5-10 minutes
- Difficulty: Beginner
- What you’ll need: Any T-shirt (oversized, regular, or longline work best)
Step-by-Step Instructions
Step 1: Choose Your T-Shirt
Select a T-shirt that offers a bit of extra fabric. Oversized or longer-line shirts are ideal for creating a noticeable knot.
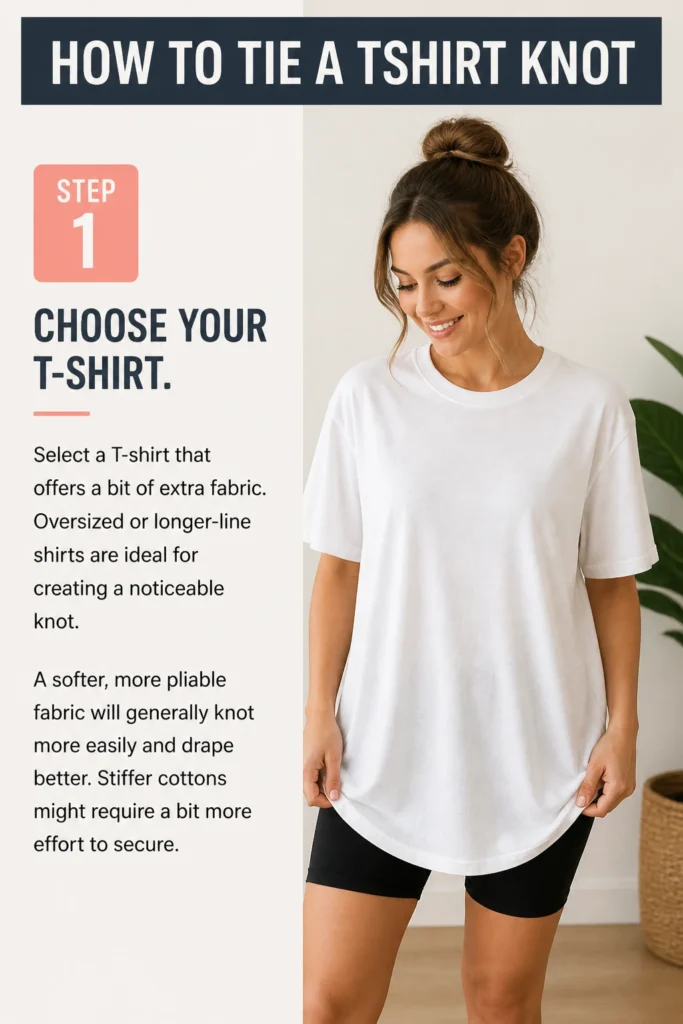
A softer, more pliable fabric will generally knot more easily and drape better. Stiffer cottons might require a bit more effort to secure.
Step 2: Decide on Knot Placement
Determine where you want your knot to sit. Common placements include the front center, the side (left or right), or even at the back for a subtle detail.
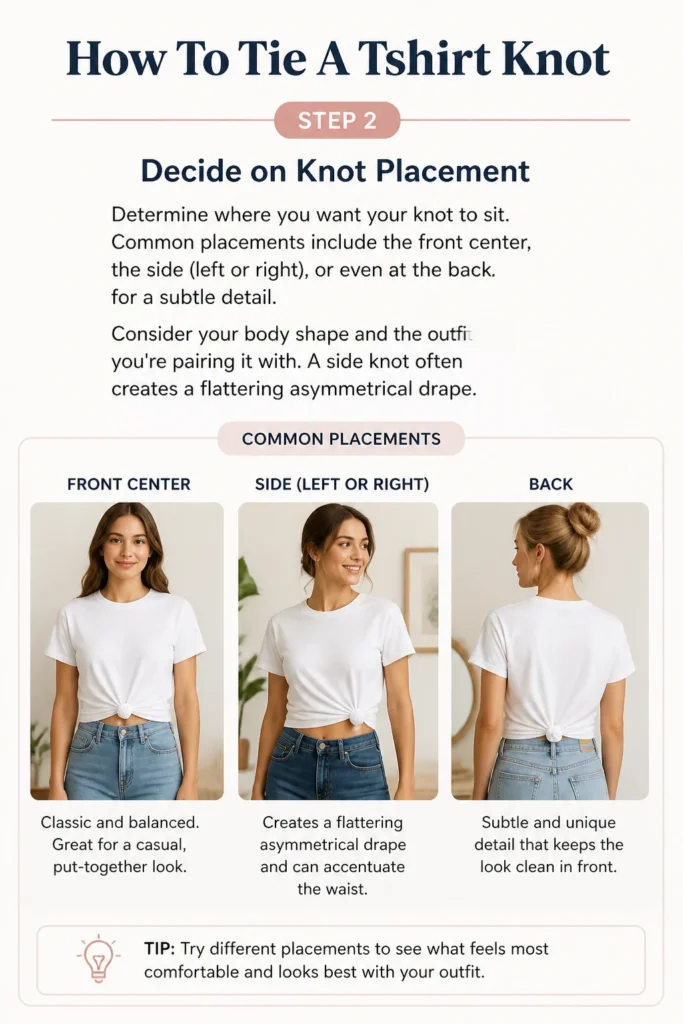
Consider your body shape and the outfit you’re pairing it with. A side knot often creates a flattering asymmetrical drape.
Step 3: Gather the Fabric
Reach for the hem of your T-shirt in the chosen knot area. Pinch a section of fabric, about 2-4 inches wide, depending on the desired knot size.
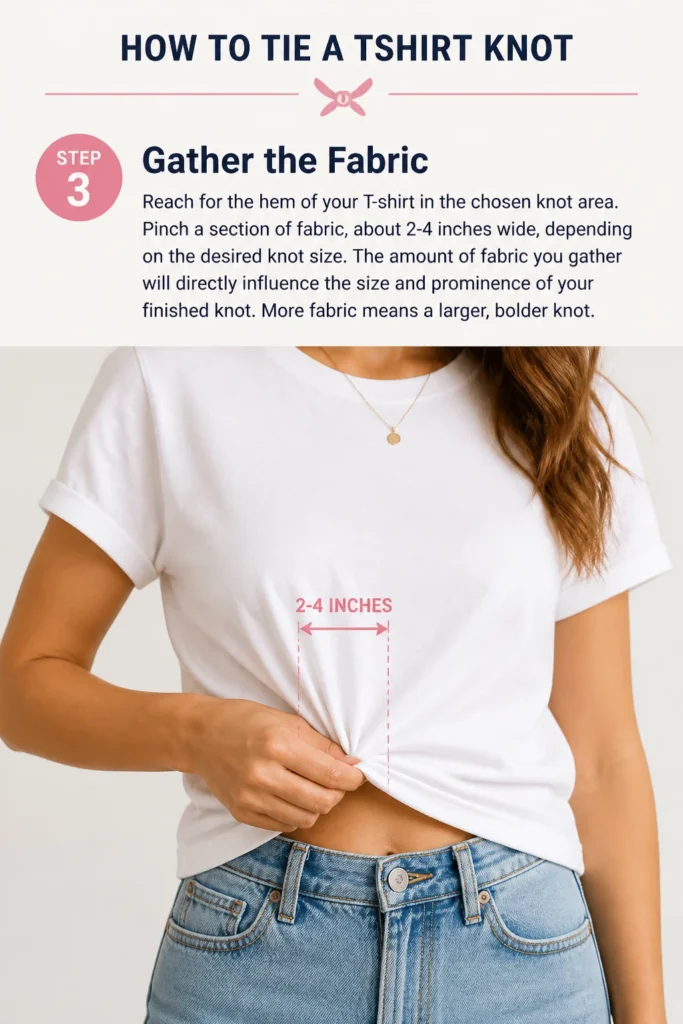
The amount of fabric you gather will directly influence the size and prominence of your finished knot. More fabric means a larger, bolder knot.
Step 4: Twist the Fabric (The Basic Knot)
Hold the gathered fabric firmly between your thumb and forefinger. Begin to twist it tightly in one direction, forming a rope-like strand.
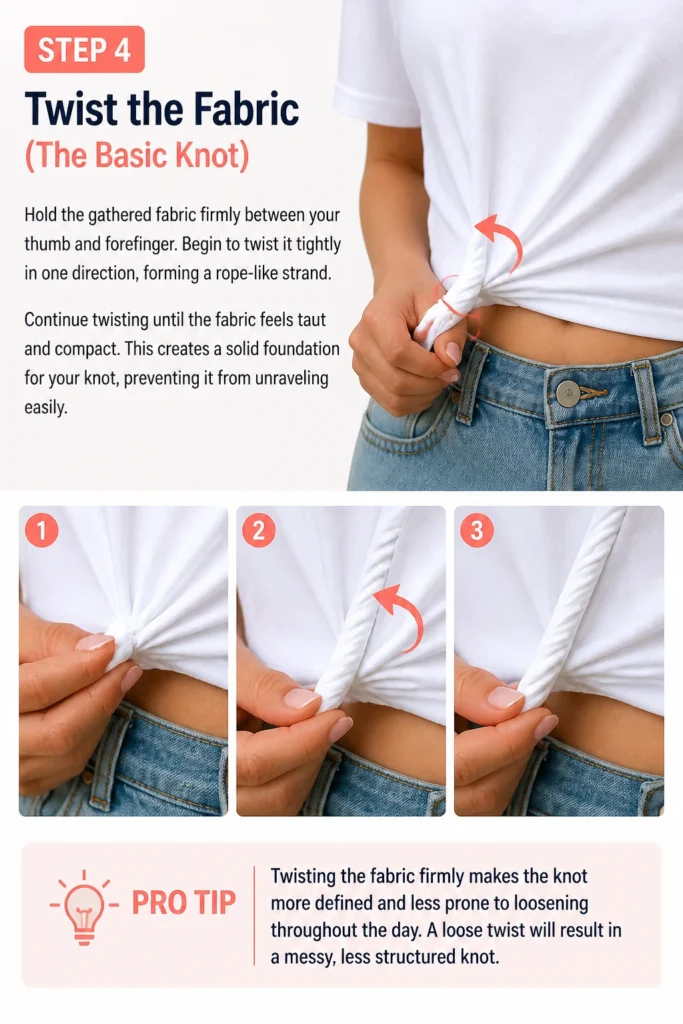
Continue twisting until the fabric feels taut and compact. This creates a solid foundation for your knot, preventing it from unraveling easily.
Pro Tip: Twisting the fabric firmly makes the knot more defined and less prone to loosening throughout the day. A loose twist will result in a messy, less structured knot.
Step 5: Tie the First Loop
Bring the twisted fabric up and over itself, creating a simple loop. Imagine tying the first step of a shoelace knot.
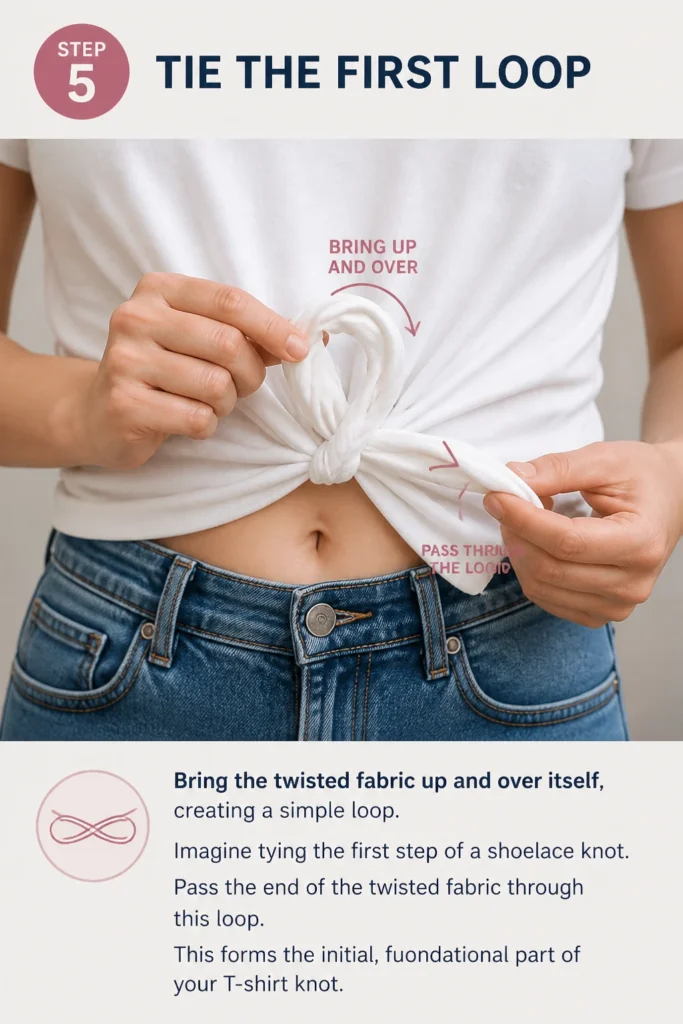
Pass the end of the twisted fabric through this loop. This forms the initial, foundational part of your T-shirt knot.
Step 6: Pull Through and Tighten
Pull the twisted end completely through the loop you just created. Gently tug on both the main body of the T-shirt and the knotted tail to tighten it.
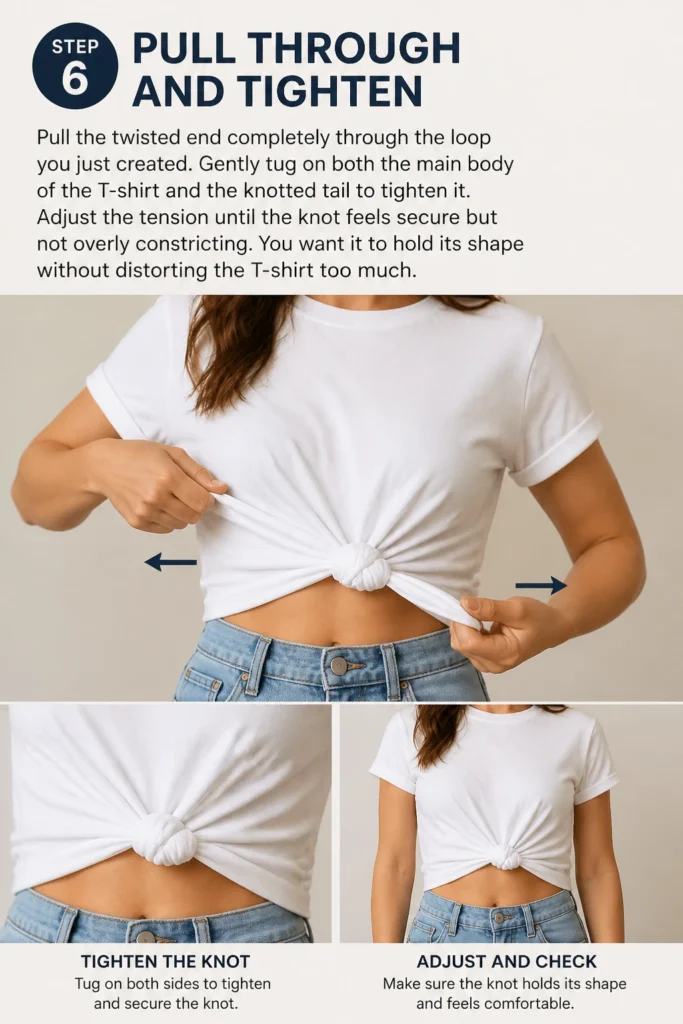
Adjust the tension until the knot feels secure but not overly constricting. You want it to hold its shape without distorting the T-shirt too much.
Step 7: Refine the Knot (Optional: The Double Knot)
Consider tying a second knot with the remaining tail if you desire extra security or a more prominent look. Simply repeat Step 5 and 6 with the existing tail.
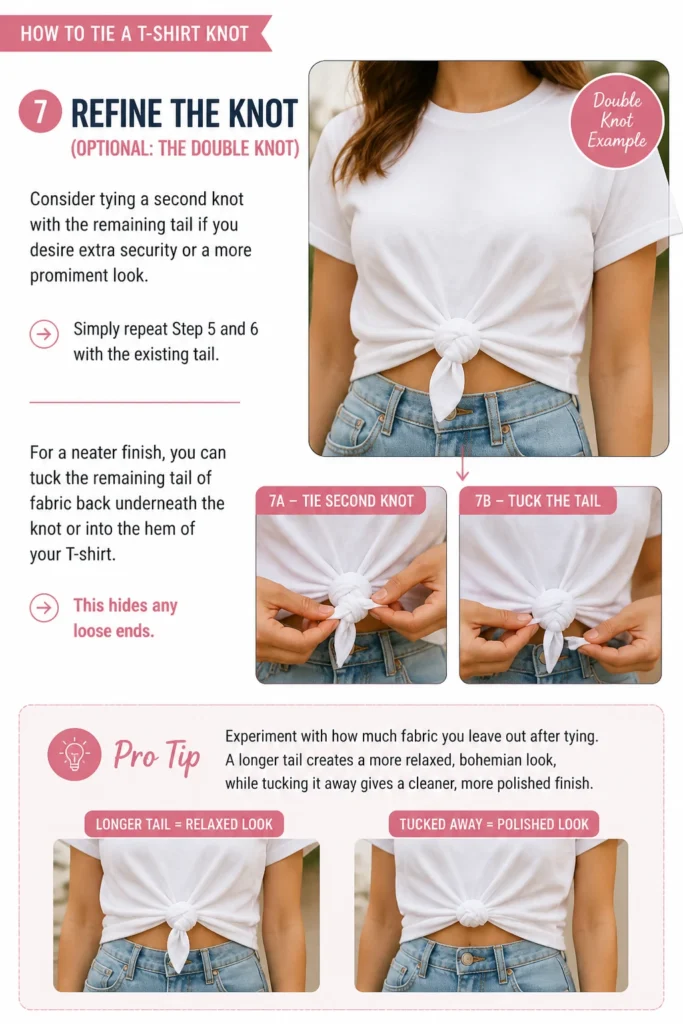
For a neater finish, you can tuck the remaining tail of fabric back underneath the knot or into the hem of your T-shirt. This hides any loose ends.
Pro Tip: Experiment with how much fabric you leave out after tying. A longer tail creates a more relaxed, bohemian look, while tucking it away gives a cleaner, more polished finish.
Step 8: Adjust the Drape
Smooth out the fabric around the knot. Gently pull and adjust the T-shirt’s material to create a flattering drape and ensure it sits comfortably.
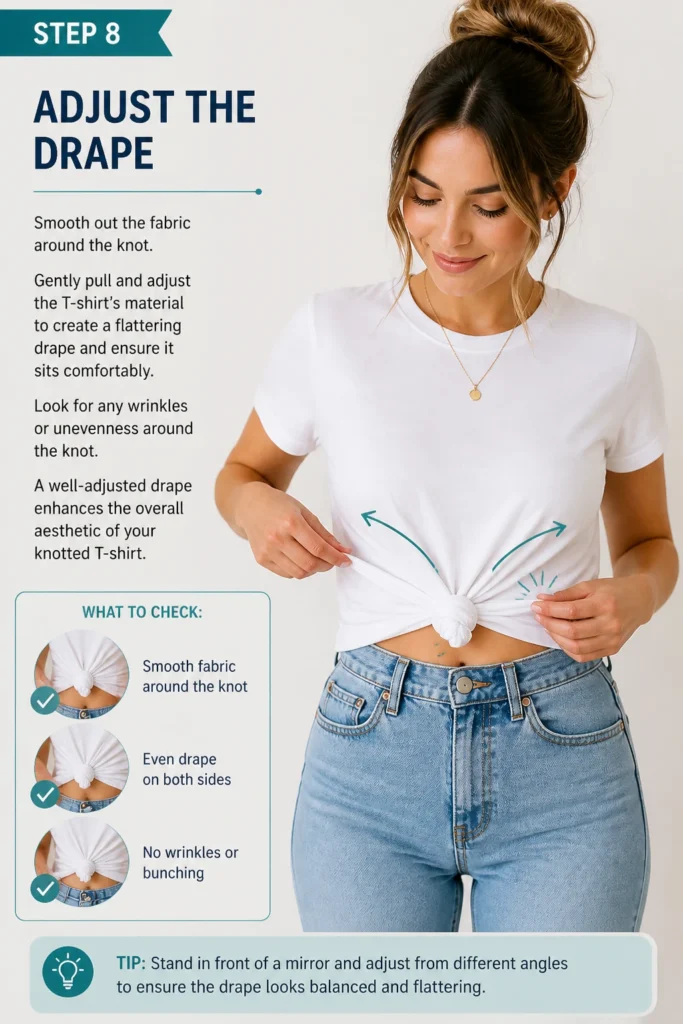
Look for any wrinkles or unevenness around the knot. A well-adjusted drape enhances the overall aesthetic of your knotted T-shirt.
Step 9: Try the “Inside-Out” Knot (For a cleaner look)
Gather the fabric from the inside of the T-shirt, pushing it through to the outside. This creates a small “bubble” of fabric on the exterior.
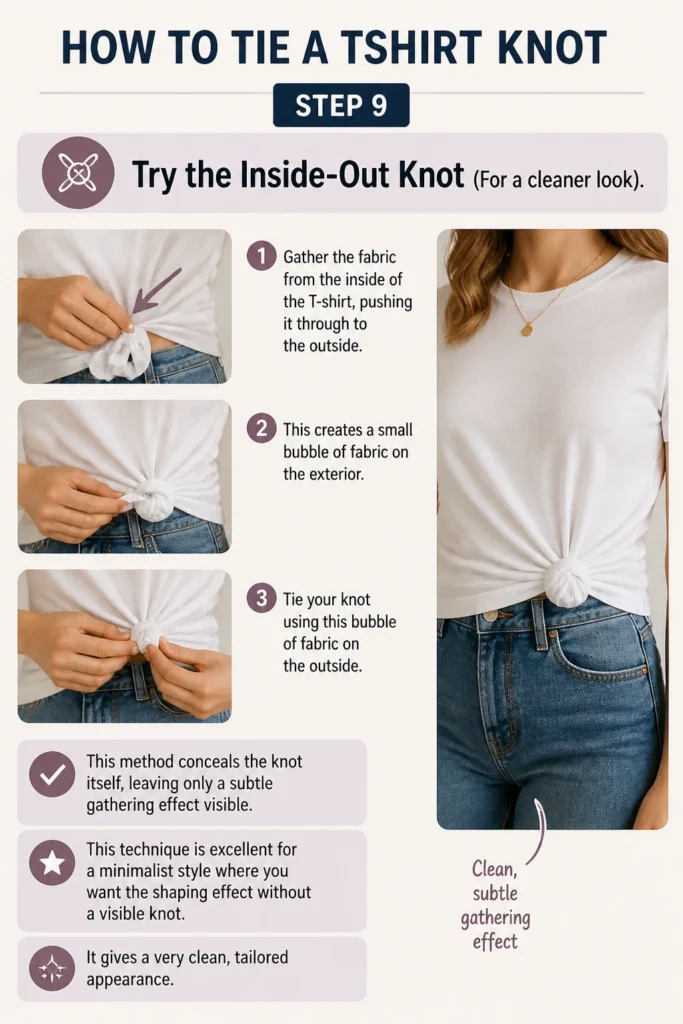
Tie your knot using this “bubble” of fabric on the outside. This method conceals the knot itself, leaving only a subtle gathering effect visible.
This technique is excellent for a minimalist style where you want the shaping effect without a visible knot. It gives a very clean, tailored appearance.
Step 10: The “Ring” or “Elastic Band” Knot (For extra security)
Gather your fabric as usual, creating a small bundle. Instead of tying a knot with the fabric itself, secure it with a small hair elastic or a T-shirt ring.
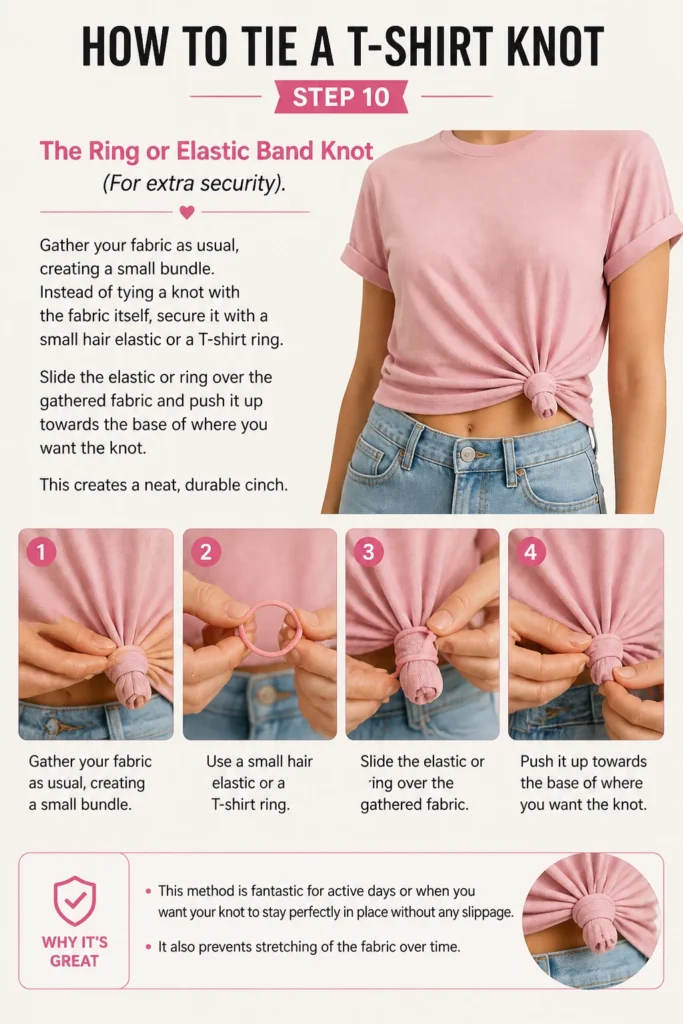
Slide the elastic or ring over the gathered fabric and push it up towards the base of where you want the knot. This creates a neat, durable cinch.
This method is fantastic for active days or when you want your knot to stay perfectly in place without any slippage. It also prevents stretching of the fabric over time.
Common Mistakes to Avoid
Tying Too Tight
Many people assume a tighter knot is a better knot. However, tying your T-shirt knot too tightly can distort the fabric, create uncomfortable tension, and make the T-shirt pull awkwardly.
Aim for a knot that is secure but allows the fabric to drape naturally around it. You should be able to move comfortably without feeling restricted.
Using Too Little Fabric
Attempting to tie a knot with only a tiny pinch of fabric can result in a flimsy knot that quickly comes undone. It might also look disproportionate to the rest of the shirt.
Always gather a substantial amount of fabric, typically 2-4 inches wide, to ensure a robust and well-defined knot that holds its shape.
Forgetting to Refine the Drape
After tying the knot, it’s easy to rush off without a final check. Neglecting to smooth and adjust the fabric around the knot can leave your T-shirt looking bunched or uneven.
Take a moment to pull and arrange the surrounding material. This small step makes a significant difference in the overall polished appearance of your knotted shirt.
Inconsistent Knot Placement
If you’re aiming for a specific look, such as a perfectly centered knot or a symmetrical side knot, inconsistent placement can throw off the balance of your outfit.
Before tying, visualize where you want the knot to sit. Use your belly button or hip bone as a guide for consistent placement each time.
Troubleshooting
Knot Keeps Coming Undone
If your knot isn’t holding, it’s likely due to insufficient twisting or not enough fabric. The fabric needs to be tightly twisted into a rope before you create the loop.
Also, ensure you’re using enough material. A larger bundle of fabric provides more friction and bulk, helping the knot stay secure. Consider a double knot or the elastic band method for extra security.
Knot Looks Bulky or Messy
A bulky knot often happens when too much fabric is gathered or the fabric isn’t twisted tightly enough before tying. A messy look can also occur if the tail isn’t tucked away or smoothed.
Try using a slightly smaller section of fabric. Focus on twisting it very tightly and neatly. After tying, spend time tucking any loose ends and smoothing out the surrounding material for a cleaner finish.
T-Shirt Feels Too Tight or Restrictive
If your T-shirt feels uncomfortable after knotting, you’ve probably pulled the knot too tightly, or the initial fabric gather was too low on the shirt, pulling it up too high.
Untie the knot and start again, ensuring you don’t over-tighten. You might also want to gather the fabric from a slightly higher point on the T-shirt to avoid pulling the hem too far up.
Key Takeaways
- Always choose a T-shirt with ample fabric for the best knotting results.
- Twist the gathered fabric firmly into a rope before tying for a secure, defined knot.
- Experiment with knot placement (center, side, back) to find what flatters you most.
- Refine the drape around the knot to ensure a smooth, polished look.
- Consider the “inside-out” or “elastic band” methods for cleaner, more secure knots.
- Avoid tying knots too tightly or using too little fabric, as this can lead to issues.
Frequently Asked Questions
Can I knot any type of T-shirt?
While most T-shirts can be knotted, those made from softer, more pliable fabrics like jersey cotton or blends work best. Stiffer materials or very thin, slippery fabrics might be more challenging to keep knotted securely. Oversized or longer-line shirts also offer more material to work with.
Will knotting damage my T-shirt?
Generally, knotting a T-shirt won’t cause permanent damage if done gently. However, repeatedly knotting in the exact same spot on delicate fabrics over a long period could potentially stretch or weaken that area. Vary your knot placement and avoid excessive pulling to preserve your shirt’s integrity.
How do I make the knot stay all day?
To ensure your knot stays put, twist the fabric very tightly before tying. A double knot provides extra security. For ultimate hold, consider using a small hair elastic or a T-shirt ring underneath the knot. This method locks the fabric in place without stretching it.
What’s the best knot for a cropped look?
For a cropped look, tie your knot higher up on the T-shirt, closer to your natural waistline. The “inside-out” knot method is also excellent for achieving a clean cropped effect without a visible knot, making the shirt appear intentionally shorter and gathered.
Our Top Recommended Finds
- Oversized Cotton T-Shirts: Perfect for creating large, relaxed knots with plenty of drape. Look for soft, breathable cotton blends.
- T-Shirt Rings or Clips: These small accessories help secure knots without tying, offering a neat and durable alternative, especially for slippery fabrics.
- Hair Elastics (fabric-covered): Great for the “elastic band” knot method, providing a strong hold without snagging or damaging your T-shirt’s fabric.
Transform Your Wardrobe Today
You now have all the tools to effortlessly elevate your T-shirt game. This simple styling trick can refresh old favorites and add a personal touch to any casual outfit.
Don’t just read about it; grab a T-shirt and try out these techniques right now. Experiment with different placements and knot styles to discover your new go-to look.
Once you master these knots, consider exploring other fabric manipulation techniques like tucking or cuffing sleeves to further personalize your style.
Beginner-friendly templates, step-by-step guides,
and weekly project ideas in your inbox.