
How To Train Your Dragon Crafts

Beginner-friendly templates, step-by-step guides,
and weekly project ideas in your inbox.
Creating crafts inspired by the world of How To Train Your Dragon is a fantastic way to bring your favorite characters and creatures to life.
I’ve spent countless hours in my craft room, transforming simple materials into majestic dragons, and I’m excited to share my go-to methods with you.
This guide will walk you through building your very own dragon model, complete with scales, wings, and a fierce personality.

Quick Overview
This guide will help you craft a unique, customizable dragon model, allowing you to express your creativity and bring a piece of Berk into your home.
You’ll learn foundational techniques applicable to many different dragon designs, from the fearsome Monstrous Nightmare to the elusive Night Fury.
- Time needed: 4-8 hours (spread over several days for drying)
- Difficulty: Intermediate
- What you’ll need: Wire, aluminum foil, masking tape, papier-mâché paste, newspaper, acrylic paints, paintbrushes, clear sealant, optional embellishments.
Step-by-Step Instructions
Step 1: Gather Your Supplies
Collect all the necessary materials before you begin. Having everything at hand streamlines the crafting process and prevents interruptions.
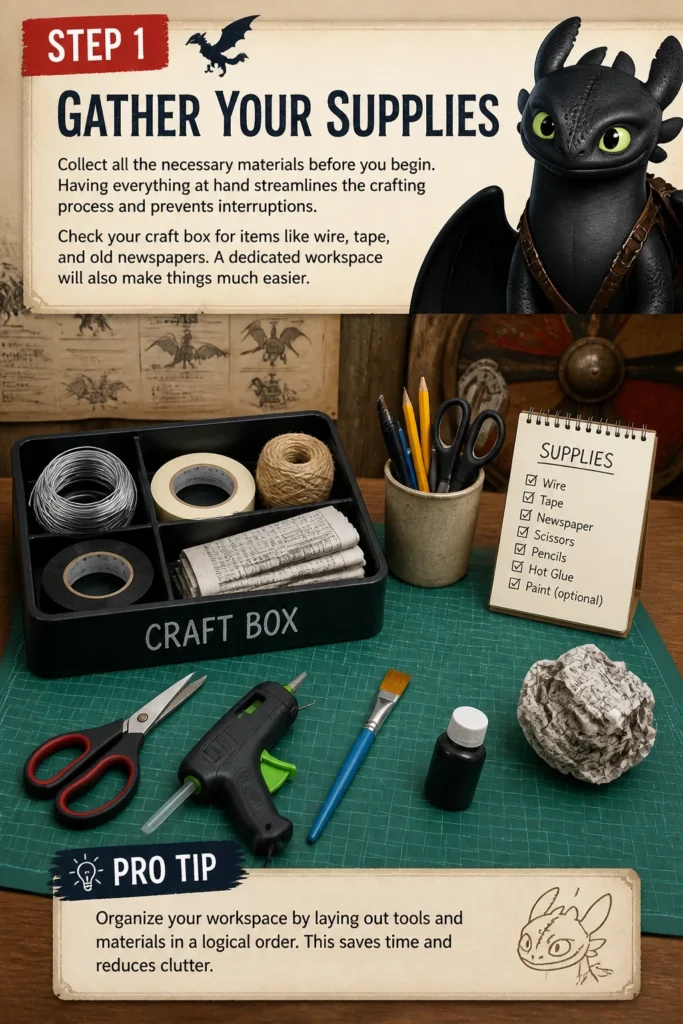
Check your craft box for items like wire, tape, and old newspapers. A dedicated workspace will also make things much easier.
Pro Tip: Organize your workspace by laying out tools and materials in a logical order. This saves time and reduces clutter.
Step 2: Sketch Your Dragon Design
Draw your dragon idea on paper. This initial sketch helps visualize the pose, size, and specific features you want for your model.
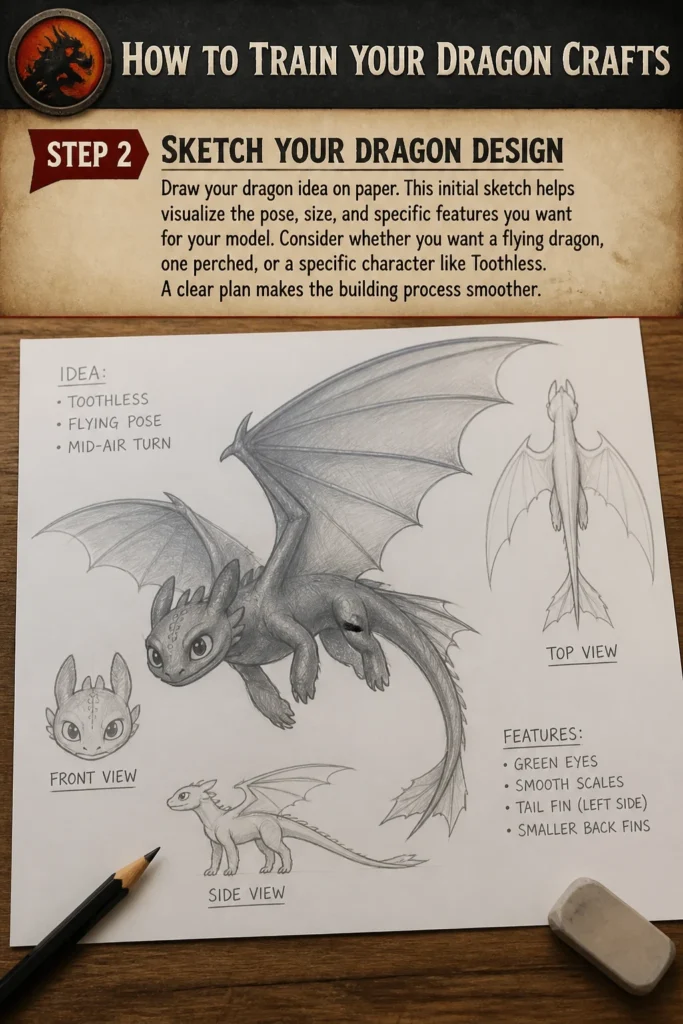
Consider whether you want a flying dragon, one perched, or a specific character like Toothless. A clear plan makes the building process smoother.
Step 3: Form the Wire Armature
Create the skeleton of your dragon using sturdy craft wire. Bend and twist the wire to form the basic shape of the head, neck, body, legs, and tail.
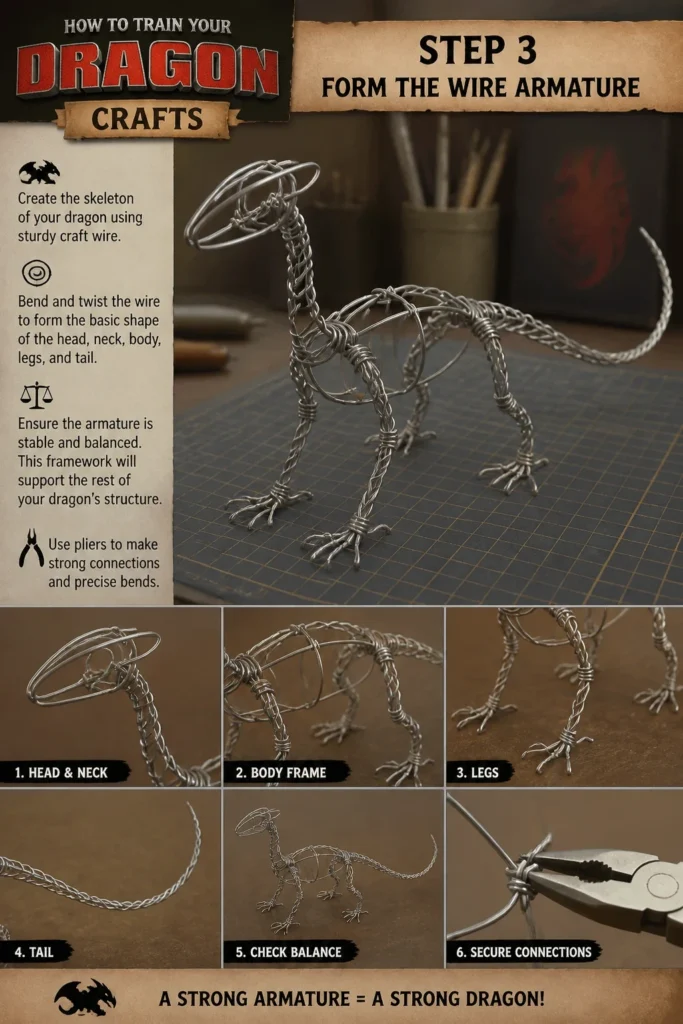
Ensure the armature is stable and balanced. This framework will support the rest of your dragon’s structure.
Use pliers to make strong connections and precise bends.
Step 4: Bulk Up the Body
Wrap aluminum foil around your wire armature. This adds volume and rough shape to your dragon’s body, limbs, and head.
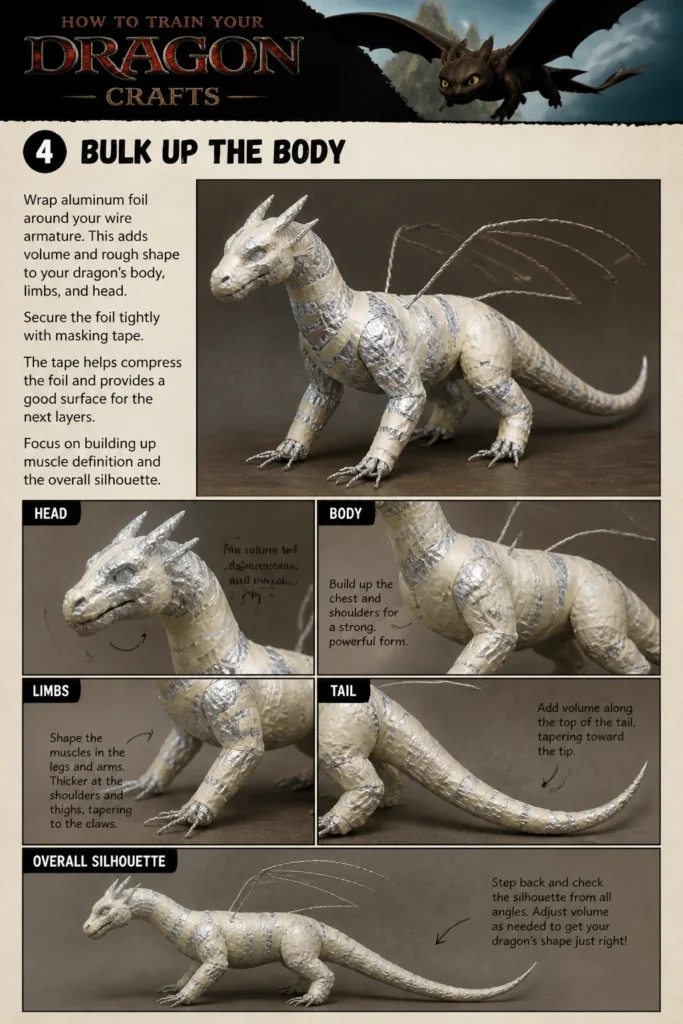
Secure the foil tightly with masking tape. The tape helps compress the foil and provides a good surface for the next layers.
Focus on building up muscle definition and the overall silhouette.
Step 5: Apply Papier-Mâché Layers
Tear newspaper into strips and prepare your papier-mâché paste (flour and water or PVA glue and water). Dip the newspaper strips into the paste, wiping off excess.
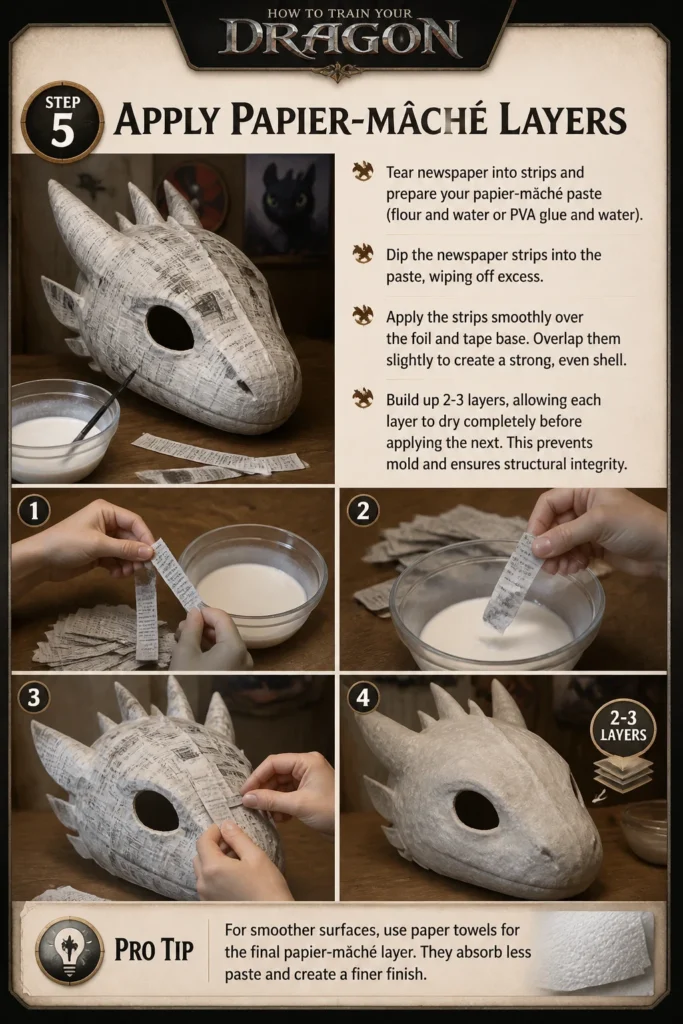
Apply the strips smoothly over the foil and tape base. Overlap them slightly to create a strong, even shell.
Build up 2-3 layers, allowing each layer to dry completely before applying the next. This prevents mold and ensures structural integrity.
Pro Tip: For smoother surfaces, use paper towels for the final papier-mâché layer. They absorb less paste and create a finer finish.
Step 6: Shape Features and Details
Once the papier-mâché is fully dry, add specific details. You can use air-dry clay or more papier-mâché to sculpt horns, teeth, claws, and eye ridges.
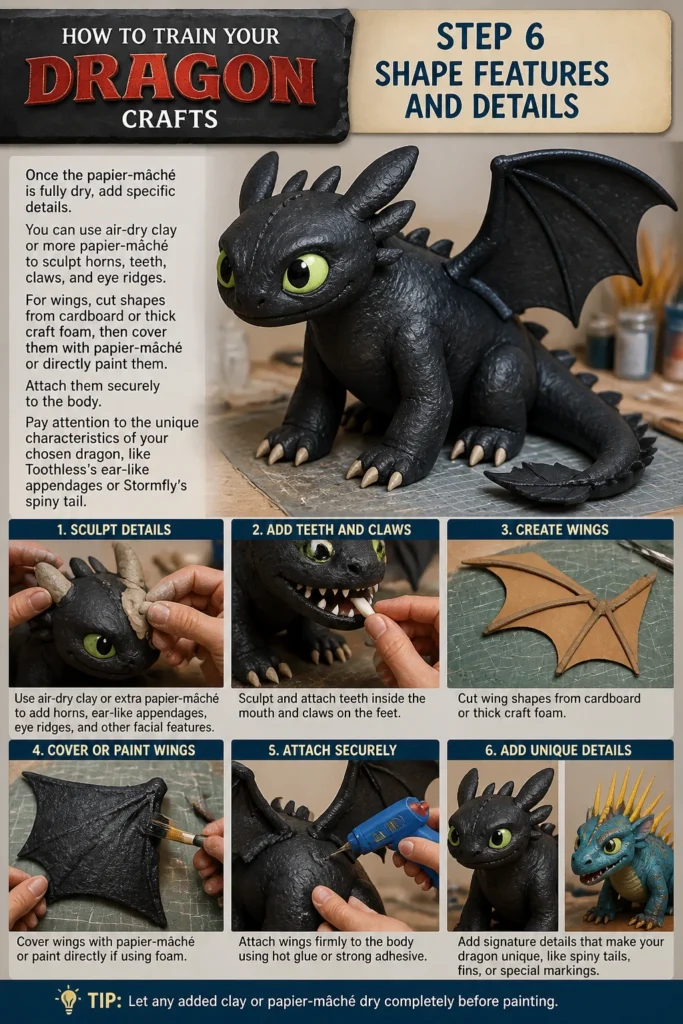
For wings, cut shapes from cardboard or thick craft foam, then cover them with papier-mâché or directly paint them. Attach them securely to the body.
Pay attention to the unique characteristics of your chosen dragon, like Toothless’s ear-like appendages or Stormfly’s spiny tail.
Step 7: Prime and Paint Your Dragon
Apply a coat of white or light grey primer to your entire dragon. This creates a uniform base and helps the paint colors stand out vibrantly.
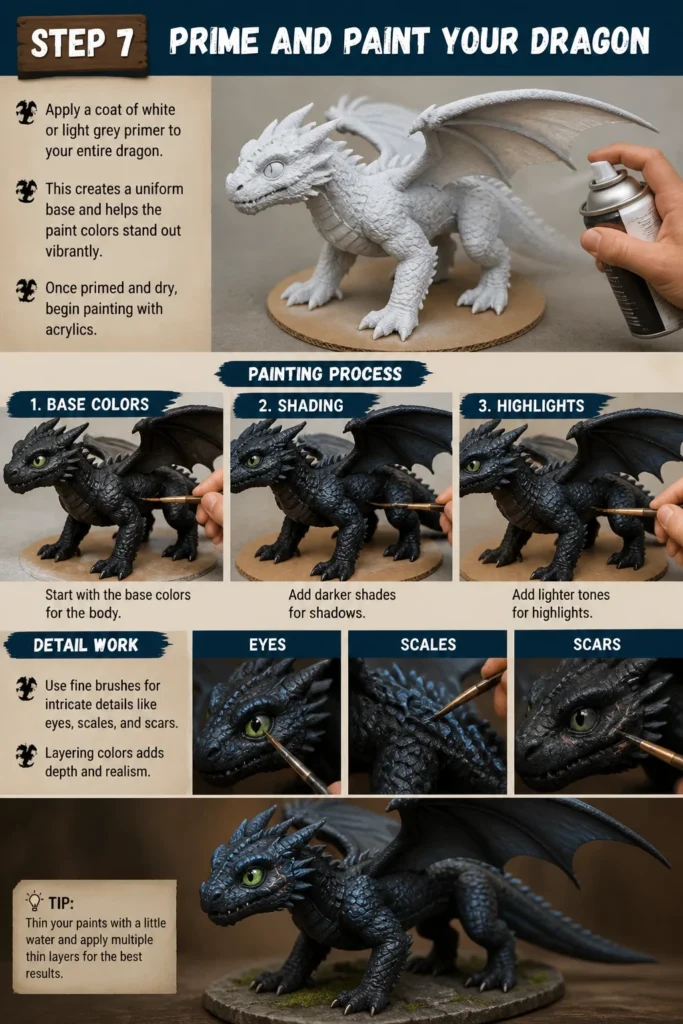
Once primed and dry, begin painting with acrylics. Start with the base colors for the body, then add darker shades for shadows and lighter tones for highlights.
Use fine brushes for intricate details like eyes, scales, and scars. Layering colors adds depth and realism.
Step 8: Add Finishing Touches and Seal
After the paint is completely dry, apply a clear sealant or varnish. This protects the paint from dust and wear, and can give your dragon a matte, satin, or glossy finish.
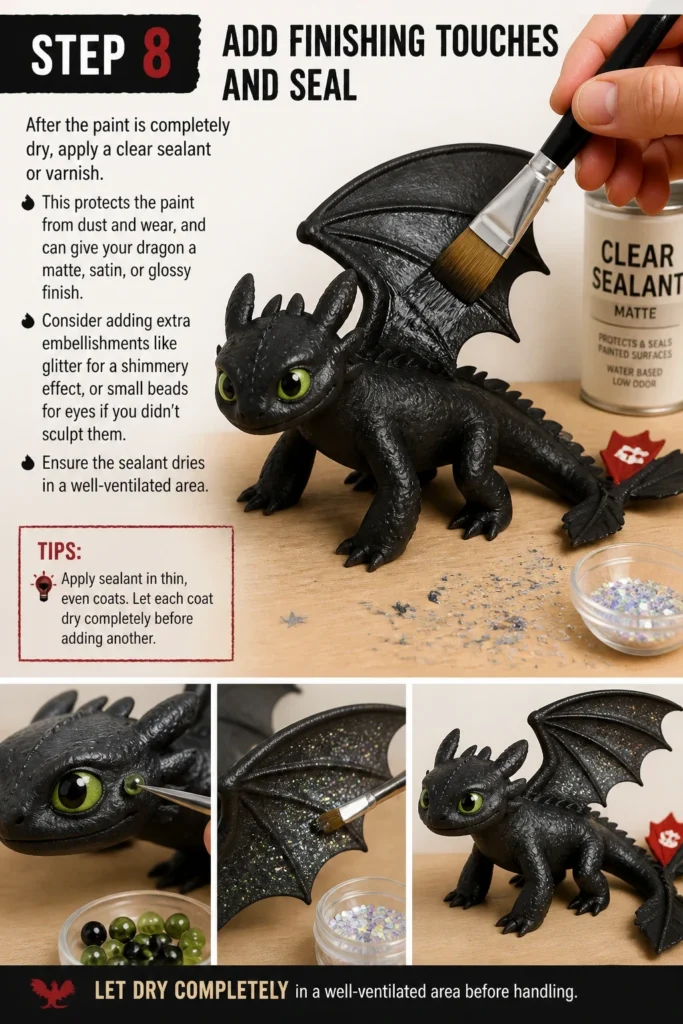
Consider adding extra embellishments like glitter for a shimmery effect, or small beads for eyes if you didn’t sculpt them.
Ensure the sealant dries in a well-ventilated area.
Step 9: Display Your Creation
Your dragon is now complete and ready to be admired. Find a special spot to display your creation, perhaps on a shelf or as a centerpiece.
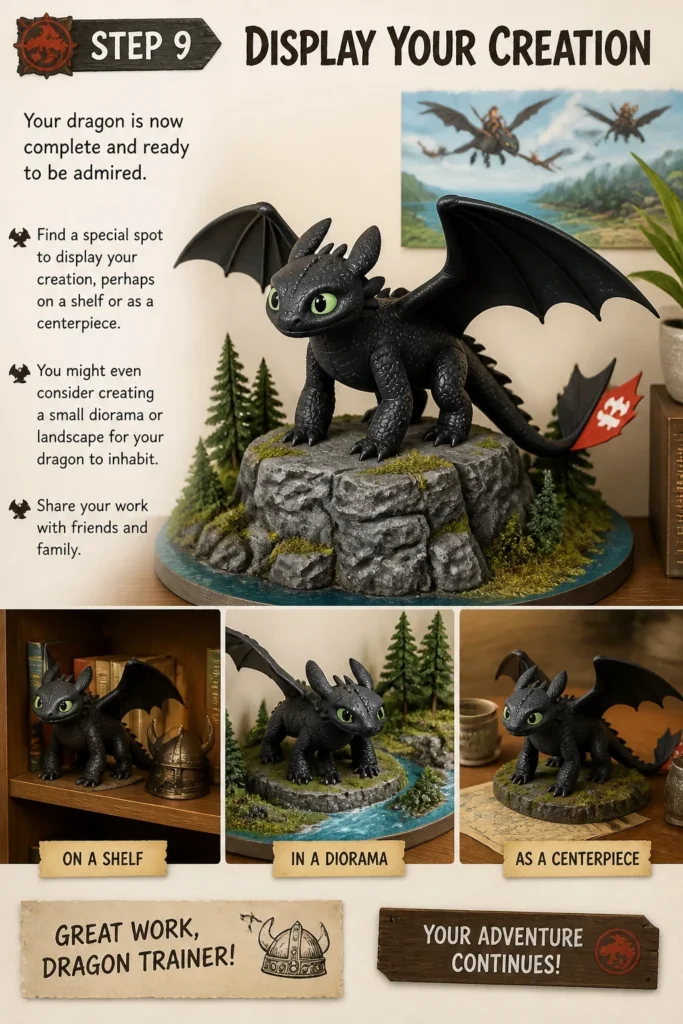
You might even consider creating a small diorama or landscape for your dragon to inhabit. Share your work with friends and family.
Common Mistakes to Avoid
Rushing the Drying Process
Many crafters get excited and try to apply new layers of papier-mâché or paint before the previous one is fully dry. This can lead to mold growth, weak structures, and cracking paint.
Always allow ample time for each layer to dry thoroughly. Patience is key to a durable and attractive dragon model.
Over-saturating Papier-Mâché Strips
Dipping newspaper strips too heavily into the paste makes them soggy and difficult to work with. It also adds excessive moisture, prolonging drying times and weakening the final structure.
Wipe off excess paste from each strip before applying it. The goal is just enough paste to adhere the paper.
Ignoring the Armature’s Stability
A flimsy or poorly constructed wire armature will result in a wobbly or unbalanced dragon. The entire structure relies on this foundation.
Spend extra time ensuring your wire frame is strong, balanced, and accurately reflects your desired pose. Reinforce joints with extra wire or tape.
Using Too Much Paint at Once
Applying thick layers of paint can obscure sculpted details and lead to cracking as the paint dries. It also makes blending colors much harder.
Build up color gradually with thin, even coats. This allows for better control, smoother transitions, and prevents paint from looking clumpy.
Troubleshooting
Dragon Model is Wobbly or Unstable
If your finished dragon feels unstable, the initial armature might have been too weak or uneven. Carefully examine the base and legs for points of weakness.
You can try reinforcing the base with a small, flat piece of wood or heavy cardboard, gluing the dragon’s feet to it. For internal weakness, it might require a more involved repair by carefully cutting into the papier-mâché and adding internal supports.
Paint is Cracking or Peeling
Cracking or peeling paint often occurs if the papier-mâché wasn’t fully dry before painting, or if thick layers of paint were applied without proper drying in between. Extreme temperature changes can also contribute.
Gently scrape off any loose paint. Re-prime the area and apply new, thinner layers of paint, ensuring each layer dries completely. Always ensure your base is fully cured before painting.
Papier-Mâché Feels Soft or Moldy
This is a sign of insufficient drying time between layers or too much moisture in the paste. Mold can also develop if the craft is stored in a humid environment.
If mold is visible, it’s best to discard the affected part or the entire project if widespread. To prevent this, always ensure each papier-mâché layer is bone dry before adding the next, and work in a well-ventilated area.
Key Takeaways
- Planning your dragon’s design with a sketch is crucial for a successful build.
- A strong, stable wire armature forms the essential foundation for your model.
- Allowing ample drying time between papier-mâché layers prevents mold and ensures durability.
- Building up shape with aluminum foil provides a lightweight and sturdy core.
- Applying thin, even coats of paint helps preserve details and achieve vibrant colors.
- A final sealant protects your hard work and gives your dragon a professional finish.
Frequently Asked Questions
Can I use something other than newspaper for papier-mâché?
Yes, you can use other types of paper. Paper towels or brown packing paper can create smoother finishes, while cardstock can be used for stronger, more rigid sections. Just ensure the paper can absorb the paste effectively.
What’s the best type of wire for the armature?
Galvanized steel wire or aluminum armature wire, typically around 16-18 gauge, works well. It’s strong enough to hold its shape but flexible enough to bend with pliers. Avoid very thin wires that might not support the weight.
How can I make my dragon’s scales look realistic?
After the papier-mâché is dry, you can cut individual scale shapes from thin craft foam or cardstock and glue them on in overlapping rows. Alternatively, you can use a sculpting tool to impress scale patterns directly into a final layer of air-dry clay before painting.
Is there a faster way to dry papier-mâché?
You can gently speed up drying by placing your project in a well-ventilated area or near a fan. Avoid direct, intense heat sources like ovens or hairdryers on high settings, as this can cause cracking or warping. Patience truly yields the best results.
Our Top Recommended Finds
- Armature Wire Assortment: Having a variety of gauges lets you build both strong foundations and finer details.
- Acrylic Paint Set: A basic set with primary colors allows for endless color mixing and custom dragon hues.
- Clear Matte Spray Sealant: Protects your artwork and gives a professional, non-glossy finish that looks natural.
Ignite Your Creative Spark
Now that you have the steps, it’s time to bring your own dragon to life. Imagine the possibilities, from the fierce Nadder to the playful Gronckle.
This process is not just about crafting; it’s about storytelling and giving form to your imagination.
Start gathering your supplies today and embark on your own dragon-crafting adventure. What kind of dragon will you create?
Beginner-friendly templates, step-by-step guides,
and weekly project ideas in your inbox.