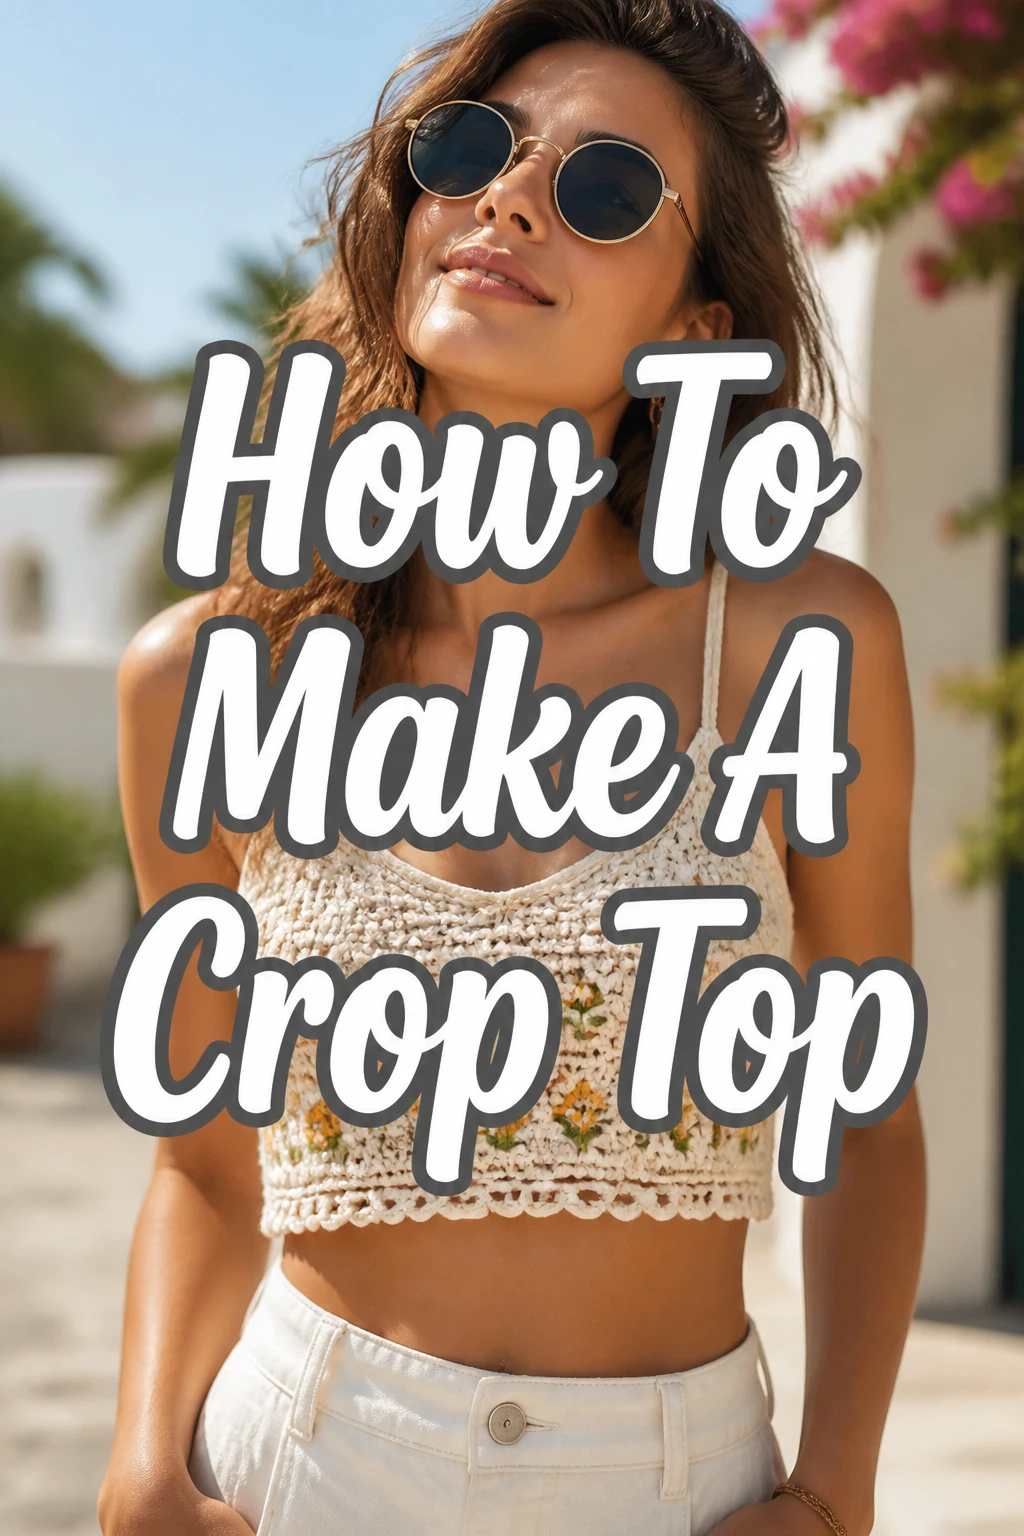
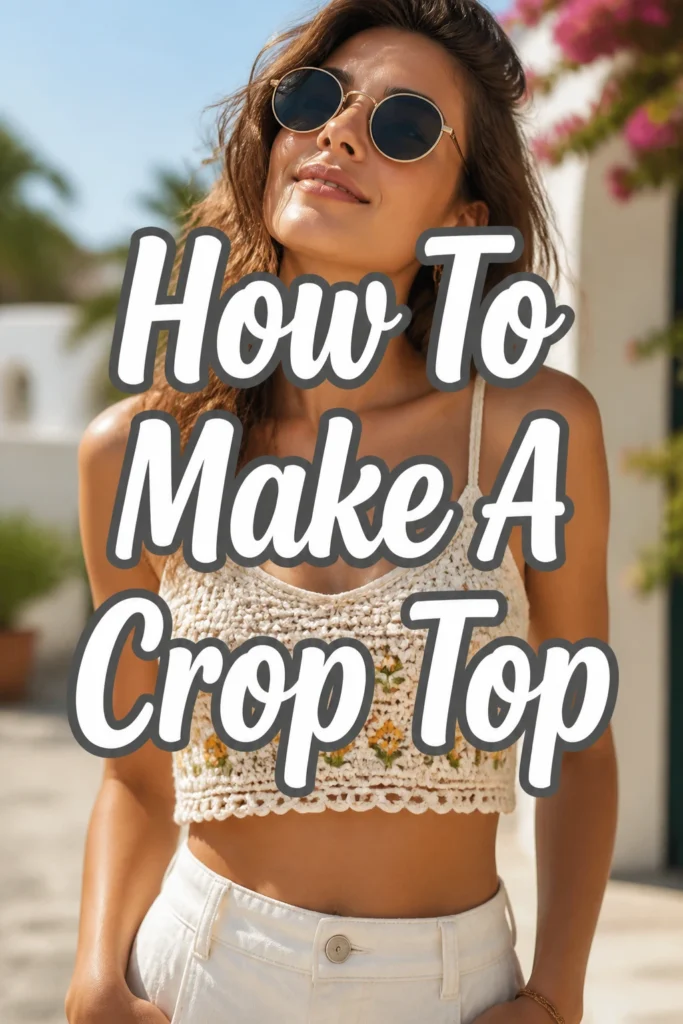
How To Make A Crop Top

Beginner-friendly templates, step-by-step guides,
and weekly project ideas in your inbox.
Ever wanted to create your own unique fashion pieces? Making a crop top is a fantastic place to start, offering a blend of creativity and practical sewing skills. I remember my first attempt, transforming an old t-shirt into something entirely new and perfectly fitted. This guide will walk you through every stitch, helping you craft a stylish crop top you’ll love.
Quick Overview
Transforming fabric into a wearable crop top is a rewarding experience. You’ll learn basic sewing techniques and customize a garment to your exact style. This project is perfect for building confidence in your crafting abilities.
- Time needed: 2-4 hours (depending on experience and design)
- Difficulty: Beginner to Intermediate
- What you’ll need: Fabric, sewing machine or needle and thread, scissors, measuring tape, pins, fabric markers.
Step-by-Step Instructions
Step 1: Choose Your Fabric and Design
Start by selecting the right fabric for your crop top. Cotton jersey, knit blends, or even an old t-shirt work wonderfully for beginners due to their stretch and ease of handling. Consider the stretchiness; a fabric with some give is often more forgiving for fit.
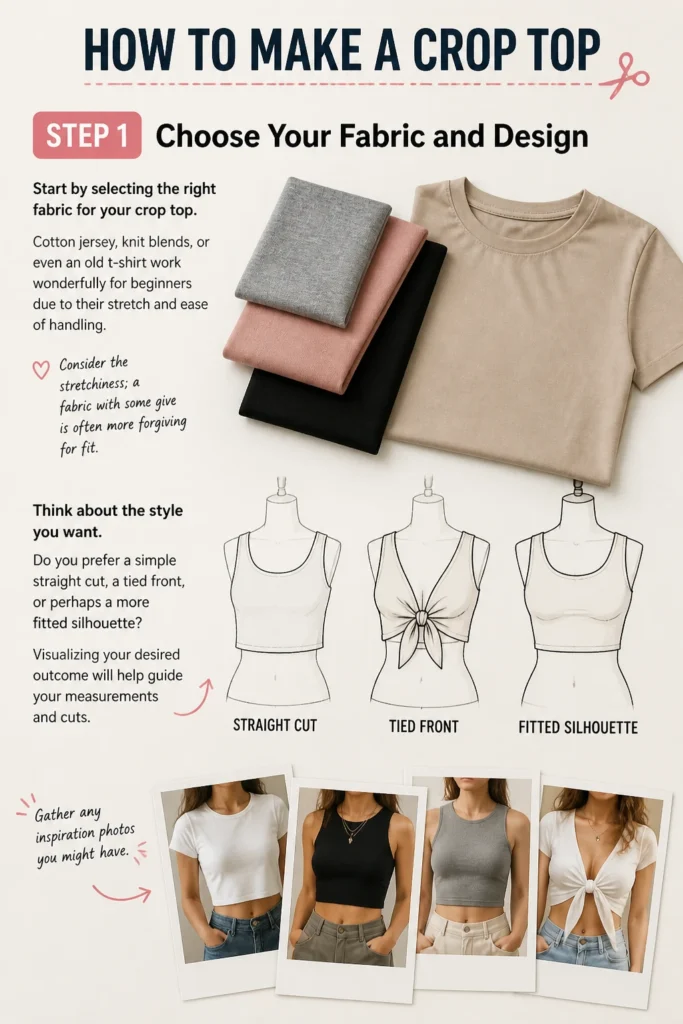
Think about the style you want. Do you prefer a simple straight cut, a tied front, or perhaps a more fitted silhouette? Visualizing your desired outcome will help guide your measurements and cuts. Gather any inspiration photos you might have.
Step 2: Take Accurate Measurements
Grab a measuring tape and an existing top that fits you well, or measure directly on your body. You’ll need your bust circumference, waist circumference, and desired length from your shoulder to where you want the crop top to end. Remember to account for seam allowances in your final pattern.
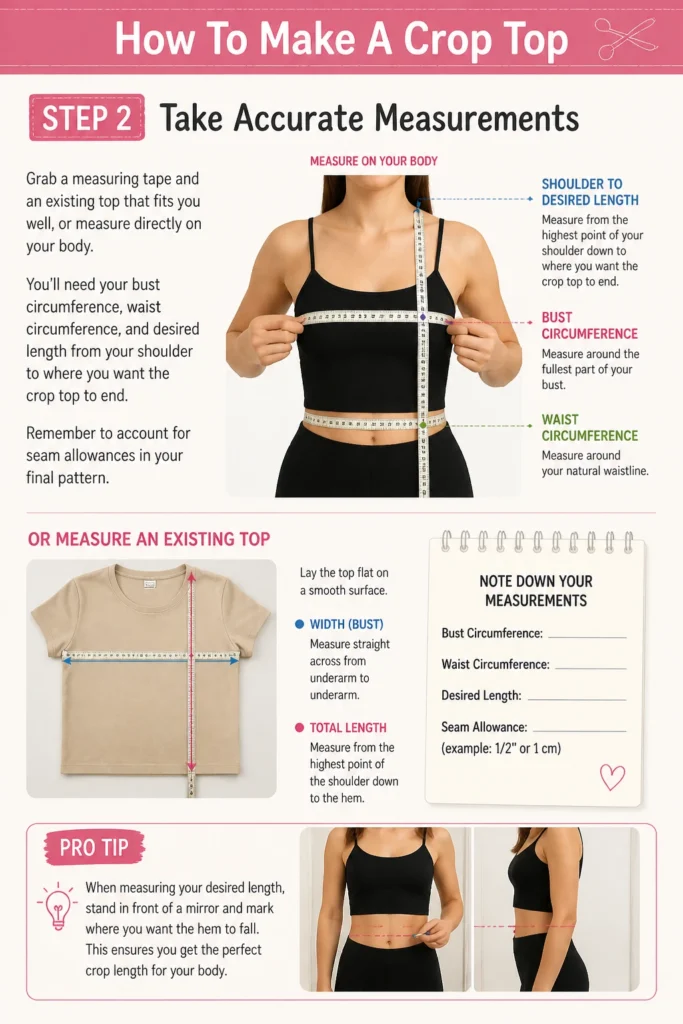
If using an existing top, lay it flat and measure its width across the bust and its total length. This method often simplifies the pattern-making process for beginners. Note down all your figures carefully.
Pro Tip: When measuring your desired length, stand in front of a mirror and mark where you want the hem to fall. This ensures you get the perfect crop length for your body.
Step 3: Create Your Pattern Pieces
Lay your chosen fabric flat and smooth it out. You can either freehand draw your pattern directly onto the fabric or create a paper pattern first. For a simple crop top, you’ll typically need a front piece, a back piece, and two sleeve pieces (if adding sleeves).
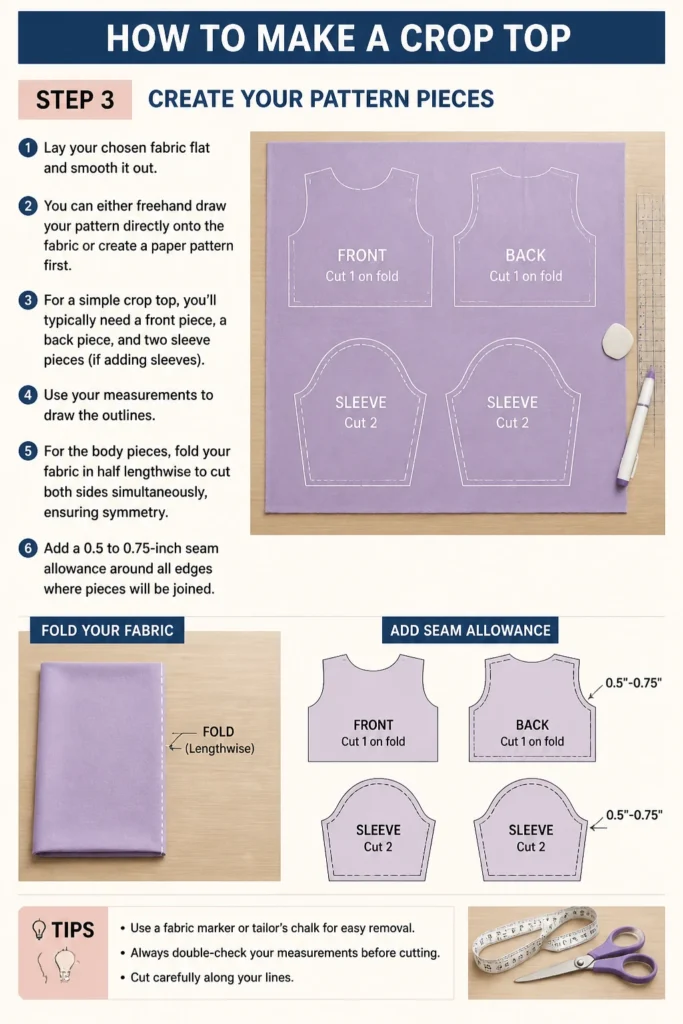
Use your measurements to draw the outlines. For the body pieces, fold your fabric in half lengthwise to cut both sides simultaneously, ensuring symmetry. Add a 0.5 to 0.75-inch seam allowance around all edges where pieces will be joined.
Step 4: Cut Your Fabric Pieces
Carefully cut out all your pattern pieces using fabric scissors. Take your time to make clean, even cuts. Precision here will make a big difference in how easily your pieces fit together later on.
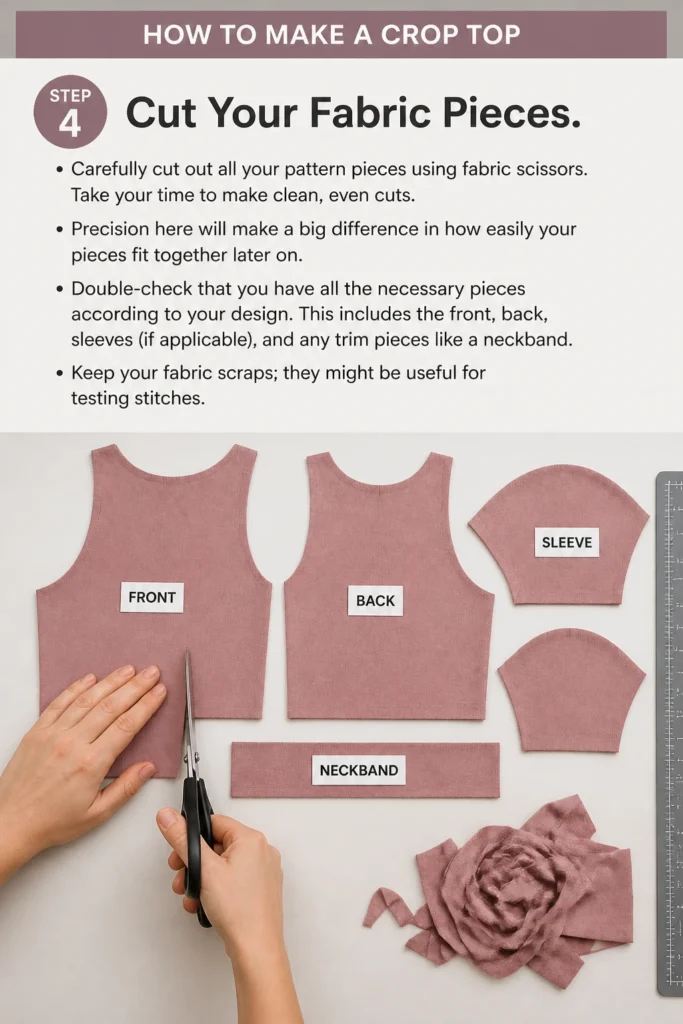
Double-check that you have all the necessary pieces according to your design. This includes the front, back, sleeves (if applicable), and any trim pieces like a neckband. Keep your fabric scraps; they might be useful for testing stitches.
Step 5: Sew the Shoulder Seams
Place the front and back pieces of your crop top right sides together. Align the shoulder edges precisely. Pin these edges together to hold them in place.
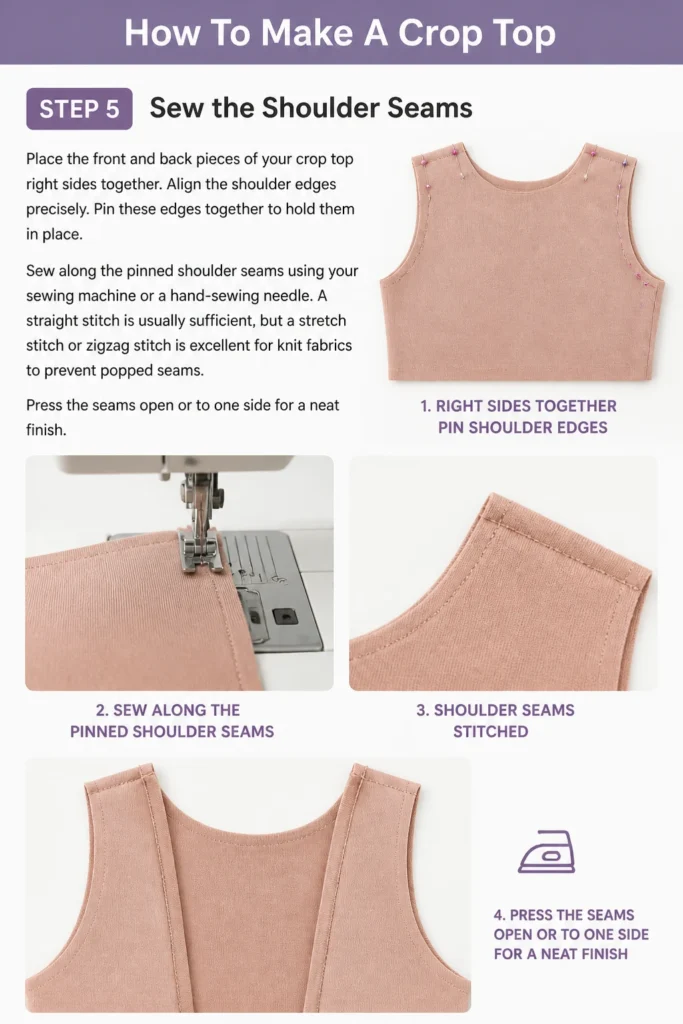
Sew along the pinned shoulder seams using your sewing machine or a hand-sewing needle. A straight stitch is usually sufficient, but a stretch stitch or zigzag stitch is excellent for knit fabrics to prevent popped seams. Press the seams open or to one side for a neat finish.
Step 6: Attach the Sleeves (Optional)
If your design includes sleeves, now is the time to attach them. Lay your crop top body flat with the right side facing up. Take one sleeve piece and align its curved edge with the armhole of the body, right sides together.
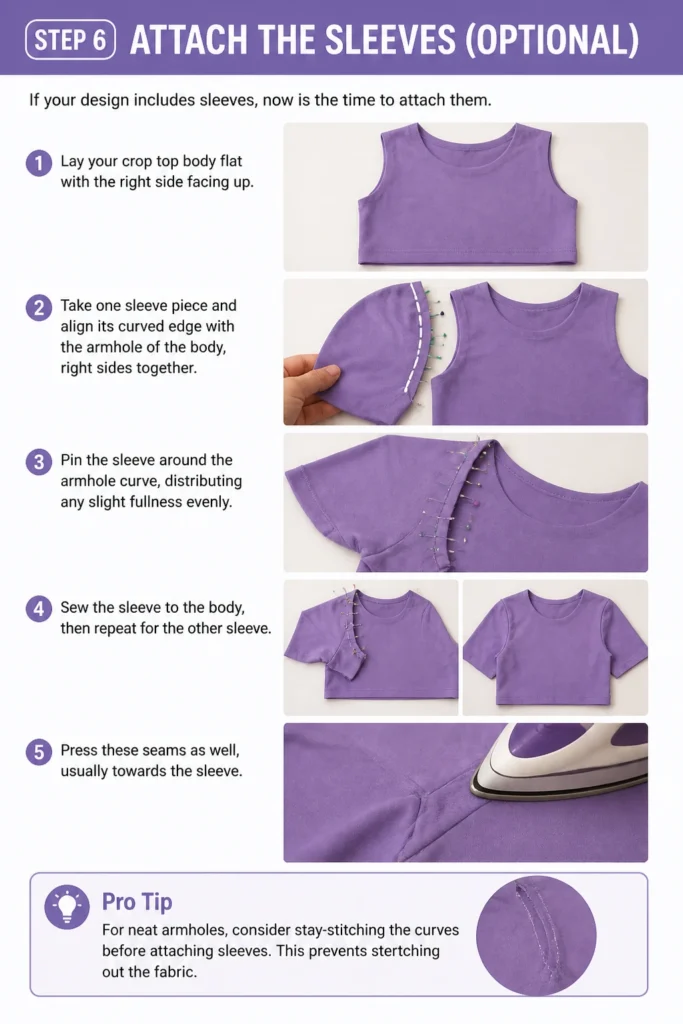
Pin the sleeve around the armhole curve, distributing any slight fullness evenly. Sew the sleeve to the body, then repeat for the other sleeve. Press these seams as well, usually towards the sleeve.
Pro Tip: For neat armholes, consider stay-stitching the curves before attaching sleeves. This prevents stretching out the fabric.
Step 7: Sew the Side Seams and Sleeve Underseams
With the shoulders and sleeves (if any) joined, fold your crop top in half lengthwise, right sides together. Align the side seams of the body and the underseams of the sleeves (if applicable). Pin these edges together from the sleeve cuff all the way down to the hem of the crop top.
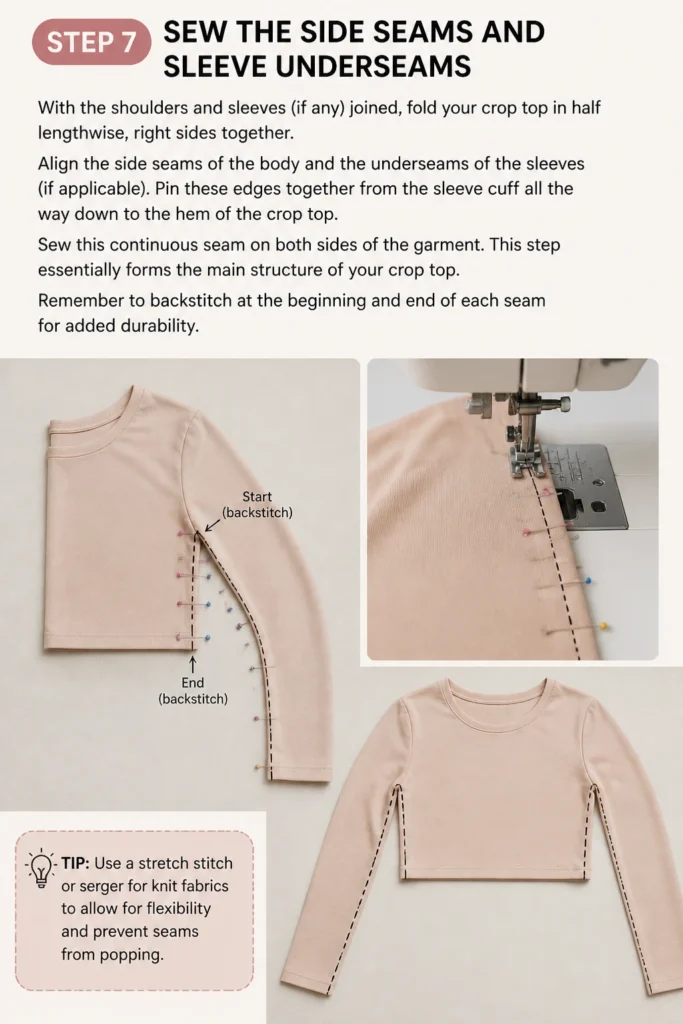
Sew this continuous seam on both sides of the garment. This step essentially forms the main structure of your crop top. Remember to backstitch at the beginning and end of each seam for added durability.
Step 8: Finish the Neckline, Sleeves, and Hem
This is where your crop top really starts to look finished. For the neckline, you can create a simple folded hem, or a more professional look with a separate neckband. If using a neckband, cut a strip of fabric, sew it into a loop, and attach it to the neckline.
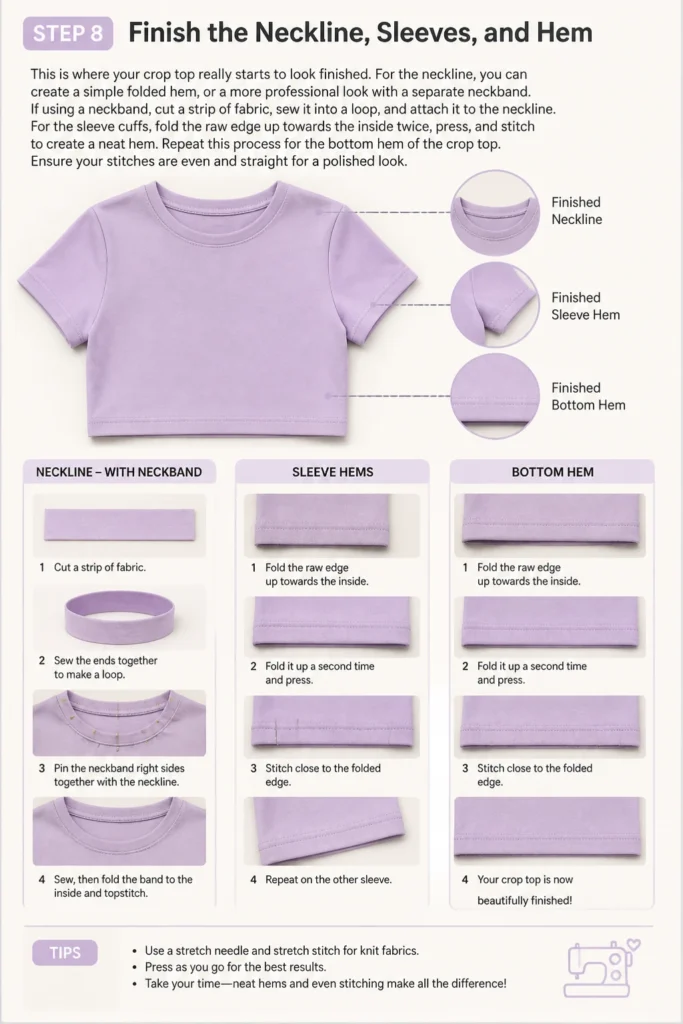
For the sleeve cuffs, fold the raw edge up towards the inside twice, press, and stitch to create a neat hem. Repeat this process for the bottom hem of the crop top. Ensure your stitches are even and straight for a polished look.
Step 9: Final Pressing and Inspection
Give your newly sewn crop top a thorough press with an iron. This helps to set the seams and give the garment a professional appearance. Smooth out any wrinkles and ensure all seams lie flat.
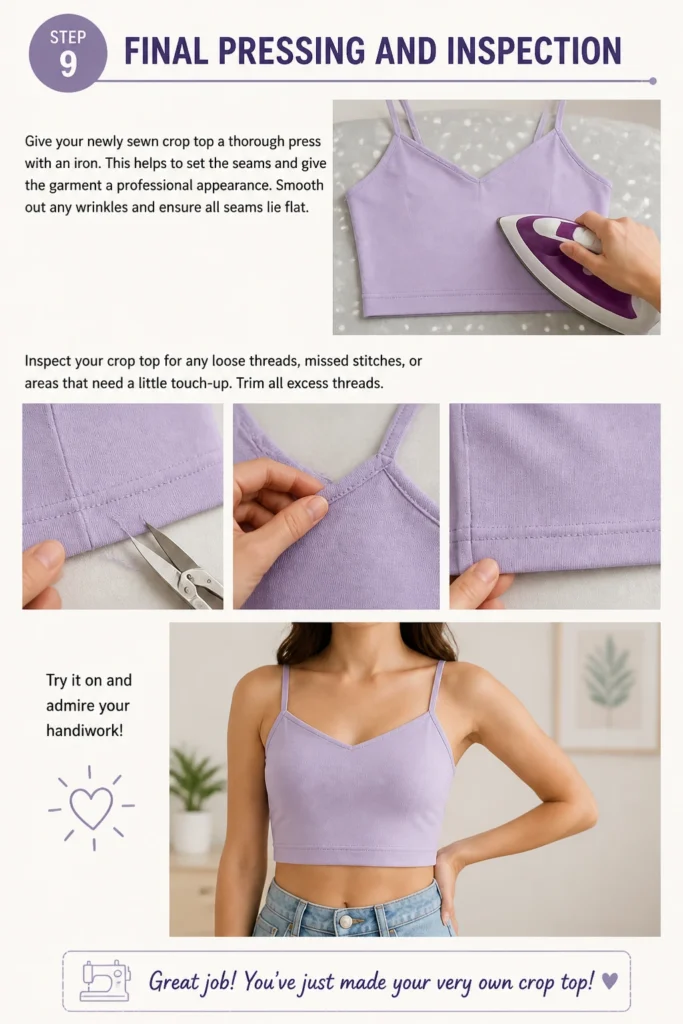
Inspect your crop top for any loose threads, missed stitches, or areas that need a little touch-up. Trim all excess threads. Try it on and admire your handiwork!
Common Mistakes to Avoid
Not Pre-Washing Fabric
Many people skip pre-washing their fabric, which can lead to disappointment later. Fabrics often shrink after their first wash, meaning your perfectly fitted crop top could end up too small. Always wash and dry your fabric before cutting and sewing. This step ensures your finished garment maintains its size and shape.
Incorrect Seam Allowances
Forgetting to add seam allowances, or adding inconsistent ones, is a common pitfall. If you don’t add enough allowance, your garment will be too small. If they’re uneven, your seams will look wavy and unprofessional. Always be mindful of your seam allowance and use a seam gauge or ruler to keep it consistent.
Rushing Through Steps
Sewing requires patience and attention to detail. Rushing through steps, especially cutting and pinning, can lead to mistakes that are difficult to fix. Take your time with each stage, double-checking your work before moving on. Slow and steady truly wins the race in sewing.
Using the Wrong Needle or Thread
The type of needle and thread you use matters significantly, especially with different fabrics. A universal needle might snag delicate knits, and thin thread might break on thick denim. Match your needle type (e.g., ballpoint for knits, sharp for wovens) and thread weight to your fabric for the best results.
Troubleshooting
My Seams Are Wavy
Wavy seams often occur when sewing stretchy fabrics without proper technique. This can happen if you stretch the fabric as you sew, or if your machine’s differential feed isn’t adjusted correctly. Try using a walking foot on your machine, which helps feed both layers of fabric evenly. You can also try reducing the presser foot pressure if your machine allows.
The Neckline Is Gaping
A gaping neckline usually means the neck opening was cut too wide or stretched during sewing. To fix this, you can try taking in the shoulder seams slightly, which will pull the neckline closer. Alternatively, you can add clear elastic or a strip of knit interfacing to the inside of the neckline seam to help it retain its shape and prevent stretching.
The Crop Top Feels Too Tight/Loose
If your finished crop top doesn’t fit quite right, don’t despair. If it’s too tight, and you have generous seam allowances, you might be able to carefully unpick the side seams and sew them with a smaller allowance. If it’s too loose, you can take in the side seams by sewing further from the original seam line. Always try it on inside out to mark adjustments accurately.
Key Takeaways
- Accurate measurements are the foundation of a well-fitting crop top.
- Pre-washing your fabric prevents unexpected shrinkage after sewing.
- Adding consistent seam allowances is crucial for correct sizing and neat finishes.
- Choosing the right needle and thread for your fabric type improves stitch quality.
- Pressing seams as you go creates a professional and polished appearance.
- Patience and attention to detail will lead to a more successful and enjoyable sewing experience.
Frequently Asked Questions
Can I make a crop top without a sewing machine?
Absolutely! While a sewing machine speeds up the process, you can hand-sew a crop top. Use a strong backstitch for durability on all seams. It will take more time, but the result can be just as lovely and well-made.
What’s the best fabric for a beginner crop top?
Knit fabrics like cotton jersey, interlock knit, or even an old t-shirt are excellent for beginners. Their stretchiness is forgiving for minor measurement inaccuracies, and they don’t fray, reducing the need for complex seam finishes.
How do I make a crop top from an old t-shirt?
Making a crop top from an old t-shirt is a fantastic upcycling project. Lay your t-shirt flat and use a well-fitting top as a guide. Cut the bottom to your desired crop length, trim the sleeves if needed, and adjust the neckline if you wish. You can hem the raw edges or leave them raw for a casual look with knit fabrics.
How do I choose the right size for a pattern?
When using a commercial pattern, compare your body measurements to the pattern’s size chart, not your ready-to-wear clothing size. Focus on your bust measurement for tops. If your measurements fall between sizes, it’s generally better to cut the larger size and take it in later for a perfect fit.
Our Top Recommended Finds
- Good Quality Fabric Scissors: Sharp scissors make precise cuts, which are essential for a professional finish. Look for a pair specifically designed for fabric.
- Fabric Markers or Chalk: These tools allow you to accurately transfer pattern markings onto your fabric without leaving permanent stains. They are invaluable for precise sewing.
- Seam Ripper: Every sewer, no matter how experienced, makes mistakes. A good seam ripper is a lifesaver for quickly and safely removing stitches without damaging your fabric.
Craft Your Style, Stitch by Stitch
You’ve just learned the foundational steps to creating your very own crop top. This isn’t just about making a piece of clothing; it’s about gaining a new skill and expressing your unique style. Each stitch you make brings you closer to a custom garment that truly reflects you.
Why not pick out some fabric today and give it a try? You might be surprised at how quickly you can create something beautiful and wearable. Consider trying different necklines or adding embellishments next time. The world of DIY fashion is now open to you!
Beginner-friendly templates, step-by-step guides,
and weekly project ideas in your inbox.