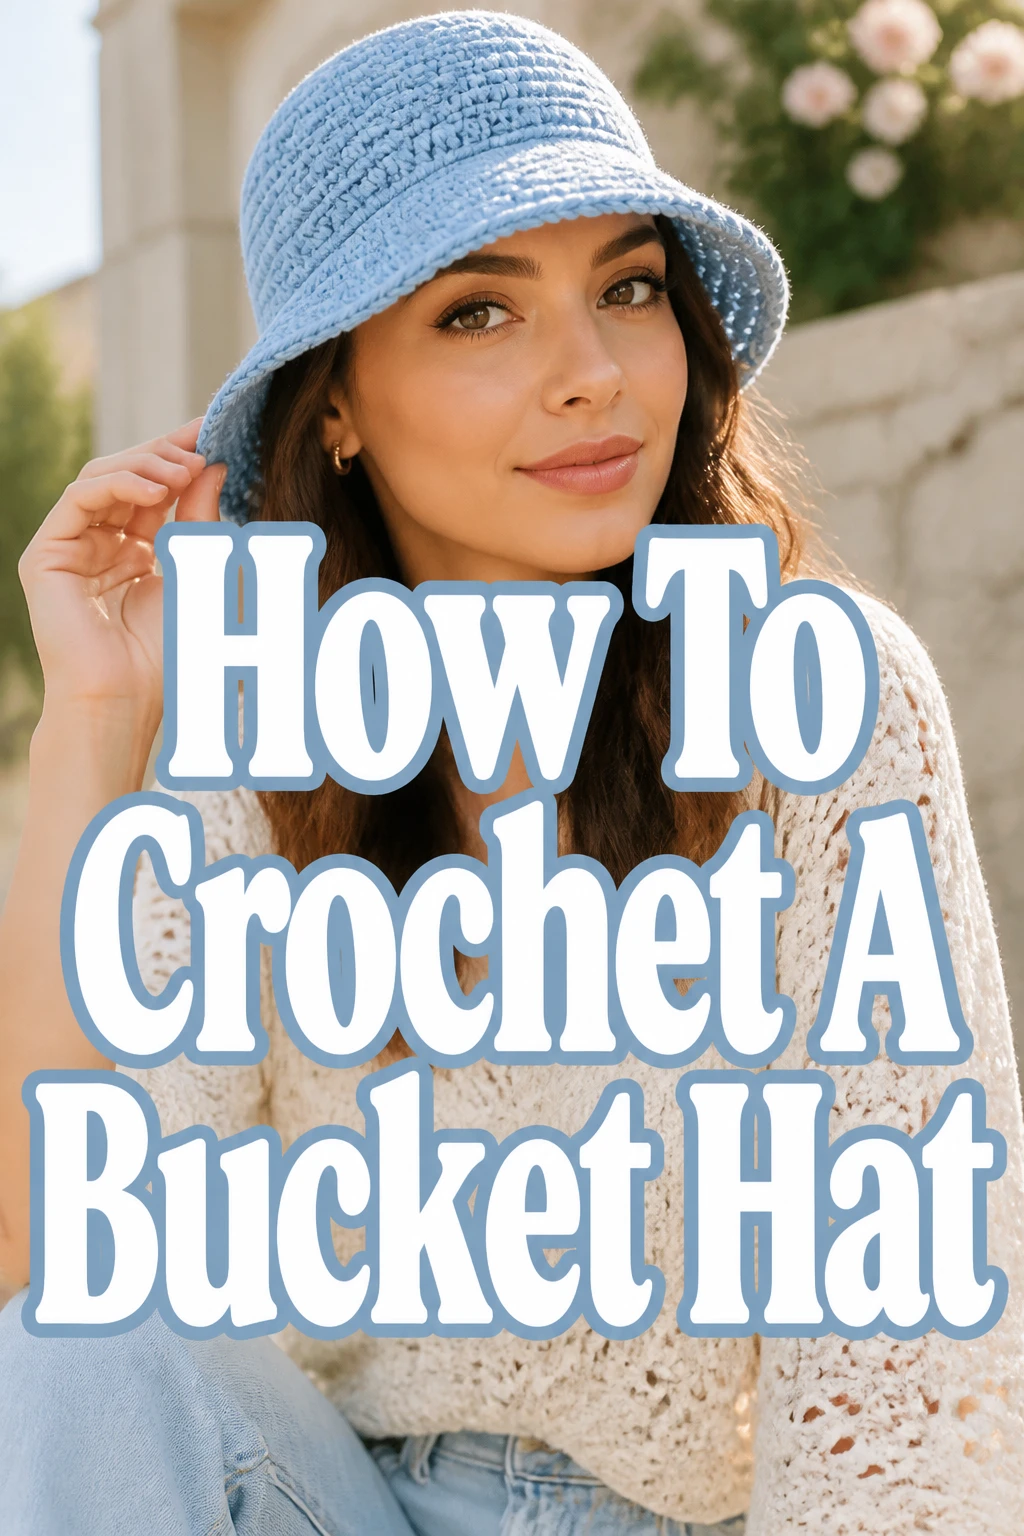
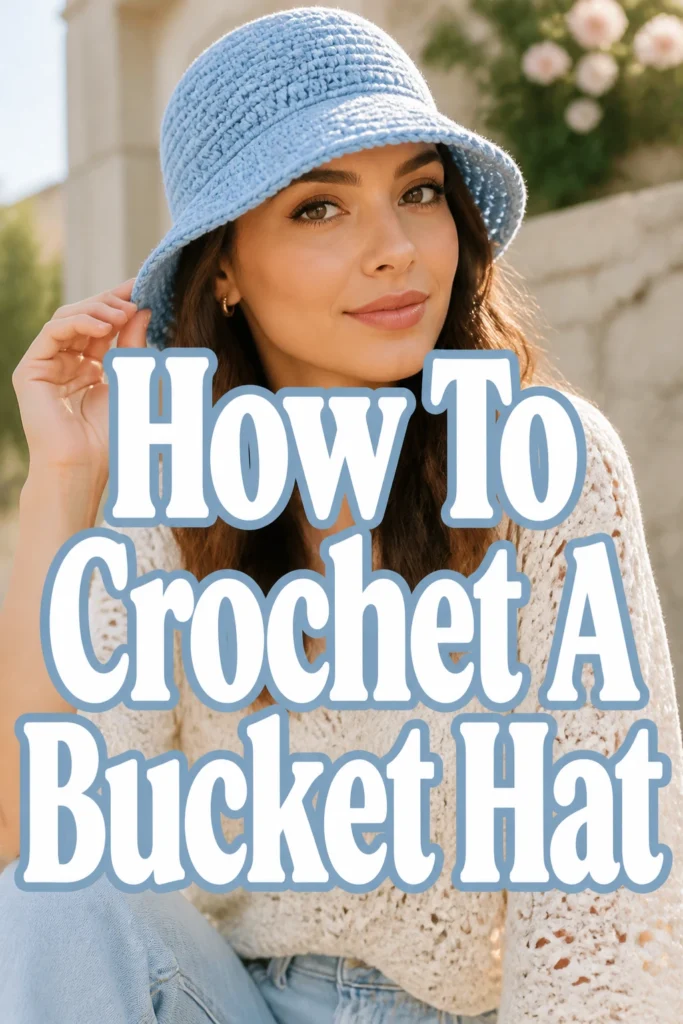
How To Crochet A Bucket Hat

Beginner-friendly templates, step-by-step guides,
and weekly project ideas in your inbox.
Crocheting your own accessories is one of the most rewarding ways to express your personal style while learning a timeless craft.
I have spent years perfecting this specific pattern to ensure it fits comfortably and looks professional every single time you pick up your hook.
This guide provides a reliable foundation for creating a durable, stylish hat that you can customize with your favorite colors and textures.
Quick Overview
Before you begin your project, it is helpful to understand the scope of the work and what you will need to have on hand.
- Time needed: 3 to 5 hours depending on your experience level
- Difficulty: Beginner
- What you’ll need: Medium weight yarn, a 5.0mm crochet hook, a tapestry needle, scissors, and a stitch marker
Step 1: Select Your Yarn and Hook
Choosing the right materials is the most important decision you will make before starting your first stitch.
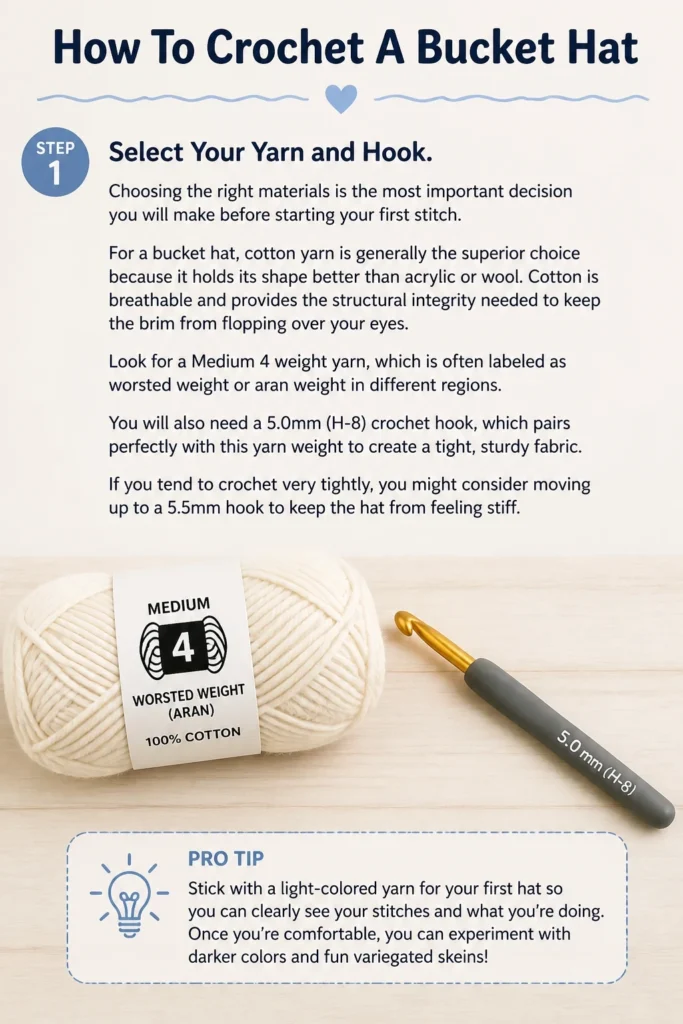
For a bucket hat, cotton yarn is generally the superior choice because it holds its shape better than acrylic or wool.
Cotton is breathable and provides the structural integrity needed to keep the brim from flopping over your eyes.
Look for a “Medium 4” weight yarn, which is often labeled as worsted weight or aran weight in different regions.
You will also need a 5.0mm (H-8) crochet hook, which pairs perfectly with this yarn weight to create a tight, sturdy fabric.
If you tend to crochet very tightly, you might consider moving up to a 5.5mm hook to keep the hat from feeling stiff.
Pro Tip: Stick with a light-colored yarn for your first hat so you can clearly see your stitches and where to insert your hook.
Step 2: Create a Magic Ring
The magic ring is the gold standard for starting projects worked in the round because it leaves no hole in the center.
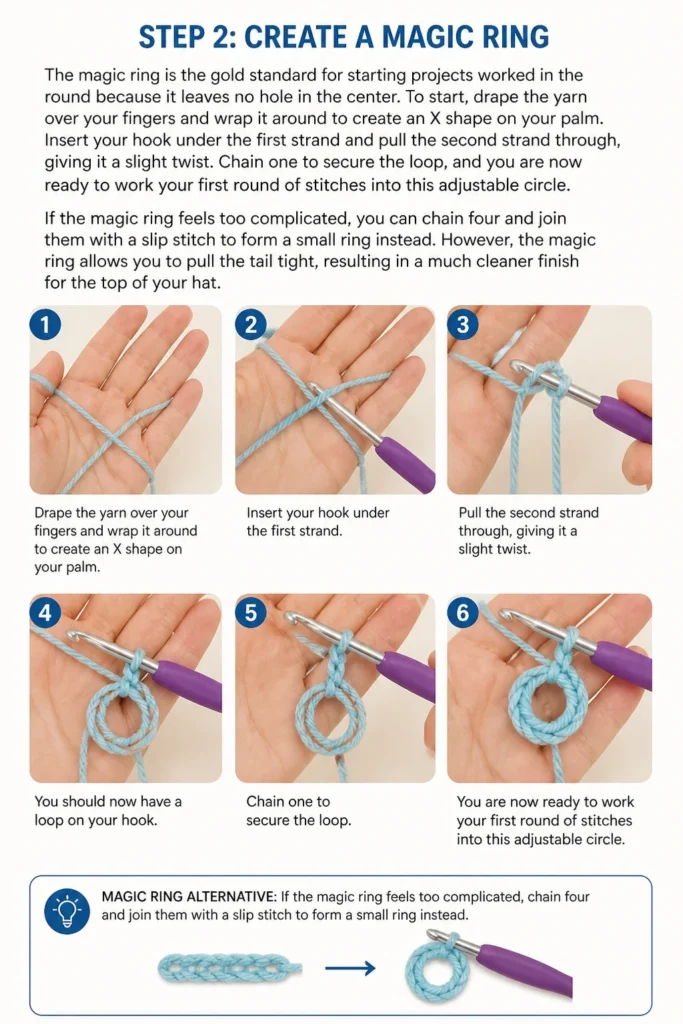
To start, drape the yarn over your fingers and wrap it around to create an “X” shape on your palm.
Insert your hook under the first strand and pull the second strand through, giving it a slight twist.
Chain one to secure the loop, and you are now ready to work your first round of stitches into this adjustable circle.
If the magic ring feels too complicated, you can chain four and join them with a slip stitch to form a small ring instead.
However, the magic ring allows you to pull the tail tight, resulting in a much cleaner finish for the top of your hat.
Step 3: Work the First Round
Most bucket hats use the half double crochet (hdc) stitch because it provides a great balance of height and density.
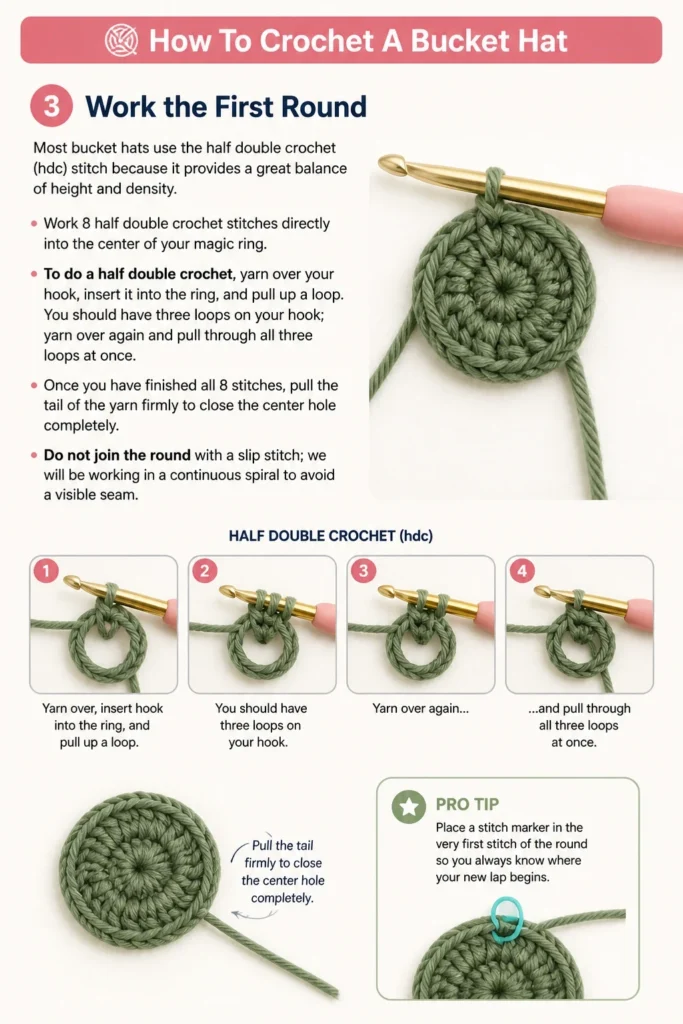
Work 8 half double crochet stitches directly into the center of your magic ring.
To do a half double crochet, yarn over your hook, insert it into the ring, and pull up a loop.
You should have three loops on your hook; yarn over again and pull through all three loops at once.
Once you have finished all 8 stitches, pull the tail of the yarn firmly to close the center hole completely.
Do not join the round with a slip stitch; we will be working in a continuous spiral to avoid a visible seam.
Pro Tip: Place a stitch marker in the very first stitch of the round so you always know where your new lap begins.
Step 4: Increase the Crown
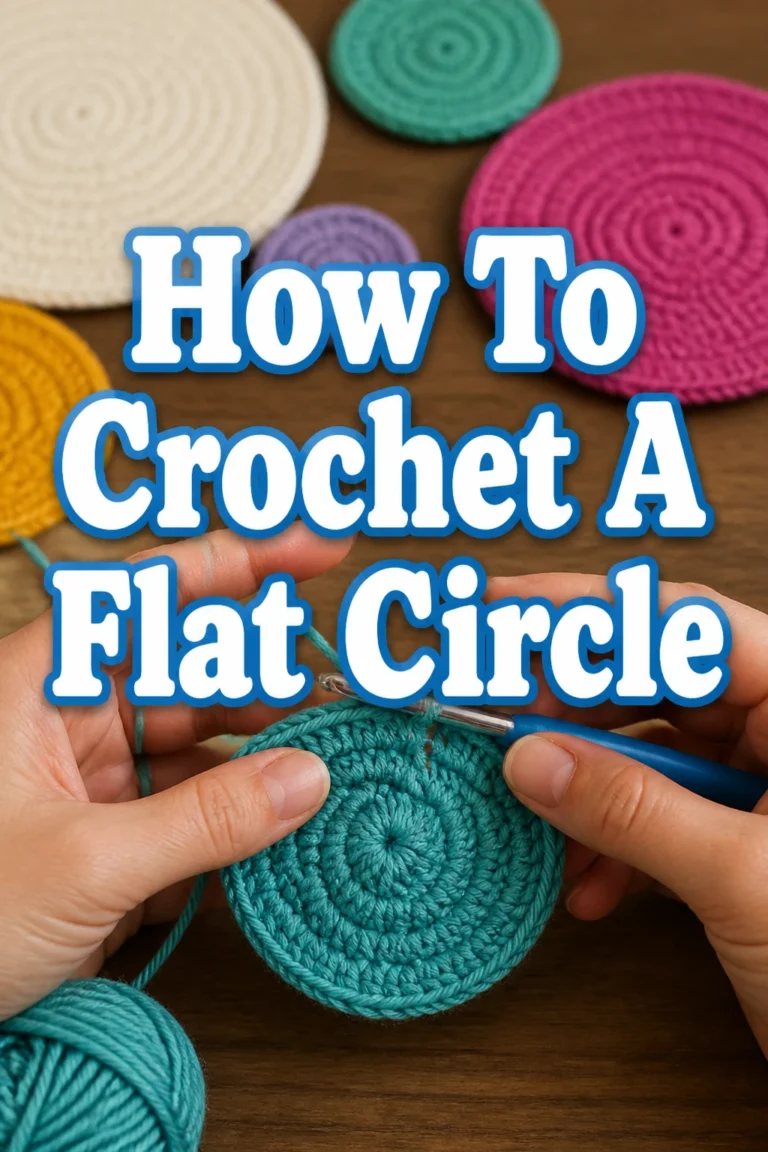
The crown is the flat, circular top of the hat that sits on the very top of your head.
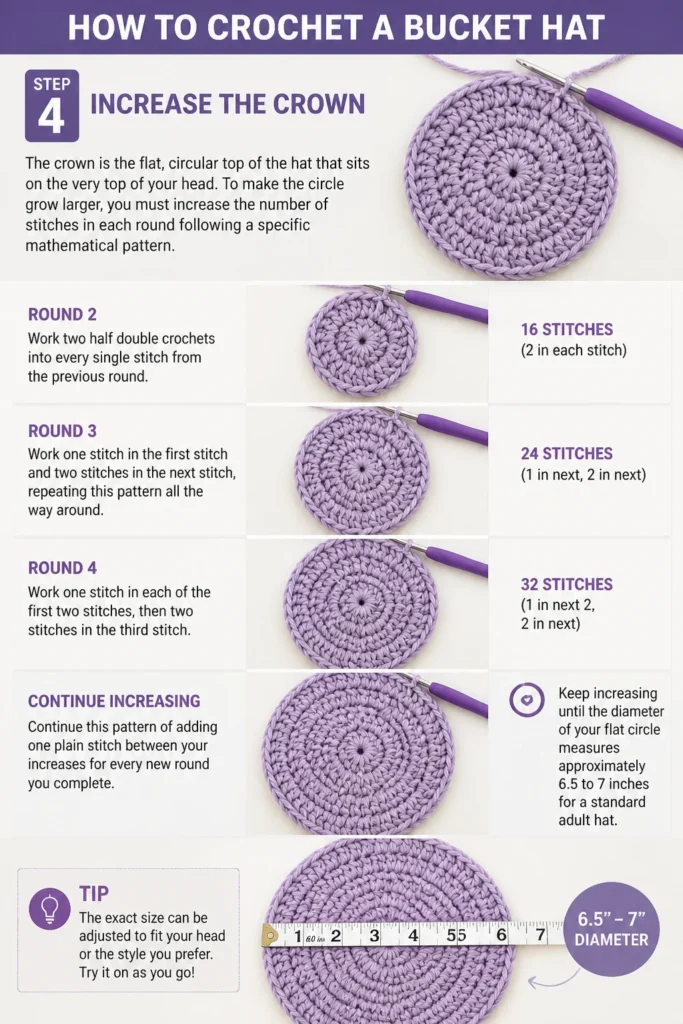
To make the circle grow larger, you must increase the number of stitches in each round following a specific mathematical pattern.
In round two, work two half double crochets into every single stitch from the previous round, giving you a total of 16 stitches.
In round three, work one stitch in the first stitch and two stitches in the next stitch, repeating this pattern all the way around.
Round four involves working one stitch in each of the first two stitches, then two stitches in the third stitch.
Continue this pattern of adding one plain stitch between your increases for every new round you complete.
Keep increasing until the diameter of your flat circle measures approximately 6.5 to 7 inches for a standard adult size.
Step 5: Measure for a Perfect Fit
Before moving on to the sides of the hat, you must ensure the crown is the correct size for the wearer.
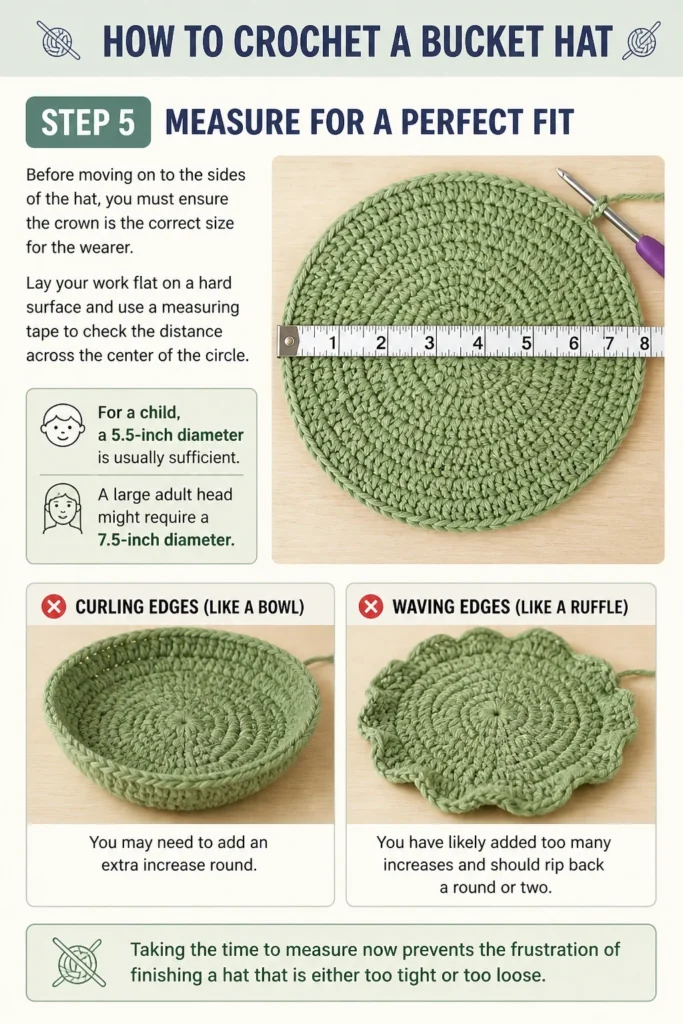
Lay your work flat on a hard surface and use a measuring tape to check the distance across the center of the circle.
For a child, a 5.5-inch diameter is usually sufficient, while a large adult head might require a 7.5-inch diameter.
If your circle is curling up at the edges like a bowl, you may need to add an extra increase round.
If the edges are waving like a ruffle, you have likely added too many increases and should rip back a round or two.
Taking the time to measure now prevents the frustration of finishing a hat that is either too tight or too loose.
Step 6: Crochet the Sides
Now that the top of the hat is finished, it is time to create the “walls” or the body of the hat.
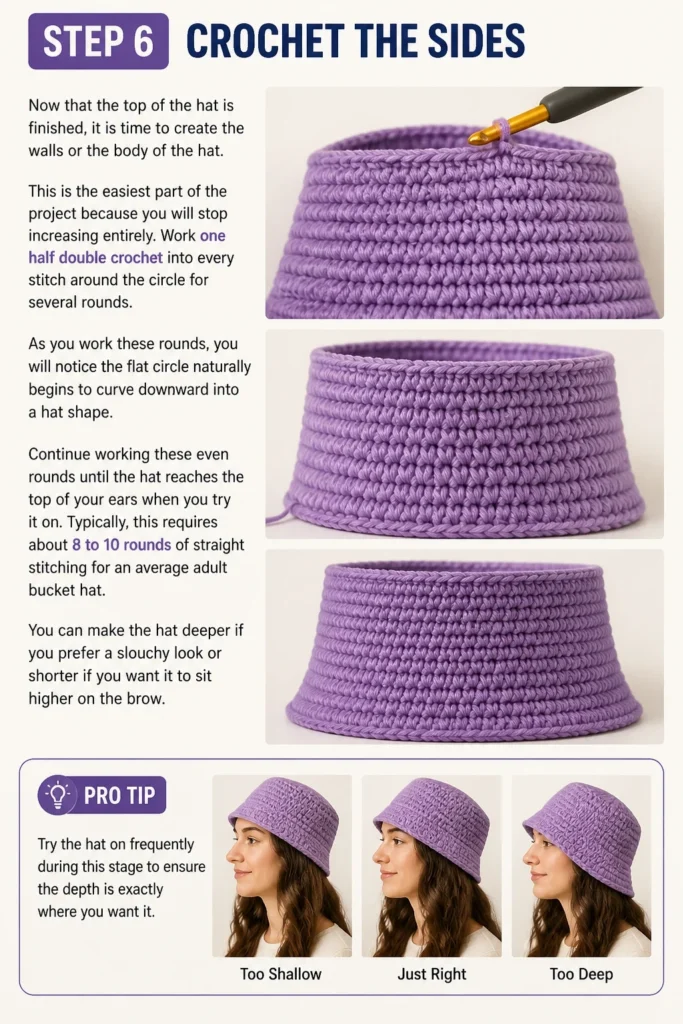
This is the easiest part of the project because you will stop increasing entirely.
Work one half double crochet into every stitch around the circle for several rounds.
As you work these rounds, you will notice the flat circle naturally begins to curve downward into a hat shape.
Continue working these even rounds until the hat reaches the top of your ears when you try it on.
Typically, this requires about 8 to 10 rounds of straight stitching for an average adult bucket hat.
You can make the hat deeper if you prefer a “slouchy” look or shorter if you want it to sit higher on the brow.
Pro Tip: Try the hat on frequently during this stage to ensure the depth is exactly where you want it to be.
Step 7: Shape the Brim
The brim is what gives the bucket hat its iconic silhouette and provides shade for your face.
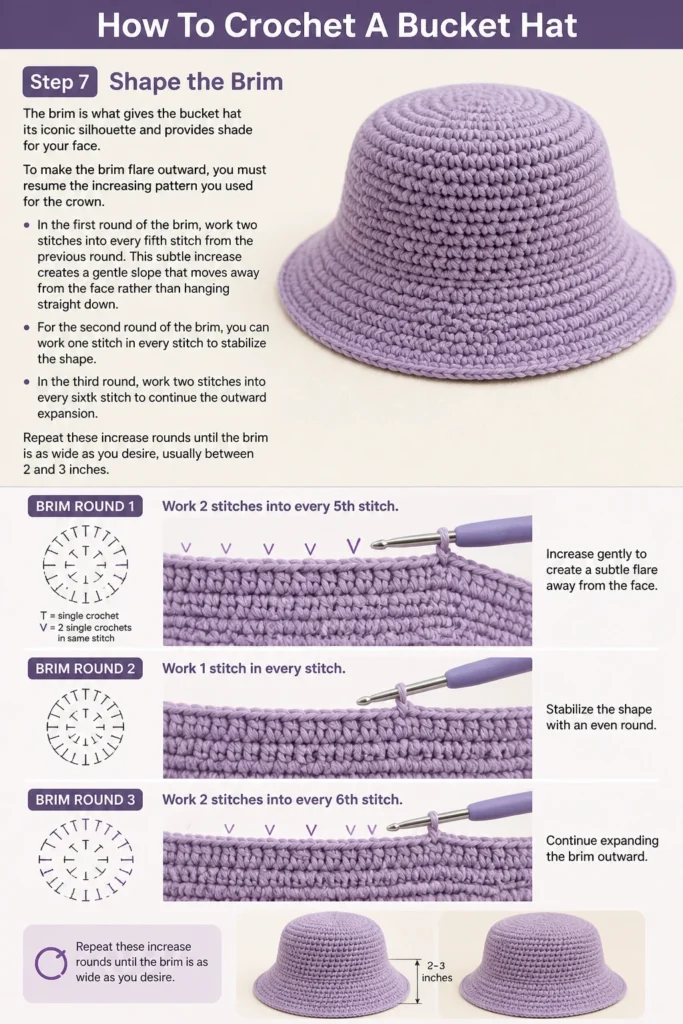
To make the brim flare outward, you must resume the increasing pattern you used for the crown.
In the first round of the brim, work two stitches into every fifth stitch from the previous round.
This subtle increase creates a gentle slope that moves away from the face rather than hanging straight down.
For the second round of the brim, you can work one stitch in every stitch to stabilize the shape.
In the third round, work two stitches into every sixth stitch to continue the outward expansion.
Repeat these increase rounds until the brim is as wide as you desire, usually between 2 and 3 inches.
Step 8: Finish the Edges
The final round of your hat should be sturdy enough to prevent the brim from stretching out over time.
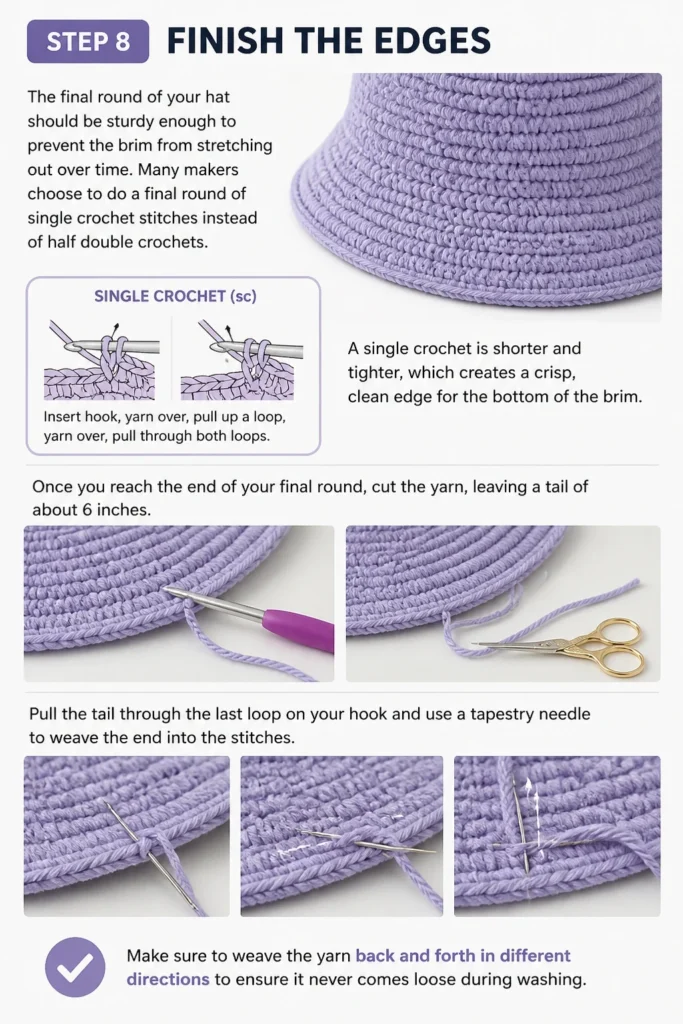
Many makers choose to do a final round of single crochet stitches instead of half double crochets.
A single crochet is shorter and tighter, which creates a crisp, clean edge for the bottom of the brim.
Once you reach the end of your final round, cut the yarn, leaving a tail of about 6 inches.
Pull the tail through the last loop on your hook and use a tapestry needle to weave the end into the stitches.
Make sure to weave the yarn back and forth in different directions to ensure it never comes loose during washing.
Common Mistakes to Avoid
Inconsistent Tension
If you hold your yarn tightly at the beginning and loosen your grip later, your hat will look lopsided or uneven. Try to maintain a relaxed but firm hold on the yarn throughout the entire project to keep your stitches uniform in size. If you notice your hands getting tired, take a break rather than forcing your way through, as fatigue often leads to tighter stitches.
Losing the Beginning of the Round
Since this hat is worked in a continuous spiral, there is no obvious seam to tell you where one round ends and the next begins. If you forget to use a stitch marker, you will lose track of your increase counts, leading to a hat that is not perfectly circular. Always move your marker up to the first stitch of every new round immediately after you make it.
Using the Wrong Yarn Fiber
Using a very soft or fuzzy yarn like mohair or certain types of acrylic can result in a hat that lacks structure. A bucket hat needs to be somewhat stiff to maintain its shape, especially in the brim area. If your yarn is too soft, the brim will simply hang down over your eyes like a bell instead of flaring out stylishly.
Troubleshooting
The Top of the Hat is Pointy
If the crown of your hat looks like a cone rather than a flat circle, you are likely not increasing enough in the early rounds. Ensure you are following the increase math strictly, adding the correct number of stitches in each lap. You can fix this by unraveling the work and ensuring your increases are evenly spaced around the circle.
The Brim is Too Wavy
A wavy or ruffled brim occurs when you have added too many increase stitches too quickly. This happens if you put two stitches in every stitch for multiple rounds of the brim. To solve this, alternate between an increase round and a “plain” round where you only work one stitch in each stitch.
The Hat is Too Small for the Head
If the hat feels tight or sits too high, your crown diameter was likely too small before you started the side walls. Crochet is very flexible, but it cannot stretch indefinitely without losing its shape. You will need to add one or two more increase rounds to the crown before starting the straight sides to give the hat more width.
Key Takeaways
- Choose 100 percent cotton yarn for the best structural integrity and breathability.
- Start with a magic ring to ensure the top of the hat is tightly closed without any gaps.
- Work in a continuous spiral using a stitch marker to track your progress and maintain the shape.
- Maintain a flat circle for the crown until it matches the diameter of the wearer’s head.
- Use a single crochet for the final round to create a durable and professional-looking edge.
- Weave in your ends securely in multiple directions to prevent the hat from unraveling.
Frequently Asked Questions
Can I use a different stitch besides half double crochet?
Yes, you can use double crochet for a faster project or single crochet for a much denser, warmer hat. However, using different stitches will change the height of your rounds, so you may need to adjust the number of rounds for the sides and brim. Half double crochet is the most popular choice because it offers the perfect balance of speed and fabric density.
How many skeins of yarn do I need?
For a standard adult bucket hat, you will typically need about 150 to 200 yards of worsted weight yarn. This usually equates to one large skein or two smaller balls of cotton yarn. It is always a good idea to buy an extra skein if you plan on making a very wide brim or adding decorative stripes.
How do I wash my crocheted bucket hat?
If you used cotton yarn, you can usually machine wash the hat on a gentle cycle with cool water. It is best to lay the hat flat on a towel and reshape it by hand while it is still damp to ensure it dries in the correct form. Avoid putting crocheted items in a high-heat dryer, as this can cause the fibers to shrink or become distorted.
What if I want to change colors?
To change colors, work your last stitch of the old color until you have the final loops on your hook. Pull the new color through those final loops to complete the stitch, then continue working with the new yarn. You can carry the old yarn along the back or cut it and weave in the ends as you go.
Our Top Recommended Finds
- Ergonomic Crochet Hook Set: These hooks feature padded handles that reduce hand strain during long crafting sessions.
- Mercerized Cotton Yarn: This type of cotton has a slight sheen and is exceptionally strong, making it perfect for hats that need to hold their shape.
- Locking Stitch Markers: These small plastic clips stay securely in your work and are essential for keeping track of your rounds in a spiral.
Expand Your Crochet Collection
Now that you have mastered the basic bucket hat, you can begin experimenting with different textures and patterns.
Consider trying a checkered pattern by swapping yarn colors every few stitches or adding a scalloped edge to the brim for a feminine touch.
You might also enjoy making matching accessories like a small pouch or a water bottle carrier using the same yarn.
Pick up your hook today and start your next project to keep your creative momentum moving forward.
Beginner-friendly templates, step-by-step guides,
and weekly project ideas in your inbox.