How To Caulk Like A Pro

Beginner-friendly templates, step-by-step guides,
and weekly project ideas in your inbox.
Achieving a seamless, professional caulk line can transform the look and protection of any space. I’ve spent countless hours perfecting this skill in my own home projects, understanding the nuances that separate an amateur job from a truly flawless finish.
This guide distills years of hands-on experience into a clear, actionable roadmap.
Trust me to walk you through every critical step, ensuring your next caulking project looks like it was done by a seasoned expert.
Quick Overview
You’re about to master the art of caulking, creating durable and aesthetically pleasing seals around your home.
This process will not only enhance your home’s appearance but also improve its energy efficiency and protect against moisture.
- Time needed: 2-4 hours (depending on project size and drying time)
- Difficulty: Intermediate
- What you’ll need: Caulk gun, caulk tubes, utility knife, caulk tool/finishing tool, painter’s tape, cleaning solution (e.g., rubbing alcohol), clean rags, bucket of water, gloves.
Step-by-Step Instructions
Step 1: Gather Your Tools and Materials
Before you begin, ensure you have every item readily available. A well-prepared workspace saves time and prevents frustration during the process.
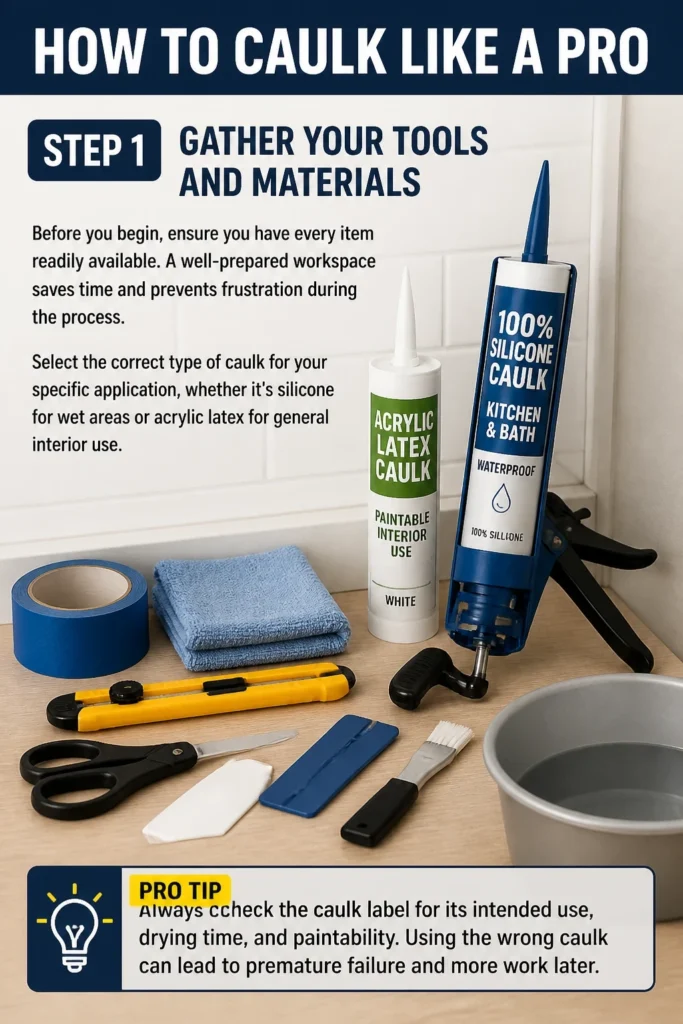
Select the correct type of caulk for your specific application, whether it’s silicone for wet areas or acrylic latex for general interior use.
Pro Tip: Always check the caulk label for its intended use, drying time, and paintability. Using the wrong caulk can lead to premature failure and more work later.
Step 2: Prepare the Surface Thoroughly
Proper surface preparation is the cornerstone of a lasting caulk bead. This step is often overlooked but is crucial for strong adhesion.
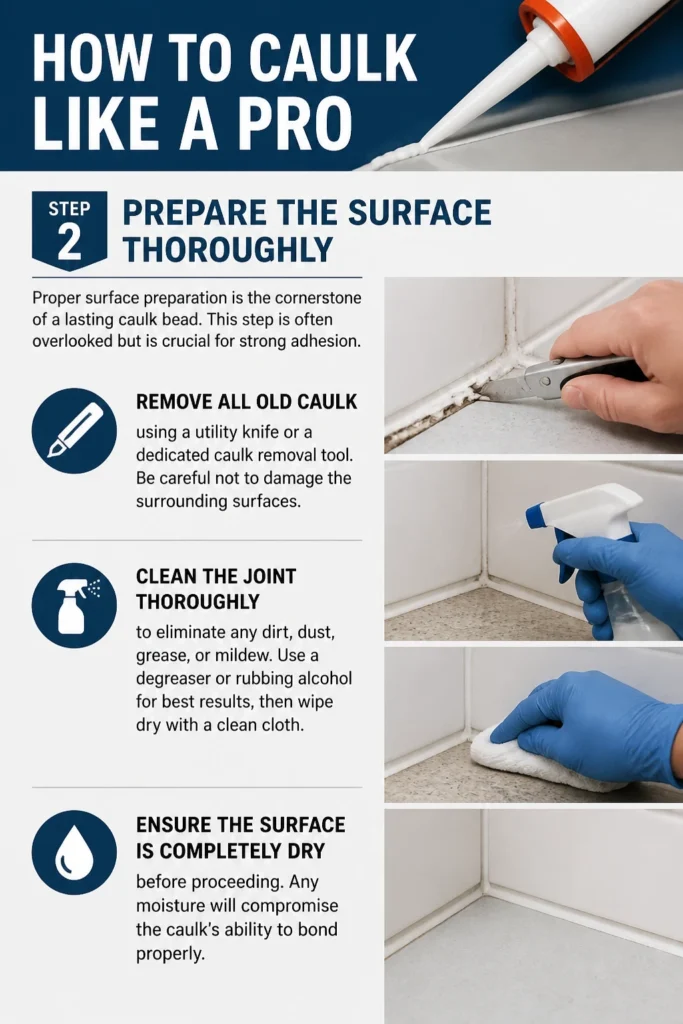
Remove all old caulk using a utility knife or a dedicated caulk removal tool. Be careful not to damage the surrounding surfaces.
Clean the joint thoroughly to eliminate any dirt, dust, grease, or mildew. Use a degreaser or rubbing alcohol for best results, then wipe dry with a clean cloth.
Ensure the surface is completely dry before proceeding. Any moisture will compromise the caulk’s ability to bond properly.
Step 3: Apply Painter’s Tape for Crisp Lines
Painter’s tape acts as a guide, helping you achieve perfectly straight and uniform caulk lines. This technique is a hallmark of professional work.
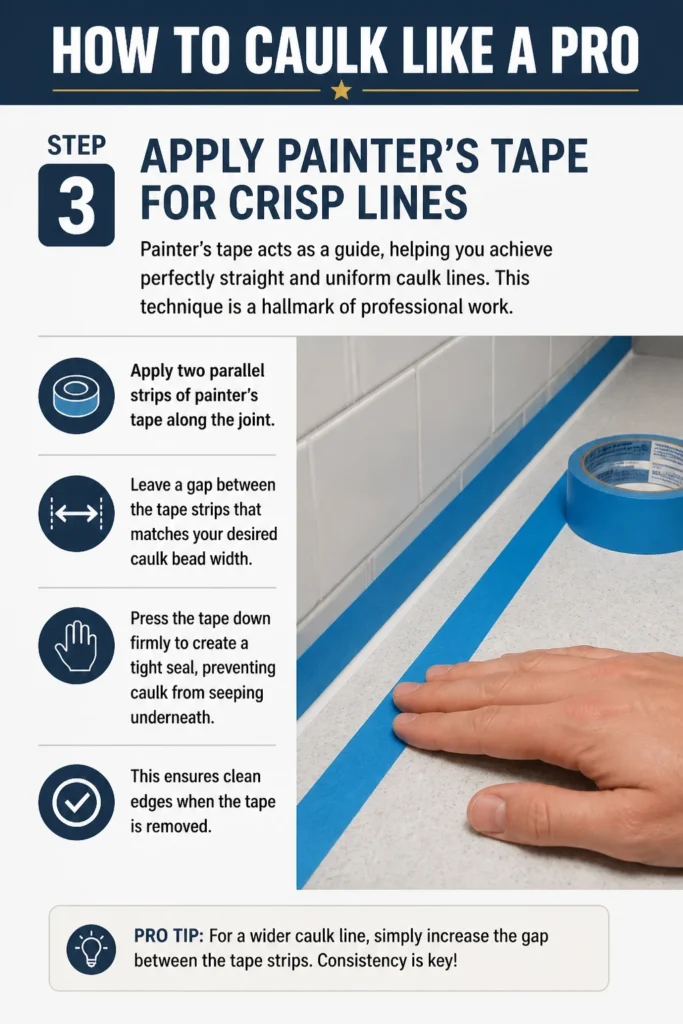
Apply two parallel strips of painter’s tape along the joint. Leave a gap between the tape strips that matches your desired caulk bead width.
Press the tape down firmly to create a tight seal, preventing caulk from seeping underneath. This ensures clean edges when the tape is removed.
Step 4: Prepare the Caulk Tube and Gun
Loading the caulk gun correctly and cutting the nozzle properly are essential for smooth application.
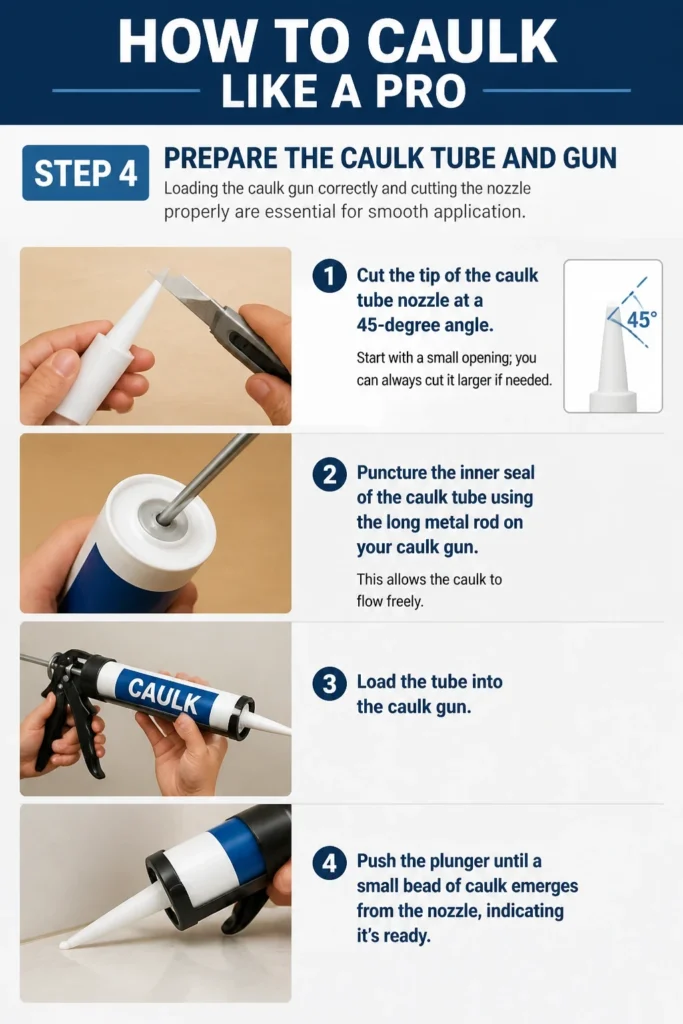
Cut the tip of the caulk tube nozzle at a 45-degree angle. Start with a small opening; you can always cut it larger if needed.
Puncture the inner seal of the caulk tube using the long metal rod on your caulk gun. This allows the caulk to flow freely.
Load the tube into the caulk gun and push the plunger until a small bead of caulk emerges from the nozzle, indicating it’s ready.
Step 5: Apply the Caulk Bead Evenly
This is where technique truly matters. Consistency is key to a professional finish.
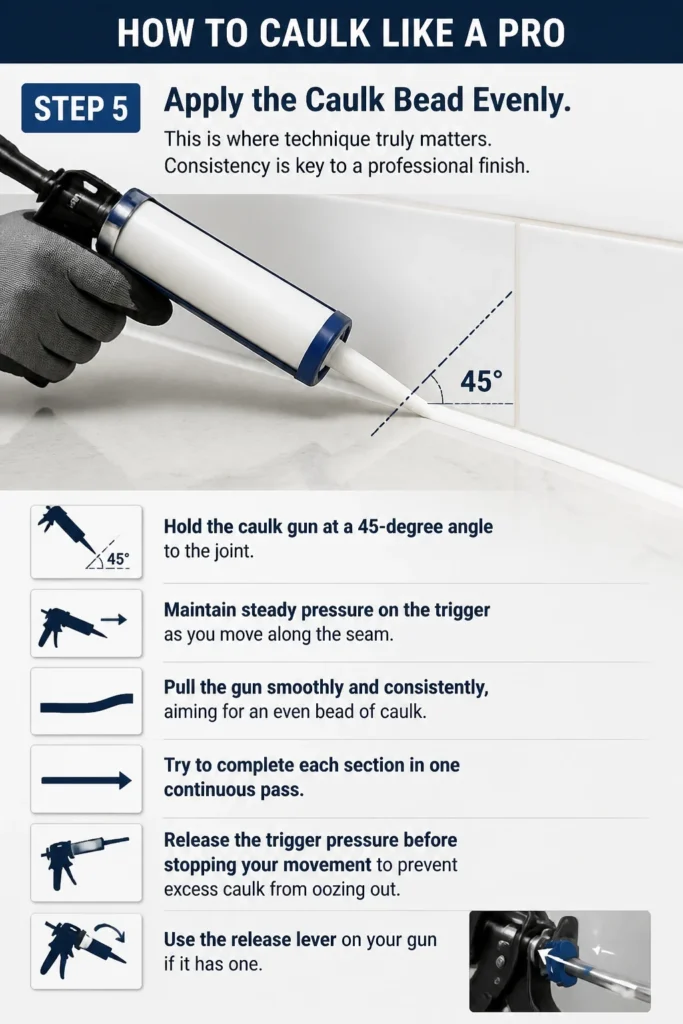
Hold the caulk gun at a 45-degree angle to the joint. Maintain steady pressure on the trigger as you move along the seam.
Pull the gun smoothly and consistently, aiming for an even bead of caulk. Try to complete each section in one continuous pass.
Release the trigger pressure before stopping your movement to prevent excess caulk from oozing out. Use the release lever on your gun if it has one.
Step 6: Tool and Smooth the Caulk
Tooling the caulk compresses it into the joint, creates a strong seal, and provides a clean, finished appearance.
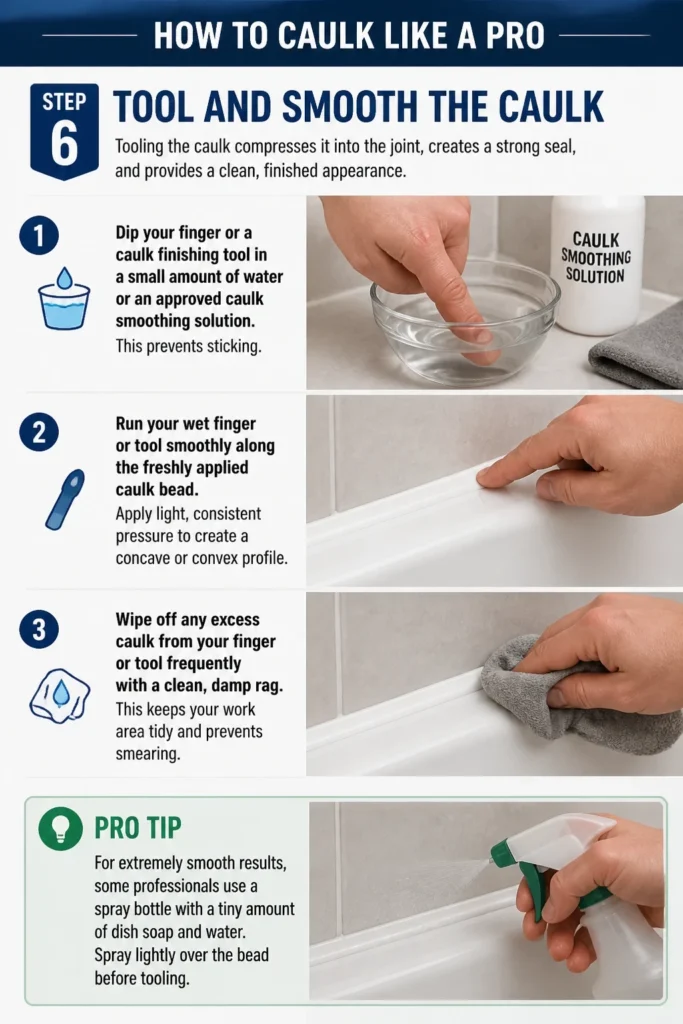
Dip your finger or a caulk finishing tool in a small amount of water or an approved caulk smoothing solution. This prevents sticking.
Run your wet finger or tool smoothly along the freshly applied caulk bead. Apply light, consistent pressure to create a concave or convex profile.
Wipe off any excess caulk from your finger or tool frequently with a clean, damp rag. This keeps your work area tidy and prevents smearing.
Pro Tip: For extremely smooth results, some professionals use a spray bottle with a tiny amount of dish soap and water. Spray lightly over the bead before tooling.
Step 7: Remove Painter’s Tape Immediately
Timing is critical when removing the tape to ensure sharp, clean lines.
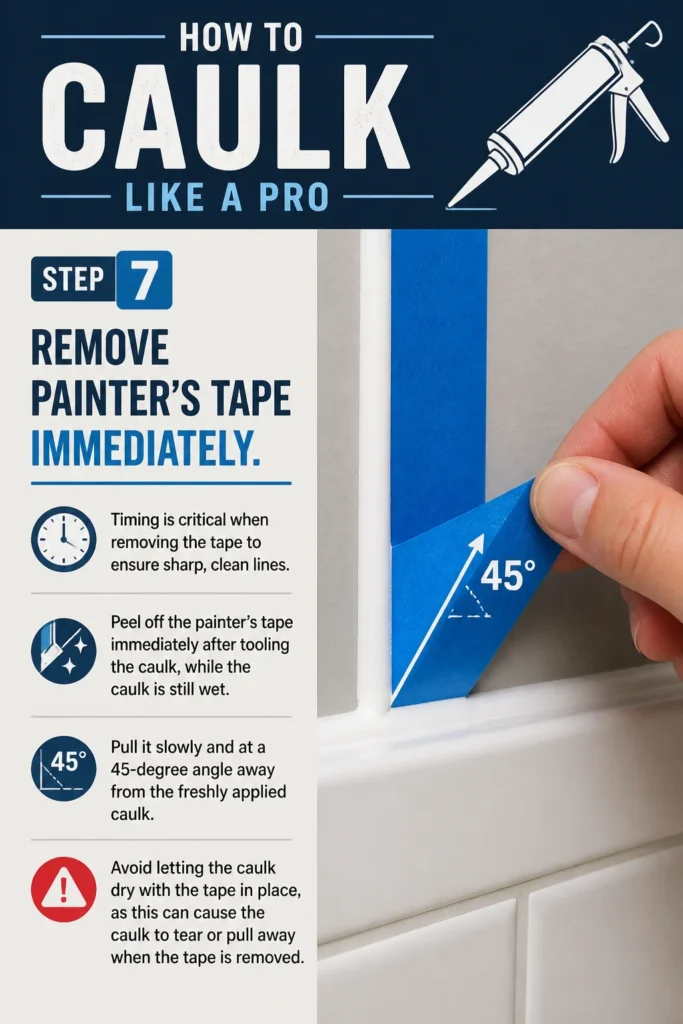
Peel off the painter’s tape immediately after tooling the caulk, while the caulk is still wet. Pull it slowly and at a 45-degree angle away from the freshly applied caulk.
Avoid letting the caulk dry with the tape in place, as this can cause the caulk to tear or pull away when the tape is removed.
Step 8: Clean Up and Allow to Cure
Proper cleanup ensures a professional look and prevents accidental smudges.
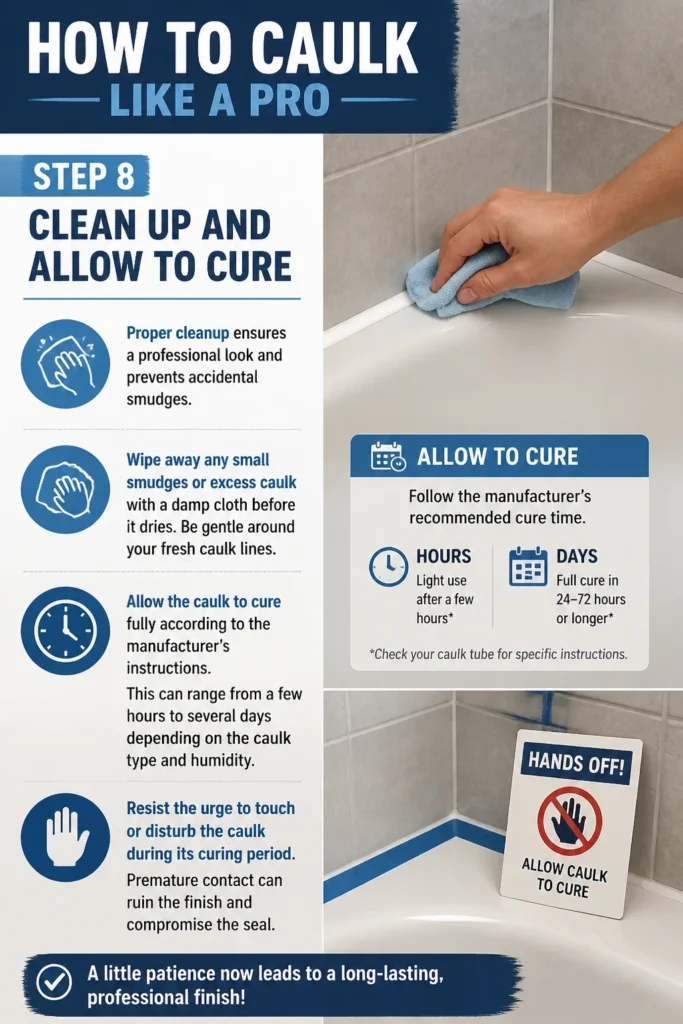
Wipe away any small smudges or excess caulk with a damp cloth before it dries. Be gentle around your fresh caulk lines.
Allow the caulk to cure fully according to the manufacturer’s instructions. This can range from a few hours to several days depending on the caulk type and humidity.
Resist the urge to touch or disturb the caulk during its curing period. Premature contact can ruin the finish and compromise the seal.
Common Mistakes to Avoid
Not Preparing the Surface Properly
Many DIYers rush the cleaning and removal of old caulk, leading to poor adhesion. Caulk needs a clean, dry, and debris-free surface to bond effectively.
Failing to remove old caulk can create a bumpy, uneven surface, and the new caulk may not stick well, leading to cracks and gaps over time. Always take the time to scrape, clean, and dry the joint thoroughly.
Cutting the Nozzle Too Large
A common error is cutting the caulk tube nozzle with too wide an opening. This results in an excessively large caulk bead that is difficult to tool and wastes material.
Start with a very small 45-degree cut. You can always widen the opening with another small cut if more caulk is needed for wider gaps. Control over bead size is crucial for a tidy appearance.
Applying Too Much or Too Little Caulk
Over-applying caulk creates a messy, bulky bead that’s hard to smooth and wastes product. Conversely, using too little caulk can leave gaps or result in a weak seal that breaks down quickly.
Aim for a consistent, moderate bead that fills the joint without excessive overflow. Practice on a scrap piece of material if you are unsure about your pressure and speed.
Not Tooling the Caulk Quickly Enough
Caulk begins to skin over relatively fast, especially in warm or dry conditions. Waiting too long to tool the bead makes it difficult to smooth and shape, resulting in an uneven texture.
Tool the caulk immediately after application, ideally within 5-10 minutes, depending on the caulk type. Work in manageable sections to ensure you can tool each bead before it sets.
Troubleshooting
Caulk Not Sticking to the Surface
If your caulk isn’t adhering, the surface was likely not clean or dry enough. Grease, dust, or moisture acts as a barrier, preventing proper bonding.
Remove the non-adhering caulk, thoroughly clean the surface with rubbing alcohol or a specialized cleaner, and ensure it’s completely dry before reapplying. Use a caulk suitable for damp conditions if necessary, but dry is always best.
Uneven or Bumpy Caulk Bead
An uneven bead often results from inconsistent pressure on the caulk gun trigger or a shaky hand. This can also happen if the nozzle cut is uneven or too large.
Practice maintaining steady pressure and movement. If you’re struggling, consider using painter’s tape as a guide. For existing bumpy beads, you might need to scrape it off and reapply, focusing on control.
Caulk Smears or Messy Edges
Smears typically occur when excess caulk is left on the surface or when the tape is removed too late. This can also happen if your tooling finger or tool is not wiped clean frequently.
Always remove painter’s tape immediately after tooling. Keep your smoothing tool or finger consistently clean by wiping away excess caulk onto a rag. Clean any fresh smears with a damp cloth before the caulk sets.
Key Takeaways
- Preparation is Paramount: A clean, dry surface is the foundation of a professional caulk job.
- Choose the Right Caulk: Select a caulk type appropriate for your specific environment and materials.
- Cut the Nozzle Smartly: Start small with your nozzle cut and angle, widening only if necessary for better control.
- Maintain Consistent Flow: Apply caulk with steady pressure and a continuous motion for an even bead.
- Tool Immediately and Smoothly: Finish the caulk bead promptly after application to achieve a clean, sealed finish.
- Timely Tape Removal: Peel off painter’s tape while the caulk is still wet to avoid tearing and ensure crisp lines.
Frequently Asked Questions
How long does caulk typically take to dry?
Drying times vary significantly based on the caulk type, humidity, and temperature. Most caulk is “tack-free” within 30 minutes to a few hours, meaning it’s dry to the touch.
However, it can take 24 hours to several days for caulk to fully cure and achieve its maximum strength and water resistance. Always refer to the manufacturer’s instructions on the caulk tube for precise drying and curing times.
Can I paint over caulk?
Many types of caulk are paintable, especially acrylic latex caulk. Silicone caulk, however, is generally not paintable and paint will not adhere to it well.
Always check the product label to confirm if the caulk is paintable. If it is, ensure the caulk is fully cured before applying any paint, as painting too early can cause cracking or bubbling.
What’s the best way to store leftover caulk?
To keep leftover caulk fresh, first clean the nozzle of any excess caulk. Then, insert a long nail or screw into the nozzle opening to create a seal, or use a specialized caulk cap.
Store the tube upright in a cool, dry place away from direct sunlight and extreme temperatures. This helps prevent the caulk from hardening inside the tube, extending its shelf life for future projects.
Do I need to wear gloves when caulking?
While not strictly mandatory for all caulk types, wearing gloves is highly recommended, especially when working with silicone or solvent-based caulks. These materials can be difficult to remove from skin and may cause irritation.
Gloves also help keep your hands clean and free from sticky residue, making cleanup much easier. Choose disposable nitrile or latex gloves for best results.
Our Top Recommended Finds
- High-Quality Caulk Gun: A smooth rod caulk gun with a drip-free feature offers better control and reduces mess during application.
- Multi-Purpose Caulk Tool: These tools often combine a scraper for old caulk, a nozzle cutter, and various shaping profiles for smoothing new beads.
- Painter’s Tape (Delicate Surfaces): For achieving crisp lines without damaging painted walls or delicate finishes, a low-tack painter’s tape is invaluable.
Transform Your Home, One Bead at a Time
You now possess the knowledge and techniques to tackle any caulking project with confidence. Moving beyond messy, uneven lines is not just about aesthetics; it’s about protecting your home.
Embrace these professional methods to create seals that are both beautiful and durable. Your improved skills will enhance your living spaces and provide lasting peace of mind.
Why wait? Gather your tools and start your next project today, experiencing the satisfaction of a truly professional finish.
Beginner-friendly templates, step-by-step guides,
and weekly project ideas in your inbox.