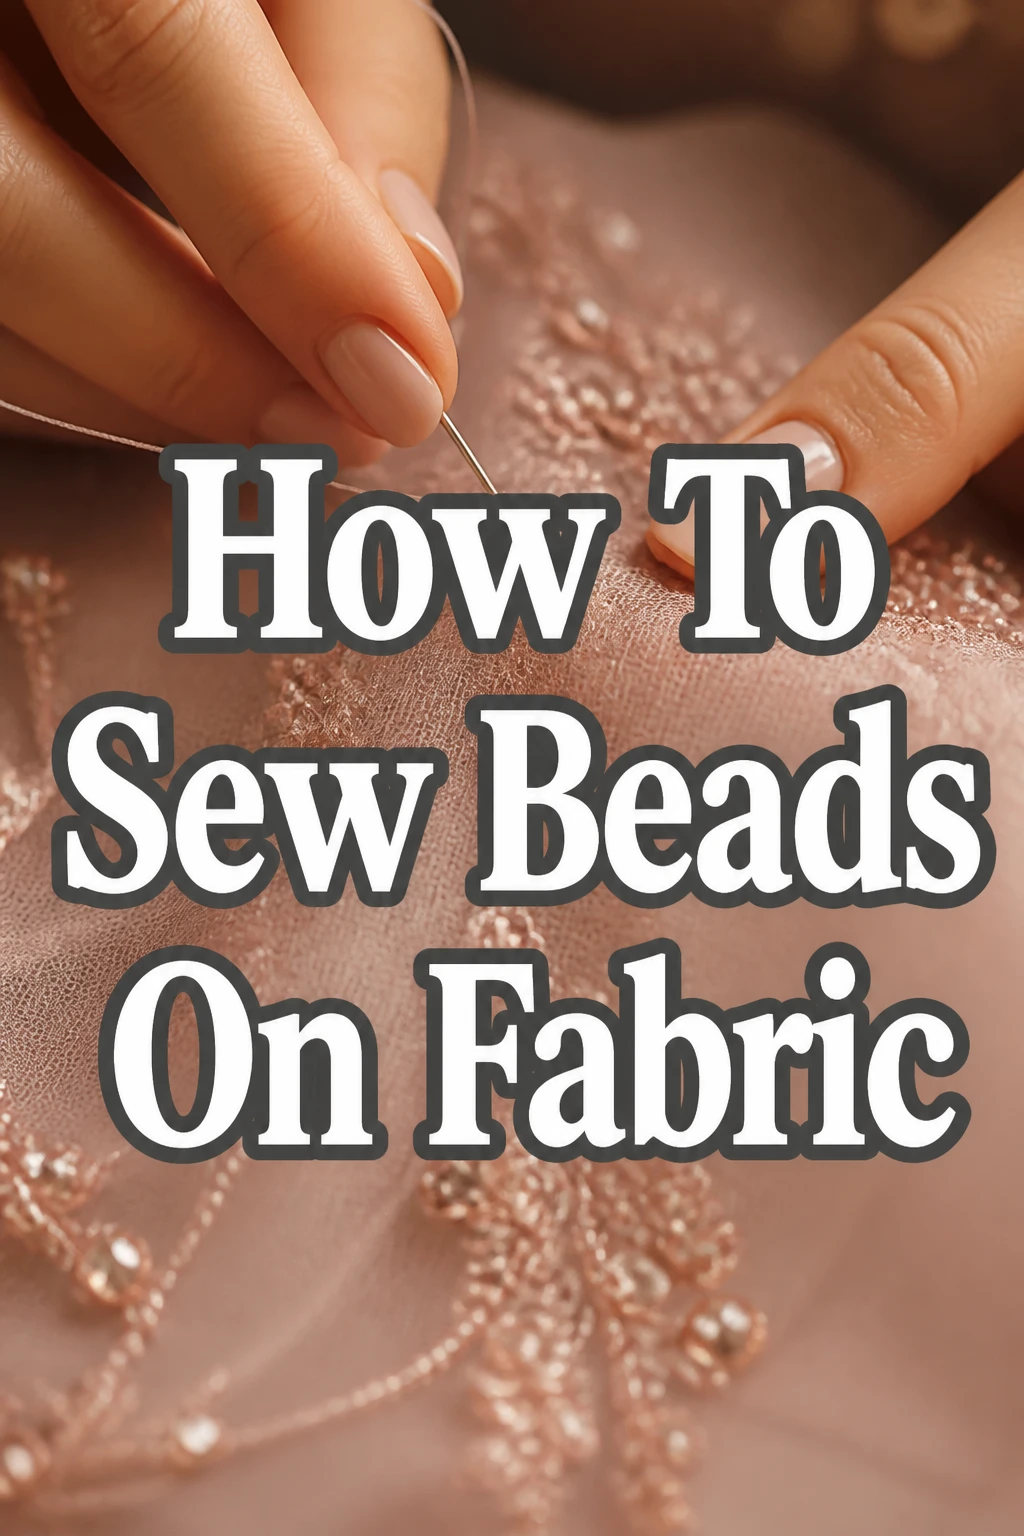
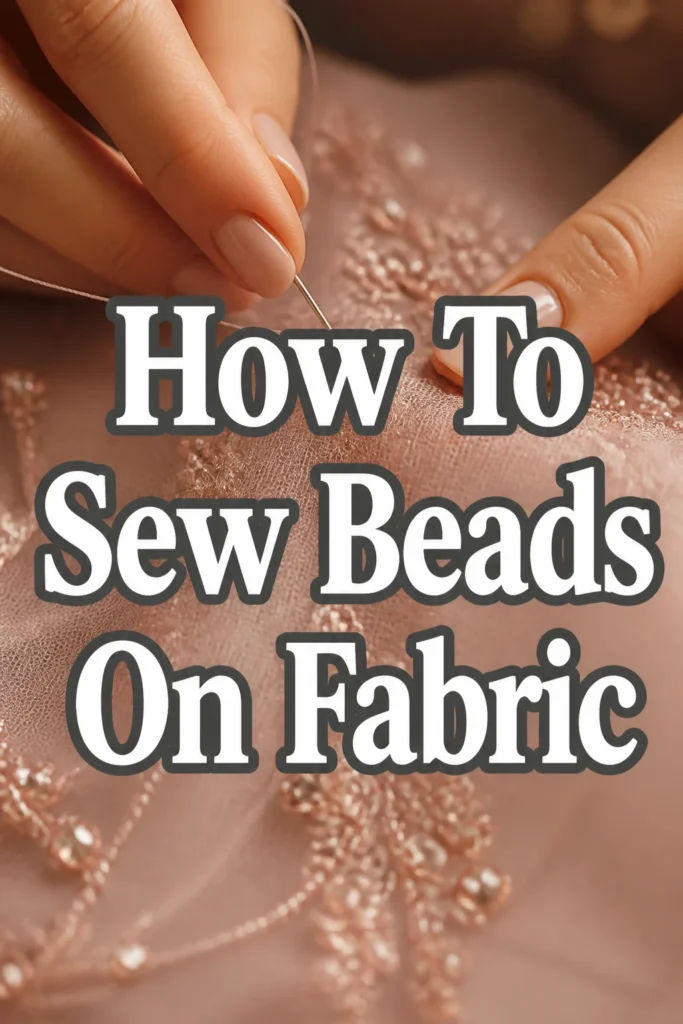
How To Sew Beads On Fabric

Beginner-friendly templates, step-by-step guides,
and weekly project ideas in your inbox.
Adding beads to fabric can transform an ordinary piece into something truly extraordinary.
I’ve personally spent countless hours embellishing garments, accessories, and home decor items, discovering the nuances that make a beaded project stand out.
This guide distills years of practical experience into clear, actionable steps, ensuring your beading endeavors are successful and beautiful.
Quick Overview
By the end of this guide, you’ll be equipped with the knowledge and confidence to securely sew beads onto any fabric, creating stunning custom designs.
- Time needed: 1-3 hours (depending on project size and bead count)
- Difficulty: Beginner to Intermediate
- What you’ll need: Fabric, beads, beading needle, strong thread, scissors, thimble (optional), fabric marker (optional)
Step-by-Step Instructions
Step 1: Gather Your Supplies
Before you begin, ensure you have all the necessary tools and materials at hand.
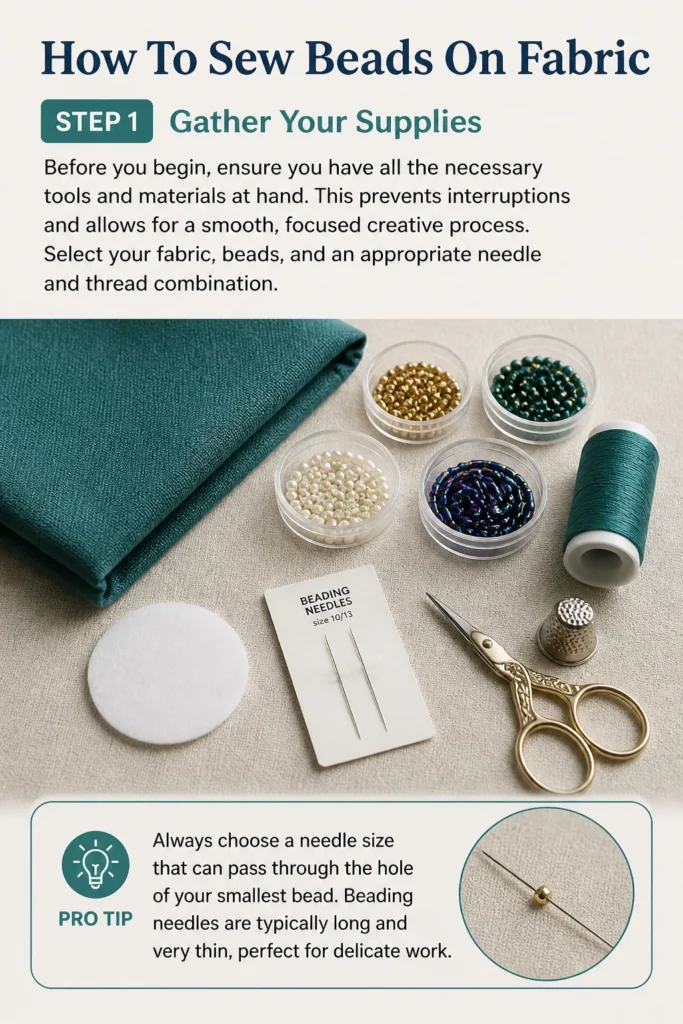
This prevents interruptions and allows for a smooth, focused creative process.
Select your fabric, beads, and an appropriate needle and thread combination.
Pro Tip: Always choose a needle size that can pass through the hole of your smallest bead. Beading needles are typically long and very thin, perfect for delicate work.
Step 2: Prepare Your Fabric
Lay your fabric flat on a clean, well-lit surface.
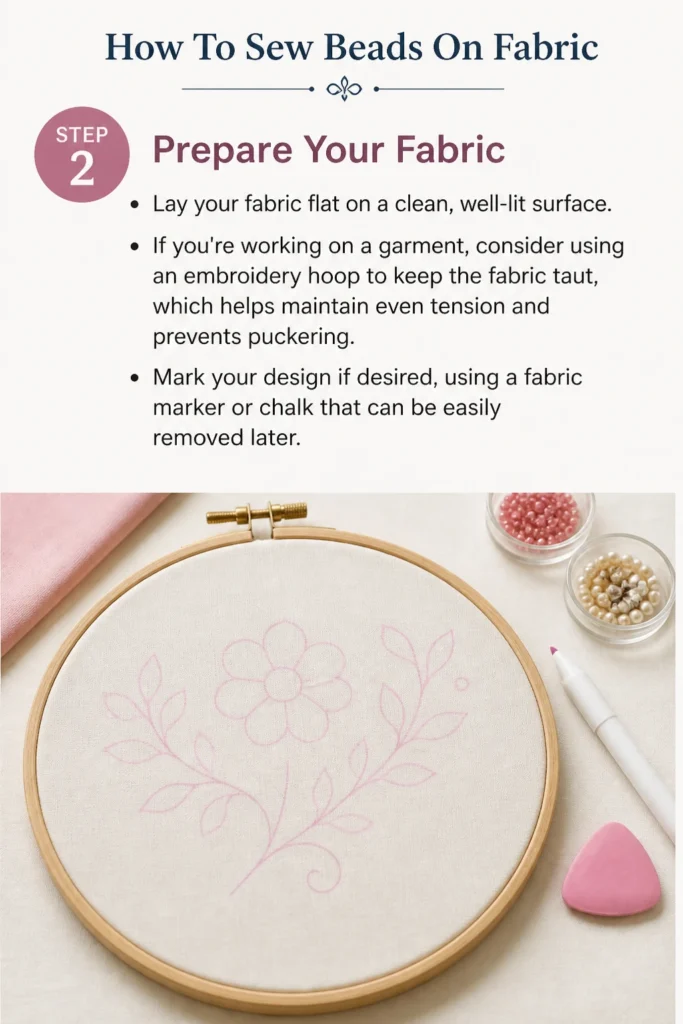
If you’re working on a garment, consider using an embroidery hoop to keep the fabric taut, which helps maintain even tension and prevents puckering.
Mark your design if desired, using a fabric marker or chalk that can be easily removed later.
Step 3: Thread Your Needle
Cut a length of thread, ideally no longer than 18-24 inches to minimize tangling.
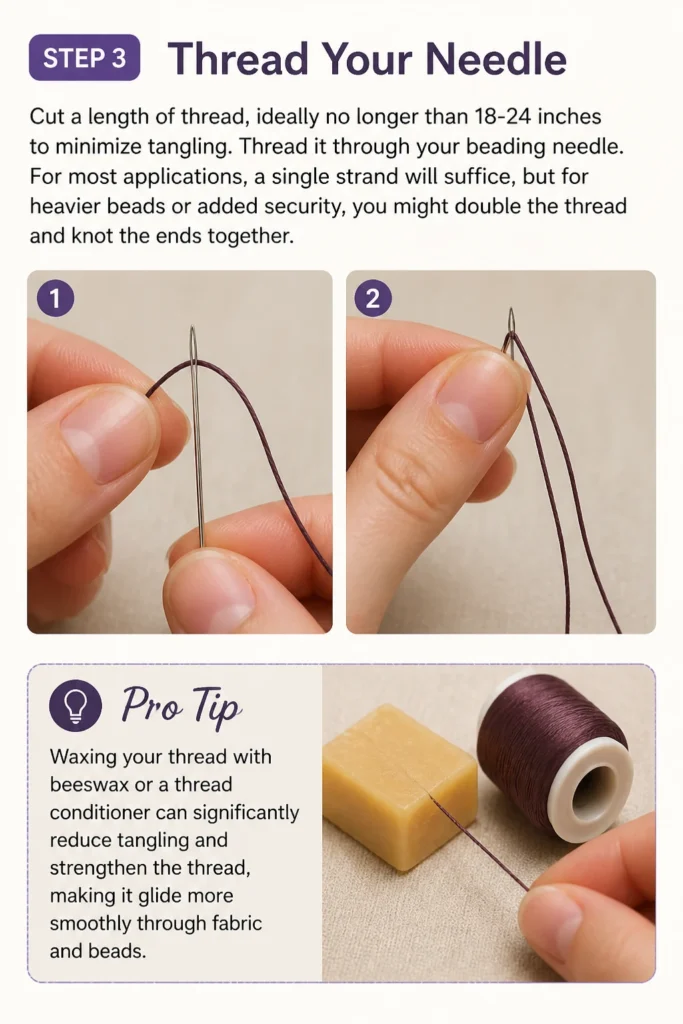
Thread it through your beading needle.
For most applications, a single strand will suffice, but for heavier beads or added security, you might double the thread and knot the ends together.
Pro Tip: Waxing your thread with beeswax or a thread conditioner can significantly reduce tangling and strengthen the thread, making it glide more smoothly through fabric and beads.
Step 4: Anchor Your Thread
Before adding any beads, you need to secure your thread to the fabric.
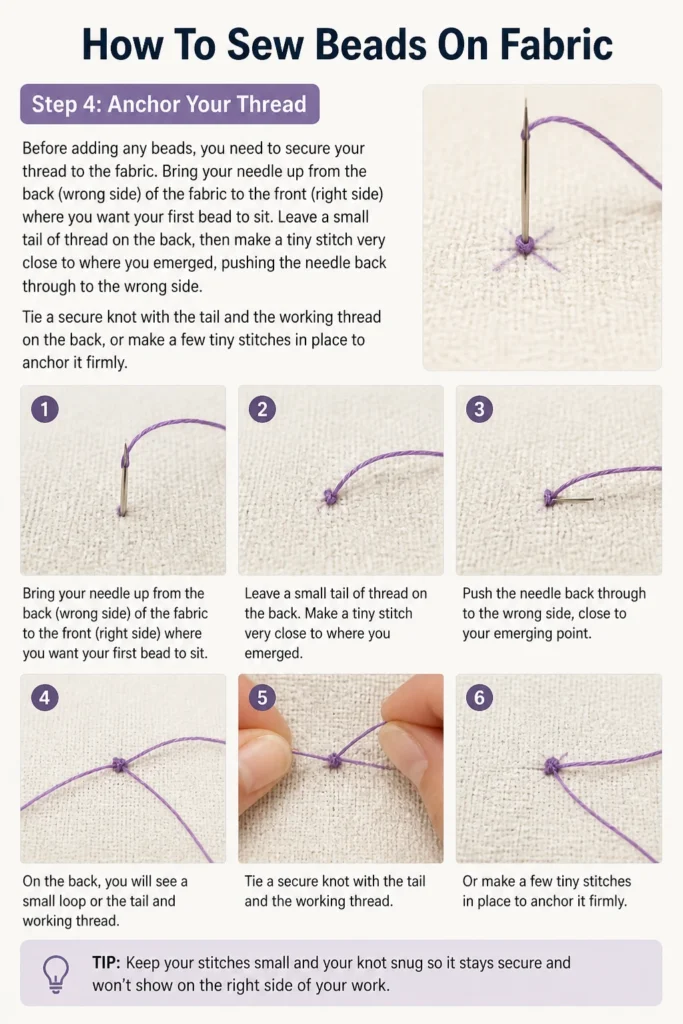
Bring your needle up from the back (wrong side) of the fabric to the front (right side) where you want your first bead to sit.
Leave a small tail of thread on the back, then make a tiny stitch very close to where you emerged, pushing the needle back through to the wrong side.
Tie a secure knot with the tail and the working thread on the back, or make a few tiny stitches in place to anchor it firmly.
Step 5: Sew on a Single Bead (Basic Stitch)
This is the fundamental technique for attaching individual beads.
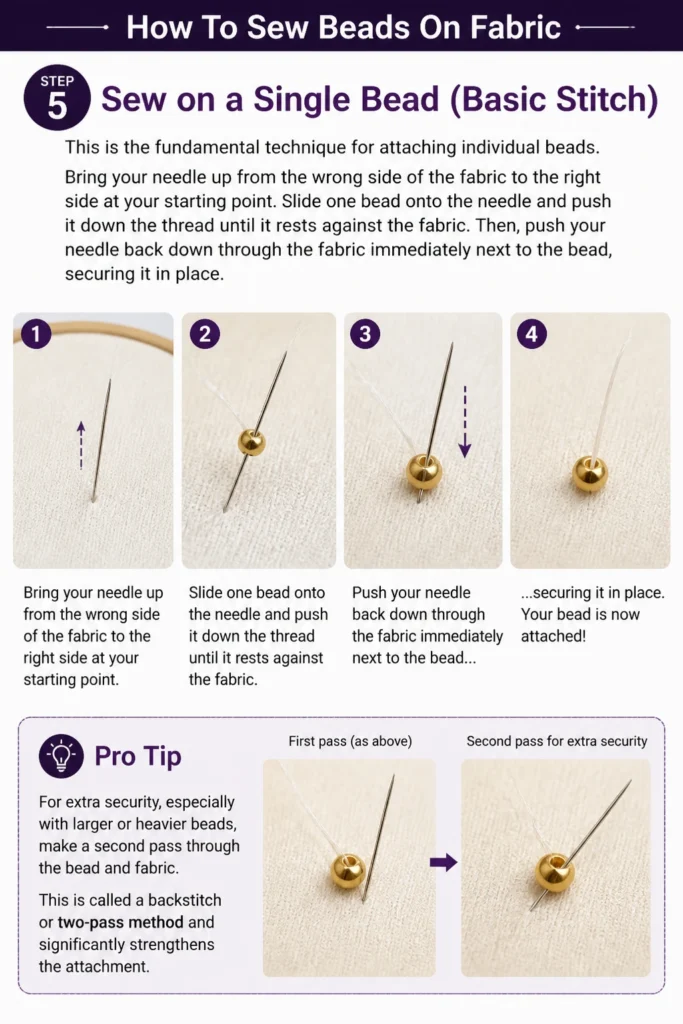
Bring your needle up from the wrong side of the fabric to the right side at your starting point.
Slide one bead onto the needle and push it down the thread until it rests against the fabric.
Then, push your needle back down through the fabric immediately next to the bead, securing it in place.
Pro Tip: For extra security, especially with larger or heavier beads, make a second pass through the bead and fabric. This is called a “backstitch” or “two-pass” method and significantly strengthens the attachment.
Step 6: Attach Multiple Beads (Running Stitch or Backstitch Method)
To create lines or patterns of beads, you can use variations of the basic stitch.
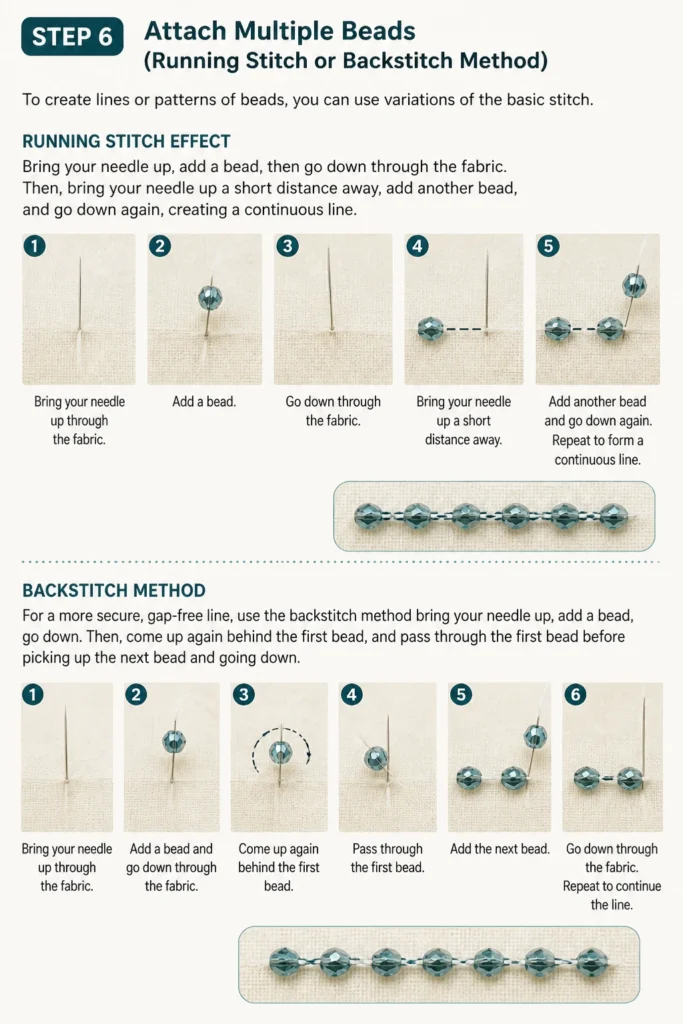
For a running stitch effect, bring your needle up, add a bead, then go down through the fabric.
Then, bring your needle up a short distance away, add another bead, and go down again, creating a continuous line.
For a more secure, gap-free line, use the backstitch method: bring your needle up, add a bead, go down. Then, come up again behind the first bead, and pass through the first bead before picking up the next bead and going down.
Step 7: Create a Beaded Strand or Loop
Sometimes you want beads to form a flexible line or a small loop, rather than lying flat.
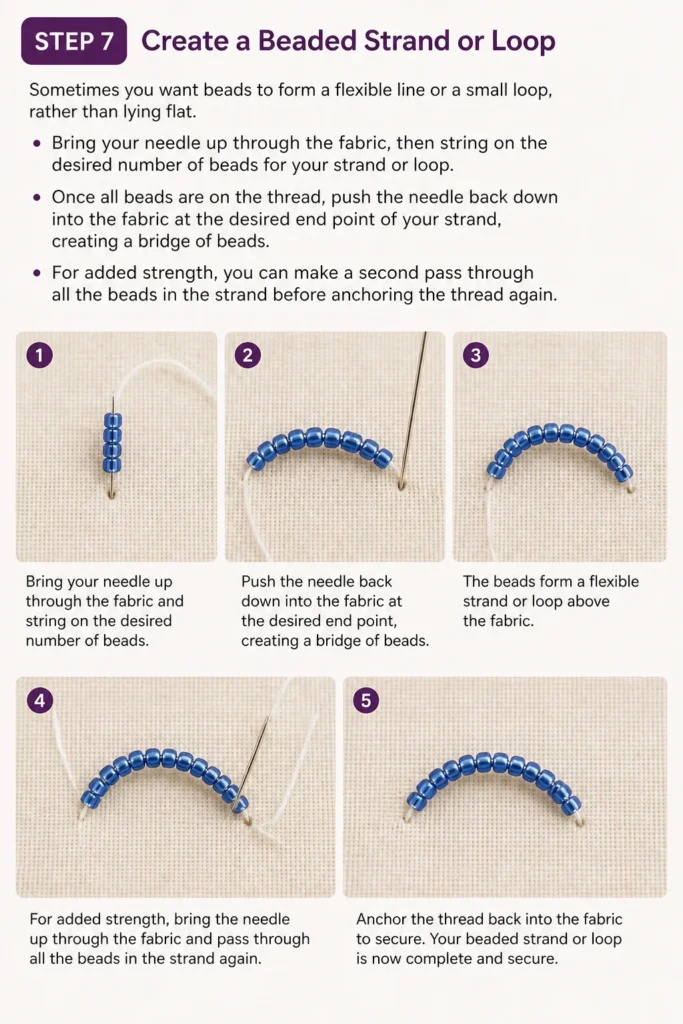
Bring your needle up through the fabric, then string on the desired number of beads for your strand or loop.
Once all beads are on the thread, push the needle back down into the fabric at the desired end point of your strand, creating a bridge of beads.
For added strength, you can make a second pass through all the beads in the strand before anchoring the thread again.
Step 8: Secure Your Thread
Once you’ve finished sewing your beads or completed a section, it’s crucial to secure your thread properly.
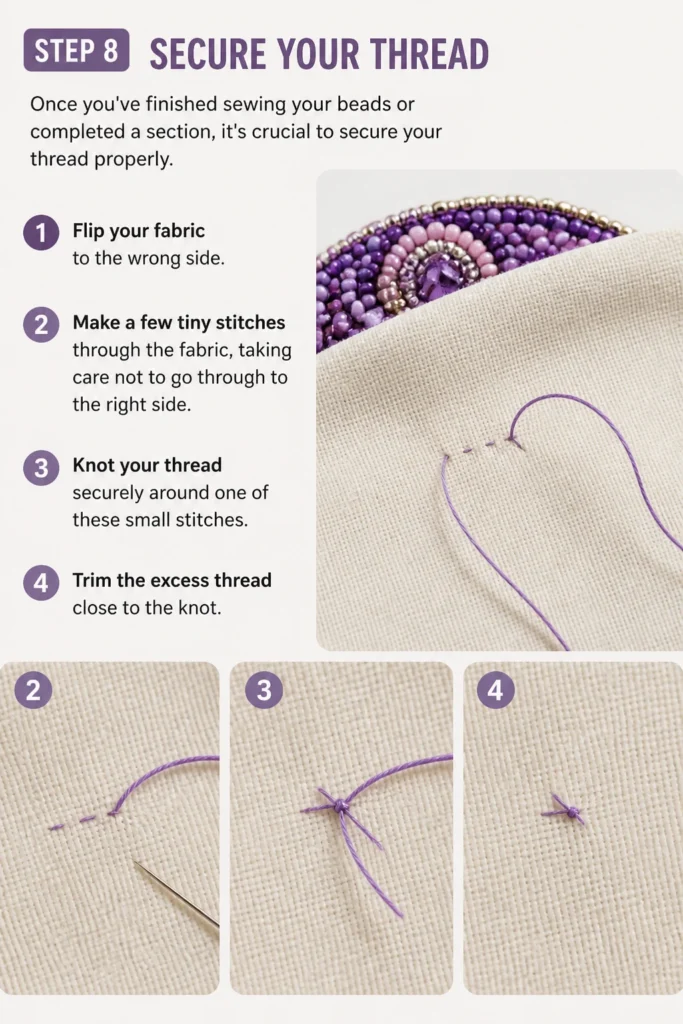
Flip your fabric to the wrong side.
Make a few tiny stitches through the fabric, taking care not to go through to the right side.
Knot your thread securely around one of these small stitches, then trim the excess thread close to the knot.
Step 9: Review and Refine
Take a step back and examine your work.
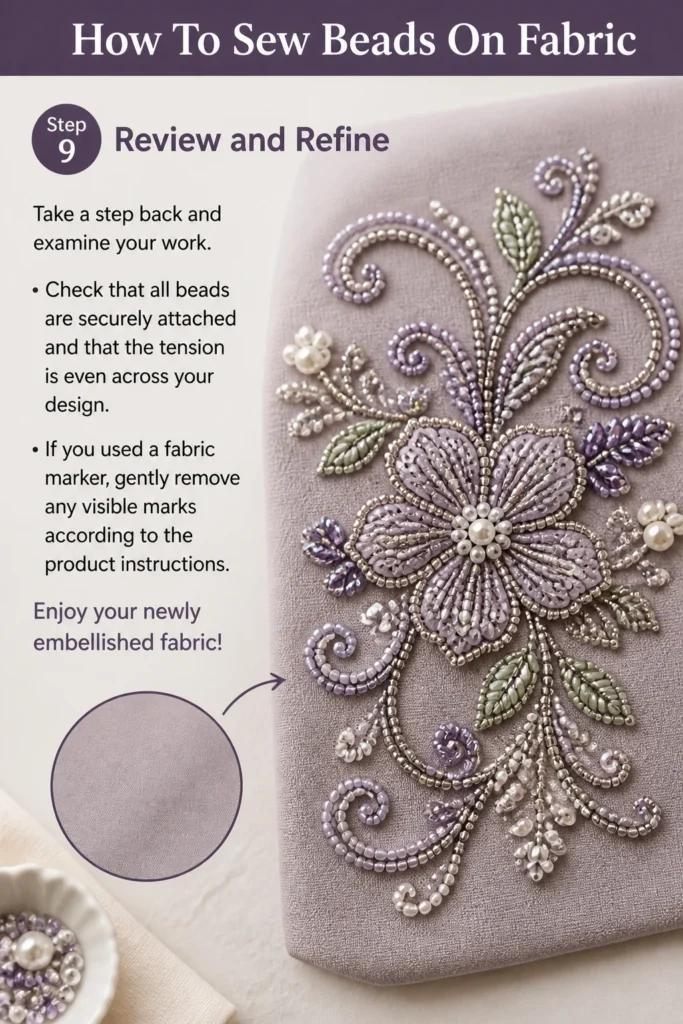
Check that all beads are securely attached and that the tension is even across your design.
If you used a fabric marker, gently remove any visible marks according to the product instructions.
Enjoy your newly embellished fabric!
Common Mistakes to Avoid
Using the Wrong Thread
Many beginners use regular sewing thread, which is often too weak and prone to breaking or fraying when used for beading.
This results in beads falling off over time, ruining your hard work.
Always opt for strong, specialized beading thread like Nymo, FireLine, or a heavy-duty polyester thread, which offers superior durability and resistance to abrasion.
Pulling the Thread Too Tightly
Over-tightening your thread can cause the fabric to pucker and distort, especially with delicate materials.
This creates an uneven, unprofessional finish and can stress the fabric, potentially leading to tears.
Aim for a firm but gentle tension that holds the beads snugly without pulling the fabric out of shape; the fabric should lay flat once the bead is sewn.
Inconsistent Bead Spacing
When creating patterns or lines, uneven spacing between beads can make the design look messy and unpolished.
This often happens when rushing or not marking your design beforehand.
Take your time, use a fabric marker to pre-mark your bead placement, or consistently measure the distance between each bead to ensure a uniform and aesthetically pleasing result.
Not Securing Knots Properly
A poorly secured starting or ending knot is a common reason for beads coming loose or entire sections unraveling.
A single, loose knot is insufficient to withstand the stress of wear and washing.
Always make double or triple knots, and consider adding a tiny drop of fabric glue to the final knot on the wrong side for extra peace of mind and durability.
Troubleshooting
Beads Falling Off
If beads are detaching from your fabric, it’s typically due to insufficient thread strength or improper knotting.
Ensure you are using a strong beading thread designed for durability, and always secure your starting and ending threads with multiple, tight knots.
Consider passing through each bead twice with your thread for added reinforcement, especially for beads that will experience more wear.
Thread Tangles Frequently
Frequent thread tangling can be frustrating and slow down your progress, often caused by using too long a piece of thread or not conditioning it.
Work with shorter lengths of thread, ideally no more than 18-24 inches at a time, to reduce the chances of knots forming.
Additionally, run your thread through beeswax or a thread conditioner before you begin; this smooths the fibers and minimizes tangles significantly.
Fabric Puckering Around Beads
Puckering indicates that your thread tension is too tight, pulling the fabric inward around the beads.
To correct this, loosen your grip slightly when pulling the thread through, aiming for a snug but not taut hold on the beads.
Using an embroidery hoop to keep your fabric stretched evenly can also help prevent puckering by providing a stable surface for sewing.
Key Takeaways
- Preparation is Paramount: Gather all your materials and prepare your fabric with an embroidery hoop if needed, ensuring a smooth workflow.
- Choose the Right Tools: Invest in quality beading needles and strong, specialized beading thread for lasting results.
- Anchor Securely: Always start and end your thread with robust knots or multiple small stitches to prevent unraveling.
- Master Basic Stitches: Practice the single bead stitch and variations like the backstitch for lines to build your foundational skills.
- Mind Your Tension: Maintain even, gentle tension to avoid fabric puckering and ensure beads lie flat and securely.
- Double Down on Security: For critical beads or high-wear areas, pass through beads twice to enhance their attachment strength.
Frequently Asked Questions
What is the best type of thread for sewing beads on fabric?
The best threads are strong, non-stretching options like Nymo, FireLine, or One-G beading thread. These are specifically designed to resist abrasion and provide the necessary durability for securely attaching beads.
What size needle should I use for beading?
You should use a beading needle that is thin enough to pass through the smallest hole of your beads, yet strong enough not to bend or break easily. Sizes typically range from 10 to 15, with higher numbers indicating thinner needles.
Can I wash fabric with sewn-on beads?
It depends on the type of beads and how they are sewn. Most beaded items are best hand-washed gently in cool water and air-dried flat to prevent damage to the beads or thread. Always check the care instructions for your specific beads and fabric.
How do I choose the right beads for my project?
Consider the fabric’s weight and the project’s intended use. Lighter fabrics might suit smaller, lighter beads like seed beads, while heavier fabrics can support larger, heavier glass or metal beads. Also, think about color, shape, and overall design aesthetic.
Our Top Recommended Finds
- Assorted Beading Needles: A multi-pack ensures you have various sizes for different bead holes and projects.
- High-Strength Beading Thread: Brands like FireLine or Nymo offer exceptional durability and tangle resistance.
- Bead Mat or Tray: Keeps beads from rolling away, making your workspace organized and efficient.
Embrace Your Creative Spark
You now possess the foundational knowledge to confidently sew beads onto fabric, opening up a world of creative possibilities.
From subtle accents to elaborate embellishments, your hands can bring unique visions to life.
Don’t hesitate to experiment with different bead types, colors, and stitching patterns.
Grab your needle and thread today, and start transforming your fabric into a sparkling masterpiece.
Beginner-friendly templates, step-by-step guides,
and weekly project ideas in your inbox.