
How To Make Dried Orange Slices

Beginner-friendly templates, step-by-step guides,
and weekly project ideas in your inbox.
There’s a special kind of satisfaction in transforming simple oranges into beautiful, versatile dried slices.
I first started making these for holiday garlands, and quickly discovered their endless uses beyond just decoration.
This guide shares all my practical tips and tricks, ensuring your dried orange slices turn out perfect every time.

Quick Overview
Making dried orange slices is a rewarding process that adds a touch of natural beauty and aroma to your home and kitchen. You’ll learn how to prepare, dry, and store these lovely citrus gems, whether you use an oven or a dehydrator.
- Time needed: 4-8 hours (mostly passive drying)
- Difficulty: Beginner
- What you’ll need: Oranges, a sharp knife, a cutting board, an oven or food dehydrator, and baking sheets/racks.
Step-by-Step Instructions
Step 1: Select Your Oranges Carefully
Choose firm, unblemished oranges. Look for varieties with thinner skins, as they tend to dry more evenly and quickly.

Navel oranges, Valencia oranges, and even blood oranges work wonderfully, offering different color variations.
Step 2: Prepare Your Oranges for Slicing
Wash each orange thoroughly under cool running water. Use a vegetable brush to gently scrub the skin, removing any wax or dirt.
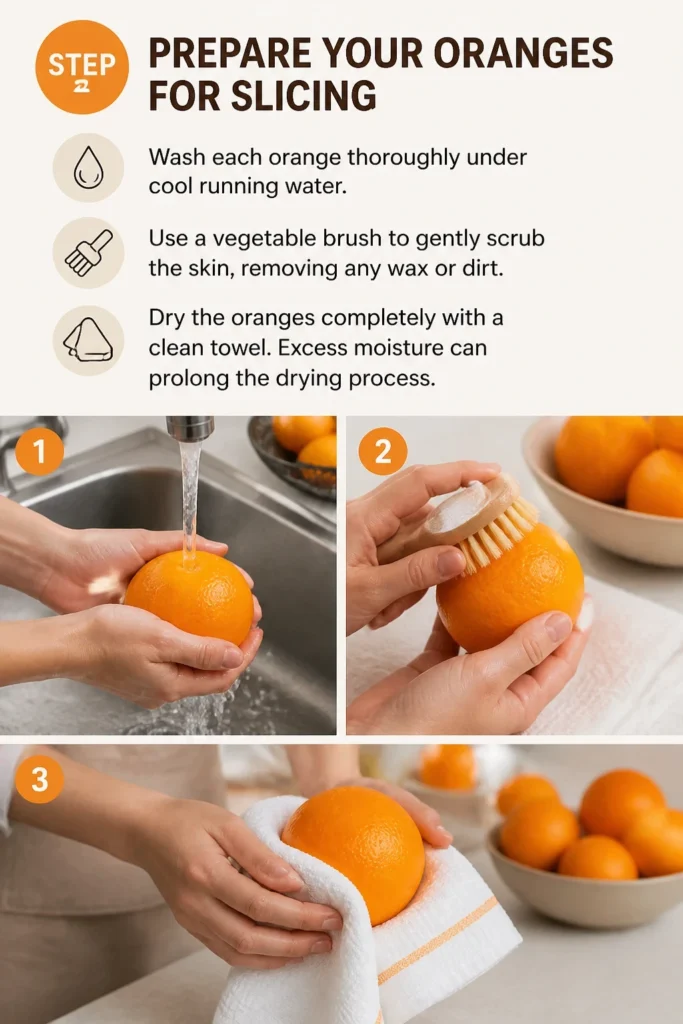
Dry the oranges completely with a clean towel. Excess moisture can prolong the drying process.
Step 3: Slice the Oranges Uniformly
Place an orange on a sturdy cutting board. Using a very sharp knife, ideally a serrated one, slice the oranges into uniform rounds.
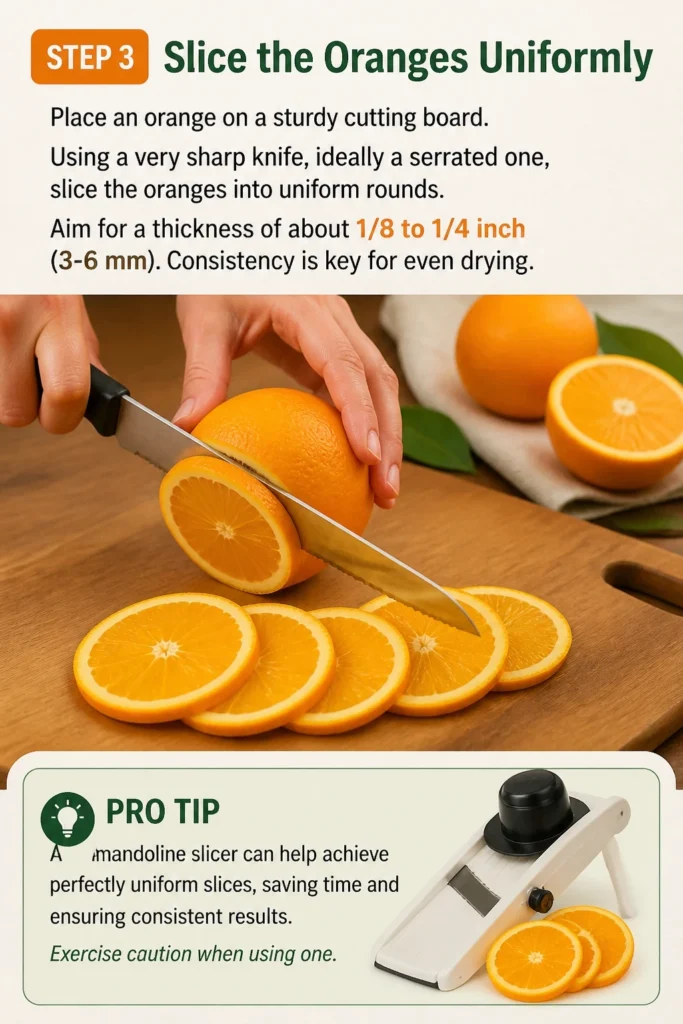
Aim for a thickness of about 1/8 to 1/4 inch (3-6 mm). Consistency is key for even drying.
Pro Tip: A mandoline slicer can help achieve perfectly uniform slices, saving time and ensuring consistent results. Exercise caution when using one.
Step 4: Blot Away Excess Moisture
Lay the orange slices in a single layer on a clean kitchen towel or several sheets of paper towel.
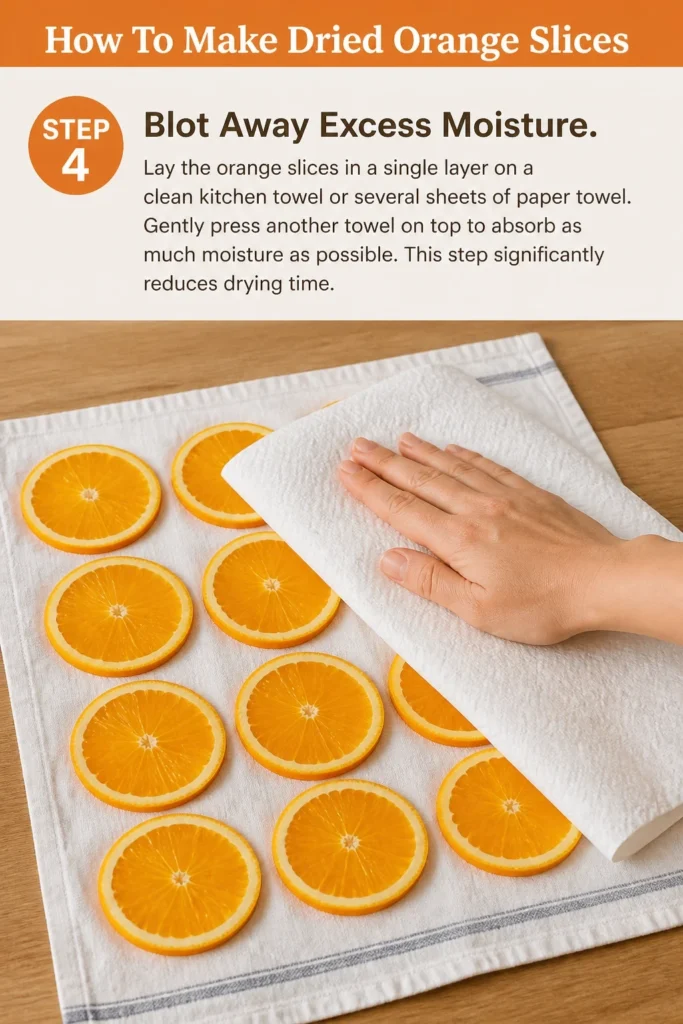
Gently press another towel on top to absorb as much moisture as possible. This step significantly reduces drying time.
Step 5: Arrange Slices for Drying
If using an oven, line baking sheets with parchment paper or silicone baking mats. If using a dehydrator, arrange slices directly on the dehydrator trays.
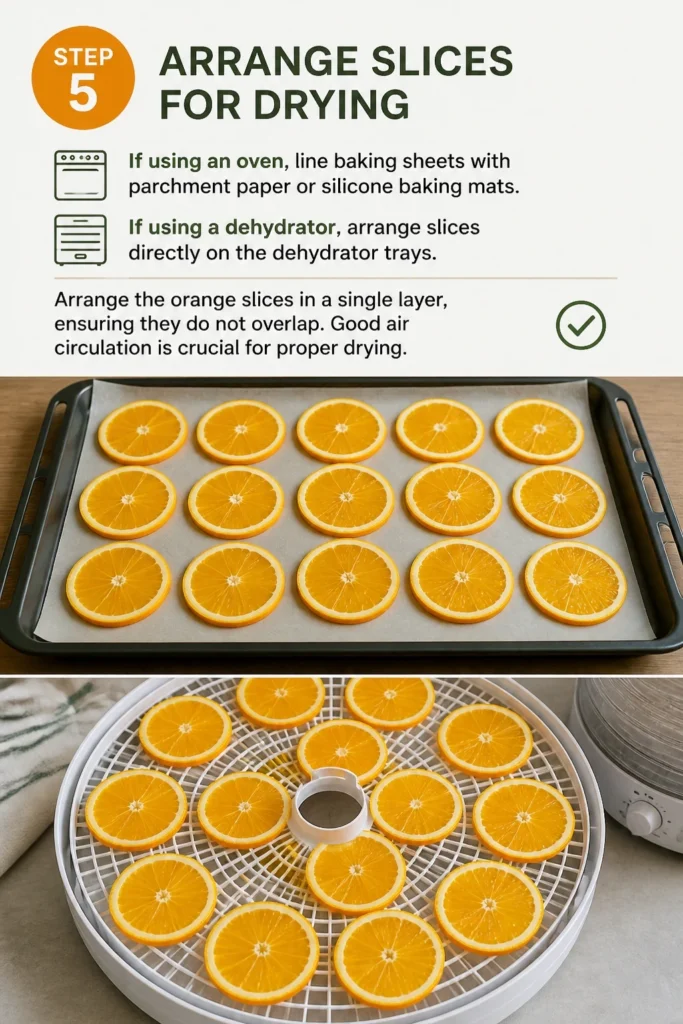
Arrange the orange slices in a single layer, ensuring they do not overlap. Good air circulation is crucial for proper drying.
Step 6: Dry in the Oven (Method A)
Preheat your oven to its lowest setting, typically between 170-200F (75-95C).
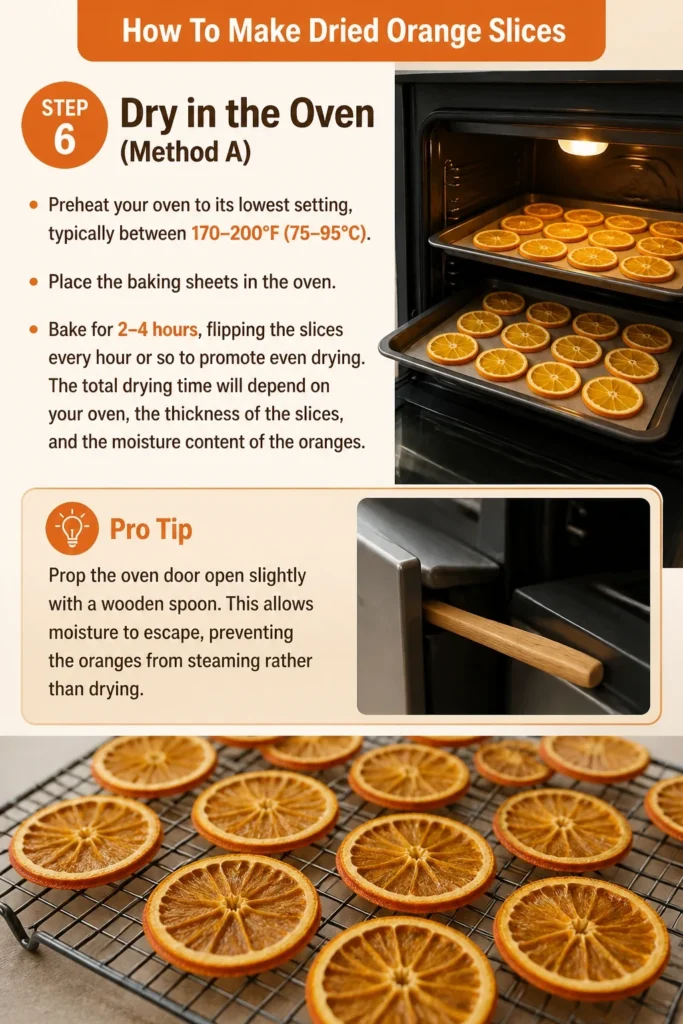
Place the baking sheets in the oven. Bake for 2-4 hours, flipping the slices every hour or so to promote even drying.
The total drying time will depend on your oven, the thickness of the slices, and the moisture content of the oranges.
Pro Tip: Prop the oven door open slightly with a wooden spoon. This allows moisture to escape, preventing the oranges from steaming rather than drying.
Step 7: Dry in a Dehydrator (Method B)
Set your food dehydrator to 125F (52C).

Dehydrate the orange slices for 4-8 hours, checking periodically. The exact time varies based on the dehydrator model and slice thickness.
Rotate the trays every few hours if your dehydrator doesn’t have even heat distribution.
Step 8: Check for Doneness
The orange slices are fully dried when they are firm, brittle, and no longer pliable.
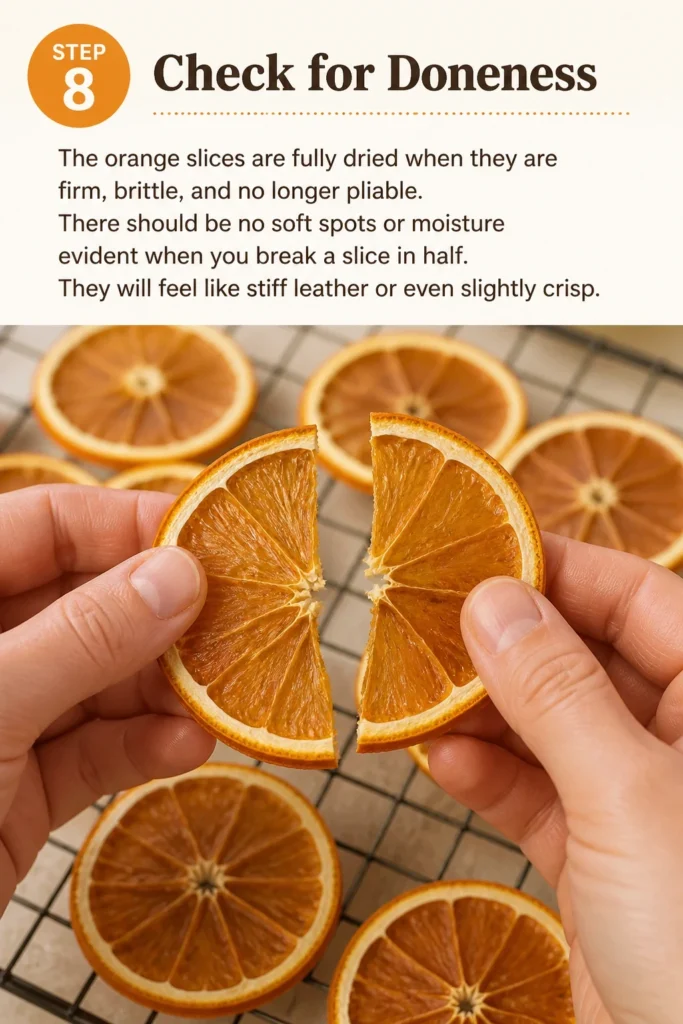
There should be no soft spots or moisture evident when you break a slice in half. They will feel like stiff leather or even slightly crisp.
Step 9: Cool Completely
Once dried, remove the orange slices from the oven or dehydrator. Transfer them to a wire cooling rack.
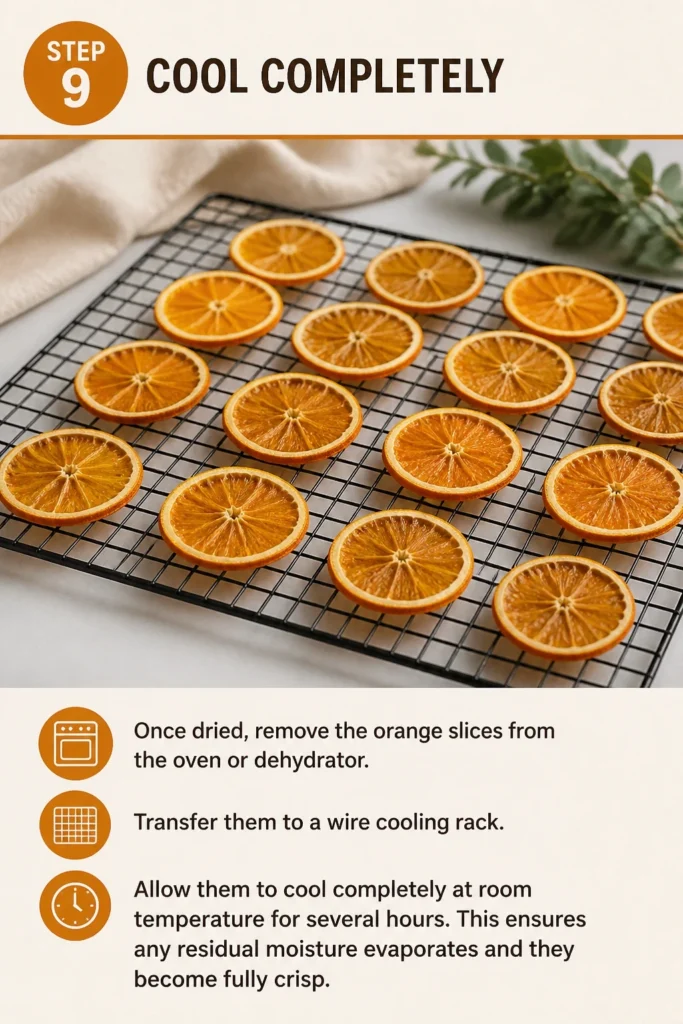
Allow them to cool completely at room temperature for several hours. This ensures any residual moisture evaporates and they become fully crisp.
Step 10: Store Your Dried Orange Slices
Store the cooled, dried orange slices in an airtight container. A glass jar or a sealed plastic bag works well.

Keep them in a cool, dark, and dry place. Properly stored, they can last for up to one to two years.
Common Mistakes to Avoid
Slicing Oranges Too Thick or Too Thin
Slices that are too thick will take an excessively long time to dry, increasing the risk of spoilage before they fully dehydrate. They might also remain chewy. Conversely, slices that are too thin can become brittle and burn easily, or crumble during handling, especially when using an oven.
Aim for a consistent thickness of 1/8 to 1/4 inch (3-6 mm) for optimal drying results and durability.
Overcrowding the Drying Trays
Placing too many orange slices on a single tray or allowing them to overlap restricts airflow. This leads to uneven drying, with some slices remaining moist while others dry out.
Always arrange slices in a single layer with a small space between each one. This ensures proper air circulation, allowing moisture to escape efficiently from all surfaces.
Using Too High Heat
Drying at a temperature that is too high will cook the oranges rather than dehydrate them. This can result in burnt edges, a caramelized flavor, and a loss of their vibrant color and essential oils.
Stick to low temperatures, ideally 170-200F (75-95C) for an oven or 125F (52C) for a dehydrator. Patience is crucial for proper dehydration.
Not Drying Completely
If the orange slices retain any moisture, even a small amount, they are highly susceptible to mold growth during storage. This renders them unusable and can be a health hazard.
Ensure the slices are completely firm, brittle, and snap when bent before storing. If in doubt, dry them for a little longer. A properly dried slice will feel like stiff leather or be crisp.
Troubleshooting
Slices are Limp or Chewy After Drying
This usually means the slices have not been dried long enough, and residual moisture remains. The goal is a firm, brittle texture, not a leathery one.
Simply return the slices to the oven or dehydrator for additional drying time. Continue to check them every hour until they reach the desired crispness. Ensure your oven door is slightly ajar if using an oven.
Slices are Burning or Turning Brown
If your orange slices are browning too quickly or burning at the edges, the drying temperature is likely too high. Cooking them instead of slowly dehydrating them leads to this issue.
Lower the oven temperature to its absolute minimum, or adjust your dehydrator setting. Also, ensure the oven door is propped open to allow moisture to escape, preventing a steaming effect that can also lead to browning.
Slices are Curling or Warping
Curling often happens as the slices dry and moisture evaporates unevenly. While a little curling is normal, excessive warping can make them harder to store or use for decorative purposes.
During the drying process, especially in the oven, you can gently press the slices flat with a spatula when you flip them. You can also place a cooling rack on top of them during the last hour of drying to help keep them flat.
Key Takeaways
- Always start with fresh, unblemished oranges and wash them thoroughly.
- Slice oranges uniformly thin (1/8 to 1/4 inch) for even drying.
- Blot excess moisture from slices before drying to reduce overall time.
- Use a low drying temperature (170-200F oven, 125F dehydrator) to prevent cooking.
- Ensure good air circulation by arranging slices in a single layer with space between them.
- Dry completely until firm and brittle, with no soft spots, to prevent mold.
- Cool completely on a wire rack before storing in an airtight container in a cool, dark place.
Frequently Asked Questions
What kind of oranges are best for drying?
Navel oranges are a popular choice due to their sweet flavor and generally thinner rind. Valencia oranges also work well. For unique colors, consider blood oranges, which dry into beautiful deep red hues, or even mandarins for smaller slices.
How long do dried orange slices last?
When properly dried and stored in an airtight container in a cool, dark, and dry place, dried orange slices can last for one to two years. It’s important to ensure they are completely moisture-free before storage to prevent mold.
Can I dry orange slices in a microwave?
While technically possible to remove some moisture, drying orange slices in a microwave is generally not recommended for achieving the best results. Microwaves tend to cook the fruit unevenly and can make them tough or leathery rather than brittle and fully dried.
What are some popular uses for dried orange slices?
Dried orange slices are incredibly versatile. They make beautiful holiday decorations for garlands and wreaths, elegant garnishes for cocktails and desserts, and aromatic additions to potpourri or simmering stovetop scents. You can also grind them into a powder for baking or tea.
Our Top Recommended Finds
- Sharp Serrated Knife: Essential for clean, even slices without crushing the fruit.
- Silicone Baking Mats: Provides a non-stick surface for oven drying and makes flipping easier.
- Food Dehydrator: An excellent investment if you plan to dry fruit frequently, offering precise temperature control and efficiency.
Embrace the Art of Drying Citrus
Creating your own dried orange slices is more than just a kitchen task; it’s a delightful way to preserve the beauty and fragrance of citrus.
From holiday decor to everyday kitchen accents, these golden discs offer endless possibilities.
Don’t wait for a special occasion. Grab some oranges today and bring a touch of natural elegance into your home.
Beginner-friendly templates, step-by-step guides,
and weekly project ideas in your inbox.