How To Tailor Your Own Clothes

Beginner-friendly templates, step-by-step guides,
and weekly project ideas in your inbox.
I remember the first time I tried to wear a vintage button-down shirt I found at a thrift store.
The fabric was beautiful, but the fit was so boxy that I looked like I was wearing a literal tent.
After years of practicing on my own wardrobe, I discovered that a few simple adjustments can make a cheap garment look like a custom-made masterpiece.
Quick Overview
This guide will teach you how to take standard, off-the-rack clothing and modify it to fit your unique body shape perfectly.
- Time needed: 1 to 3 hours per garment
- Difficulty: Beginner
- What you’ll need: Sewing machine, seam ripper, fabric chalk, pins, measuring tape, and iron
Step 1: Gather Your Essential Tools
Before you touch any fabric, you need to have the right equipment ready on your workspace.
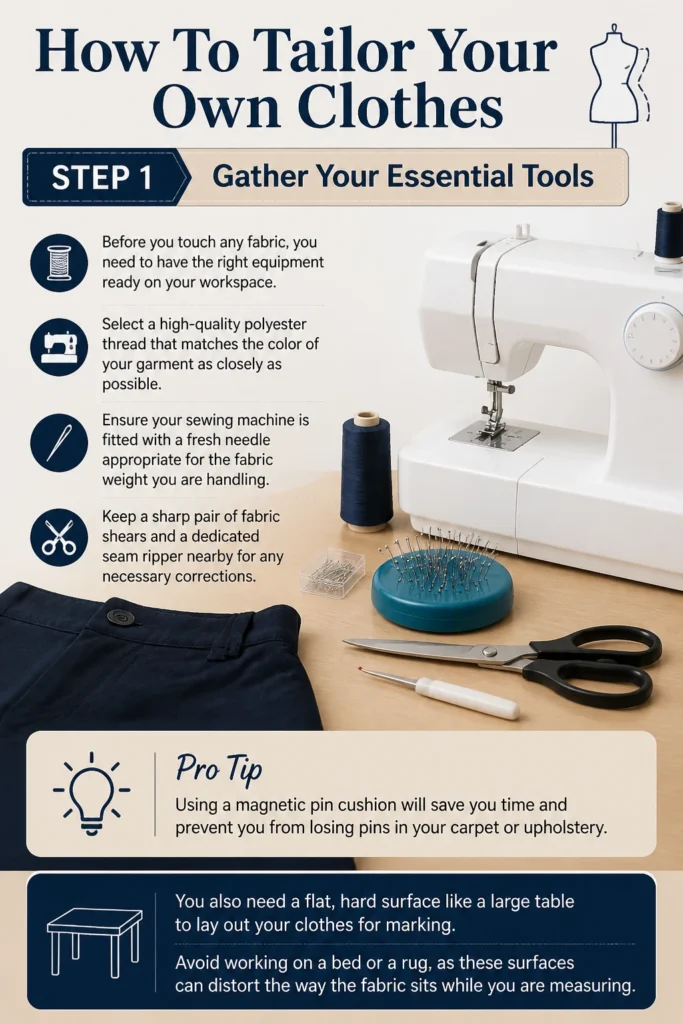
Select a high-quality polyester thread that matches the color of your garment as closely as possible.
Ensure your sewing machine is fitted with a fresh needle appropriate for the fabric weight you are handling.
Keep a sharp pair of fabric shears and a dedicated seam ripper nearby for any necessary corrections.
Pro Tip: Using a magnetic pin cushion will save you time and prevent you from losing pins in your carpet or upholstery.
You also need a flat, hard surface like a large table to lay out your clothes for marking.
Avoid working on a bed or a rug, as these surfaces can distort the way the fabric sits while you are measuring.
Step 2: Prepare the Garment by Washing
Wash and dry the clothing item according to its care label before you begin any measurements.
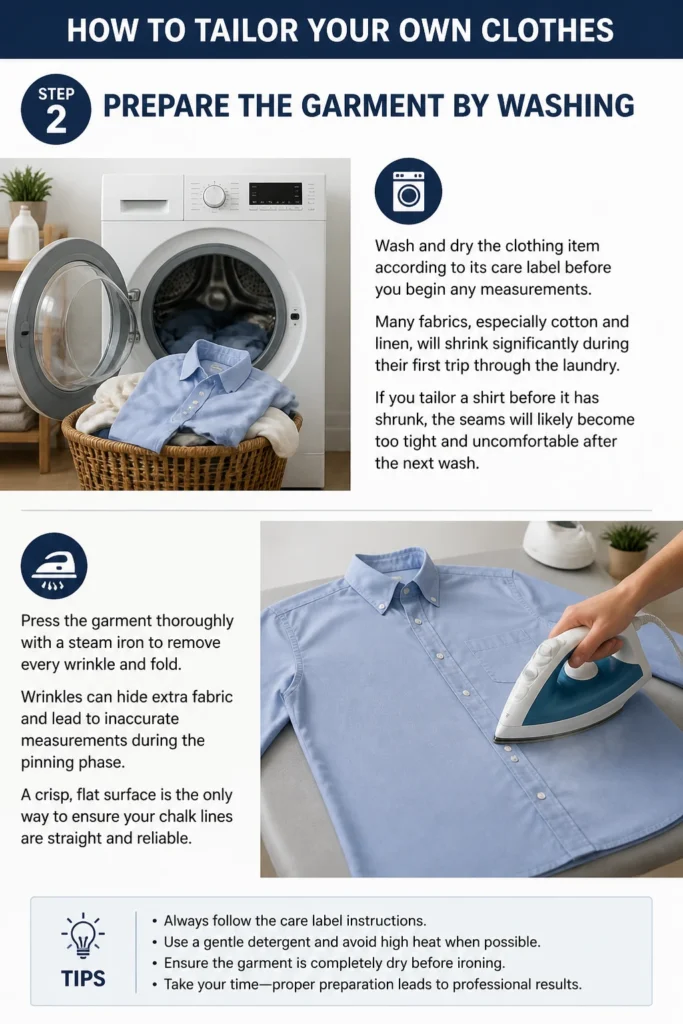
Many fabrics, especially cotton and linen, will shrink significantly during their first trip through the laundry.
If you tailor a shirt before it has shrunk, the seams will likely become too tight and uncomfortable after the next wash.
Press the garment thoroughly with a steam iron to remove every wrinkle and fold.
Wrinkles can hide extra fabric and lead to inaccurate measurements during the pinning phase.
A crisp, flat surface is the only way to ensure your chalk lines are straight and reliable.
Step 3: Pin for the Perfect Fit
Turn the garment inside out and put it on so you can see the internal seams clearly.
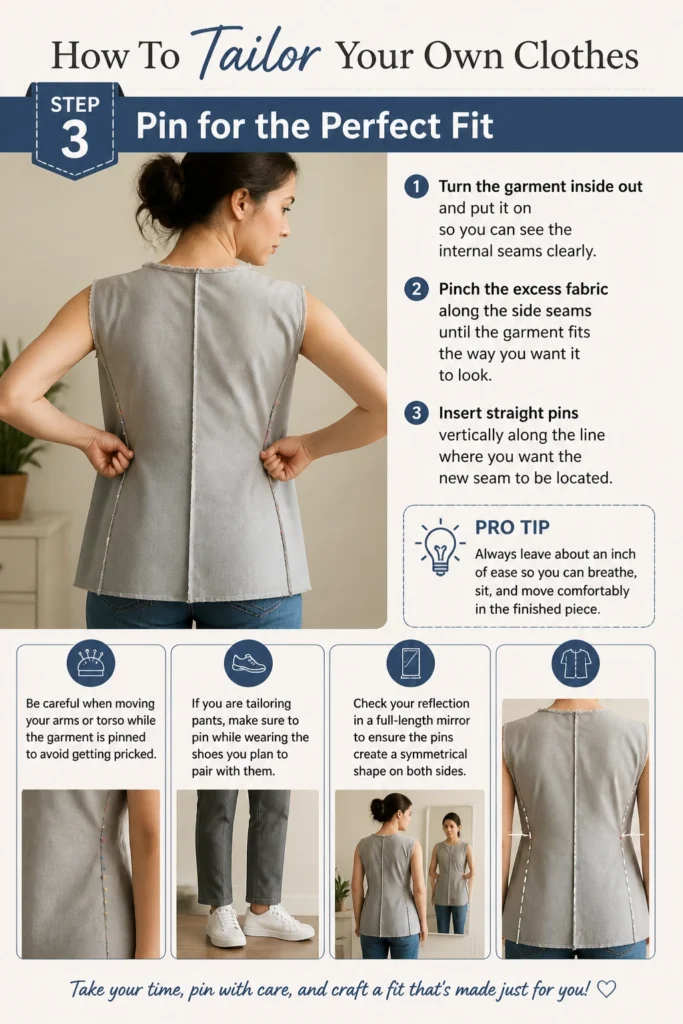
Pinch the excess fabric along the side seams until the garment fits the way you want it to look.
Insert straight pins vertically along the line where you want the new seam to be located.
Pro Tip: Always leave about an inch of “ease” so you can breathe, sit, and move comfortably in the finished piece.
Be careful when moving your arms or torso while the garment is pinned to avoid getting pricked.
If you are tailoring pants, make sure to pin while wearing the shoes you plan to pair with them.
Check your reflection in a full-length mirror to ensure the pins create a symmetrical shape on both sides.
Step 4: Mark Your Stitch Lines
Remove the garment carefully and lay it flat on your work surface while the pins are still in place.
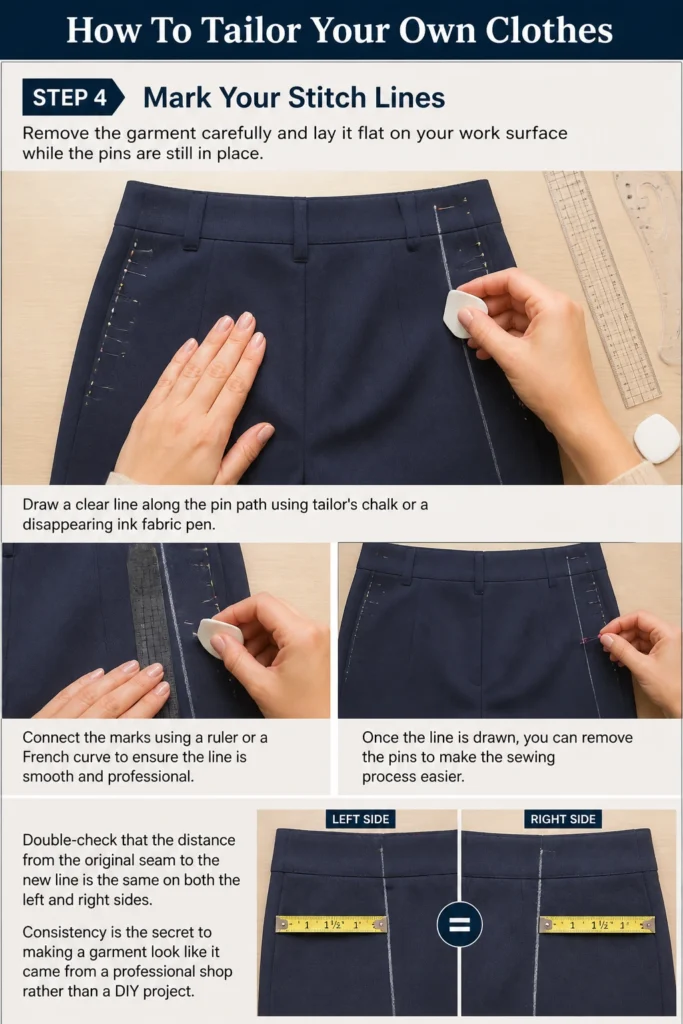
Draw a clear line along the pin path using tailor’s chalk or a disappearing ink fabric pen.
Connect the marks using a ruler or a French curve to ensure the line is smooth and professional.
Once the line is drawn, you can remove the pins to make the sewing process easier.
Double-check that the distance from the original seam to the new line is the same on both the left and right sides.
Consistency is the secret to making a garment look like it came from a professional shop rather than a DIY project.
Step 5: Set Up the Sewing Machine
Thread your machine and wind a bobbin using the matching thread you selected earlier.
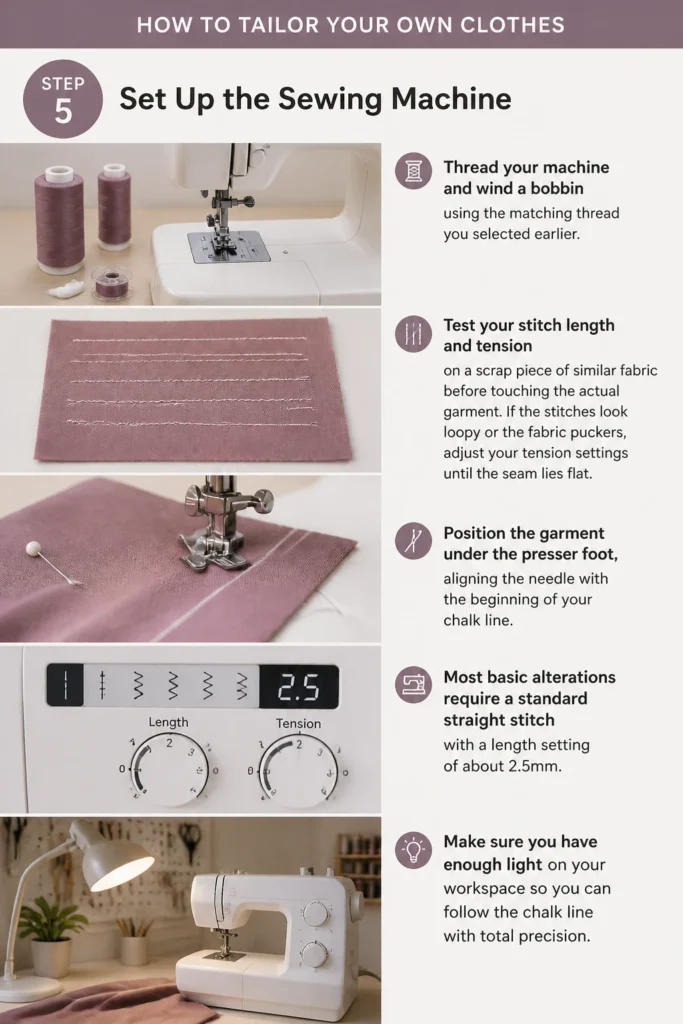
Test your stitch length and tension on a scrap piece of similar fabric before touching the actual garment.
If the stitches look loopy or the fabric puckers, adjust your tension settings until the seam lies flat.
Position the garment under the presser foot, aligning the needle with the beginning of your chalk line.
Most basic alterations require a standard straight stitch with a length setting of about 2.5mm.
Make sure you have enough light on your workspace so you can follow the chalk line with total precision.
Step 6: Sew the New Seams
Lower the presser foot and begin sewing slowly along the marked line.
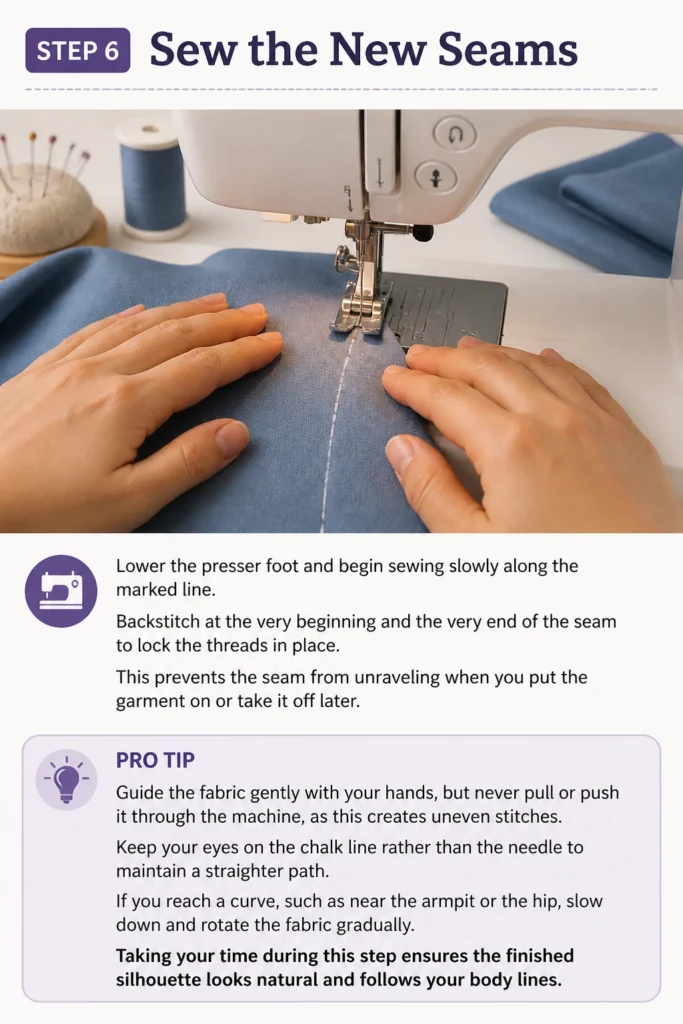
Backstitch at the very beginning and the very end of the seam to lock the threads in place.
This prevents the seam from unraveling when you put the garment on or take it off later.
Pro Tip: Guide the fabric gently with your hands, but never pull or push it through the machine, as this creates uneven stitches.
Keep your eyes on the chalk line rather than the needle to maintain a straighter path.
If you reach a curve, such as near the armpit or the hip, slow down and rotate the fabric gradually.
Taking your time during this step ensures the finished silhouette looks natural and follows your body lines.
Step 7: Try It On and Check the Fit
Turn the garment right-side out before you trim away any excess material.
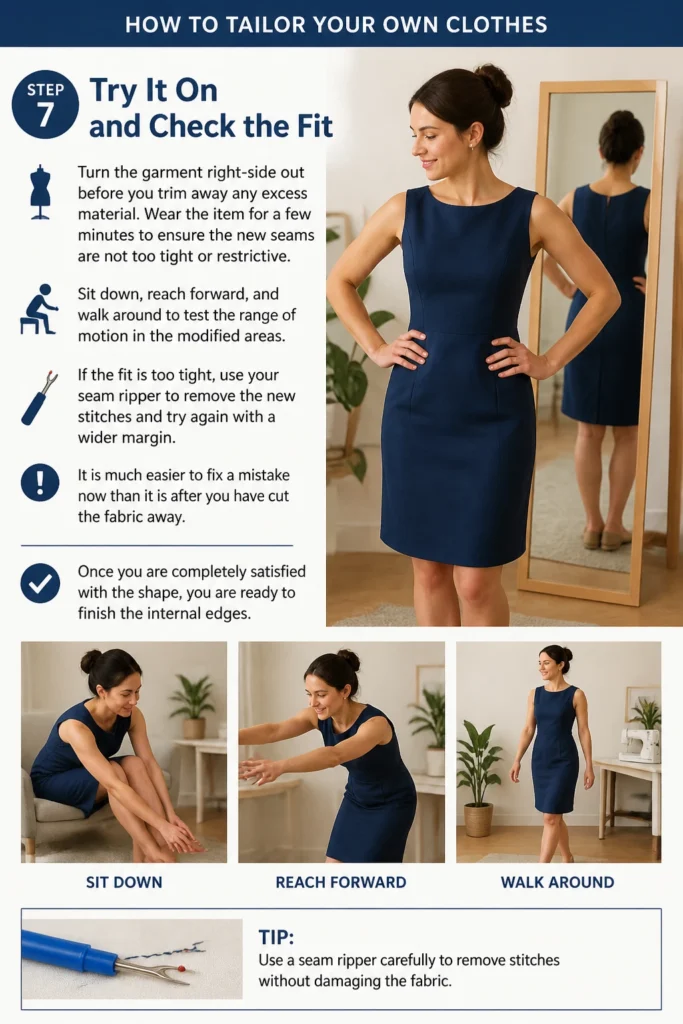
Wear the item for a few minutes to ensure the new seams are not too tight or restrictive.
Sit down, reach forward, and walk around to test the range of motion in the modified areas.
If the fit is too tight, use your seam ripper to remove the new stitches and try again with a wider margin.
It is much easier to fix a mistake now than it is after you have cut the fabric away.
Once you are completely satisfied with the shape, you are ready to finish the internal edges.
Step 8: Trim and Finish the Edges
Cut away the excess fabric about half an inch away from your new line of stitching.
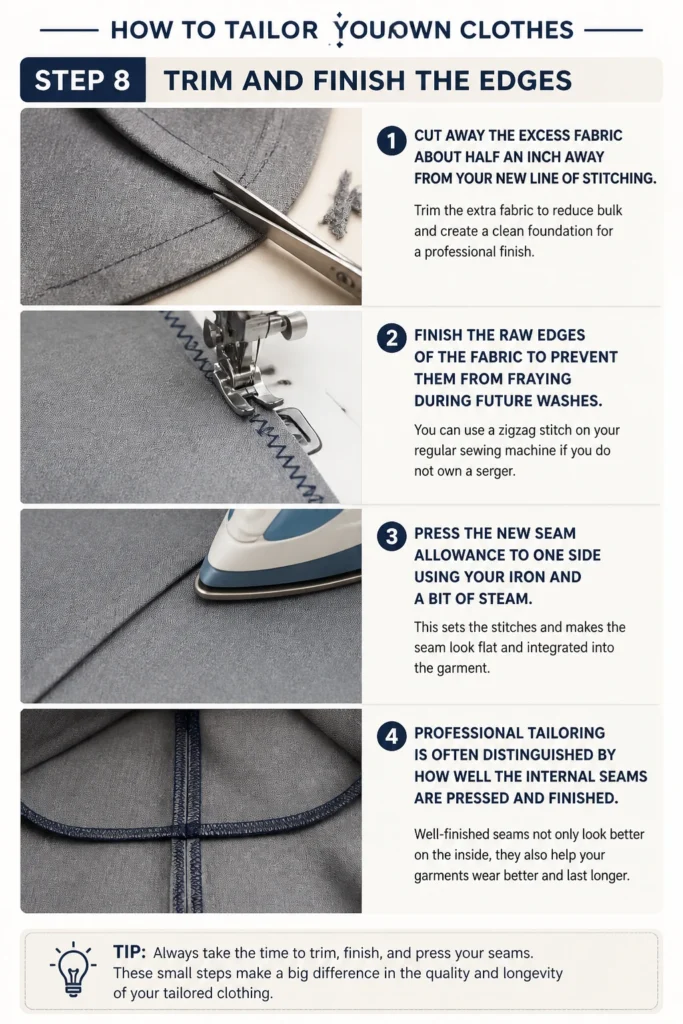
Finish the raw edges of the fabric to prevent them from fraying during future washes.
You can use a zigzag stitch on your regular sewing machine if you do not own a serger.
Press the new seam allowance to one side using your iron and a bit of steam.
This “sets” the stitches and makes the seam look flat and integrated into the garment.
Professional tailoring is often distinguished by how well the internal seams are pressed and finished.
Common Mistakes to Avoid
Ignoring the Grain Line
Fabric has a specific direction in which the threads are woven, known as the grain.
If you sew a seam that ignores this direction, the fabric may twist or pull awkwardly across your body.
Always try to keep your new seams parallel to the original construction of the garment to maintain the structural integrity.
Using the Wrong Needle Type
Using a thick denim needle on a silk blouse will leave permanent, visible holes in the delicate fabric.
Conversely, a fine needle will likely snap if you try to force it through heavy layers of chino or denim.
Match your needle size and point type to the specific weight and weave of the clothing you are altering.
Forgetting to Backstitch
Many beginners forget to reverse the machine for two or three stitches at the start and end of a seam.
Without this lock, the tension of your body moving inside the clothes will eventually pull the seam apart.
This results in holes appearing at the waist or underarms after only one or two wearings.
Troubleshooting
The Fabric is Puckering Along the Seam
Puckering usually happens because the thread tension is too high or you are pulling the fabric as you sew.
Try loosening the upper tension dial on your machine and let the feed dogs move the fabric naturally.
If the issue persists, check if your needle is blunt, as a dull point can push the fabric down into the needle plate.
The Machine is Skipping Stitches
Skipped stitches often occur when the needle is bent or if you are using a universal needle on a knit fabric.
For stretchy materials like t-shirts or leggings, switch to a ballpoint or stretch needle immediately.
These needles are designed to slide between the knit loops rather than piercing and damaging the fibers.
The Thread is Bunching Underneath the Fabric
This common problem, often called a bird’s nest, is almost always caused by incorrect threading of the upper machine.
Rethread the entire machine from scratch, making sure the presser foot is up while you guide the thread through the tension disks.
Ensure the bobbin is also inserted correctly and spinning in the right direction according to your manual.
Key Takeaways
- Always wash and press your garments before measuring to account for potential shrinkage.
- Pin the garment while it is inside out to create an accurate map for your new seams.
- Leave enough room for movement so the clothes are functional for daily activities.
- Use the correct needle and thread type to avoid damaging the fabric or breaking your machine.
- Press every seam with an iron after sewing to achieve a professional, high-end finish.
- Practice on old or thrifted clothing before attempting to tailor your most expensive pieces.
Frequently Asked Questions
Can I tailor clothes without a sewing machine?
Yes, you can perform basic alterations using a needle and thread, but it requires a very strong and consistent backstitch.
Hand-sewing is much slower and may not be as durable as machine-sewn seams for high-stress areas like trousers.
However, for simple tasks like sewing on a button or fixing a small hem, hand-sewing is perfectly adequate.
What is the easiest garment for a beginner to tailor?
A basic cotton t-shirt or a pair of straight-leg trousers are usually the best starting points for beginners.
These items typically have simple side seams that are easy to access and do not involve complex linings or padding.
Avoid starting with blazers or formal gowns, as these require advanced knowledge of internal structure and draping.
How do I know if a garment is too big to be tailored?
If the shoulders of a shirt or jacket are too wide, it is very difficult and expensive to fix correctly.
General rule of thumb is that you can safely take a garment down two sizes without ruining the proportions.
Beyond that, the pockets, collars, and armholes will start to look out of place on the smaller frame.
Is it possible to tailor stretchy fabrics like spandex?
Tailoring stretch fabric is possible, but you must use a zigzag stitch or a specialized stretch stitch.
A straight stitch will snap the moment the fabric expands when you put it on your body.
You also need a ballpoint needle to prevent the fabric from snagging or developing runs during the sewing process.
Our Top Recommended Finds
- Clear Acrylic Ruler: This allows you to see the fabric underneath while you are drawing your stitch lines for better accuracy.
- Tailor’s Ham: This firm, curved pillow helps you press seams in curved areas like sleeves and hips without flattening the garment.
- Assorted Needle Pack: Having a variety of sizes on hand ensures you are always prepared for different fabric weights from denim to silk.
Mastering Your Personal Style
Learning to alter your own clothing is one of the most rewarding skills you can develop.
It allows you to shop with more confidence, knowing that a less-than-perfect fit is only a temporary problem.
Start by visiting a local thrift store and picking up a few items that are one size too large.
Use these pieces as your canvas to practice the pinning and sewing techniques outlined in this guide.
Once you see the difference a tailored fit makes, you will never want to go back to wearing standard sizes again.
Take that first step today by gathering your tools and examining a piece in your closet that needs a little extra love.
Beginner-friendly templates, step-by-step guides,
and weekly project ideas in your inbox.