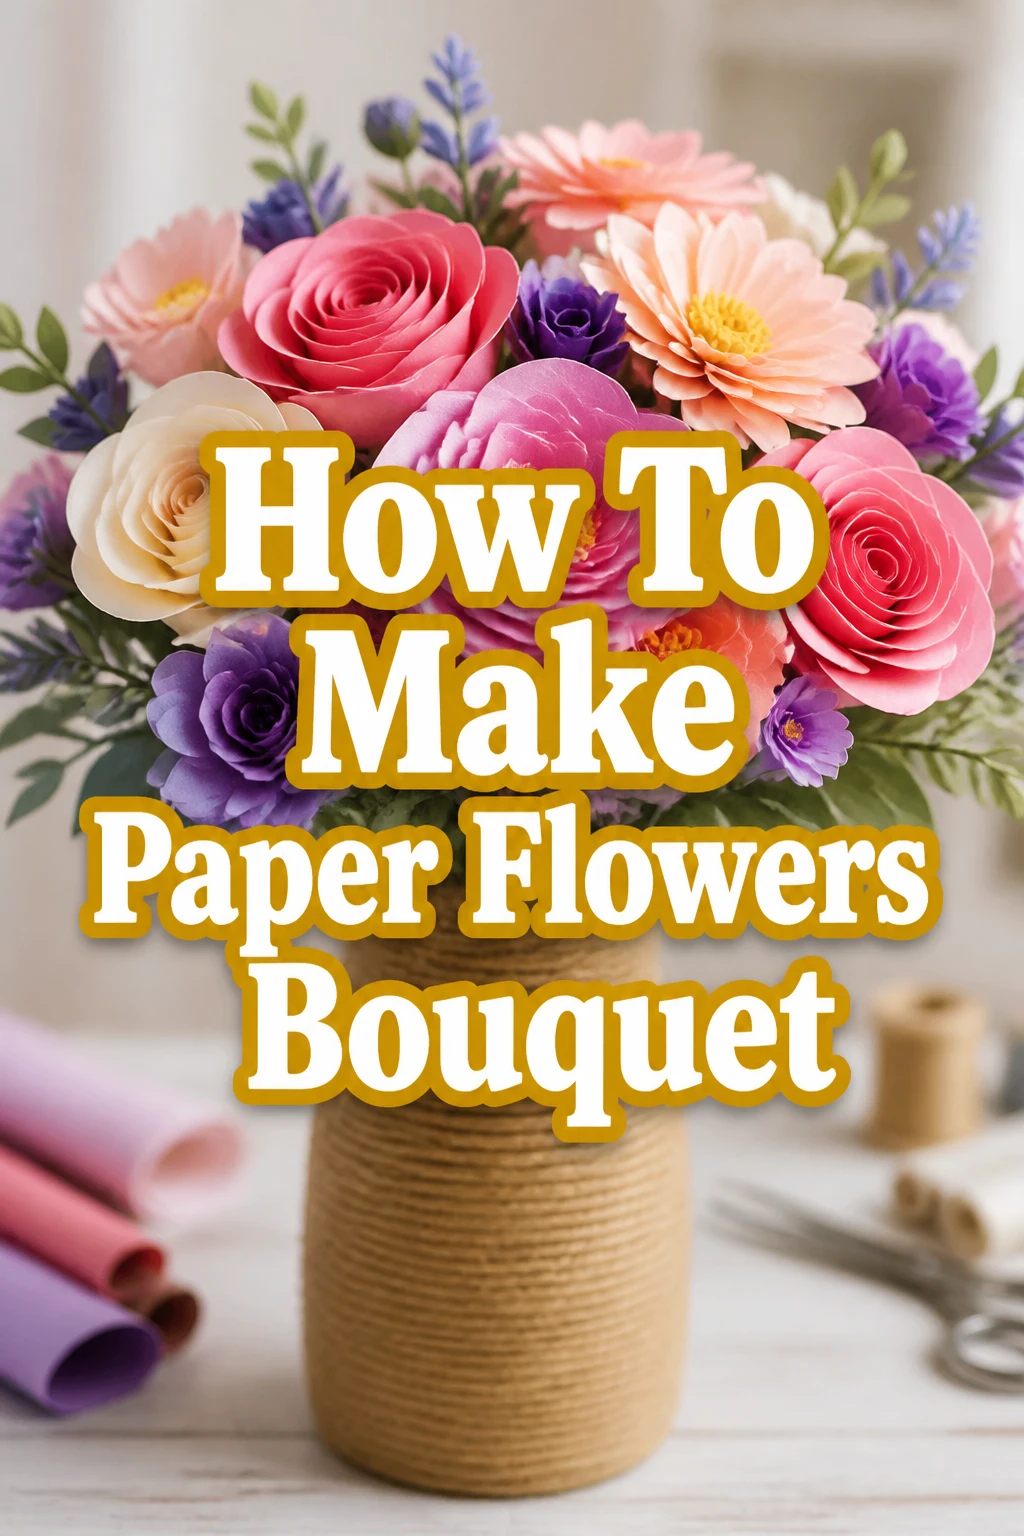
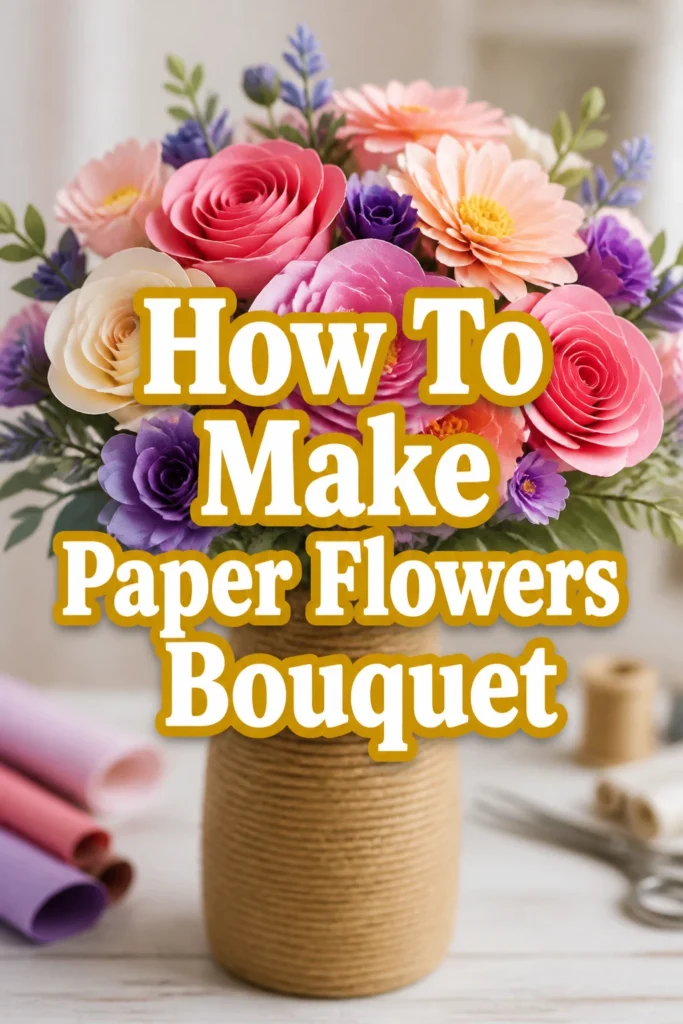
How To Make Paper Flowers Bouquet

Beginner-friendly templates, step-by-step guides,
and weekly project ideas in your inbox.
There’s something truly special about a handcrafted bouquet, especially one that lasts forever. I remember making my very first paper flower for my grandmother, and the joy on her face was priceless.
This guide will walk you through creating beautiful, lasting paper flower bouquets, sharing all the tips I’ve learned along the way.
You’ll gain the skills to craft stunning paper blooms that bring beauty to any space or occasion.
Quick Overview
You’re about to embark on a delightful creative journey, transforming simple paper into an exquisite, long-lasting flower bouquet. This project is incredibly rewarding and allows for immense personal expression.
- Time needed: 4-8 hours (depending on complexity and number of flowers)
- Difficulty: Intermediate
- What you’ll need: Cardstock, floral wire, hot glue, scissors, templates, floral tape.
Step-by-Step Instructions
Step 1: Gather Your Materials
Collect all your necessary tools and supplies before starting. Having everything within reach streamlines your crafting process significantly.
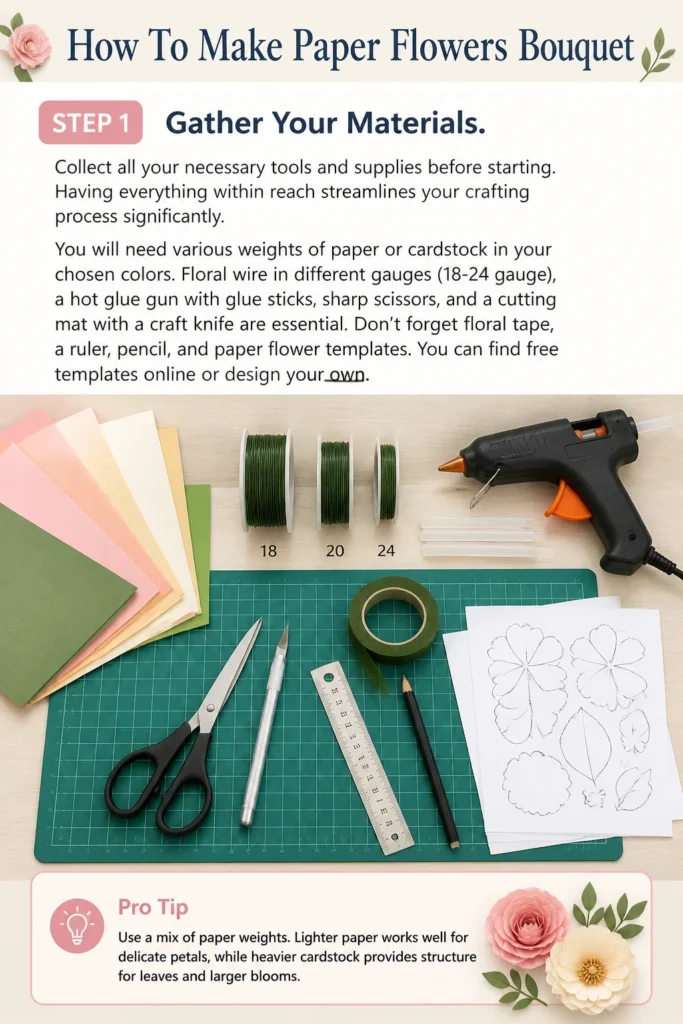
You will need various weights of paper or cardstock in your chosen colors. Floral wire in different gauges (18-24 gauge), a hot glue gun with glue sticks, sharp scissors, and a cutting mat with a craft knife are essential.
Don’t forget floral tape, a ruler, pencil, and paper flower templates. You can find free templates online or design your own.
Pro Tip: Use a mix of paper weights. Lighter paper works well for delicate petals, while heavier cardstock provides structure for leaves and larger blooms.
Step 2: Choose Your Flower Types and Colors
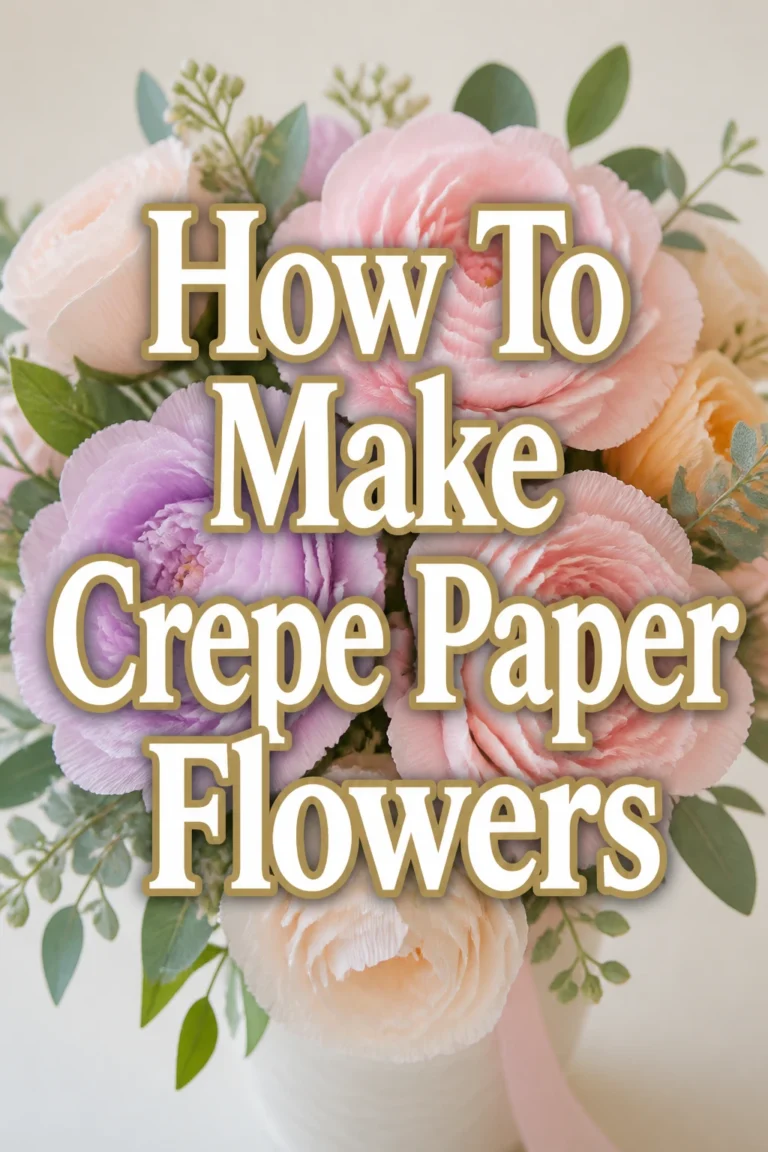
Decide on the types of flowers you want to include in your bouquet. Roses, peonies, ranunculus, and poppies are popular choices for paper flowers.
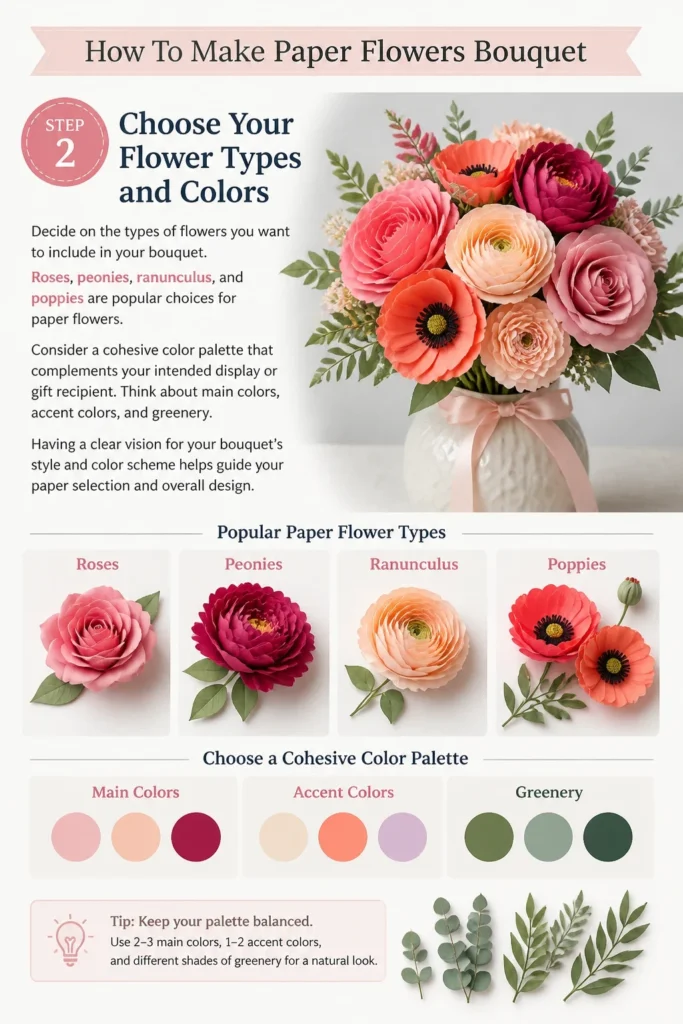
Consider a cohesive color palette that complements your intended display or gift recipient. Think about main colors, accent colors, and greenery.
Having a clear vision for your bouquet’s style and color scheme helps guide your paper selection and overall design.
Step 3: Cut Your Petals and Leaves
Print your chosen paper flower templates onto your cardstock. Carefully cut out all the individual petals, centers, and leaves according to the template lines.
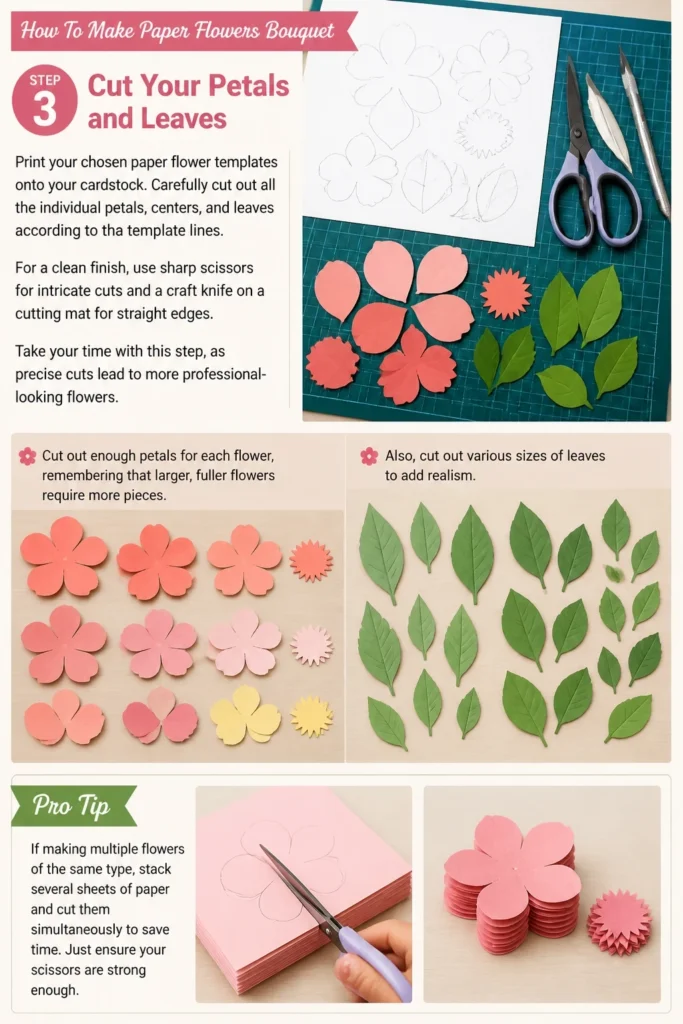
For a clean finish, use sharp scissors for intricate cuts and a craft knife on a cutting mat for straight edges. Take your time with this step, as precise cuts lead to more professional-looking flowers.
Cut out enough petals for each flower, remembering that larger, fuller flowers require more pieces. Also, cut out various sizes of leaves to add realism.
Pro Tip: If making multiple flowers of the same type, stack several sheets of paper and cut them simultaneously to save time. Just ensure your scissors are strong enough.
Step 4: Shape Your Petals
Add dimension to your flat paper petals by shaping them. This is a crucial step for creating realistic-looking flowers.
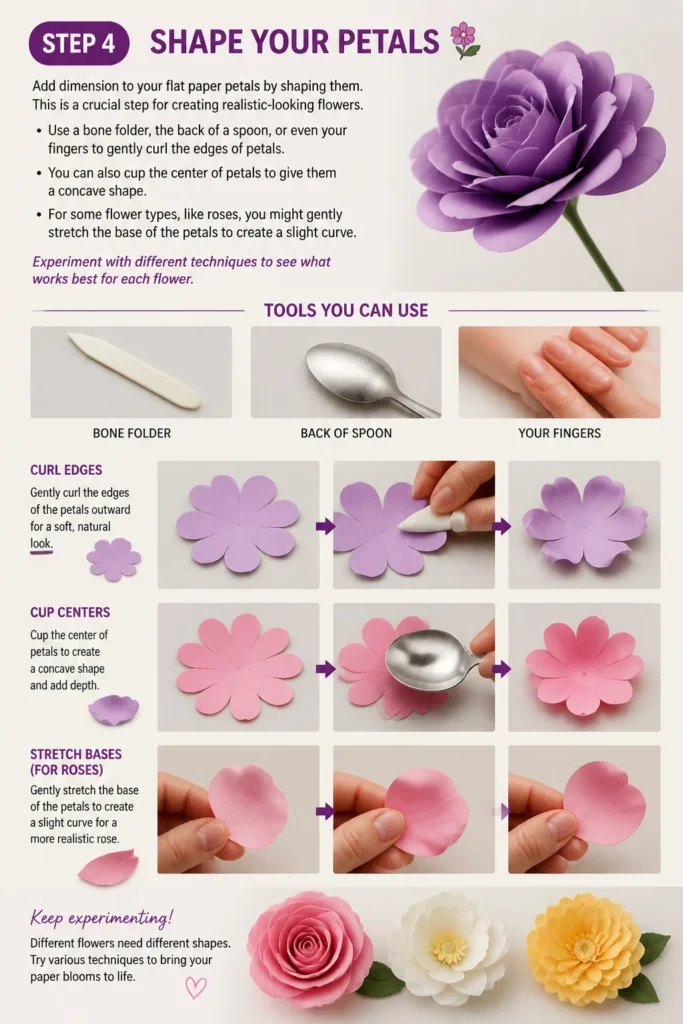
Use a bone folder, the back of a spoon, or even your fingers to gently curl the edges of petals. You can also cup the center of petals to give them a concave shape.
For some flower types, like roses, you might gently stretch the base of the petals to create a slight curve. Experiment with different techniques to see what works best for each flower.
Step 5: Assemble Your Flower Centers
Construct the core of your flowers first. Many paper flowers start with a small, tight center around a floral wire.
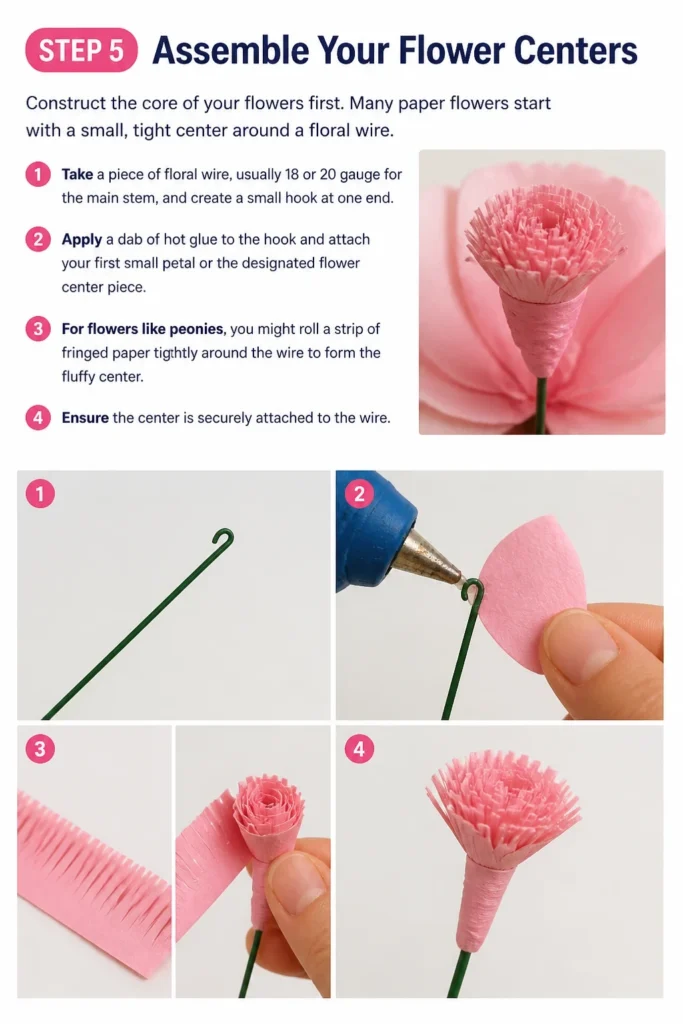
Take a piece of floral wire, usually 18 or 20 gauge for the main stem, and create a small hook at one end. Apply a dab of hot glue to the hook and attach your first small petal or the designated flower center piece.
For flowers like peonies, you might roll a strip of fringed paper tightly around the wire to form the fluffy center. Ensure the center is securely attached to the wire.
Step 6: Build Your Flowers Layer by Layer
Attach the shaped petals around your prepared flower center. Work in layers, starting with the smallest petals closest to the center and gradually adding larger petals.
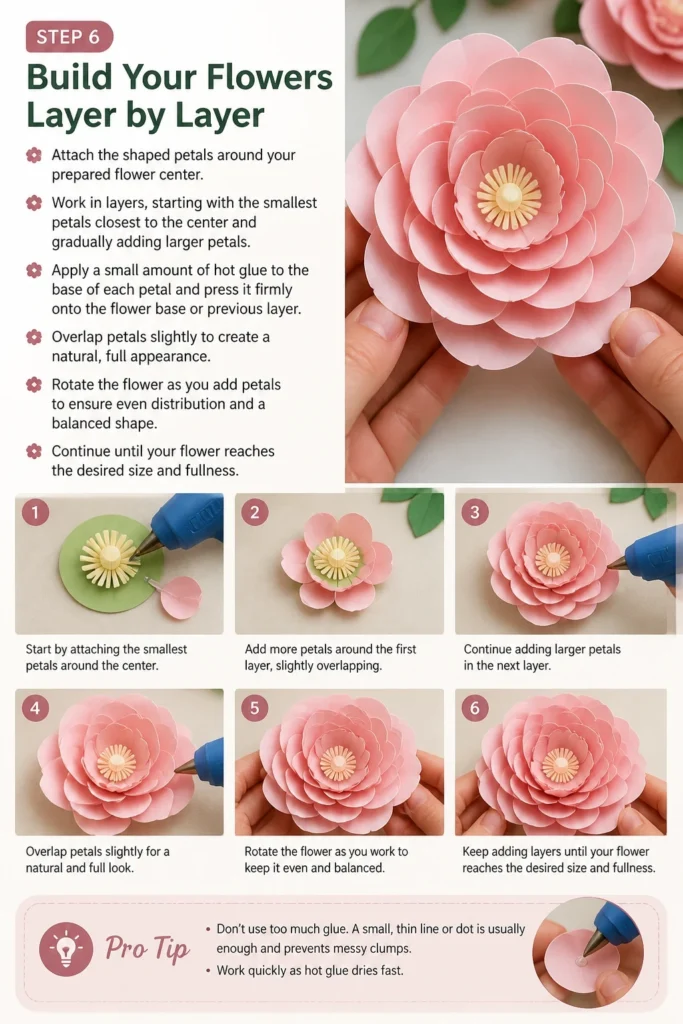
Apply a small amount of hot glue to the base of each petal and press it firmly onto the flower base or previous layer. Overlap petals slightly to create a natural, full appearance.
Rotate the flower as you add petals to ensure even distribution and a balanced shape. Continue until your flower reaches the desired size and fullness.
Pro Tip: Don’t use too much glue. A small, thin line or dot is usually enough and prevents messy clumps. Work quickly as hot glue dries fast.
Step 7: Add Greenery and Calyxes
Enhance the realism of your flowers by adding calyxes and leaves. A calyx is the green leaf-like structure at the base of a flower head.
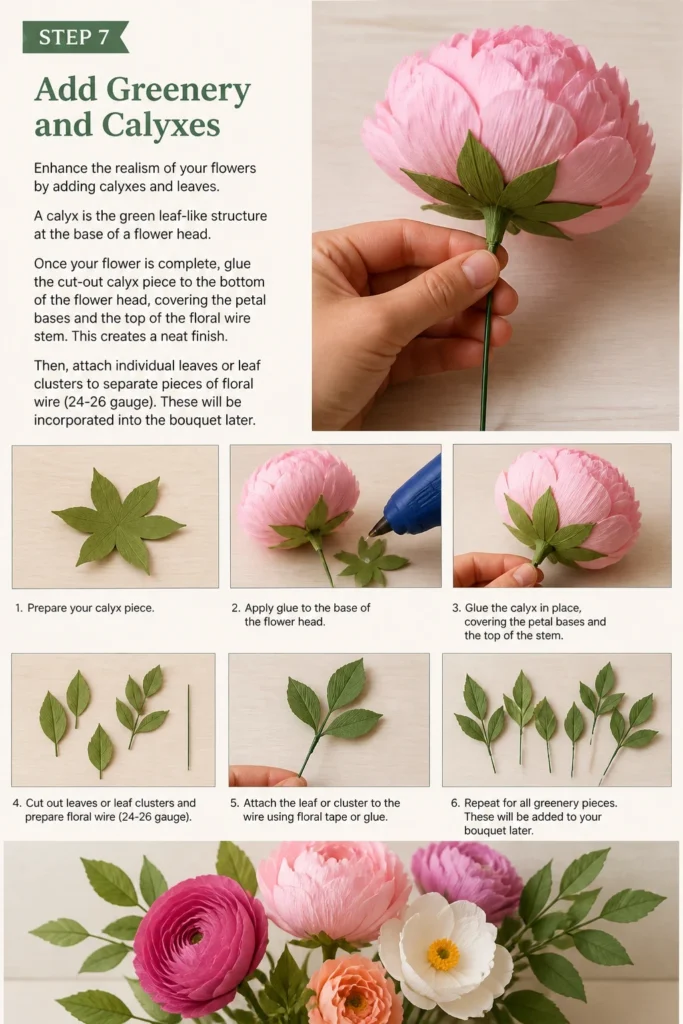
Once your flower is complete, glue the cut-out calyx piece to the bottom of the flower head, covering the petal bases and the top of the floral wire stem. This creates a neat finish.
Then, attach individual leaves or leaf clusters to separate pieces of floral wire (24-26 gauge). These will be incorporated into the bouquet later.
Step 8: Wrap the Stems with Floral Tape
Cover the exposed floral wire stems with floral tape. This step gives the stems a more finished, natural look and helps secure any attached leaves.
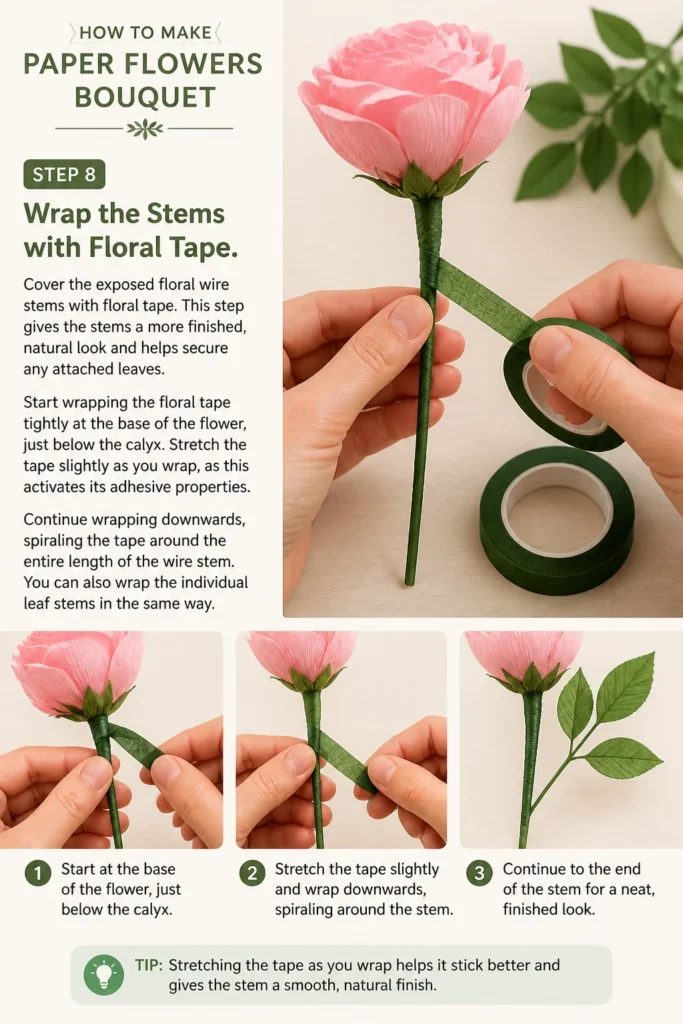
Start wrapping the floral tape tightly at the base of the flower, just below the calyx. Stretch the tape slightly as you wrap, as this activates its adhesive properties.
Continue wrapping downwards, spiraling the tape around the entire length of the wire stem. You can also wrap the individual leaf stems in the same way.
Step 9: Arrange Your Bouquet
Combine your finished paper flowers and wired leaves into a beautiful bouquet. Start by selecting your focal flowers, typically the largest or most intricate blooms.
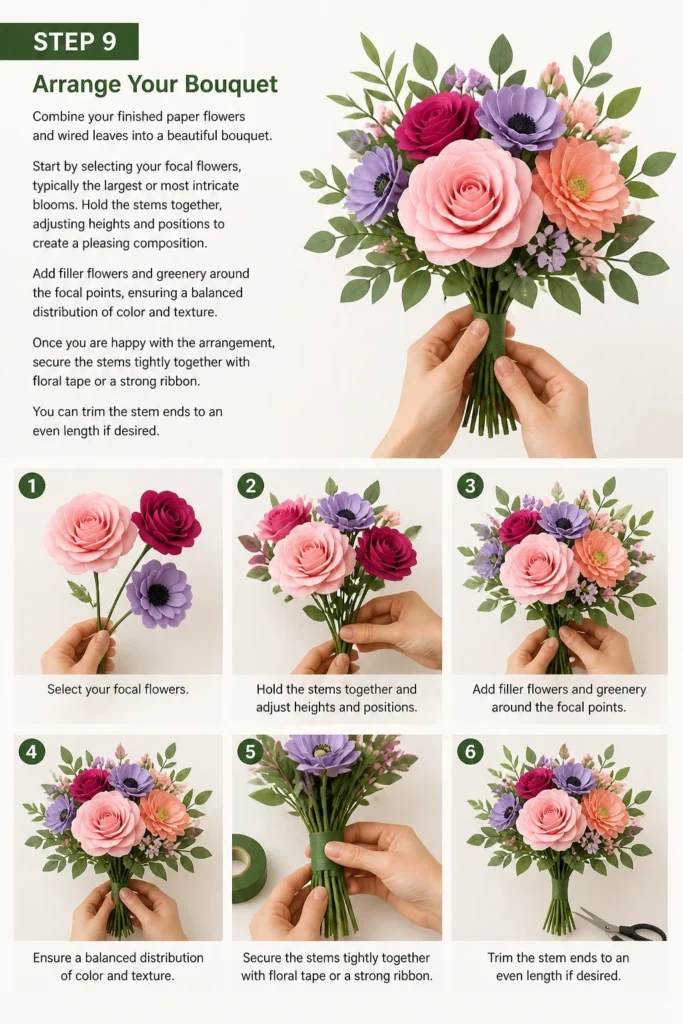
Hold the stems together, adjusting heights and positions to create a pleasing composition. Add filler flowers and greenery around the focal points, ensuring a balanced distribution of color and texture.
Once you are happy with the arrangement, secure the stems tightly together with floral tape or a strong ribbon. You can trim the stem ends to an even length if desired.
Common Mistakes to Avoid
Using Dull Scissors
Cutting paper with dull scissors can lead to frayed edges and an uneven finish on your petals and leaves. This compromises the overall professional look of your paper flowers.
Always use sharp scissors or a fresh blade in your craft knife. Replace blades frequently or sharpen your scissors regularly to ensure clean, crisp cuts every time.
Applying Too Much Glue
Excessive hot glue can create bulky, visible clumps that detract from the delicate appearance of your flowers. It can also make the paper stiff and difficult to shape.
Use hot glue sparingly, applying small dots or thin lines. Press pieces together firmly but gently to ensure a secure bond without a glue overflow.
Skipping the Petal Shaping Step
Leaving petals flat results in a two-dimensional, artificial-looking flower. The natural curves and dimensions are essential for realism.
Always take the time to shape each petal individually using a bone folder, the back of a spoon, or your fingers. Experiment with different curling and cupping techniques to bring your flowers to life.
Ignoring Stem Wrapping
Leaving floral wire exposed can make your bouquet look unfinished and less polished. The wire can also be sharp or snag on things.
Always wrap all floral wire stems with floral tape. This creates a cohesive, natural-looking stem and helps to secure any attached leaves or calyxes neatly.
Troubleshooting
Flowers Look Flat and Unrealistic
If your finished flowers lack depth, it’s likely due to insufficient petal shaping. Flat petals prevent the flower from looking natural and full.
Go back and gently reshape the individual petals. Use a bone folder or a round object to curl edges and cup the centers more significantly. Adding more layers of petals can also increase fullness.
Petals Won’t Stay Glued
If petals are detaching, the glue might be insufficient, or the surfaces weren’t clean. Also, not holding the pieces together long enough as the glue sets can be an issue.
Ensure you are applying enough hot glue to create a good bond, but not so much that it’s messy. Hold the petals firmly in place for a few seconds until the glue cools and sets completely. Clean any dust or debris from the paper surfaces before gluing.
Stems Feel Flimsy and Unstable
A flimsy stem can occur if the floral wire gauge is too light for the size of the flower head or if the wrapping isn’t tight enough.
For larger flowers, use a thicker gauge floral wire (e.g., 18-20 gauge). When wrapping with floral tape, ensure you stretch it slightly as you go to activate its adhesive and create a firm, secure covering. You can also double-wrap the stem for extra rigidity.
Key Takeaways
- Preparation is key: gather all materials and plan your design before starting.
- Precision in cutting and shaping petals is crucial for realistic results.
- Use hot glue sparingly to avoid messy, visible clumps.
- Wrap all floral wire stems with floral tape for a finished, professional look.
- Arrange your bouquet thoughtfully, balancing colors, sizes, and textures.
- Practice makes perfect; don’t be afraid to experiment with different techniques.
Frequently Asked Questions
What type of paper is best for paper flowers?
Cardstock ranging from 65lb to 110lb is generally ideal. Lighter weights (65-80lb) are good for delicate petals that need to curl easily, while heavier weights (90-110lb) provide better structure for larger flowers and leaves. Crepe paper is also an excellent option for a more realistic, textured look, though it requires different shaping techniques.
Can I use a cutting machine like a Cricut or Silhouette?
Absolutely! Electronic cutting machines are fantastic for cutting out multiple intricate petal and leaf shapes quickly and precisely. You’ll still need to do the shaping and assembly by hand, but the cutting process becomes much faster, especially for large bouquets.
How do I make my paper flowers last longer?
Paper flowers are inherently long-lasting because they don’t wilt. To ensure they stay beautiful, keep them away from direct sunlight, which can fade colors over time. Also, avoid excessive humidity, which can cause the paper to warp. A light dusting with a soft brush or compressed air occasionally will keep them clean.
Can I add scent to my paper flowers?
Yes, you can! A subtle scent can enhance the experience. Lightly spritz your finished paper flowers with a floral-scented room spray or apply a few drops of essential oil to the non-visible parts of the paper, like the back of leaves or the base of the calyx. Test a small, inconspicuous area first to ensure it doesn’t stain the paper.
Our Top Recommended Finds
- Quality Cardstock Assortment: A pack with various colors and weights gives you flexibility for different flower types.
- Precision Craft Knife Set: Essential for clean, intricate cuts that scissors might struggle with.
- Low-Temp Hot Glue Gun: Safer for crafting, especially when working with delicate paper, and still provides a strong bond.
Craft Your Everlasting Blooms Today
You now have the insights and steps to create a beautiful paper flower bouquet that will bring lasting joy. Imagine the pride in gifting a handmade arrangement or adorning your home with your own artistry.
Don’t wait to gather your materials and begin this rewarding project. Each petal you shape, each flower you assemble, adds to a truly unique creation.
Start crafting your paper flower masterpiece and let your creativity blossom!
Beginner-friendly templates, step-by-step guides,
and weekly project ideas in your inbox.