How To Package Cookies For Gifts

Beginner-friendly templates, step-by-step guides,
and weekly project ideas in your inbox.
I’ve spent countless hours in the kitchen, baking batches of cookies for friends and family. The joy of giving a beautifully packaged gift is almost as rewarding as the baking itself. Over the years, I’ve learned the best ways to ensure those homemade treats arrive looking as good as they taste.
This guide shares all my practical tips and tricks, so your cookie gifts impress everyone. You’ll learn how to protect your delicious creations and present them with style. Let’s make your next cookie gift truly special.

Quick Overview
This guide will walk you through the process of transforming your delicious homemade cookies into stunning, gift-ready packages. You’ll learn how to keep them fresh, prevent breakage, and add that personal touch.
- Time needed: 45-90 minutes (excluding baking time)
- Difficulty: Beginner
- What you’ll need: Cookies, gift boxes/bags, tissue paper, cellophane, ribbon, labels, optional decorative elements
Step-by-Step Instructions
Step 1: Gather Your Supplies
Before you begin, lay out all your packaging materials. Having everything ready streamlines the process and prevents last-minute scrambling. This includes your chosen containers, protective layers, and decorative elements.
Consider the size and quantity of cookies you plan to package. This will help you select appropriate boxes or bags.
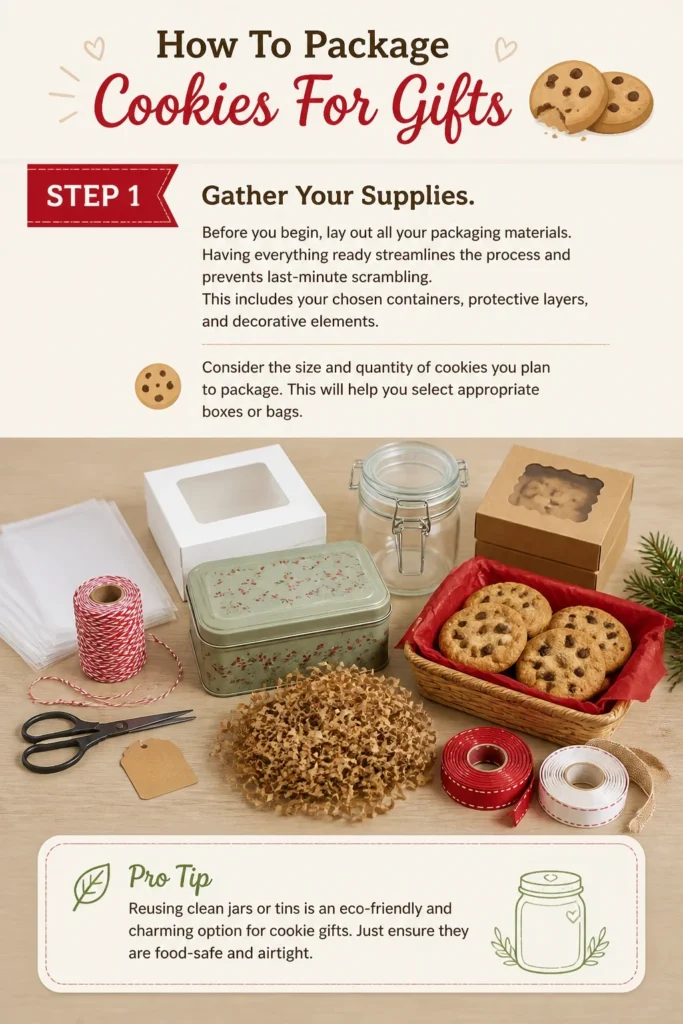
Pro Tip: Reusing clean jars or tins is an eco-friendly and charming option for cookie gifts. Just ensure they are food-safe and airtight.
Step 2: Choose The Right Container
The container is the foundation of your cookie gift. It needs to be both functional and attractive. Options range from sturdy gift boxes to elegant cellophane bags.
For delicate cookies, a rigid box with dividers works best. For heartier cookies, a decorative tin or a simple cellophane bag can be perfect.
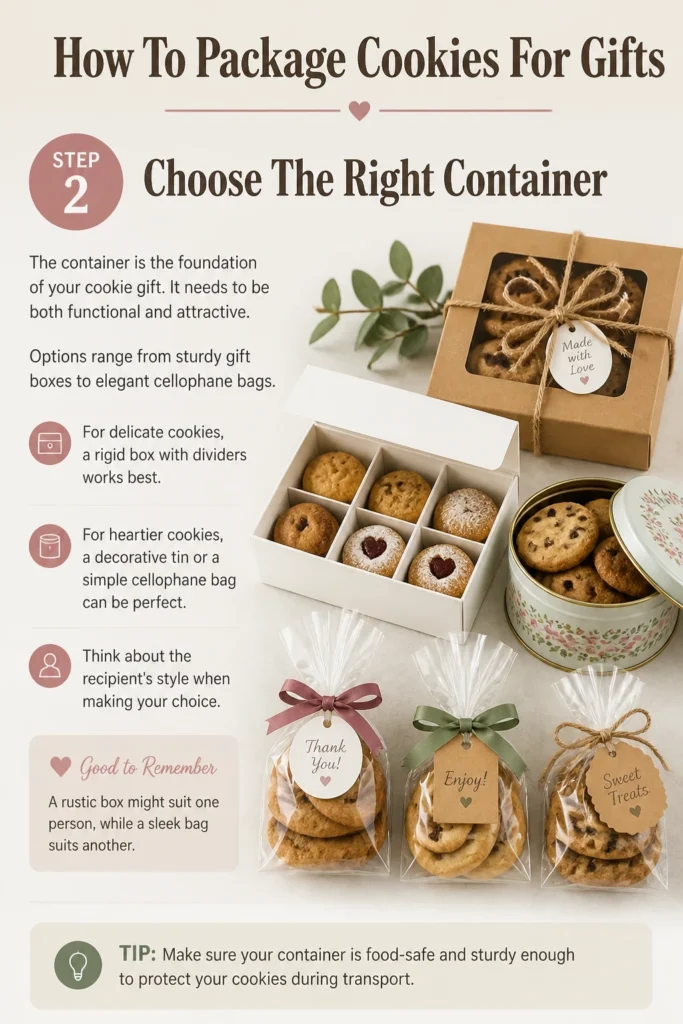
Think about the recipient’s style when making your choice. A rustic box might suit one person, while a sleek bag suits another.
Step 3: Prepare Your Cookies for Packaging
Ensure your cookies are completely cool before packaging. Warm cookies will create condensation, leading to soggy or spoiled treats. This step is crucial for freshness.
If you’ve baked different types of cookies, consider their textures and flavors. Package soft and crisp cookies separately to maintain their individual qualities.
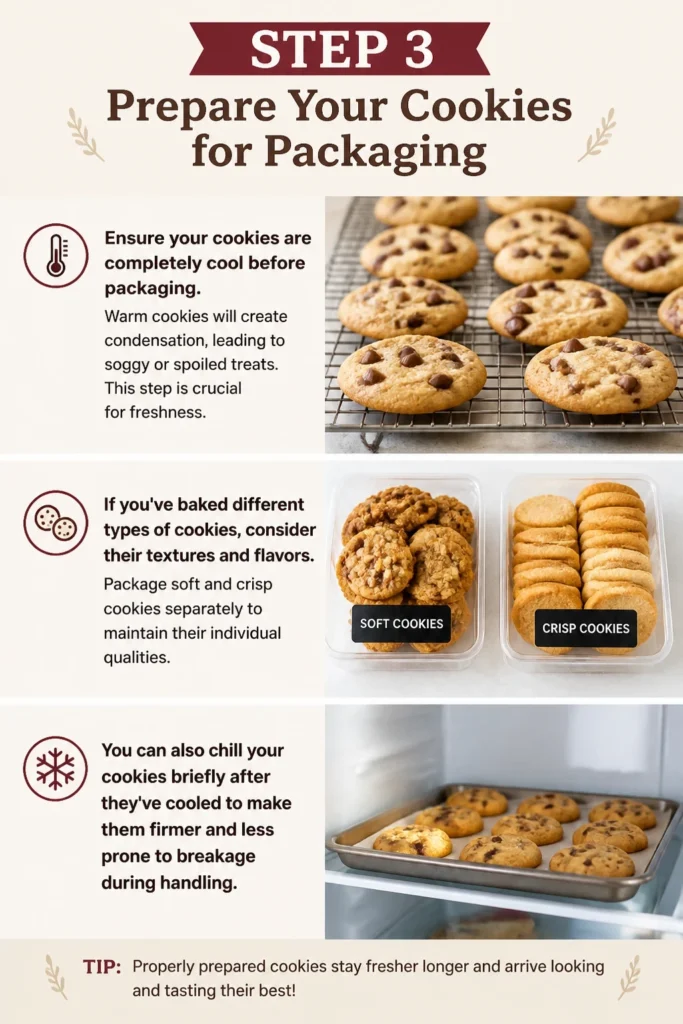
You can also chill your cookies briefly after they’ve cooled to make them firmer and less prone to breakage during handling.
Step 4: Protect Your Treats
This is where you safeguard your delicious work. Use layers of protection to cushion the cookies and prevent them from shifting. Tissue paper, crinkle paper, or shredded food-safe paper are excellent choices.
Line the bottom of your chosen container with a generous layer of protective material. This creates a soft landing for your cookies.
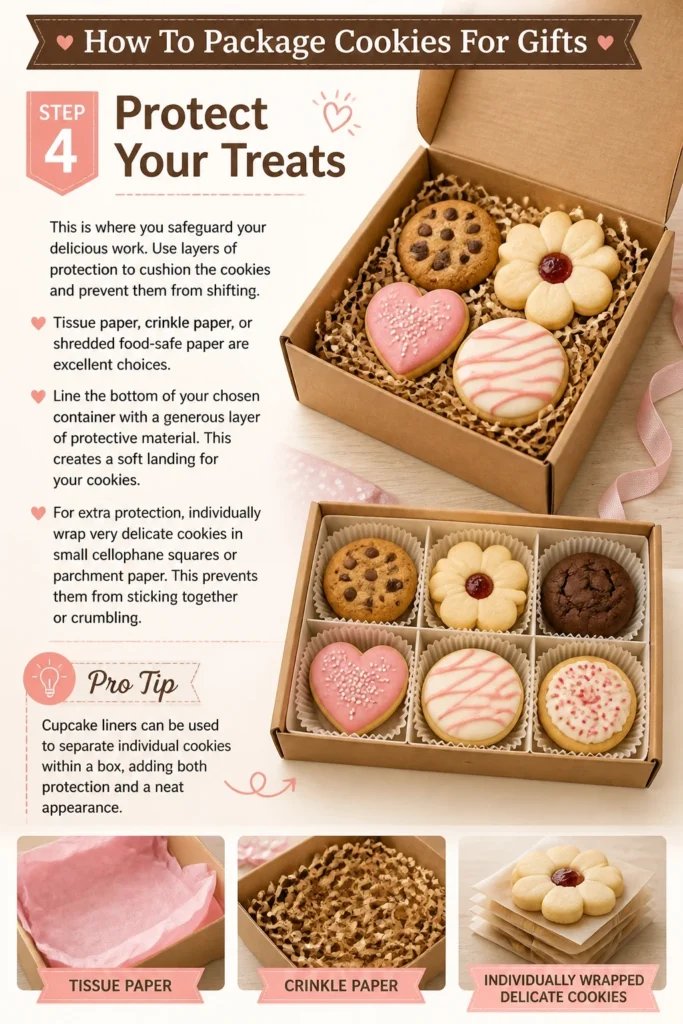
For extra protection, individually wrap very delicate cookies in small cellophane squares or parchment paper. This prevents them from sticking together or crumbling.
Pro Tip: Cupcake liners can be used to separate individual cookies within a box, adding both protection and a neat appearance.
Step 5: Arrange for Impact
How you place the cookies inside the container significantly affects the final presentation. Aim for an appealing and organized arrangement. Stack cookies neatly or arrange them in rows.
If you have different cookie shapes or sizes, alternate them for visual interest. Consider placing the most beautiful cookies on top.
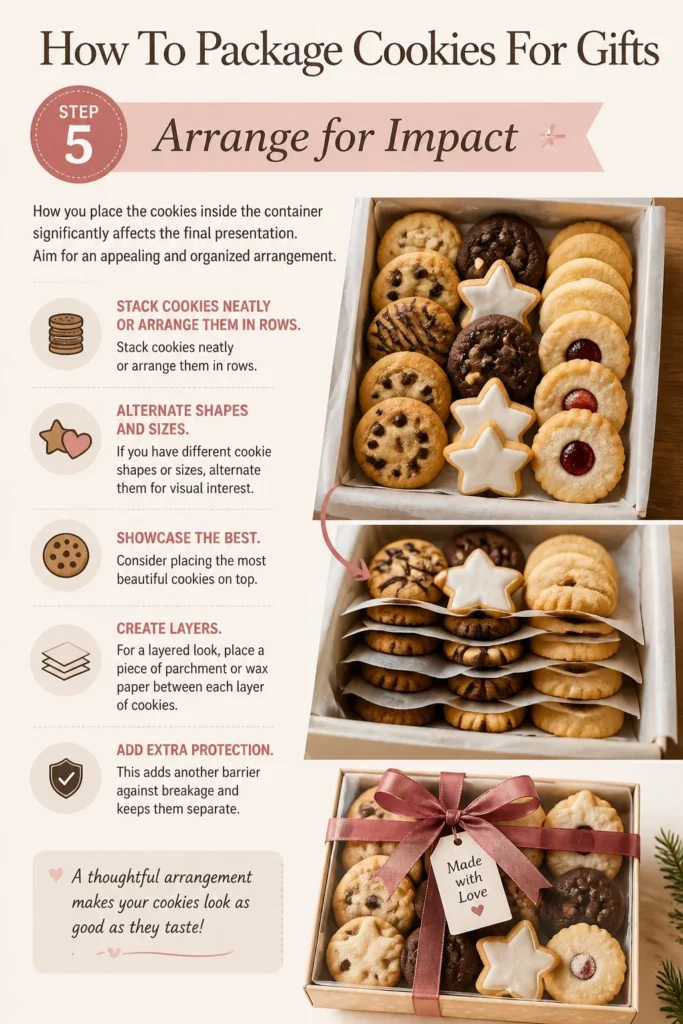
For a layered look, place a piece of parchment or wax paper between each layer of cookies. This adds another barrier against breakage and keeps them separate.
Step 6: Seal and Secure
Once your cookies are perfectly arranged, it’s time to seal the container. This keeps them fresh and prevents any treats from falling out during transport. An airtight seal is key for maintaining freshness.
For boxes, ensure the lid fits snugly. You can reinforce it with a simple piece of tape on the underside if needed.
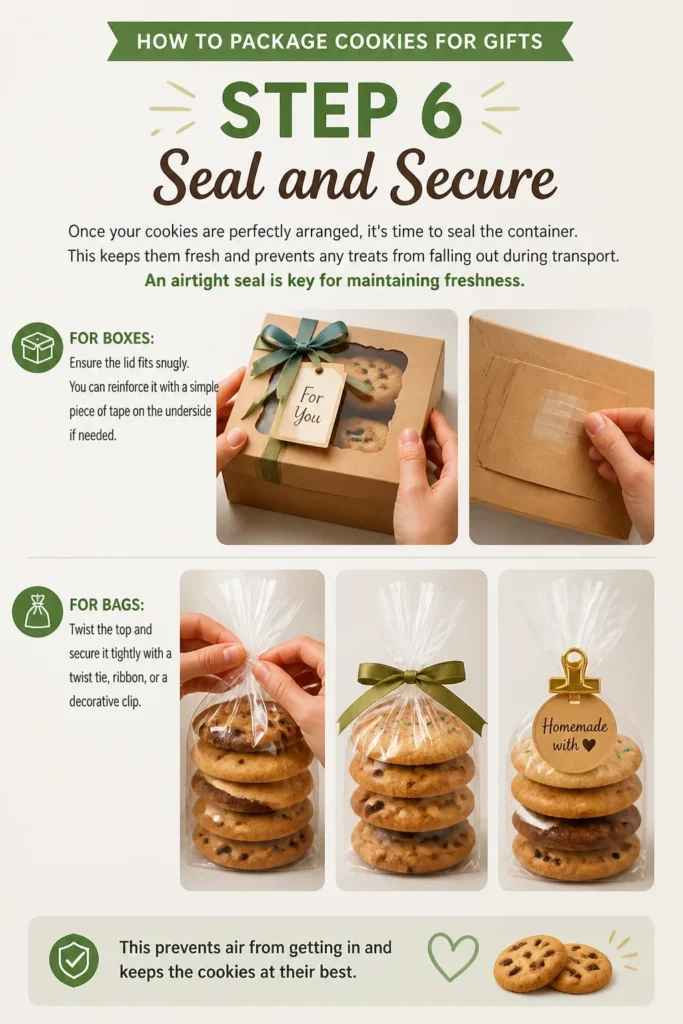
For bags, twist the top and secure it tightly with a twist tie, ribbon, or a decorative clip. This prevents air from getting in and keeps the cookies at their best.
Step 7: Decorate with Flair
Now for the fun part: adding decorative elements. This is where you infuse your gift with personality and charm. Ribbons, tags, and bows can transform a simple package.
Choose colors and textures that complement the occasion or the recipient’s preferences. A simple twine bow can be rustic, while satin ribbon adds elegance.
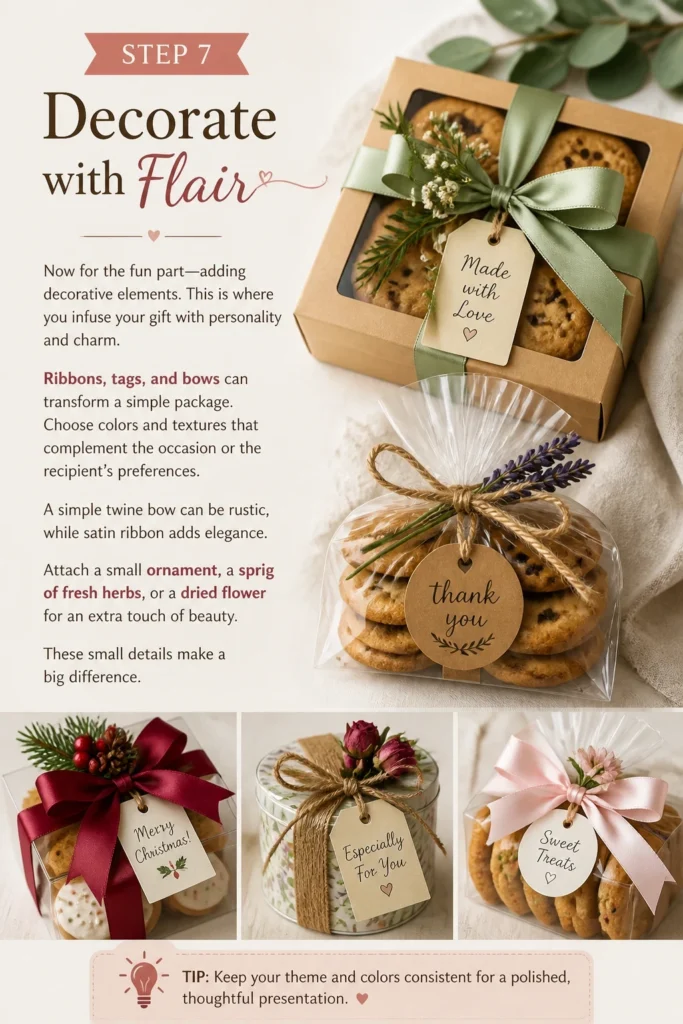
Attach a small ornament, a sprig of fresh herbs, or a dried flower for an extra touch of beauty. These small details make a big difference.
Step 8: Add a Personal Touch
A handwritten note or a custom label elevates your cookie gift from good to unforgettable. It shows you put thought and effort into the present. This step makes the gift truly yours.
Include a small card with the cookie type, ingredients (especially for allergy awareness), or a short, heartfelt message.
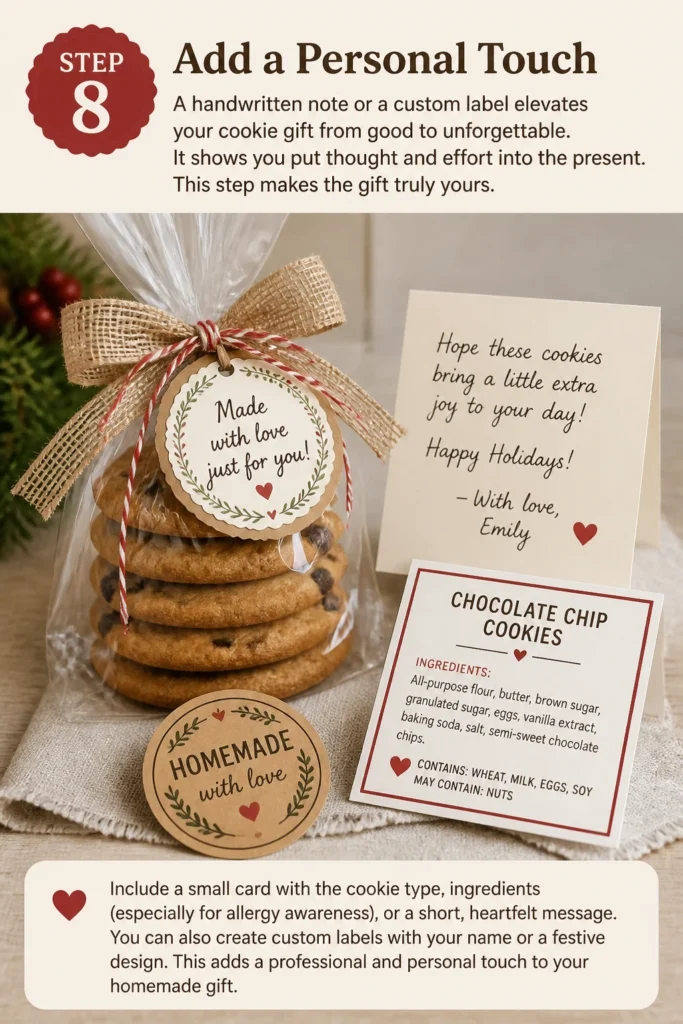
You can also create custom labels with your name or a festive design. This adds a professional and personal touch to your homemade gift.
Step 9: Transport Safely
The final step is ensuring your beautifully packaged cookies reach their destination intact. Plan how you will carry or ship them. For local delivery, a sturdy bag or small basket works well.
If shipping, use a larger box with plenty of cushioning material around your cookie package. This prevents jostling and potential damage.
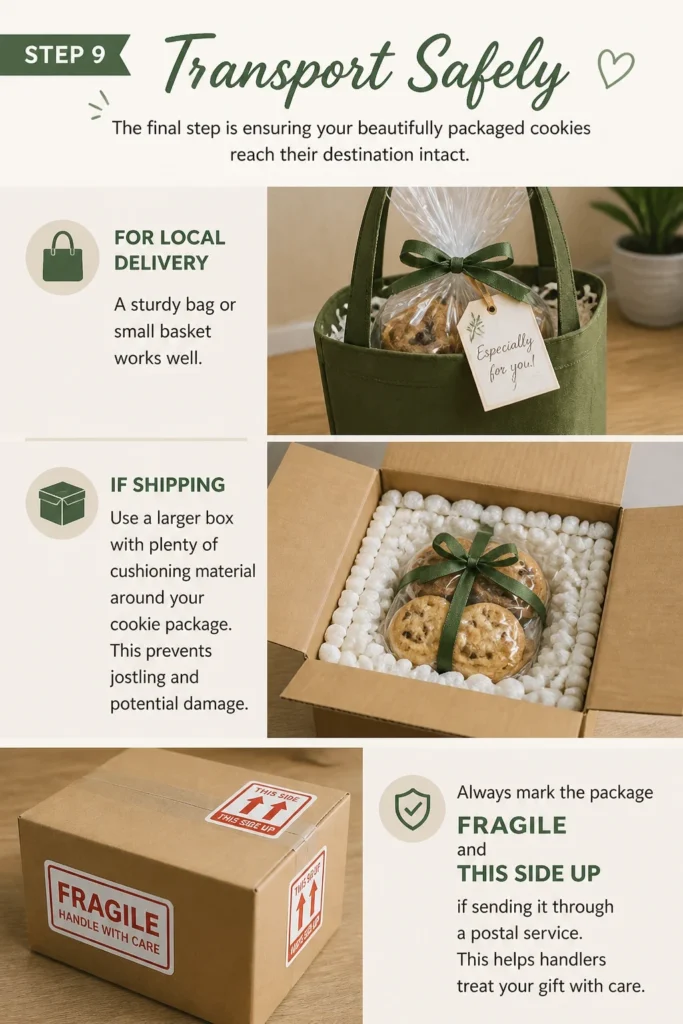
Always mark the package “Fragile” and “This Side Up” if sending it through a postal service. This helps handlers treat your gift with care.
Common Mistakes to Avoid
Packaging Warm Cookies
Putting cookies into containers before they are completely cool is a common error. The residual heat creates condensation inside the package, turning crisp cookies soggy and accelerating spoilage. Always allow your cookies to cool fully on a wire rack for several hours, or even overnight, before packaging them. Patience here ensures freshness and texture are preserved.
Using Flimsy Containers
Choosing containers that aren’t sturdy enough for your cookies can lead to disappointment. Thin cardboard boxes or weak plastic bags offer little protection against bumps and squishes during transport. Invest in robust gift boxes, tins, or thicker cellophane bags that can withstand handling and protect your delicate treats. The right container is an investment in your gift’s integrity.
Neglecting Protective Layers
Skipping internal padding is a recipe for broken cookies. Without soft cushioning, cookies will jostle against each other and the container walls, leading to crumbs rather than whole treats. Always use tissue paper, crinkle paper, or parchment paper to line the container and create layers between cookies. This simple step provides vital shock absorption.
Over-Decorating
While decoration is important, too much can overwhelm the gift or make it impractical. Excessive ribbon, bulky embellishments, or glitter that sheds can detract from the cookies themselves. Aim for elegant simplicity. Choose a few key decorative elements that enhance the package without making it difficult to open or transport. Less is often more when it comes to visual appeal.
Troubleshooting
Cookies Arriving Broken
If your cookies consistently break during transit, the issue likely lies with insufficient cushioning or an unstable container. Re-evaluate your protective layers. Ensure there’s ample crinkle paper or tissue paper at the bottom, top, and between layers of cookies. Also, consider using a sturdier box or adding cardboard dividers to prevent movement.
Cookies Getting Stale Quickly
Staleness usually indicates that air is getting into the package. Check for any gaps in your container’s seal. Make sure lids fit tightly, and cellophane bags are securely tied or heat-sealed. For maximum freshness, consider adding a food-safe desiccant packet (like silica gel packets designed for food) if the cookies are very moisture-sensitive, but always ensure it’s clearly labeled as non-edible.
Packaging Looking Messy
A cluttered or disorganized look often stems from not planning your arrangement or using too many disparate decorative elements. Before you start, visualize the final look. Lay out your cookies and practice arranging them neatly. Stick to a cohesive color scheme for your ribbons, tags, and paper. Trim ribbons cleanly and ensure labels are applied straight.
Key Takeaways
- Always ensure cookies are completely cool before packaging to prevent condensation and spoilage.
- Select sturdy, appropriate containers that offer protection and enhance presentation.
- Utilize protective layers like tissue or crinkle paper to cushion cookies and prevent breakage.
- Arrange cookies thoughtfully for an appealing visual impact, separating different types if necessary.
- Seal packages securely to maintain freshness and prevent treats from falling out.
- Personalize your gift with thoughtful decorations and a handwritten note or custom label.
Frequently Asked Questions
What’s the best way to prevent different cookie flavors from mingling?
To prevent flavors from mingling, package different types of cookies in separate containers or individual cellophane bags within a larger box. This keeps each cookie’s unique taste intact. You can also use parchment paper as a barrier between layers of different cookie types.
How long do cookies stay fresh in gift packaging?
The freshness duration depends on the cookie type and packaging. Generally, well-sealed, sturdy packaging can keep most cookies fresh for 3-7 days at room temperature. Crispier cookies often last longer than softer, chewier ones. For extended freshness, some cookies can be frozen in their packaging.
Can I mix different types of cookies in one gift box?
Yes, you can mix different types of cookies, but it’s best to separate them with parchment paper or small cupcake liners. This prevents breakage and keeps softer cookies from making crispier ones soggy. Grouping similar textures together also helps maintain quality.
What if I don’t have fancy packaging supplies?
Don’t worry if you lack fancy supplies. Creativity is key. You can use clean glass jars, recycled tins, or even brown paper bags decorated with stamps or drawings. Simple twine, fabric scraps, or even dried orange slices can make charming, rustic decorations. The thought truly counts the most.
Our Top Recommended Finds
- Sturdy Kraft Gift Boxes with Windows: These boxes offer excellent protection and a peek at the delicious contents, perfect for showcasing your cookies.
- Clear Cellophane Bags (Food Grade): Ideal for individual cookie portions or small stacks, these bags keep cookies fresh and allow their beauty to shine through.
- Assorted Ribbon and Twine Set: A versatile collection of ribbons and natural twine allows you to add decorative flair for any occasion or style.
Elevate Your Gifting Game Today
You now have the knowledge and steps to transform your homemade cookies into truly memorable gifts. No more worrying about broken treats or lackluster presentation. With a little planning and these practical tips, your cookie gifts will stand out.
Imagine the delight on someone’s face when they receive a beautifully packaged box of your delicious creations. Start experimenting with different containers and decorative touches. Your next batch of cookies is waiting to be shared in style.
Beginner-friendly templates, step-by-step guides,
and weekly project ideas in your inbox.