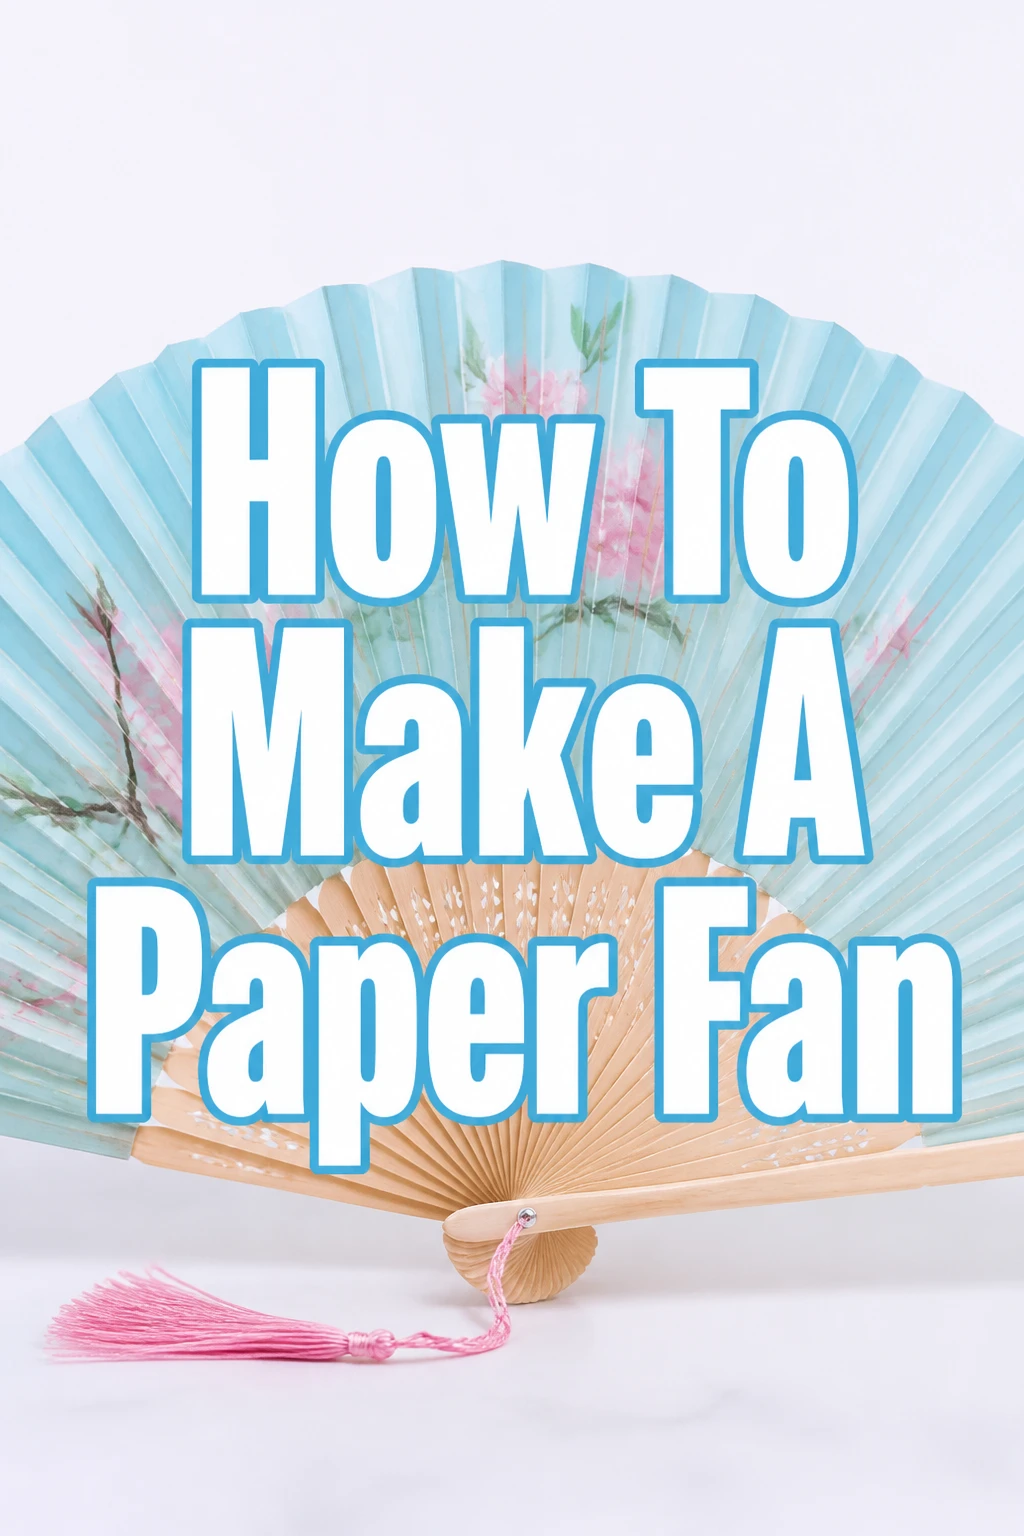
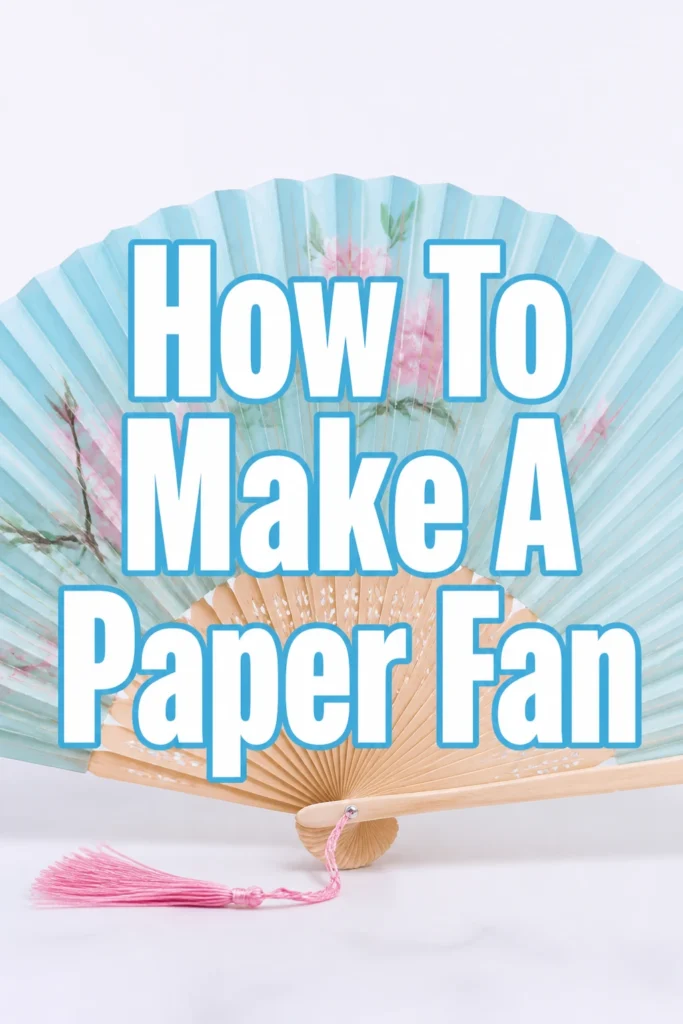
How To Make A Paper Fan

Beginner-friendly templates, step-by-step guides,
and weekly project ideas in your inbox.
Feeling a little warm? Sometimes, the simplest solutions are the most satisfying.
A handmade paper fan offers instant relief and a touch of nostalgic charm.
I’ve personally crafted countless fans to beat the heat, and I’m excited to share the easiest, most effective method with you today.
Quick Overview
You’re about to create a functional and beautiful paper fan, perfect for a warm day or as a decorative piece.
This project is incredibly straightforward and offers plenty of room for personal flair.
- Time needed: 15-30 minutes (depending on decoration)
- Difficulty: Beginner
- What you’ll need: Paper, ruler, pencil, scissors, adhesive (glue stick or tape), optional decorations
Step-by-Step Instructions
Step 1: Gather Your Materials
Before you begin, lay out all your necessary items. A clear workspace helps immensely.
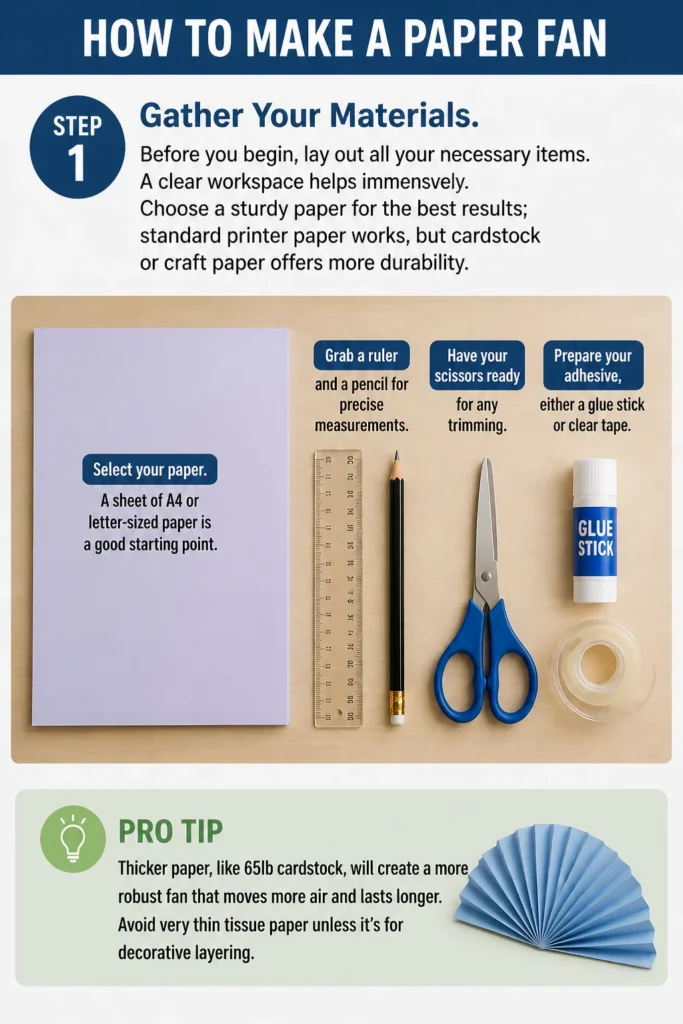
Choose a sturdy paper for the best results; standard printer paper works, but cardstock or craft paper offers more durability.
- Select your paper. A sheet of A4 or letter-sized paper is a good starting point.
- Grab a ruler and a pencil for precise measurements.
- Have your scissors ready for any trimming.
- Prepare your adhesive, either a glue stick or clear tape.
Pro Tip: Thicker paper, like 65lb cardstock, will create a more robust fan that moves more air and lasts longer. Avoid very thin tissue paper unless it’s for decorative layering.
Step 2: Prepare Your Paper
Ensuring your paper is the right shape and size is crucial for an effective fan.
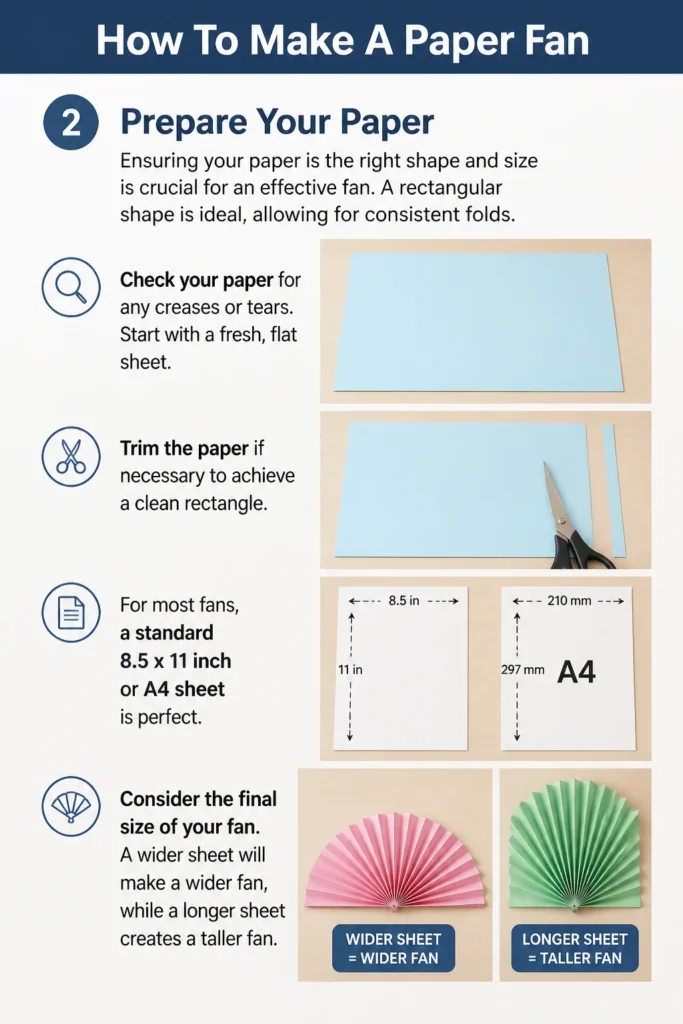
A rectangular shape is ideal, allowing for consistent folds.
- Check your paper for any creases or tears. Start with a fresh, flat sheet.
- Trim the paper if necessary to achieve a clean rectangle. For most fans, a standard 8.5 x 11 inch or A4 sheet is perfect.
- Consider the final size of your fan. A wider sheet will make a wider fan, while a longer sheet creates a taller fan.
Step 3: Begin Folding the Accordion
This is where the magic starts. The accordion fold is the foundation of your fan.
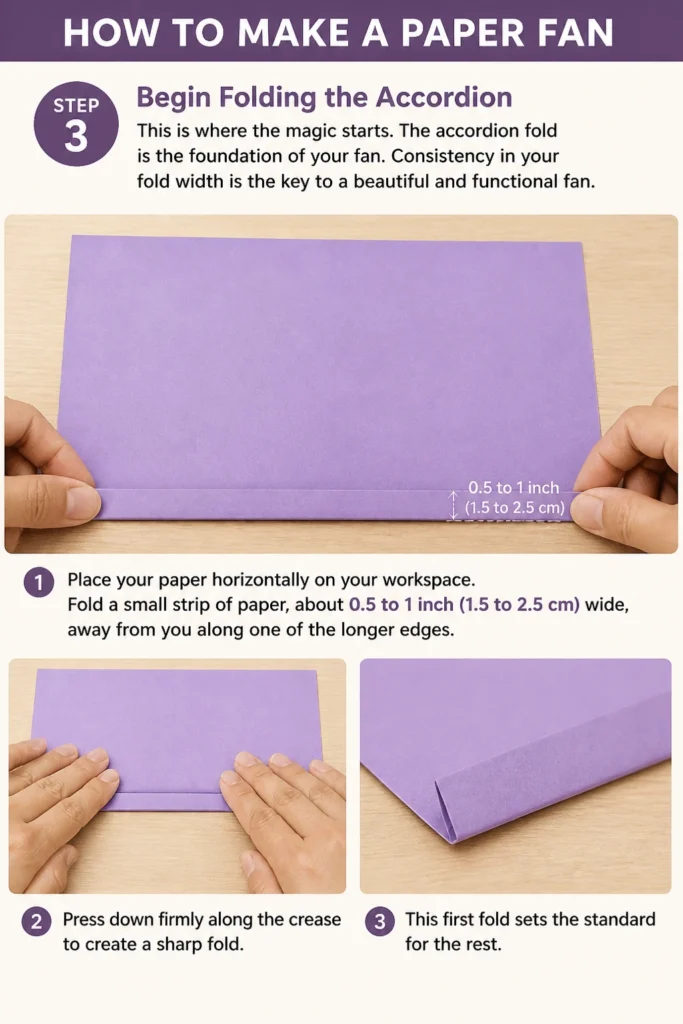
Consistency in your fold width is the key to a beautiful and functional fan.
- Place your paper horizontally on your workspace.
- Fold a small strip of paper, about 0.5 to 1 inch (1.5 to 2.5 cm) wide, away from you along one of the longer edges.
- Press down firmly along the crease to create a sharp fold. This first fold sets the standard for the rest.
Step 4: Continue Folding Evenly
Repetition and precision are important in this step. Each fold should mirror the last.
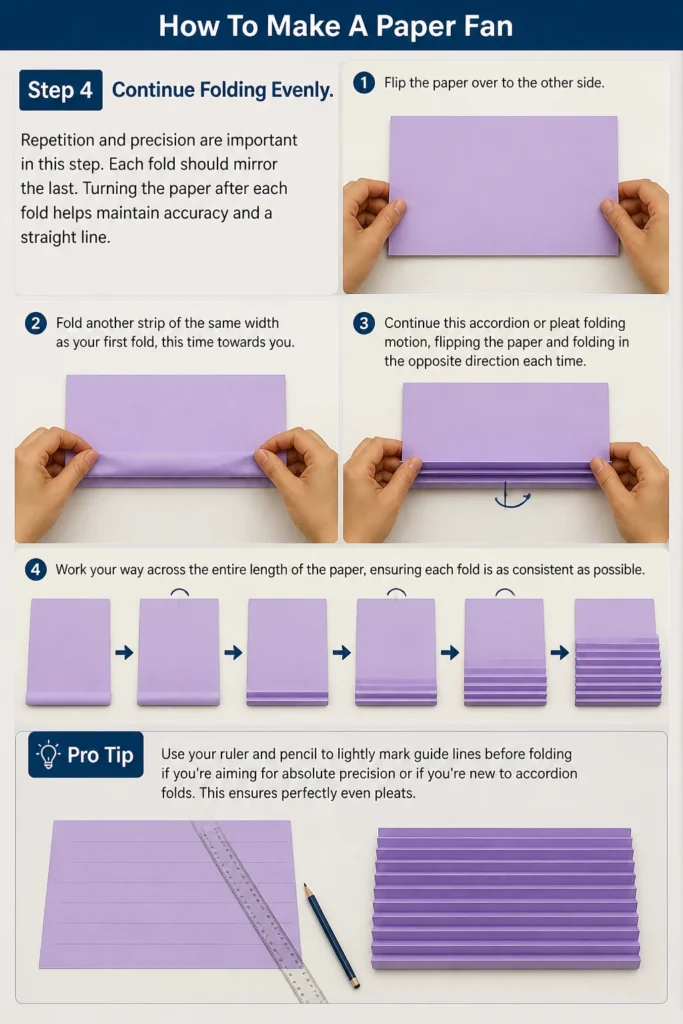
Turning the paper after each fold helps maintain accuracy and a straight line.
- Flip the paper over to the other side.
- Fold another strip of the same width as your first fold, this time towards you.
- Continue this “accordion” or “pleat” folding motion, flipping the paper and folding in the opposite direction each time.
- Work your way across the entire length of the paper, ensuring each fold is as consistent as possible.
Pro Tip: Use your ruler and pencil to lightly mark guide lines before folding if you’re aiming for absolute precision or if you’re new to accordion folds. This ensures perfectly even pleats.
Step 5: Secure the Base
The base is what holds all your folds together and forms the handle of your fan.
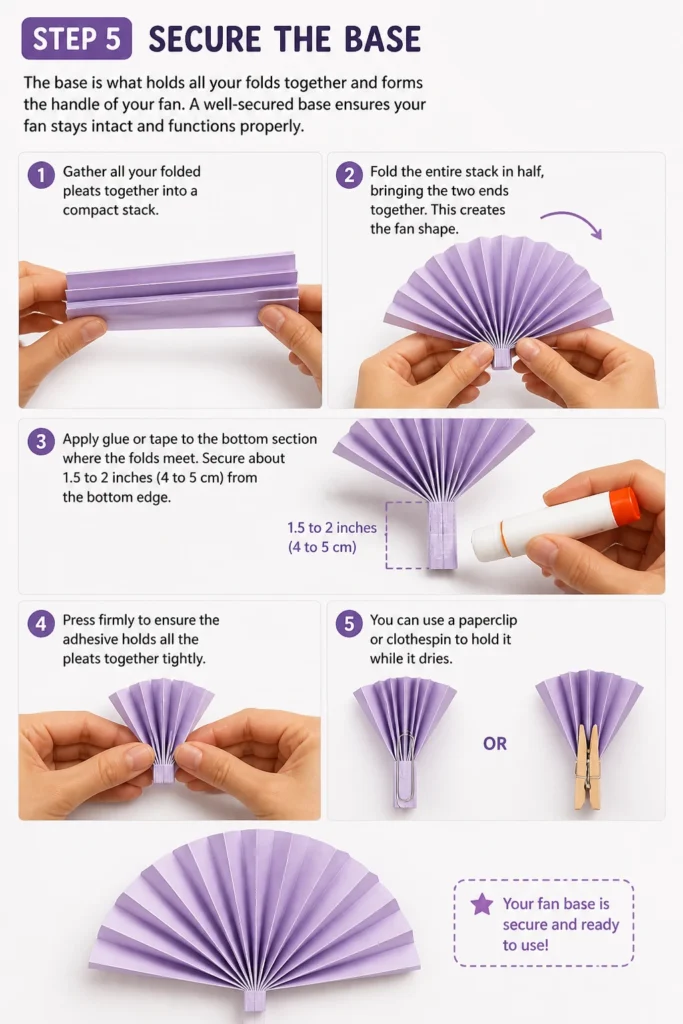
A well-secured base ensures your fan stays intact and functions properly.
- Gather all your folded pleats together into a compact stack.
- Fold the entire stack in half, bringing the two ends together. This creates the fan shape.
- Apply glue or tape to the bottom section where the folds meet. Secure about 1.5 to 2 inches (4 to 5 cm) from the bottom edge.
- Press firmly to ensure the adhesive holds all the pleats together tightly. You can use a paperclip or clothespin to hold it while it dries.
Step 6: Fan Out Your Creation
With the base secured, it’s time to reveal your fan’s full potential.
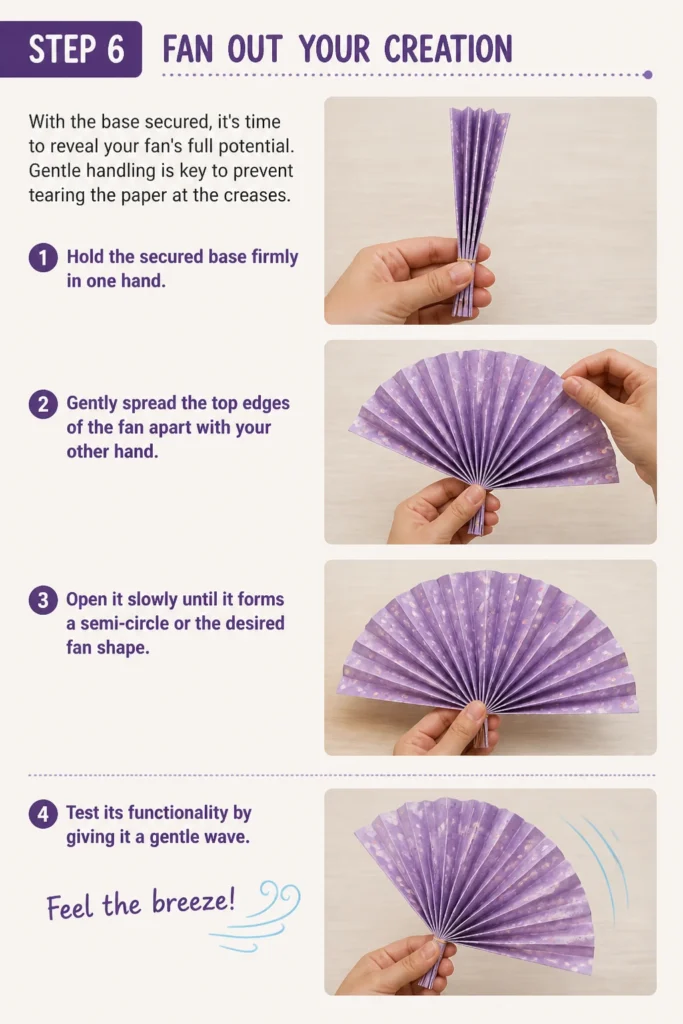
Gentle handling is key to prevent tearing the paper at the creases.
- Hold the secured base firmly in one hand.
- Gently spread the top edges of the fan apart with your other hand.
- Open it slowly until it forms a semi-circle or the desired fan shape.
- Test its functionality by giving it a gentle wave. Feel the breeze!
Step 7: Personalize Your Fan
This is where you can truly make your fan unique and express your creativity.
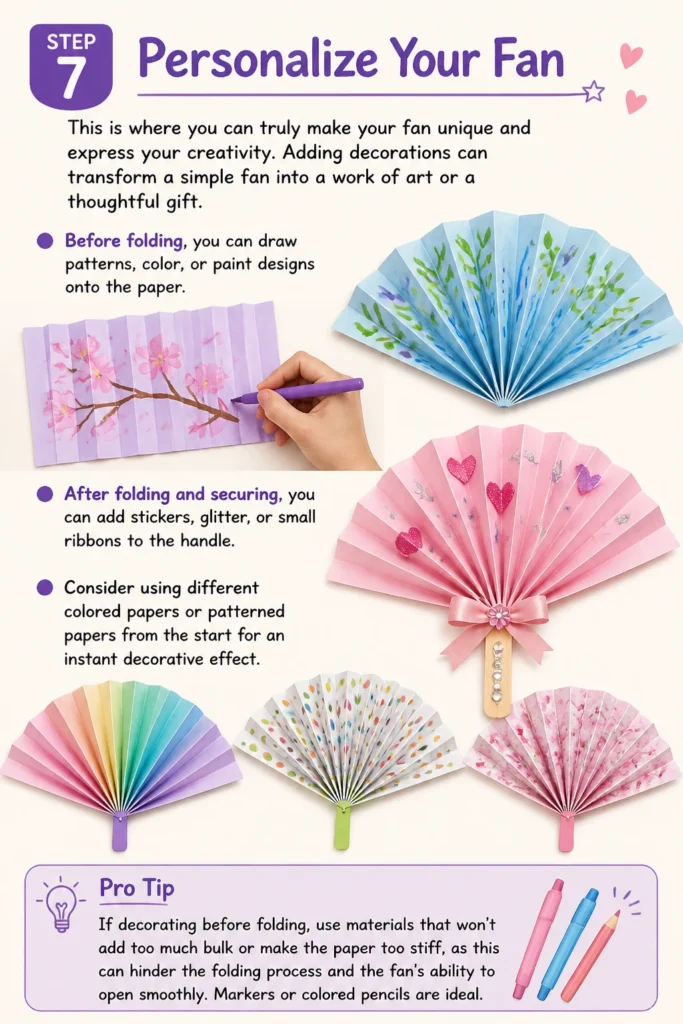
Adding decorations can transform a simple fan into a work of art or a thoughtful gift.
- Before folding, you can draw patterns, color, or paint designs onto the paper.
- After folding and securing, you can add stickers, glitter, or small ribbons to the handle.
- Consider using different colored papers or patterned papers from the start for an instant decorative effect.
Pro Tip: If decorating before folding, use materials that won’t add too much bulk or make the paper too stiff, as this can hinder the folding process and the fan’s ability to open smoothly. Markers or colored pencils are ideal.
Step 8: Reinforce for Durability
For a fan that withstands repeated use, a little reinforcement goes a long way.
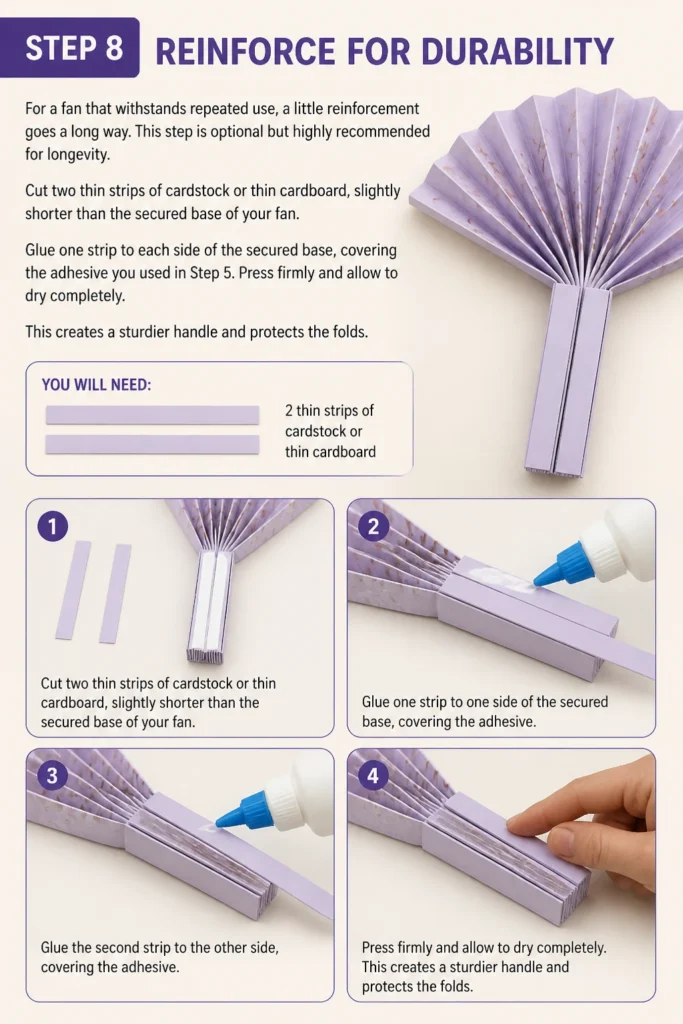
This step is optional but highly recommended for longevity.
- Cut two thin strips of cardstock or thin cardboard, slightly shorter than the secured base of your fan.
- Glue one strip to each side of the secured base, covering the adhesive you used in Step 5.
- Press firmly and allow to dry completely. This creates a sturdier handle and protects the folds.
Common Mistakes to Avoid
Uneven Folds
One of the most common pitfalls is inconsistent fold width. If your folds are not uniform, the fan will appear lopsided and may not open smoothly.
Always take your time and, if needed, use a ruler to mark out your fold lines before creasing. Precision leads to a much more attractive and functional fan.
Rushing the Process
Impatience can lead to ripped paper, sloppy creases, and a flimsy fan. Folding paper requires a steady hand and a calm approach.
Slow down, press each crease firmly, and ensure your alignment is correct before moving to the next fold. A few extra moments spent will yield a far better result.
Using Inappropriate Paper
Choosing paper that is either too thin or too thick can compromise your fan’s performance. Very thin paper tears easily and offers little air movement.
Conversely, excessively thick paper is difficult to fold and may not hold its shape when fanned open. Aim for a medium-weight paper like standard printer paper or light cardstock for the best balance of flexibility and strength.
Forgetting to Secure the Base
If the base of your fan isn’t properly secured, all your careful folding will be undone. The fan will simply fall apart when you try to use it.
Always use a strong adhesive, like a glue stick or clear tape, to bind the bottom pleats together firmly. Allow ample drying time for glue to set completely before fanning it out.
Troubleshooting
Fan Doesn’t Stay Open
If your fan tends to collapse or doesn’t hold its open shape, the issue often lies with the base or the tightness of your folds. The individual pleats might be too loose, or the base isn’t secured well enough.
To fix this, ensure the base is very tightly bound with glue or tape. You can also re-crease all your folds more firmly to give the paper more memory, helping it retain its fanned shape.
Fan Feels Flimsy
A flimsy fan provides little relief and won’t last long. This usually happens if your paper is too thin, or if you haven’t created enough folds to give it structure.
Next time, opt for a slightly heavier paper like cardstock. For your current fan, you could try reinforcing the handle with additional layers of cardstock or even adding a light coat of craft sealant (if compatible with your paper) to stiffen it slightly.
Edges Tear When Opening
Tears along the folds are frustrating and can ruin your fan. This often occurs if the paper is old and brittle, if your folds are excessively sharp, or if you’re opening the fan too forcefully.
Use fresh, good-quality paper. When folding, try to create firm creases without making them so sharp that they weaken the paper fibers. Always open your fan gently and slowly to avoid putting undue stress on the fold lines.
Key Takeaways
- Consistent fold width is essential for a symmetrical and effective fan.
- Properly securing the fan’s base ensures durability and functionality.
- The choice of paper significantly impacts the fan’s sturdiness and air-moving capacity.
- Personalizing your fan with colors and designs makes it truly unique.
- Patience and attention to detail during folding lead to a superior finished product.
- Reinforcing the handle can extend the life of your handmade fan considerably.
Frequently Asked Questions
What’s the best type of paper to use?
Standard printer paper (75-90 gsm) works well for a basic fan. For more durability and a better breeze, opt for heavier paper like cardstock (160-200 gsm) or craft paper. Avoid very glossy or coated papers as they can be harder to fold and secure.
How can I make a larger fan?
To create a larger fan, simply start with a larger sheet of paper. A poster board or a large sheet of craft paper can be used. Just remember that larger fans might require wider folds for stability and more robust adhesive for the base.
Can kids make these fans?
Absolutely! Making paper fans is an excellent craft for children. Younger kids might need help with measuring and securing the base, but the folding process is straightforward and great for developing fine motor skills. Supervision is always recommended.
How can I make my fan last longer?
To extend your fan’s life, use sturdier paper and reinforce the handle as described in Step 8. Store your fan flat when not in use to prevent creases from weakening. Gentle handling will also help prevent tears and damage over time.
Our Top Recommended Finds
- Assorted Cardstock Paper Pack: Offers a variety of colors and weights, perfect for experimenting with different fan styles and ensuring durability.
- Precision Craft Scissors: Ensures clean, crisp cuts for preparing your paper and any decorative elements, leading to a professional-looking finish.
- High-Quality Glue Stick: Provides strong, mess-free adhesion for securing the fan’s base, ensuring it holds together without damaging your paper.
Your Next Cool Project Starts Now
You’ve just learned how to create a simple yet incredibly useful paper fan. This isn’t just about beating the heat; it’s about the satisfaction of making something with your own hands.
Why stop at one? Experiment with different paper sizes, colors, and decorative techniques. Make a whole collection of fans to match your mood or outfit.
Gather your materials and start folding today. Embrace the simple joy of crafting and enjoy the refreshing breeze from your very own handmade creation!
Beginner-friendly templates, step-by-step guides,
and weekly project ideas in your inbox.