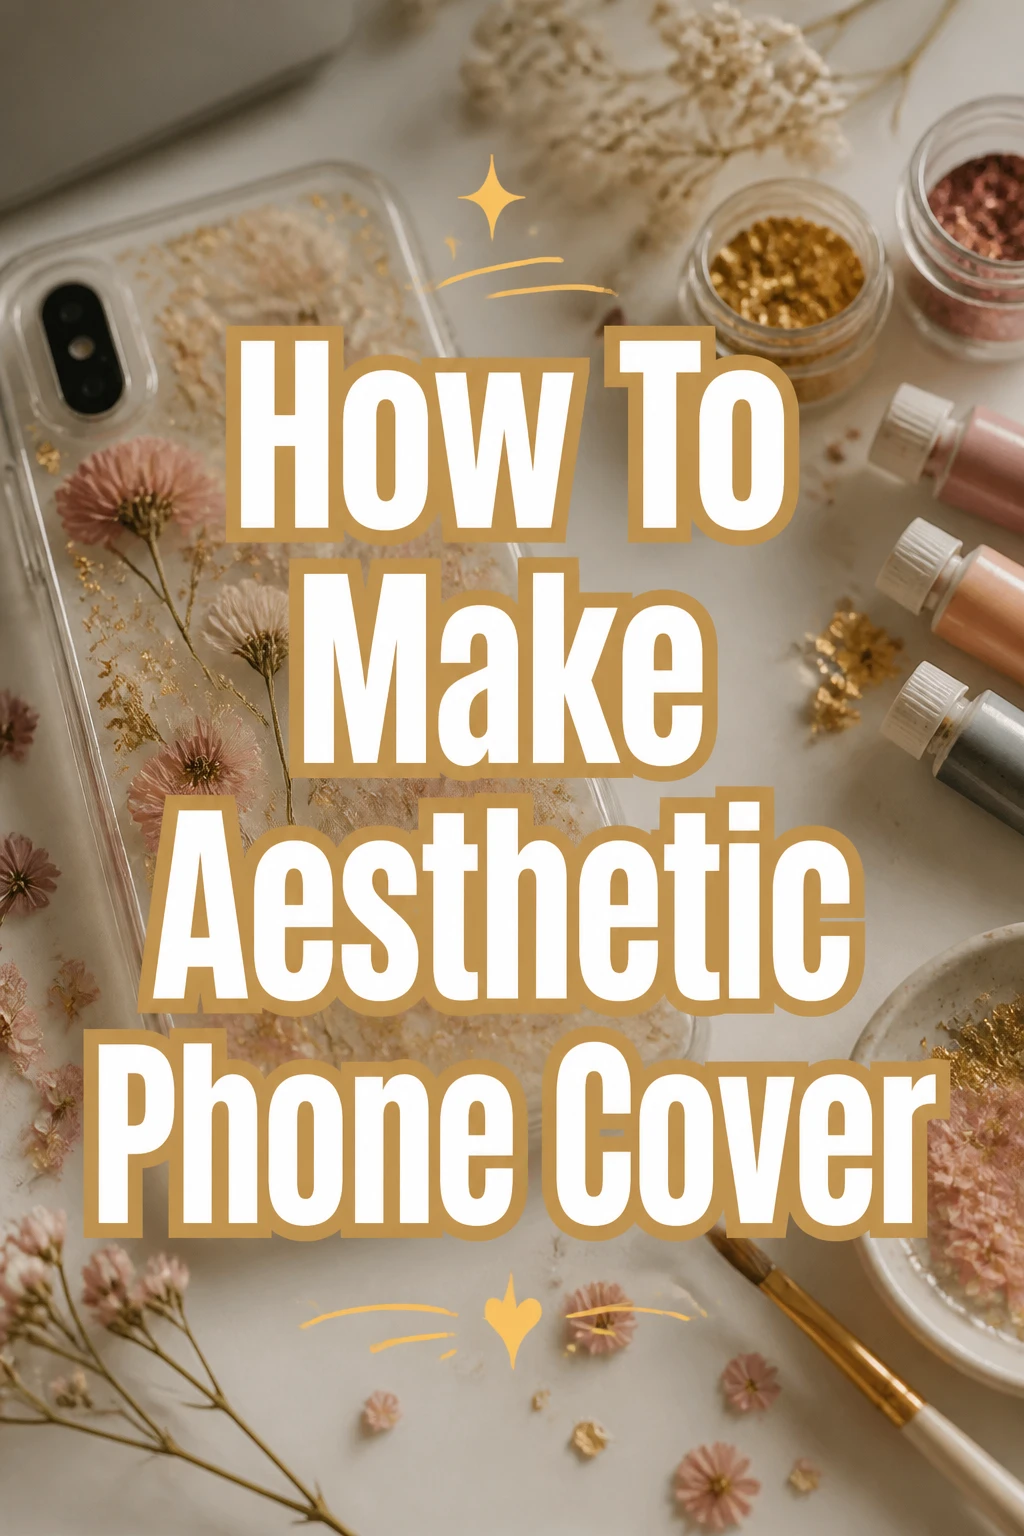
How To Make Aesthetic Phone Cover

Beginner-friendly templates, step-by-step guides,
and weekly project ideas in your inbox.
There is something truly special about holding a phone case that reflects your unique style.
I remember crafting my first custom case, a simple design with pressed flowers, and the sheer joy of receiving compliments on it.
This guide will walk you through transforming a plain phone case into a personalized work of art, sharing all the practical steps I learned along the way.
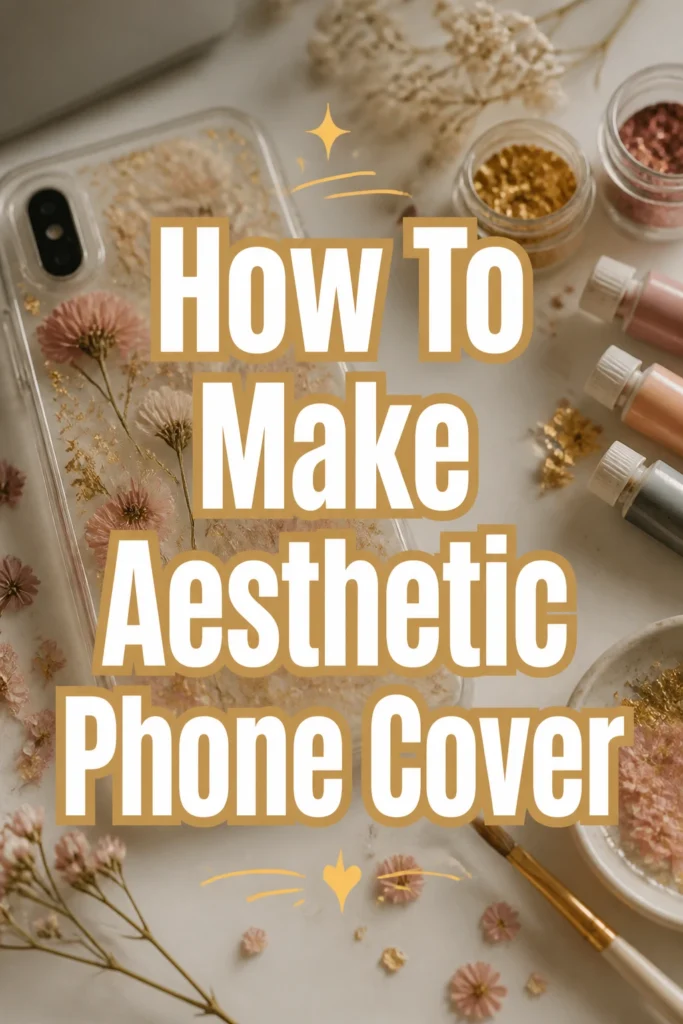
Quick Overview
This guide will empower you to create a beautiful, custom phone cover that perfectly matches your aesthetic preferences.
You will learn various techniques and tips to ensure your creation is both stunning and durable.
- Time needed: 1 to 3 hours (plus drying/curing time)
- Difficulty: Beginner
- What you’ll need: A clear phone case, various art supplies, and a sealant.
Step-by-Step Instructions
Step 1: Gather Your Creative Arsenal
Before diving into creation, assemble all your necessary materials.
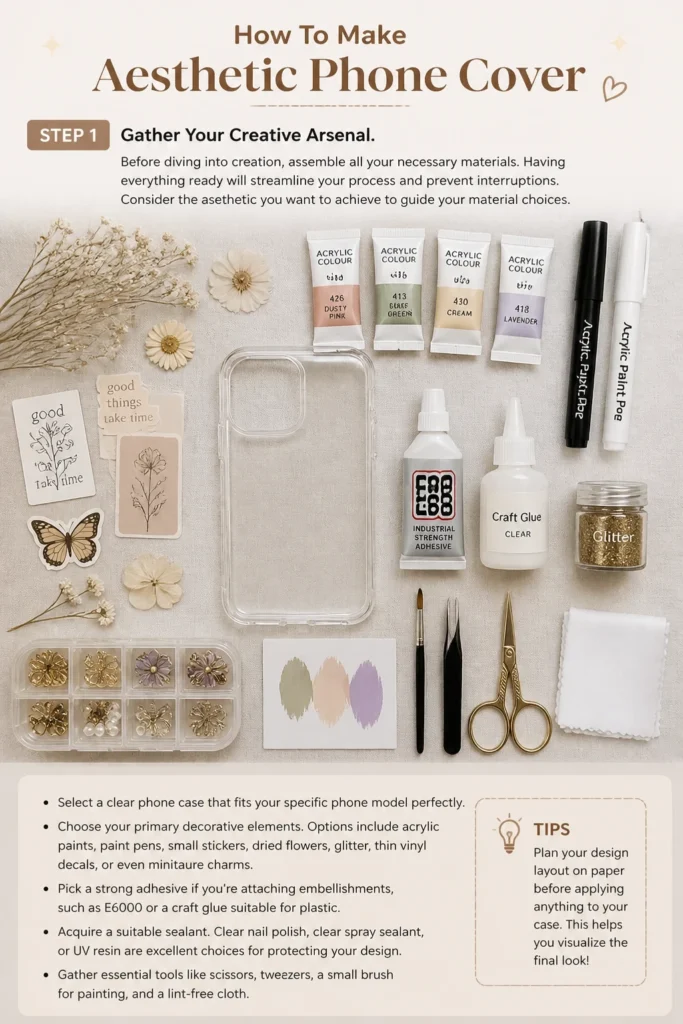
Having everything ready will streamline your process and prevent interruptions.
Consider the aesthetic you want to achieve to guide your material choices.
- Select a clear phone case that fits your specific phone model perfectly.
- Choose your primary decorative elements. Options include acrylic paints, paint pens, small stickers, dried flowers, glitter, thin vinyl decals, or even miniature charms.
- Pick a strong adhesive if you’re attaching embellishments, such as E6000 or a craft glue suitable for plastic.
- Acquire a suitable sealant. Clear nail polish, clear spray sealant, or UV resin are excellent choices for protecting your design.
- Gather essential tools like scissors, tweezers, a small brush for painting, and a lint-free cloth.
Pro Tip: Opt for a slightly thicker clear case if you plan to embed many elements or use resin, as it offers more depth and protection.
Step 2: Prepare Your Canvas
A clean surface is paramount for any successful craft project.
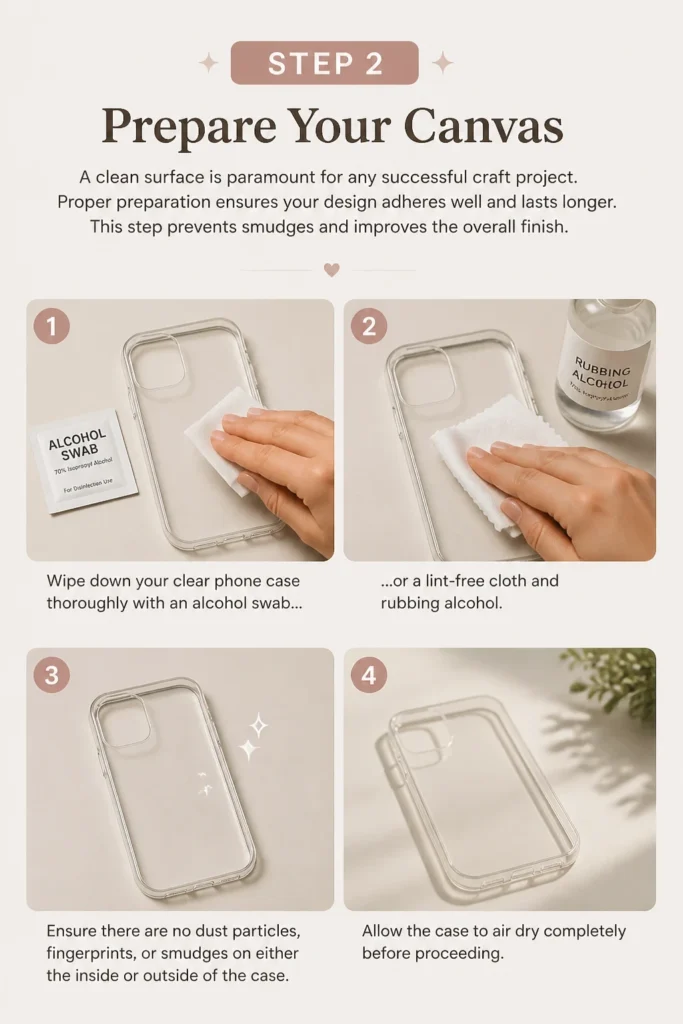
Proper preparation ensures your design adheres well and lasts longer.
This step prevents smudges and improves the overall finish.
- Wipe down your clear phone case thoroughly with an alcohol swab or a lint-free cloth and rubbing alcohol.
- Ensure there are no dust particles, fingerprints, or smudges on either the inside or outside of the case.
- Allow the case to air dry completely before proceeding.
Step 3: Envision Your Aesthetic
This is where your creativity truly takes flight.
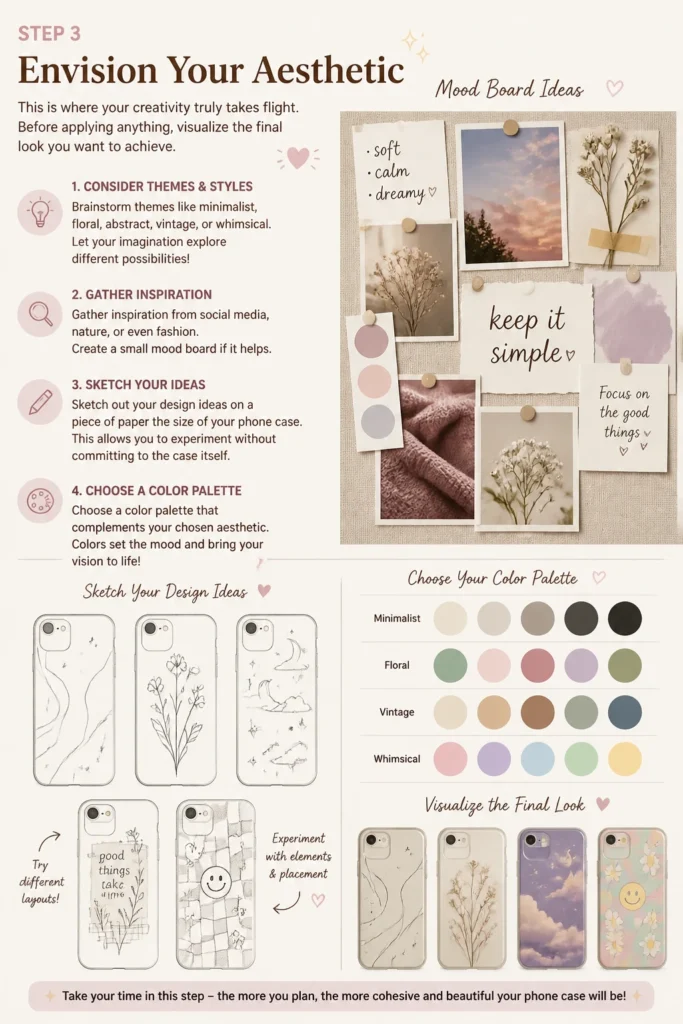
Before applying anything, visualize the final look you want to achieve.
Consider different themes and styles to inspire your design.
- Brainstorm themes like minimalist, floral, abstract, vintage, or whimsical.
- Gather inspiration from social media, nature, or even fashion. Create a small mood board if it helps.
- Sketch out your design ideas on a piece of paper the size of your phone case. This allows you to experiment without committing to the case itself.
- Choose a color palette that complements your chosen aesthetic.
Step 4: Establish Your Base Layer (Optional)
A base layer can add depth and a cohesive background to your design.
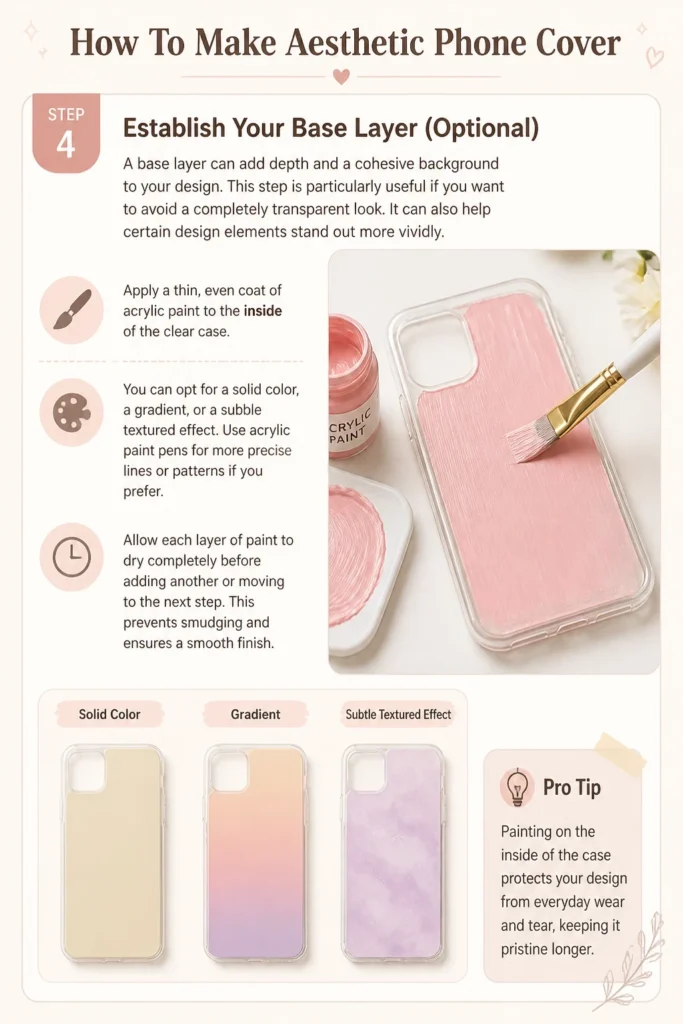
This step is particularly useful if you want to avoid a completely transparent look.
It can also help certain design elements stand out more vividly.
- Apply a thin, even coat of acrylic paint to the inside of the clear case. You can opt for a solid color, a gradient, or a subtle textured effect.
- Use acrylic paint pens for more precise lines or patterns if you prefer.
- Allow each layer of paint to dry completely before adding another or moving to the next step. This prevents smudging and ensures a smooth finish.
Pro Tip: Painting on the inside of the case protects your design from everyday wear and tear, keeping it pristine longer.
Step 5: Incorporate Your Design Elements
Now, bring your envisioned aesthetic to life by adding your chosen decorations.
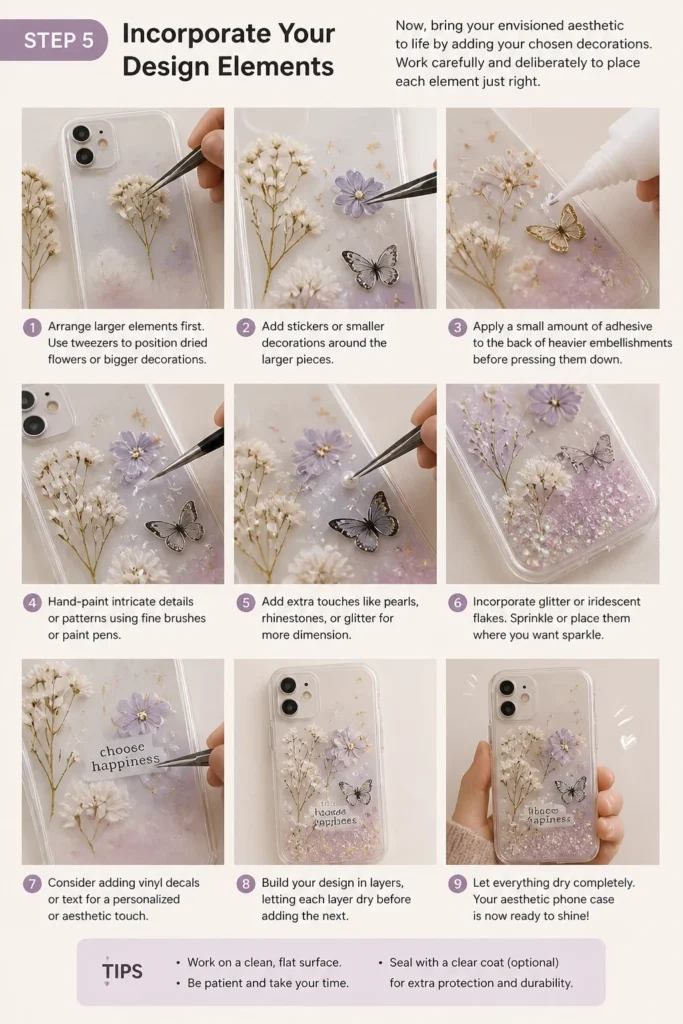
Work carefully and deliberately to place each element just right.
Layering can add visual interest and complexity to your design.
- Place stickers, dried flowers, or glitter onto the case. If using dried flowers, carefully arrange them with tweezers.
- Apply a small amount of adhesive to the back of heavier embellishments before pressing them firmly onto the case.
- Hand-paint intricate details or patterns using fine brushes or paint pens.
- Consider cutting vinyl decals to specific shapes or letters for a clean, professional look.
- Build your design in layers, letting each layer dry before adding the next, especially if stacking elements.
Step 6: Seal Your Masterpiece
Sealing is a critical step that protects your design from damage, fading, and peeling.
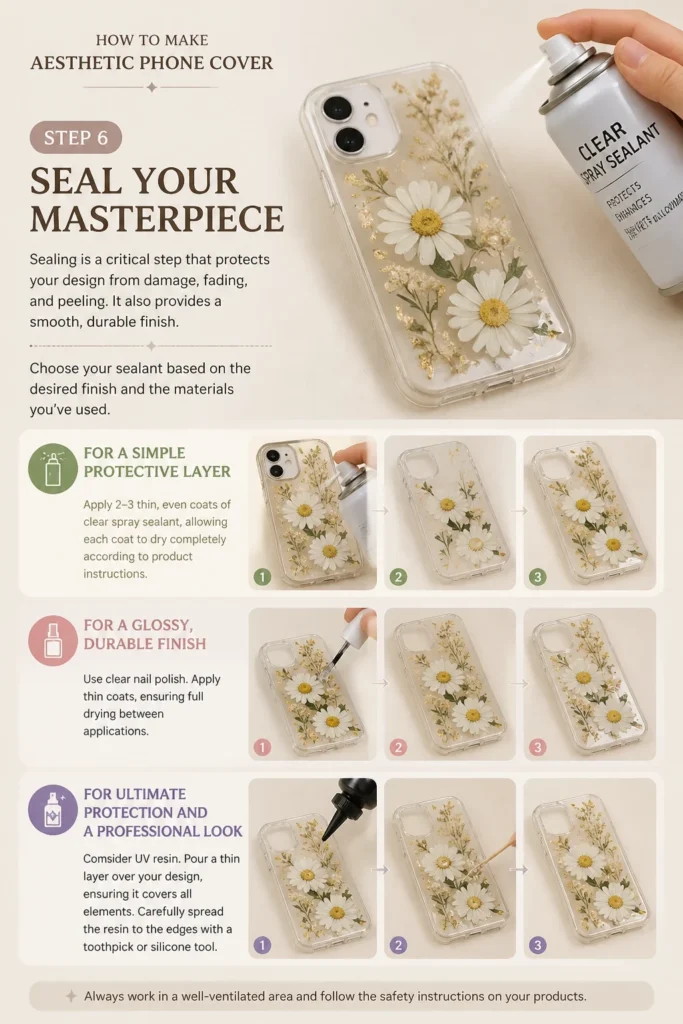
It also provides a smooth, durable finish.
Choose your sealant based on the desired finish and the materials you’ve used.
- For a simple protective layer: Apply 2-3 thin, even coats of clear spray sealant, allowing each coat to dry completely according to product instructions.
- For a glossy, durable finish: Use clear nail polish. Apply thin coats, ensuring full drying between applications.
- For ultimate protection and a professional look: Consider UV resin. Pour a thin layer over your design, ensuring it covers all elements.
- Carefully spread the resin to the edges with a toothpick or silicone tool.
Step 7: Cure and Finish
The final step involves allowing your sealant to fully harden, ensuring longevity.
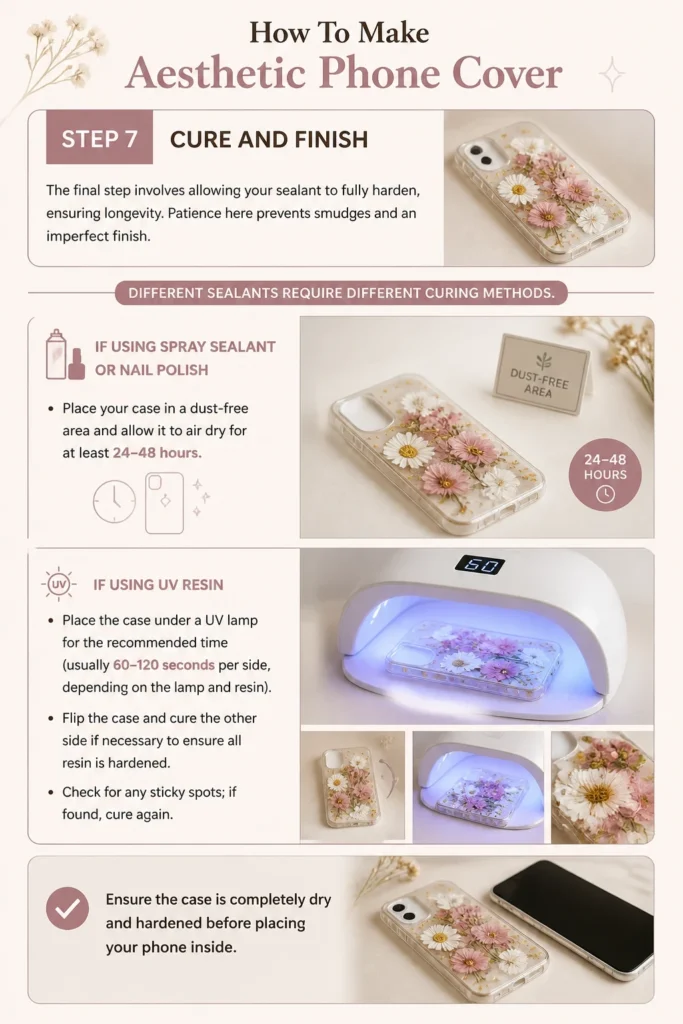
Patience here prevents smudges and an imperfect finish.
Different sealants require different curing methods.
- If using spray sealant or nail polish: Place your case in a dust-free area and allow it to air dry for at least 24-48 hours.
- If using UV resin: Place the case under a UV lamp for the recommended time (usually 60-120 seconds per side, depending on the lamp and resin).
- Flip the case and cure the other side if necessary to ensure all resin is hardened.
- Check for any sticky spots; if found, cure again.
- Ensure the case is completely dry and hardened before placing your phone inside.
Common Mistakes to Avoid
Skipping Surface Preparation
Many people overlook the importance of cleaning the phone case before starting their design. This seemingly minor step is crucial. Any dust, oil, or residue on the case can prevent your paint, stickers, or adhesive from properly bonding. This leads to peeling, bubbling, and a less professional finish over time. Always start with a thoroughly cleaned and dry surface for optimal adhesion.
Overloading Design Elements
It can be tempting to use every beautiful sticker or glitter you have, but too many elements can make a phone case look cluttered and lose its aesthetic appeal. An “aesthetic” often implies balance and thoughtful composition. Instead of adding more, focus on strategic placement and a cohesive theme. Sometimes, less is truly more, allowing individual elements to shine.
Improper Sealing Technique
The sealant is your design’s protective shield, and applying it incorrectly can ruin your hard work. Common mistakes include applying coats too thickly, which can lead to bubbles, uneven drying, or a cloudy finish. Not allowing sufficient drying time between layers can also cause smudging or a sticky texture. Always apply thin, even coats and follow the sealant’s specific drying or curing instructions precisely.
Impatience with Drying Times
Crafting requires patience, especially when working with paints and sealants. Rushing the drying process by touching the case too soon or assembling your phone prematurely can lead to smudges, fingerprints, and a compromised finish. Give each layer ample time to dry completely. This ensures durability and a flawless final product that truly reflects your effort.
Troubleshooting
Design Looks Uneven or Messy
If your design appears uneven, perhaps a sticker is crooked or paint bled in an unintended way. For stickers, gently peel them off if the adhesive isn’t fully set and reposition them carefully. If paint has bled, use a cotton swab dipped in rubbing alcohol to gently clean up small areas before the paint dries completely. For larger mistakes, it might be best to wipe the area clean with alcohol and restart that section.
Sealant Bubbles or Streaks Appear
Bubbles in sealant, especially resin, often occur due to improper mixing or applying too quickly. For minor bubbles in wet resin, you can gently pop them with a toothpick or use a heat gun (briefly and from a distance) to bring them to the surface. Streaks in spray sealants can be caused by holding the can too close or spraying unevenly. Ensure you spray in light, even passes from the recommended distance, and apply in a well-ventilated area with consistent temperature.
Adhesive Not Holding Elements
If your embellishments are not sticking firmly, it’s usually due to insufficient adhesive, an unsuitable glue for the material, or an unclean surface. Ensure you’re using a strong craft adhesive specifically designed for bonding plastic and other materials. Re-clean the area on the case and the back of the embellishment, apply a fresh, adequate amount of glue, and hold it firmly in place for a few seconds as the glue begins to set.
Key Takeaways
- Preparation is foundational; a clean case ensures superior adhesion and a lasting finish.
- Thoughtful design and aesthetic planning lead to a cohesive and visually appealing result.
- Layering elements and colors can add depth and complexity to your phone cover.
- Sealing your design is crucial for protection, durability, and a professional look.
- Patience during drying and curing stages prevents smudges and ensures a flawless outcome.
- Embrace experimentation and personal touches to create a truly unique accessory.
Frequently Asked Questions
What kind of paint works best on phone cases?
Acrylic paints and acrylic paint pens are generally the best choices for decorating phone cases. They adhere well to plastic surfaces, dry relatively quickly, and come in a wide range of colors. For intricate details, fine-tipped paint pens offer excellent control. Always ensure the paint is fully dry before applying a sealant.
Can I use resin on any phone case material?
UV resin can be used on most clear plastic phone cases, including polycarbonate and TPU. It creates a durable, high-gloss finish that encases your design. Ensure the case is clean and dry, and that any underlying paints or adhesives are completely cured before applying resin to prevent clouding or reactions.
How long will my aesthetic phone cover last?
The longevity of your custom phone cover largely depends on the quality of materials used and the care you give it. With proper sealing, especially using UV resin, your design can last for many months, even years, without significant wear. Regular cleaning with a soft cloth and avoiding harsh chemicals will help preserve its beauty.
Is a DIY aesthetic phone cover waterproof?
If you use UV resin as your sealant, your phone cover will be highly water-resistant, protecting the design underneath from splashes. However, it’s not entirely waterproof, and prolonged submersion should still be avoided. Other sealants like clear spray coats offer less water protection, so it’s always best to keep your custom case away from excessive moisture.
Our Top Recommended Finds
- Clear TPU Phone Cases: These flexible yet durable cases offer excellent protection and are the perfect canvas for any design.
- Acrylic Paint Pen Set: A versatile set of fine and medium-tipped paint pens allows for precise detailing and vibrant color application.
- UV Resin Kit with Lamp: Essential for a professional, glossy, and highly protective finish, ensuring your design lasts.
Your Phone, Your Canvas: Unleash Creativity
Creating your own aesthetic phone cover is more than just a craft project; it is an expression of self.
Each stroke, each placement, contributes to a piece that is uniquely yours, a reflection of your personality and style.
Take these steps, gather your tools, and allow your imagination to guide you toward a truly personalized accessory.
Why wait? Begin your journey into custom phone case design today and carry a piece of your art with you everywhere.
Beginner-friendly templates, step-by-step guides,
and weekly project ideas in your inbox.