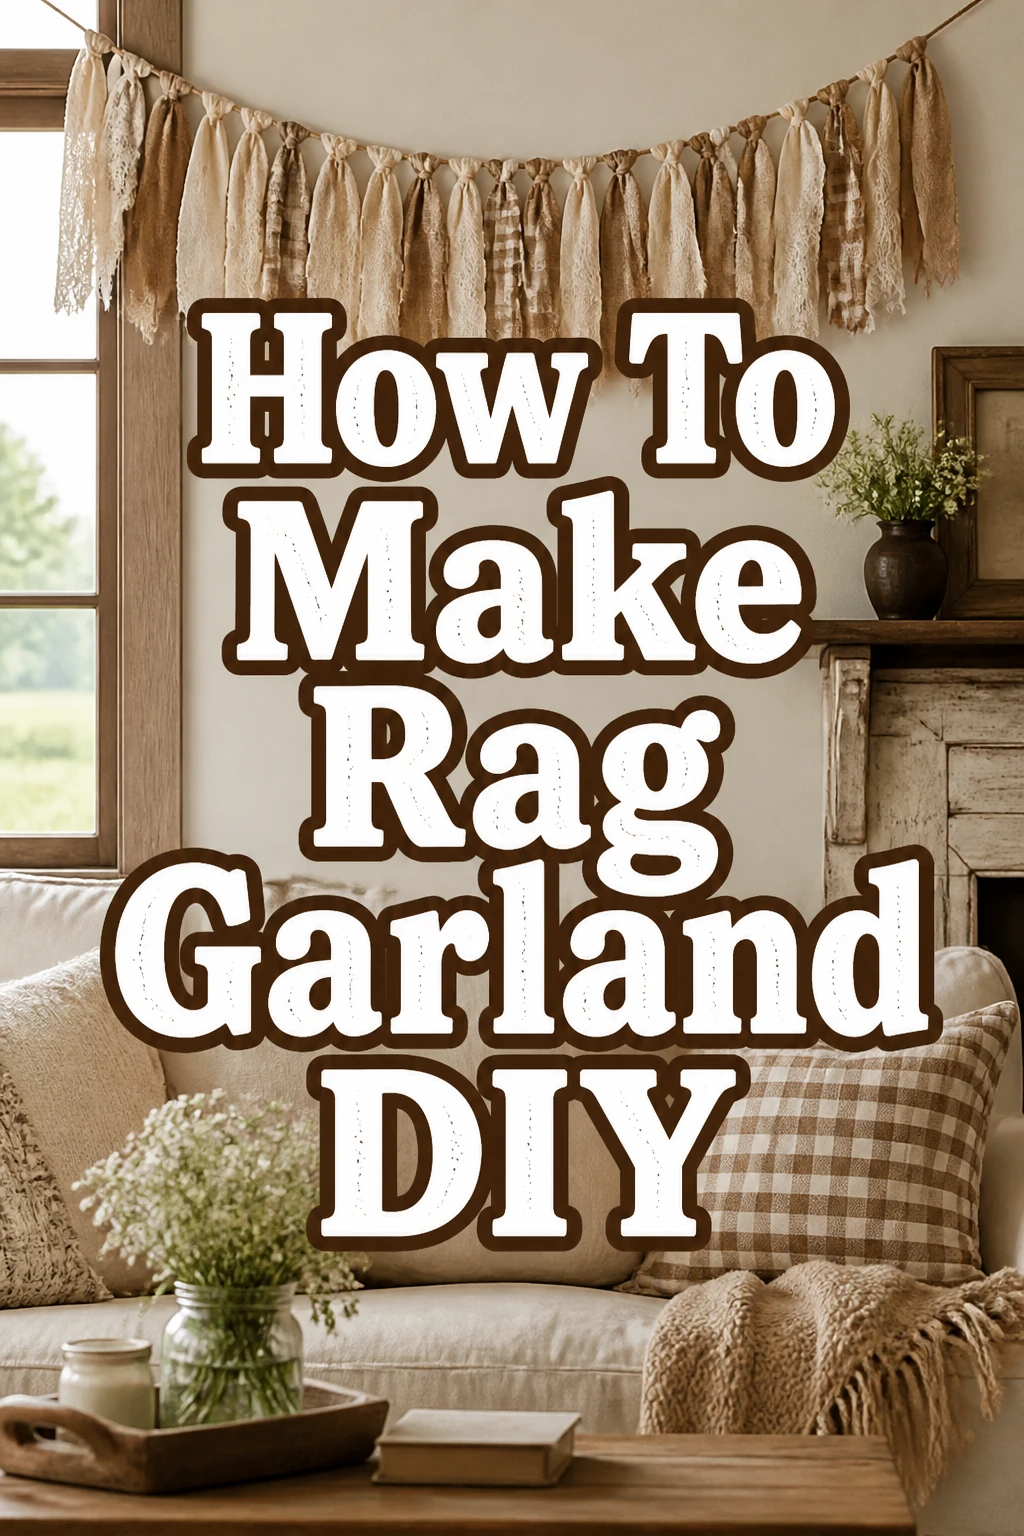
How To Make Rag Garland DIY

Beginner-friendly templates, step-by-step guides,
and weekly project ideas in your inbox.
Creating a rag garland is a wonderfully satisfying craft project. I remember making my first one for a friend’s baby shower, and the personal touch truly made the decor special. This guide will walk you through every step, ensuring your garland turns out beautifully.
This project is not only fun but also a fantastic way to use up fabric scraps. You will create a charming, rustic decoration perfect for any occasion or home accent. Let’s get started on making your very own unique rag garland.
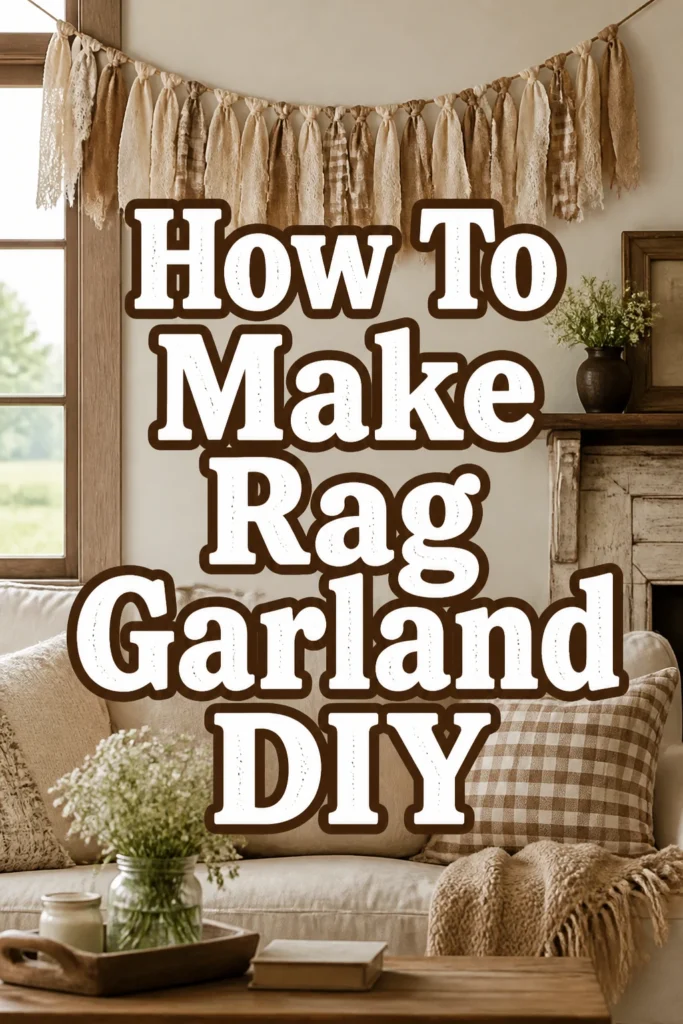
Quick Overview
You will transform simple fabric scraps into a beautiful, textured garland. This project is highly customizable, allowing your creativity to shine. The final result is a charming, handmade decoration you’ll be proud to display.
- Time needed: 1-3 hours (depending on length and fullness)
- Difficulty: Beginner
- What you’ll need: Fabric scraps, a base material (twine, rope, or ribbon), sharp scissors or a rotary cutter, and a measuring tape.
Step-by-Step Instructions
Step 1: Gather Your Fabric Scraps
The first crucial step is to collect an assortment of fabric scraps. Look for various textures, patterns, and colors that complement each other. Old clothes, sheets, pillowcases, or even curtains work perfectly.
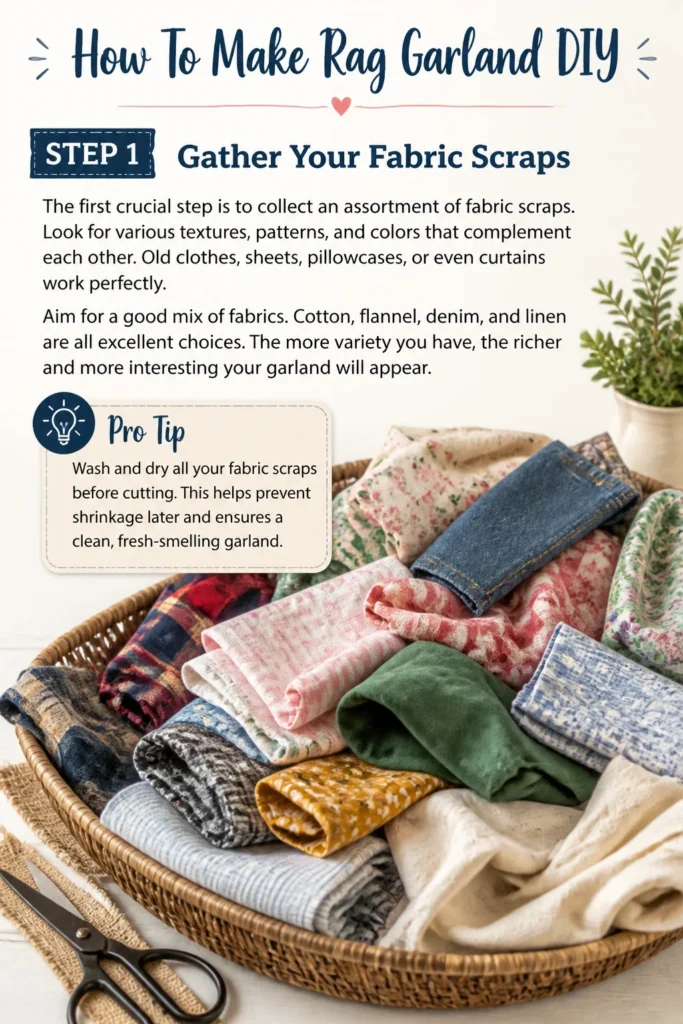
Aim for a good mix of fabrics. Cotton, flannel, denim, and linen are all excellent choices. The more variety you have, the richer and more interesting your garland will appear.
Pro Tip: Wash and dry all your fabric scraps before cutting. This helps prevent shrinkage later and ensures a clean, fresh-smelling garland.
Step 2: Prepare Your Fabric Strips
Now, cut your collected fabrics into strips. The ideal size is typically 1 inch to 2 inches wide and 8 inches to 12 inches long. This range allows for good knotting and a lovely drape.
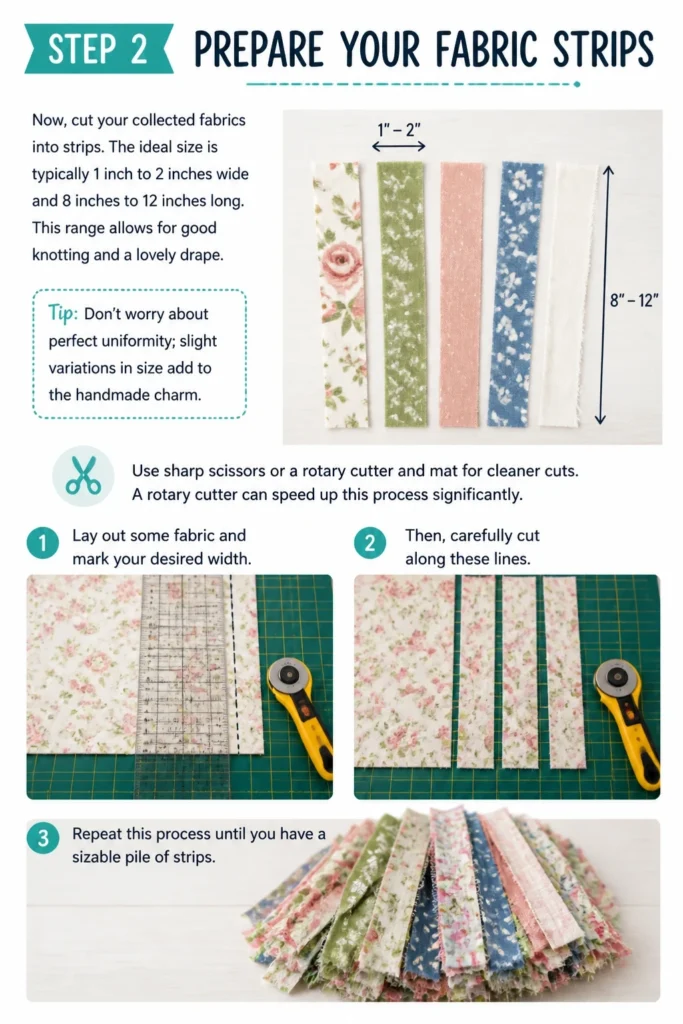
Don’t worry about perfect uniformity; slight variations in size add to the handmade charm. Use sharp scissors or a rotary cutter and mat for cleaner cuts. A rotary cutter can speed up this process significantly.
Lay out some fabric and mark your desired width. Then, carefully cut along these lines. Repeat this process until you have a sizable pile of strips.
Step 3: Select Your Garland Base
Choose a sturdy material to serve as the base for your garland. Good options include jute twine, cotton rope, or a strong ribbon. The length of your base will determine the final length of your garland.
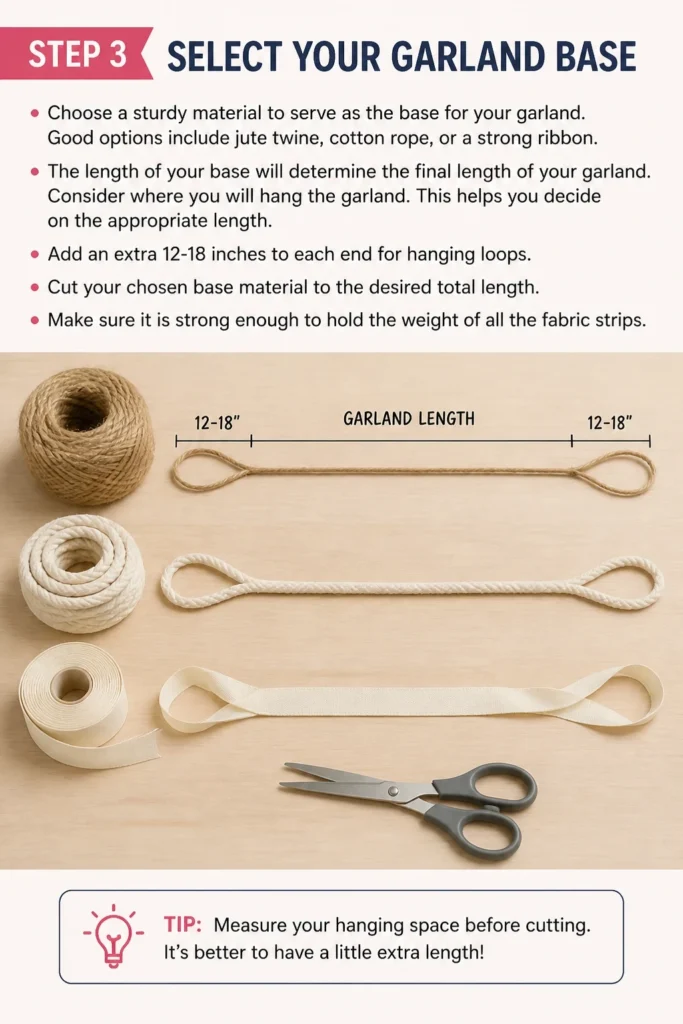
Consider where you will hang the garland. This helps you decide on the appropriate length. Add an extra 12-18 inches to each end for hanging loops.
Cut your chosen base material to the desired total length. Make sure it is strong enough to hold the weight of all the fabric strips.
Step 4: Begin Tying Fabric Strips
With your base ready, it’s time to attach the fabric strips. Take one fabric strip and fold it in half, creating a loop at one end. Place this loop under your base material.
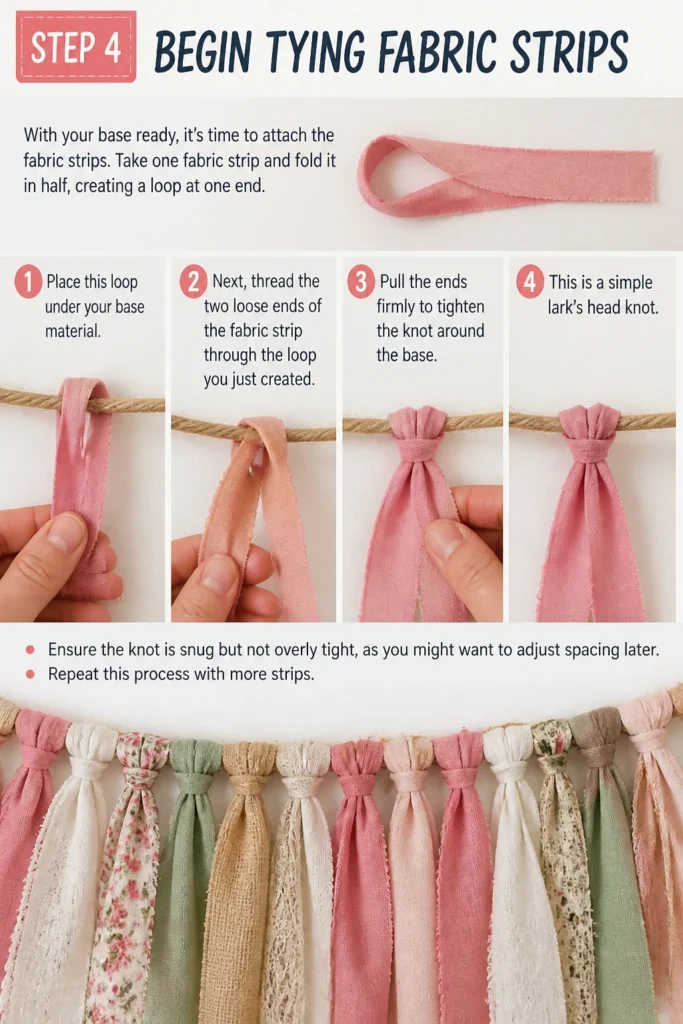
Next, thread the two loose ends of the fabric strip through the loop you just created. Pull the ends firmly to tighten the knot around the base. This is a simple lark’s head knot.
Ensure the knot is snug but not overly tight, as you might want to adjust spacing later. Repeat this process with more strips.
Step 5: Vary Colors and Textures
As you tie on each strip, alternate colors, patterns, and textures. This creates visual interest and depth in your garland. Avoid placing too many similar strips next to each other.
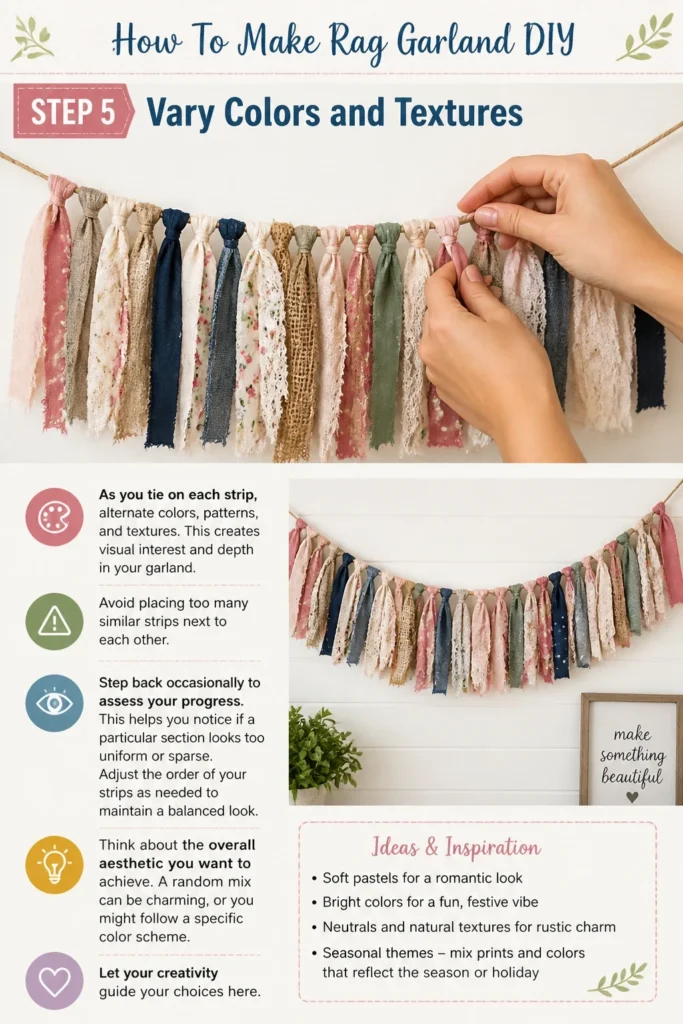
Step back occasionally to assess your progress. This helps you notice if a particular section looks too uniform or sparse. Adjust the order of your strips as needed to maintain a balanced look.
Think about the overall aesthetic you want to achieve. A random mix can be charming, or you might follow a specific color scheme. Let your creativity guide your choices here.
Step 6: Determine Strip Density and Fullness
The spacing of your fabric strips dictates the garland’s fullness. For a dense, lush garland, tie strips close together, leaving minimal space between knots. For a more airy, spread-out look, leave a bit more room.
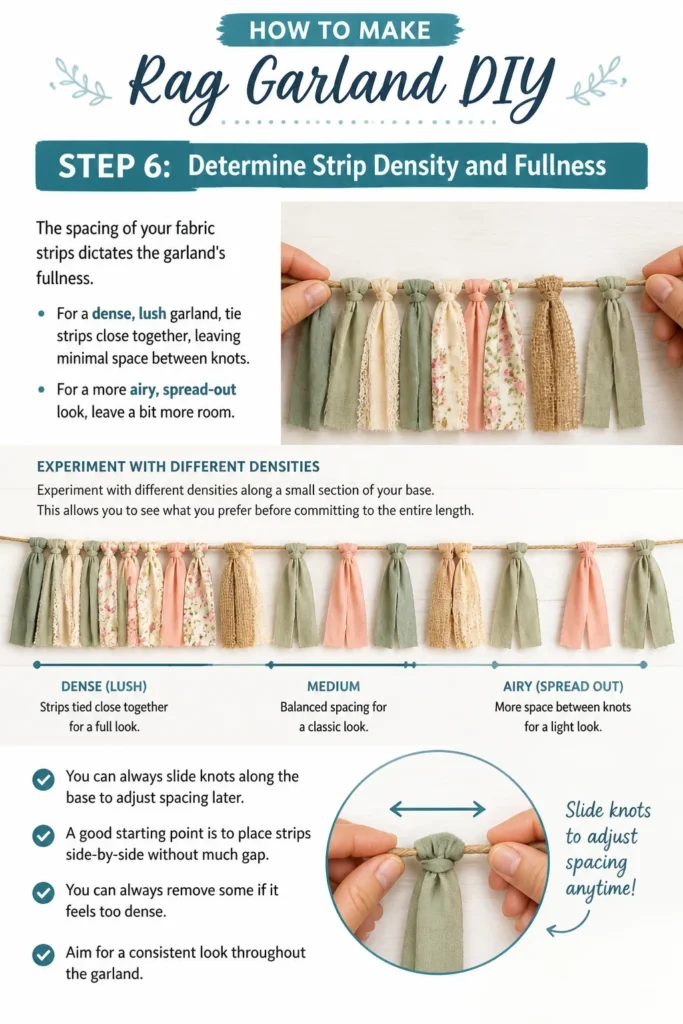
Experiment with different densities along a small section of your base. This allows you to see what you prefer before committing to the entire length. You can always slide knots along the base to adjust spacing later.
A good starting point is to place strips side-by-side without much gap. You can always remove some if it feels too dense. Aim for a consistent look throughout the garland.
Step 7: Add Embellishments (Optional)
To further personalize your garland, incorporate small embellishments. Beads, bells, small wooden shapes, or even artificial leaves can be tied onto the base alongside the fabric.
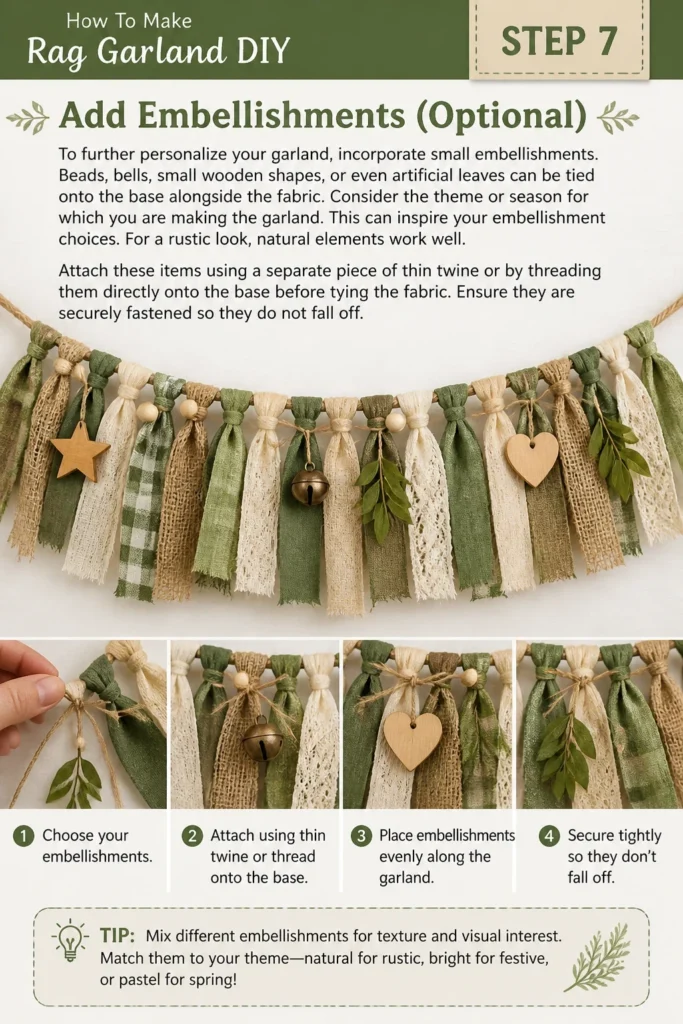
Consider the theme or season for which you are making the garland. This can inspire your embellishment choices. For a rustic look, natural elements work well.
Attach these items using a separate piece of thin twine or by threading them directly onto the base before tying the fabric. Ensure they are securely fastened so they do not fall off.
Step 8: Finish and Hang Your Garland
Once all your fabric strips are tied on and you are happy with the fullness, trim any excessively long or uneven ends. This creates a neat, finished appearance. You can leave some ends slightly longer for a more organic look.
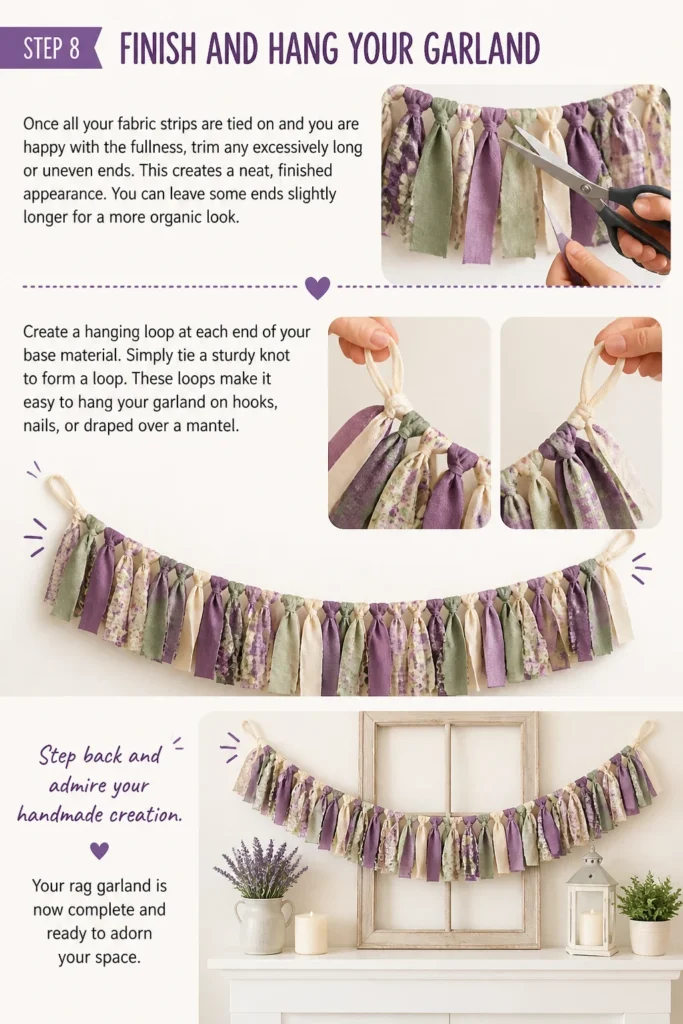
Create a hanging loop at each end of your base material. Simply tie a sturdy knot to form a loop. These loops make it easy to hang your garland on hooks, nails, or draped over a mantel.
Step back and admire your handmade creation. Your rag garland is now complete and ready to adorn your space.
Common Mistakes to Avoid
Using Only One Type of Fabric
Relying on a single fabric type or texture can result in a flat, uninteresting garland. The beauty of a rag garland comes from its varied textures and visual depth. Always strive for a mix of materials.
To correct this, consciously choose fabrics with different weaves, weights, and finishes. Combine smooth cottons with rougher linens or fuzzy flannels. This contrast creates a much more dynamic and appealing final product.
Inconsistent Strip Sizes
While some variation adds character, wildly inconsistent strip sizes can make your garland look messy rather than charmingly rustic. Strips that are too wide can look bulky, while those too narrow might disappear.
Aim for a consistent width, typically 1 to 2 inches. Minor differences in length are fine, but try to keep widths relatively uniform. This ensures a cohesive and visually balanced garland.
Loose or Improper Knots
If your knots are not tied securely, fabric strips can slip, shift, or even fall off the base over time. This leads to a sparse or uneven-looking garland. A loose knot also makes the garland less durable.
Always use a firm lark’s head knot and pull the fabric ends taut. Test each knot gently after tying to ensure it’s secure. This step prevents future frustration and keeps your garland looking its best.
Overlooking Color Palette
Throwing random colors together without thought can result in a chaotic or clashing garland. While eclectic can be fun, a thoughtful color palette ensures your garland complements its intended setting.
Before you start tying, lay out your fabric strips and arrange them into a potential color sequence. Look for colors that harmonize or create an intentional contrast. This pre-planning makes a huge difference in the aesthetic appeal.
Troubleshooting
Garland Looks Sparse or Too Thin
If your finished garland appears sparse, it likely means the fabric strips are spaced too far apart. This can happen if you initially underestimated the density needed.
To fix this, simply add more fabric strips. You can slide existing knots along the base to create small gaps, then tie new strips into those spaces. Alternatively, tie new strips right next to existing ones, making the garland fuller.
Fabric Strips Keep Unraveling
Some fabrics, especially loosely woven ones, might fray excessively, making your garland look untidy. This is a common issue with certain material types.
Consider using pinking shears when cutting your strips; their zigzag edge helps reduce fraying. For strips already tied, you can apply a tiny dot of fabric glue to the very ends of the knots where fraying is occurring, if desired.
Difficulty Hanging the Garland
If your garland is heavy or doesn’t seem to drape correctly, the base material might not be suitable or your hanging method needs adjustment. A very long, dense garland can become quite weighty.
Ensure your base material is strong enough for the total weight. For heavy garlands, use multiple hanging points along its length instead of just the ends. Command hooks or strong picture hangers work well for securing it in place.
Key Takeaways
- Rag garlands are an excellent way to repurpose fabric scraps and create unique decor.
- Variety in fabric types, patterns, and colors adds depth and visual interest to your garland.
- Consistent strip size (1-2 inches wide, 8-12 inches long) helps maintain a cohesive look.
- A sturdy base material like jute twine or cotton rope is essential for durability.
- Securely tying a lark’s head knot for each strip prevents slippage and ensures longevity.
- Adjusting the density of tied strips allows you to customize the fullness of your garland.
- Don’t be afraid to experiment with embellishments to personalize your creation further.
Frequently Asked Questions
Can I use any type of fabric?
Most fabrics work well, but some are better than others. Cotton, linen, flannel, and denim are ideal because they hold knots well and fray charmingly. Avoid very stretchy fabrics like spandex, as they can be difficult to tie securely and may sag over time. Delicate silks or satins might also be too slippery.
How long should a rag garland be?
The length depends entirely on where you plan to display it. For a mantel, measure the mantel length and add extra for draping. For a doorway, measure the width. Standard lengths can range from 4 feet for a small accent to 10 feet or more for a large wall or event decoration.
Can rag garlands be used outdoors?
Yes, they can! However, consider the fabric choices. Natural fibers like cotton or jute will hold up reasonably well, but prolonged exposure to rain, sun, or humidity can cause fading or mildew. For outdoor use, choose durable, weather-resistant fabrics if possible, and bring the garland indoors during harsh weather.
How do I clean a rag garland?
For light dust, gently shake the garland outdoors or use a lint roller. If it needs a deeper clean, spot clean specific areas with a damp cloth and mild soap. For a thorough wash, you can hand wash the entire garland in a tub with mild detergent, then air dry it completely to prevent mildew. Avoid machine washing, as it can tangle the strips.
Our Top Recommended Finds
- Sharp Fabric Scissors: A good pair of fabric scissors makes cutting strips much easier and more precise. Look for comfortable handles and a sharp blade for clean cuts.
- Jute Twine or Cotton Rope: These materials provide a strong, natural-looking base that complements the rustic aesthetic of a rag garland. They are durable and easy to work with.
- Rotary Cutter and Cutting Mat: For those planning to make multiple garlands or wanting to speed up the strip-cutting process, a rotary cutter and self-healing mat are invaluable tools. They allow for quick, straight cuts.
Unleash Your Inner Crafter Today
You now have all the knowledge and steps to create your very own beautiful rag garland. This project is a fantastic opportunity to express your creativity and add a personal touch to your home decor. Imagine the possibilities, from seasonal decorations to charming accents for a child’s room.
Don’t let those fabric scraps gather dust any longer. Gather your materials, choose your colors, and start tying your way to a unique, handmade masterpiece. The joy of creating something with your own hands is truly rewarding.
Beginner-friendly templates, step-by-step guides,
and weekly project ideas in your inbox.