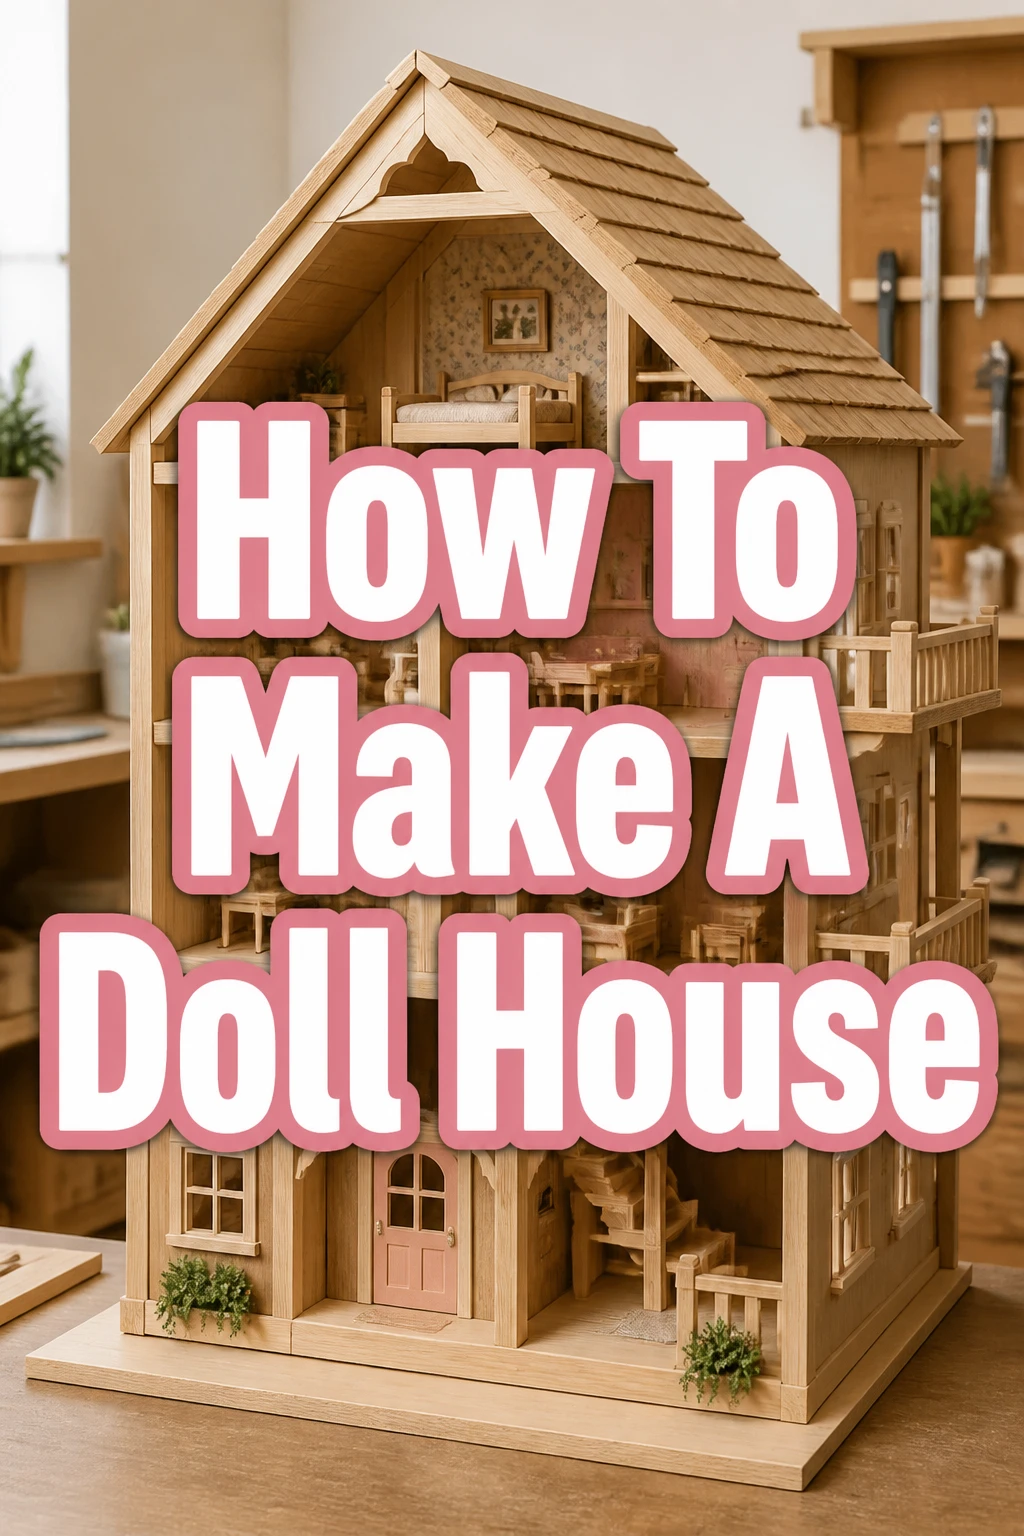
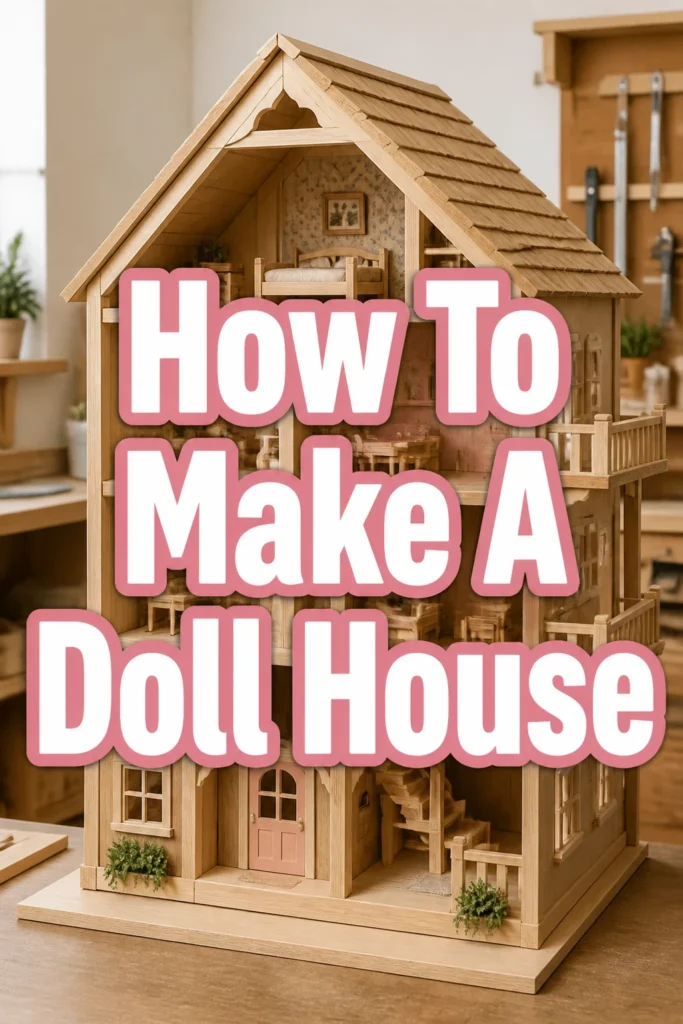
How To Make A Doll House

Beginner-friendly templates, step-by-step guides,
and weekly project ideas in your inbox.
Creating a dollhouse is a truly rewarding project, blending carpentry, design, and a touch of magic.
I’ve built several over the years for family and friends, and the joy they bring is immeasurable.
This guide distills that hands-on experience into practical, easy-to-follow steps, ensuring your dollhouse dream becomes a delightful reality.
Quick Overview
You’re about to embark on building a beautiful, custom dollhouse from scratch. This project offers immense creative freedom, allowing you to design every detail from the structure to the interior decor.
- Time needed: 20-40 hours (spread over several weekends)
- Difficulty: Intermediate
- What you’ll need: Plywood or MDF, basic woodworking tools, wood glue, sandpaper, paint, and decorative elements
Step-by-Step Instructions
Step 1: Plan Your Vision and Design
Before any cutting begins, dedicate ample time to planning. Decide on the overall style, the number of rooms, and the scale of your dollhouse.
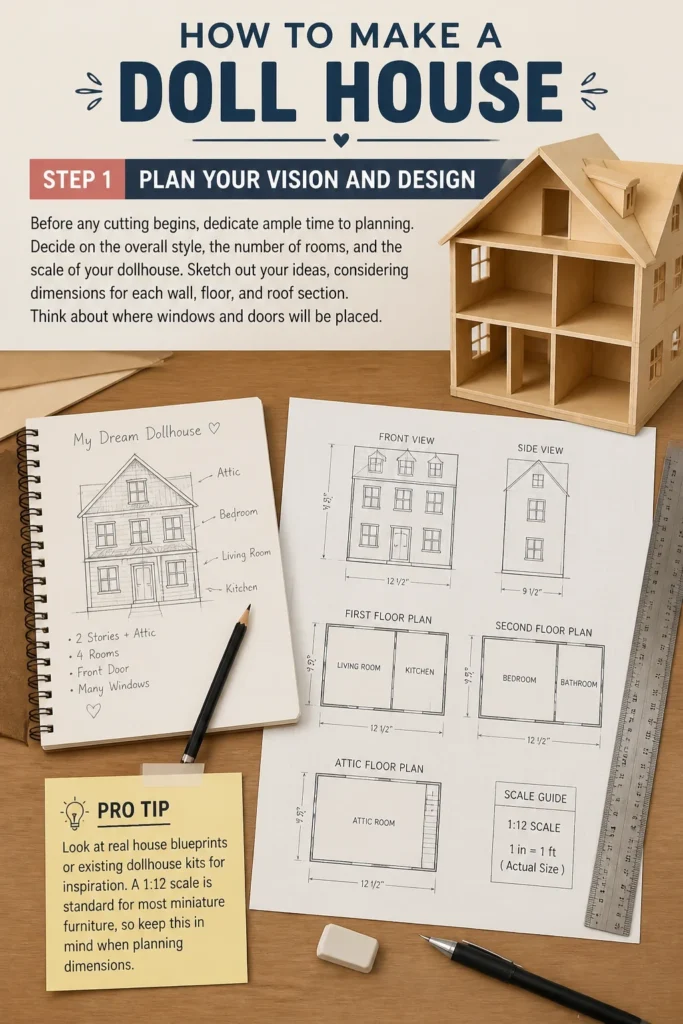
Sketch out your ideas, considering dimensions for each wall, floor, and roof section. Think about where windows and doors will be placed.
Pro Tip: Look at real house blueprints or existing dollhouse kits for inspiration. A 1:12 scale is standard for most miniature furniture, so keep this in mind when planning dimensions.
Step 2: Gather Your Materials and Tools
A successful project starts with the right supplies. You’ll need sheets of plywood or MDF for the main structure, typically 1/4-inch or 1/2-inch thick.
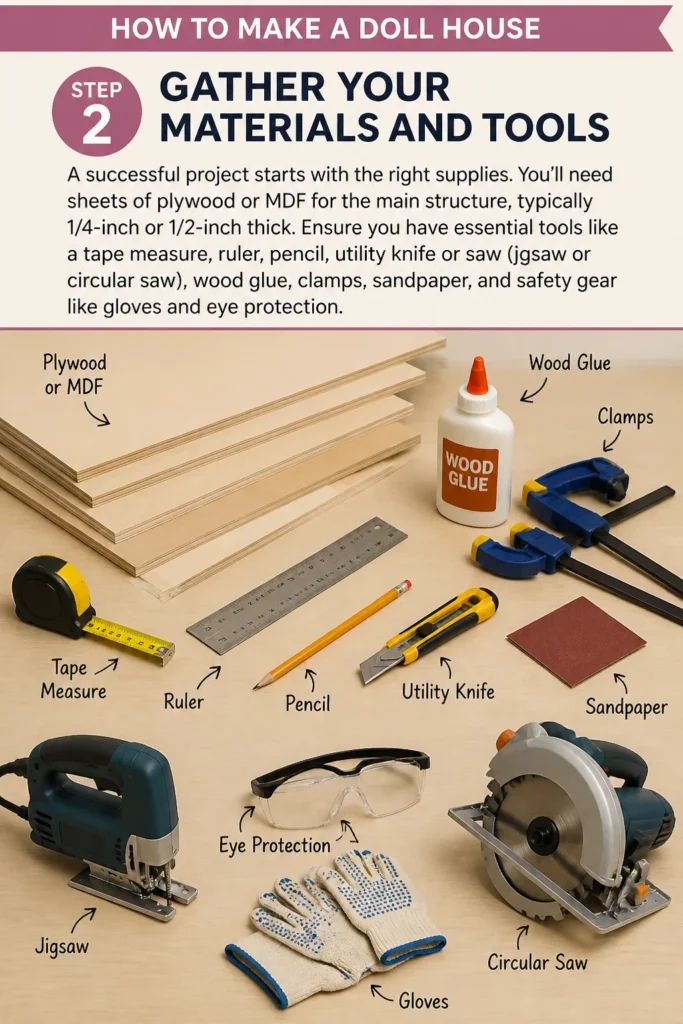
Ensure you have essential tools like a tape measure, ruler, pencil, utility knife or saw (jigsaw or circular saw), wood glue, clamps, sandpaper, and safety gear like gloves and eye protection.
Step 3: Cut the Main Structural Pieces
Carefully measure and mark all your pieces onto your chosen wood. These include the base, side walls, back wall, floor levels, and roof panels.
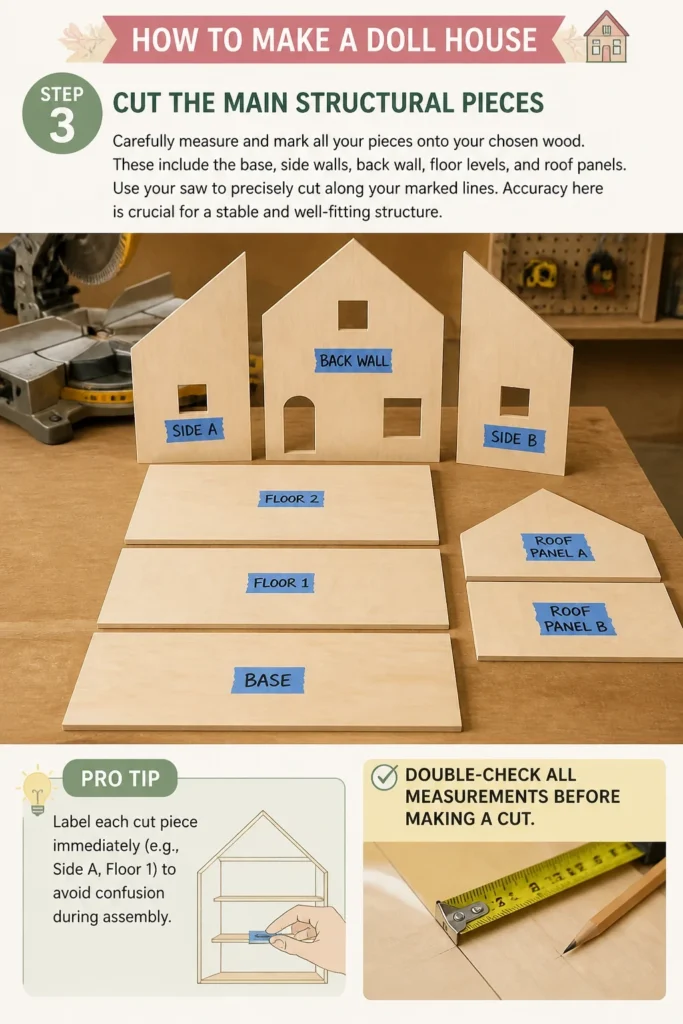
Use your saw to precisely cut along your marked lines. Accuracy here is crucial for a stable and well-fitting structure.
Pro Tip: Label each cut piece immediately (e.g., “Side A,” “Floor 1”) to avoid confusion during assembly. Double-check all measurements before making a cut.
Step 4: Assemble the Basic Shell
Begin by attaching the side walls to the base using wood glue. Apply a thin, even bead of glue along the edges where the pieces will meet.
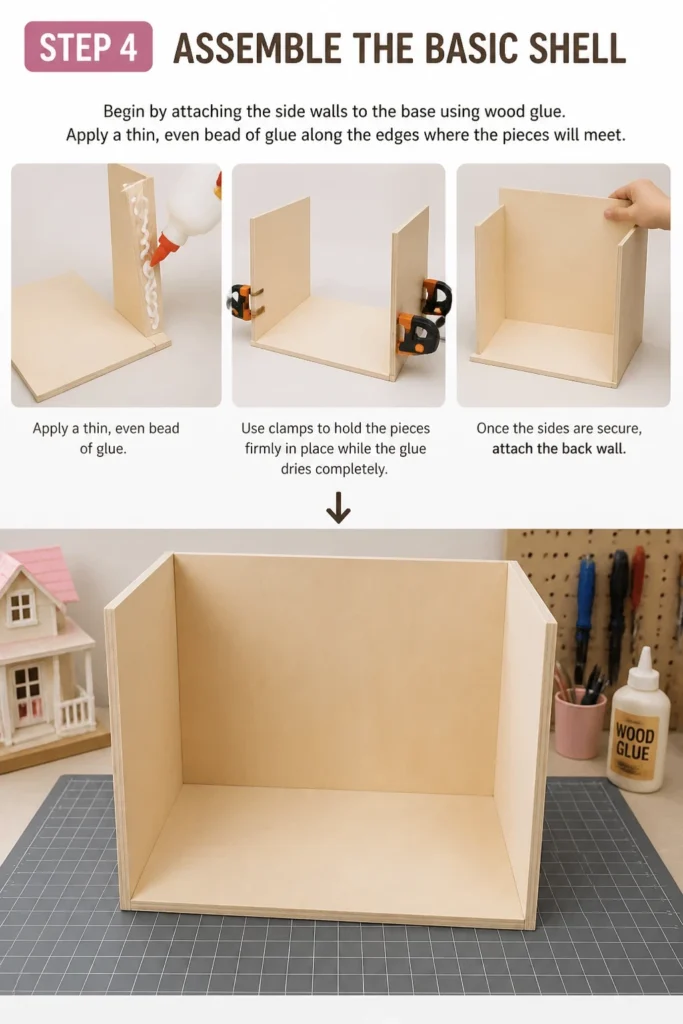
Use clamps to hold the pieces firmly in place while the glue dries completely. Once the sides are secure, attach the back wall.
Step 5: Install Interior Walls and Floors
With the exterior shell stable, it’s time to define the rooms. Measure and cut your interior floor pieces and room dividers.
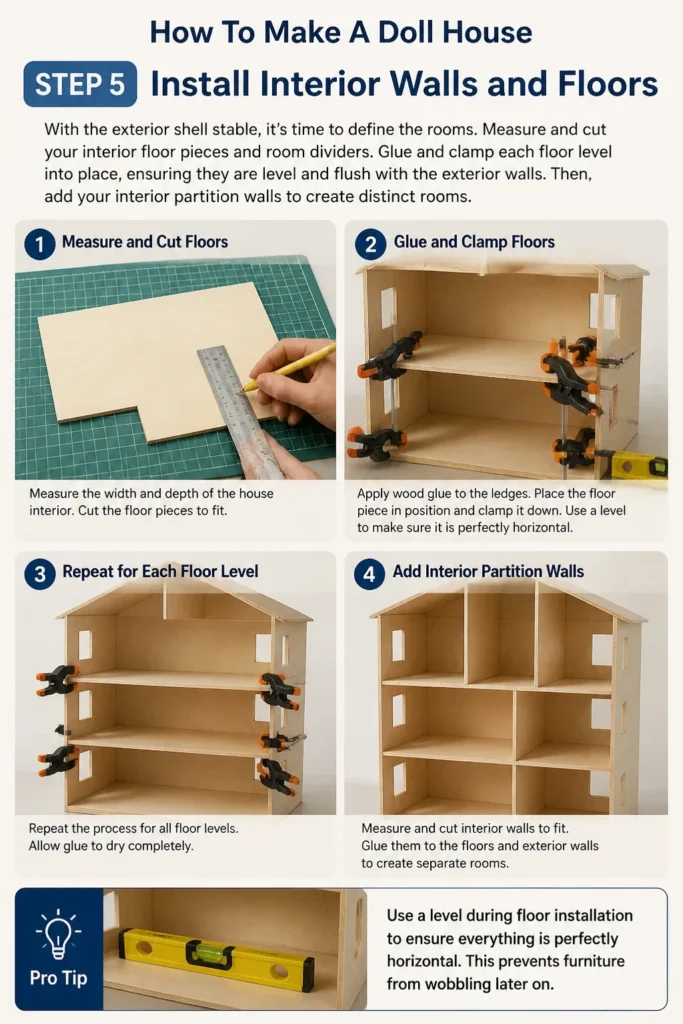
Glue and clamp each floor level into place, ensuring they are level and flush with the exterior walls. Then, add your interior partition walls to create distinct rooms.
Pro Tip: Use a level during floor installation to ensure everything is perfectly horizontal. This prevents furniture from wobbling later on.
Step 6: Create Window and Door Openings
Refer back to your design plan for window and door placements. Mark the precise locations and sizes on your walls.
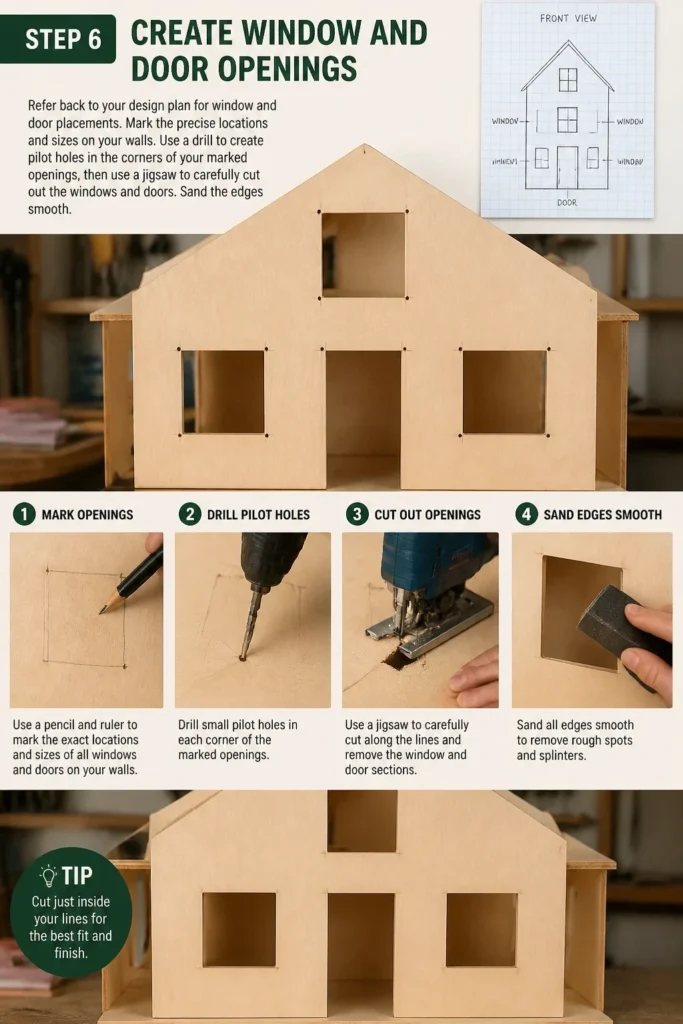
Use a drill to create pilot holes in the corners of your marked openings, then use a jigsaw to carefully cut out the windows and doors. Sand the edges smooth.
Step 7: Attach the Roof Structure
The roof adds character and completes the house. Depending on your design, this might involve two sloped panels meeting at a ridge, or a flat roof.
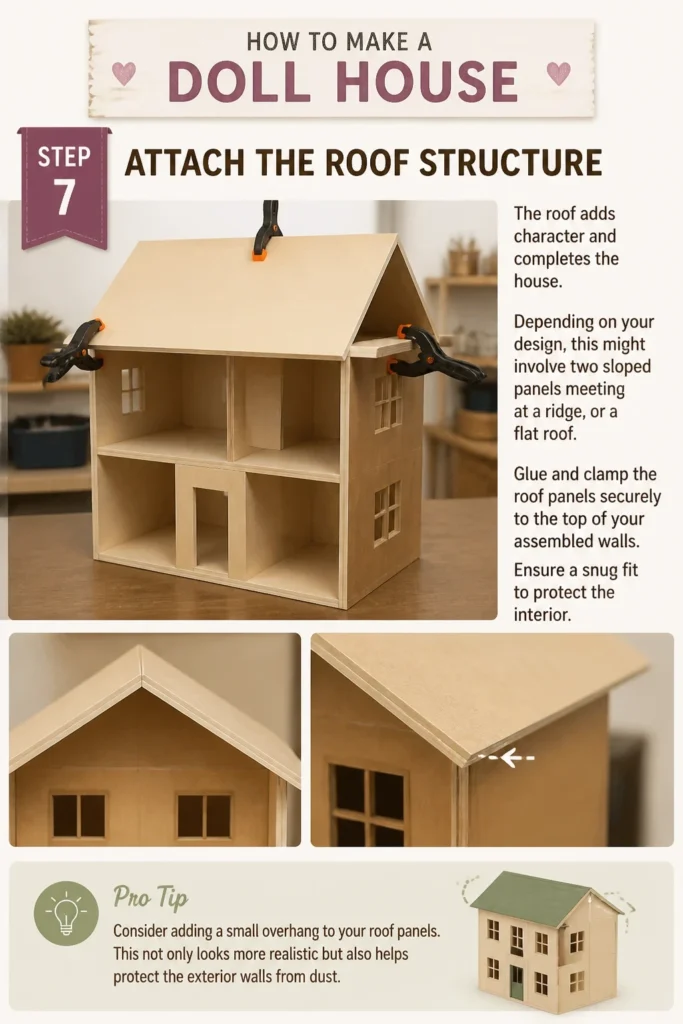
Glue and clamp the roof panels securely to the top of your assembled walls. Ensure a snug fit to protect the interior.
Pro Tip: Consider adding a small overhang to your roof panels. This not only looks more realistic but also helps protect the “exterior” walls from dust.
Step 8: Sand and Prepare for Finishing
Once all structural components are assembled and the glue is dry, thoroughly sand the entire dollhouse. Start with a medium-grit sandpaper and finish with a fine-grit.
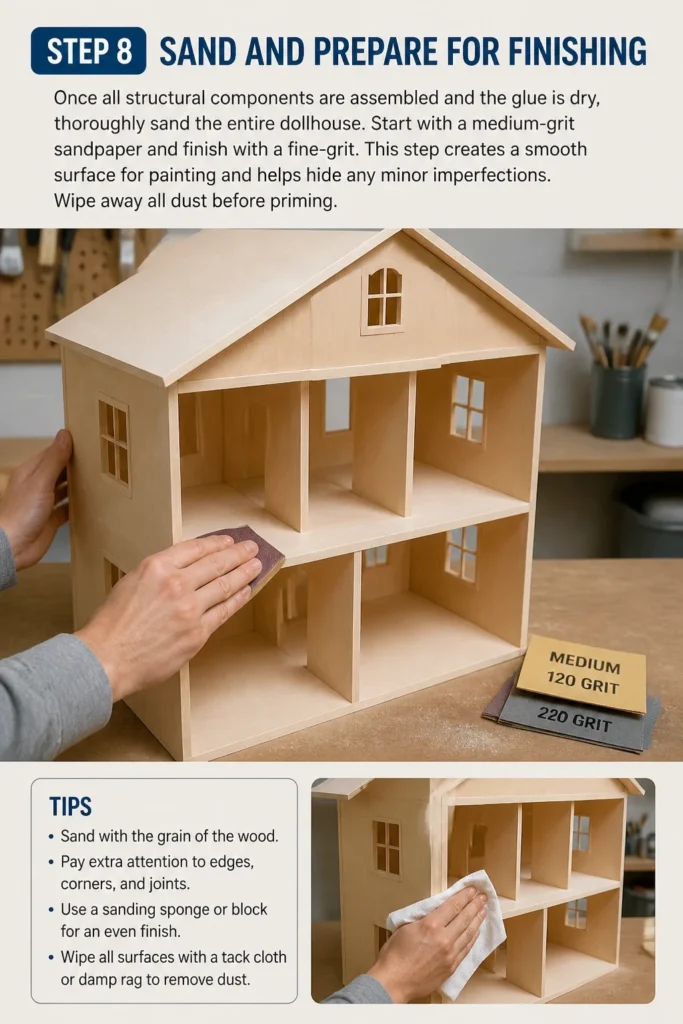
This step creates a smooth surface for painting and helps hide any minor imperfections. Wipe away all dust before priming.
Step 9: Prime, Paint, and Decorate
Apply a coat of primer to all surfaces, inside and out. This helps the paint adhere better and provides an even finish.
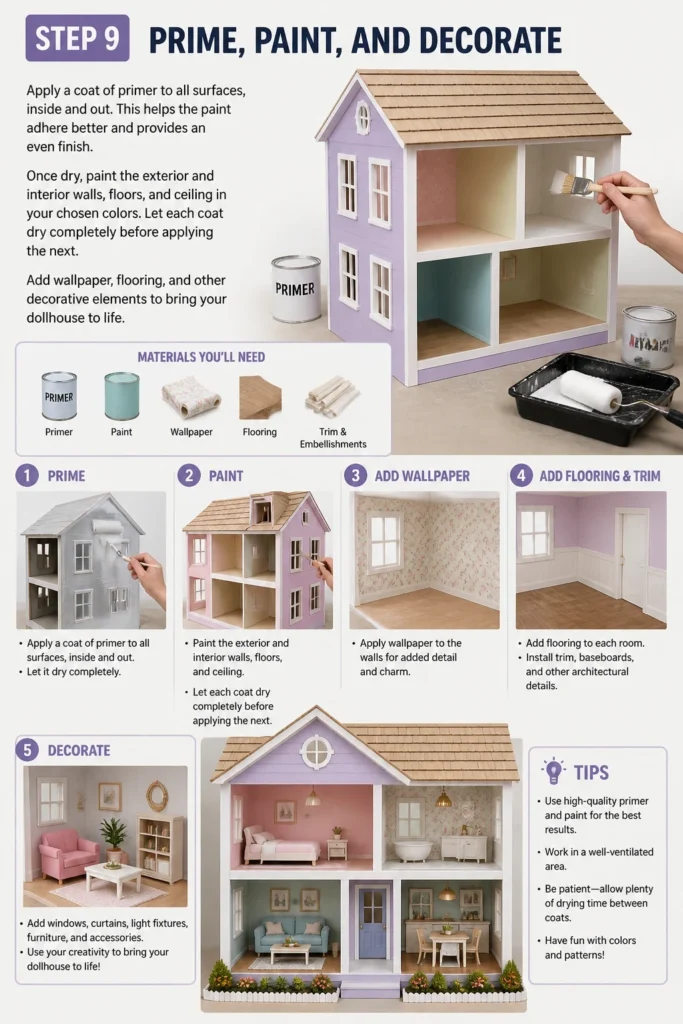
Once dry, paint the exterior and interior walls, floors, and ceiling in your chosen colors. Let each coat dry completely before applying the next.
Add wallpaper, flooring, and other decorative elements to bring your dollhouse to life.
Step 10: Add Finishing Touches and Details
This is where your dollhouse truly becomes a home. Install miniature window frames, door frames, and any exterior trim.
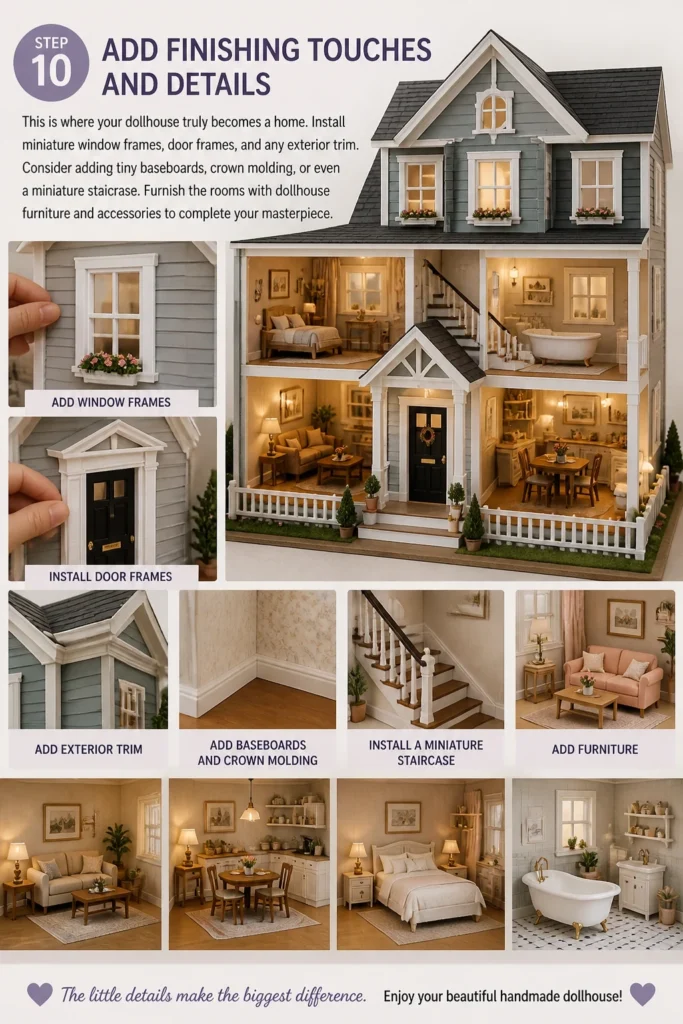
Consider adding tiny baseboards, crown molding, or even a miniature staircase. Furnish the rooms with dollhouse furniture and accessories to complete your masterpiece.
Common Mistakes to Avoid
Poor Planning and Scaling
Rushing the design phase often leads to frustrating rework. Without a clear plan and accurate scaling, rooms might end up too small for furniture, or walls might not align properly.
Take your time with sketches, measure twice, and consider the scale of your furniture from the outset to avoid ill-fitting pieces later.
Inadequate Glue Application
Using too little glue, or applying it unevenly, can result in a flimsy structure that falls apart over time. Conversely, using too much glue creates messy drips and can warp thinner wood.
Apply a thin, consistent bead of quality wood glue, then wipe away any excess immediately with a damp cloth for strong, clean joints.
Skipping Sanding and Priming
Neglecting to properly sand and prime the wood before painting will lead to a rough, uneven finish. Paint won’t adhere well, and imperfections will show through, detracting from the overall appearance.
Invest the time in thorough sanding with progressively finer grits and apply a good quality primer to ensure a smooth, professional-looking paint job.
Rushing the Drying Process
Impatience is a dollhouse builder’s enemy. Not allowing glue or paint to fully dry between steps can compromise the structural integrity or ruin your finish with smudges and uneven coats.
Always follow the manufacturer’s recommendations for drying times. Patience ensures a durable and beautifully finished dollhouse.
Troubleshooting
Wobbly or Uneven Structure
If your dollhouse feels unstable or leaning, it often points to uneven cuts or insufficient drying time for glue. Re-evaluate your joints for gaps or areas where glue didn’t fully set.
You can reinforce wobbly joints with small L-brackets on the inside corners or by applying additional wood glue and clamping securely, allowing ample drying time.
Paint Bleeding Under Masking Tape
When painting different colors, paint can sometimes seep under masking tape, creating messy lines. This usually happens if the tape isn’t pressed down firmly enough or if the paint is too thin.
Ensure masking tape is firmly adhered along its entire edge. For extra crisp lines, paint a thin layer of your base color over the tape edge first to seal it, let it dry, then apply your new color.
Ill-Fitting Windows or Doors
If your cut openings are slightly too large or too small for your chosen miniature windows and doors, don’t despair. Minor adjustments are possible.
For openings that are too small, carefully sand or file the edges until the piece fits. If an opening is slightly too large, you can use wood filler around the edges to narrow the gap before painting.
Key Takeaways
- Thorough planning and accurate measurements are fundamental to success.
- Quality materials and proper tool usage ensure a durable and attractive dollhouse.
- Patience during assembly, drying, and finishing stages yields the best results.
- Don’t underestimate the importance of sanding and priming for a professional finish.
- Personalize your dollhouse with unique decorations to make it truly special.
Frequently Asked Questions
What is the best type of wood for a dollhouse?
Plywood and MDF (medium-density fiberboard) are popular choices. Plywood offers strength and a natural wood grain, while MDF is very smooth, takes paint well, and is less prone to warping. Both are excellent, but MDF is often easier for beginners to cut cleanly.
What scale should I build my dollhouse to?
The most common scale is 1:12, also known as “one inch scale,” where one inch in the dollhouse equals one foot in real life. This scale offers a vast selection of miniature furniture and accessories. Other scales like 1:24 (half-inch scale) or 1:48 (quarter-inch scale) are also available but have fewer accessories.
Is it safe for children to play with a homemade dollhouse?
Yes, if constructed with safety in mind. Ensure all edges are sanded smooth, and there are no sharp points. Use non-toxic paints and glues. If the dollhouse is for very young children, avoid small, detachable parts that could pose a choking hazard. Always supervise play.
How much does it cost to build a dollhouse?
The cost varies widely depending on the size, complexity, and materials chosen. A basic dollhouse using plywood and simple finishes might cost $100-$300 for materials. More elaborate designs with intricate details, high-quality wood, and extensive decorations could easily run $500 or more. Remember to factor in tools if you don’t already own them.
Our Top Recommended Finds
- Titebond III Ultimate Wood Glue: An excellent, strong wood glue that is also water-resistant, making it ideal for durable joints.
- X-Acto Knife Set: Indispensable for precise cuts on small details, trimming wallpaper, or creating intricate window frames.
- Random Orbital Sander: Speeds up the sanding process significantly and provides a much smoother finish than hand sanding alone.
Your Dollhouse Journey Begins
Crafting a dollhouse is more than just a project; it’s an opportunity to create a miniature world filled with imagination and personal touches. The satisfaction of seeing your vision come to life, piece by painstaking piece, is truly unparalleled.
Whether it’s a gift for a loved one or a cherished display piece for yourself, the effort you put in will be rewarded with years of enjoyment.
Gather your tools, embrace your creativity, and start building your dream dollhouse today!
Beginner-friendly templates, step-by-step guides,
and weekly project ideas in your inbox.