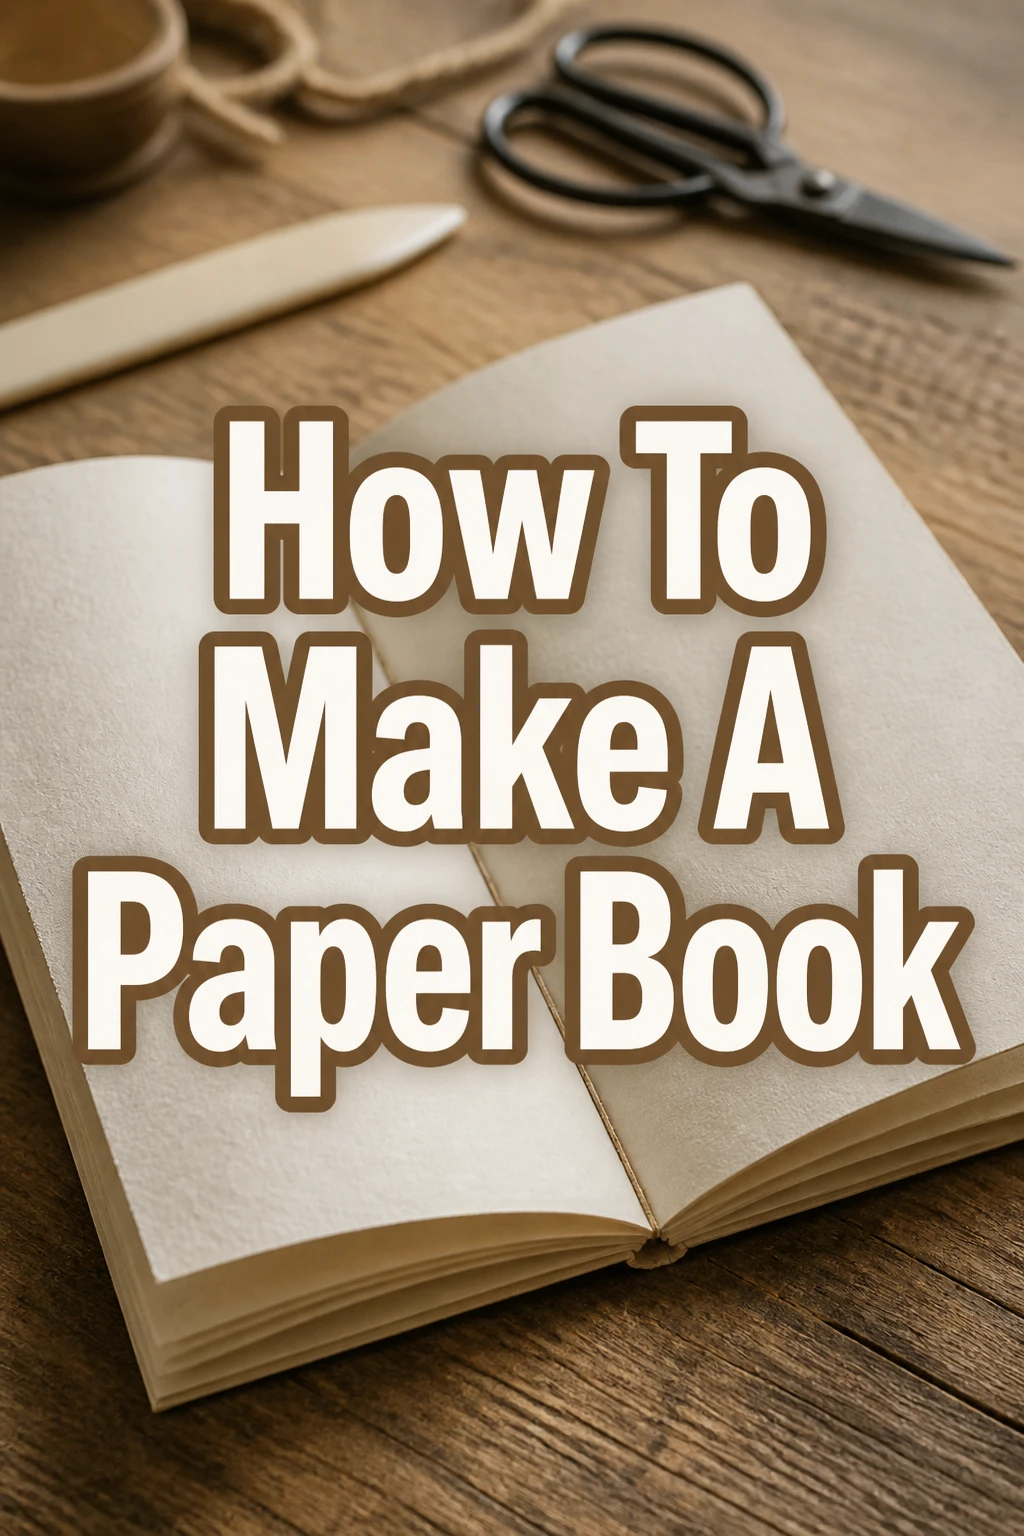
How To Make A Paper Book

Beginner-friendly templates, step-by-step guides,
and weekly project ideas in your inbox.
There’s a unique satisfaction in holding a book you’ve created with your own hands.
From the tactile feel of the paper to the personal touch of its binding, it’s a project that brings ideas to life.
I’ve spent countless hours in my studio, experimenting with different papers and bindings, and I’m excited to share a straightforward method that has always yielded beautiful results for me.
Quick Overview
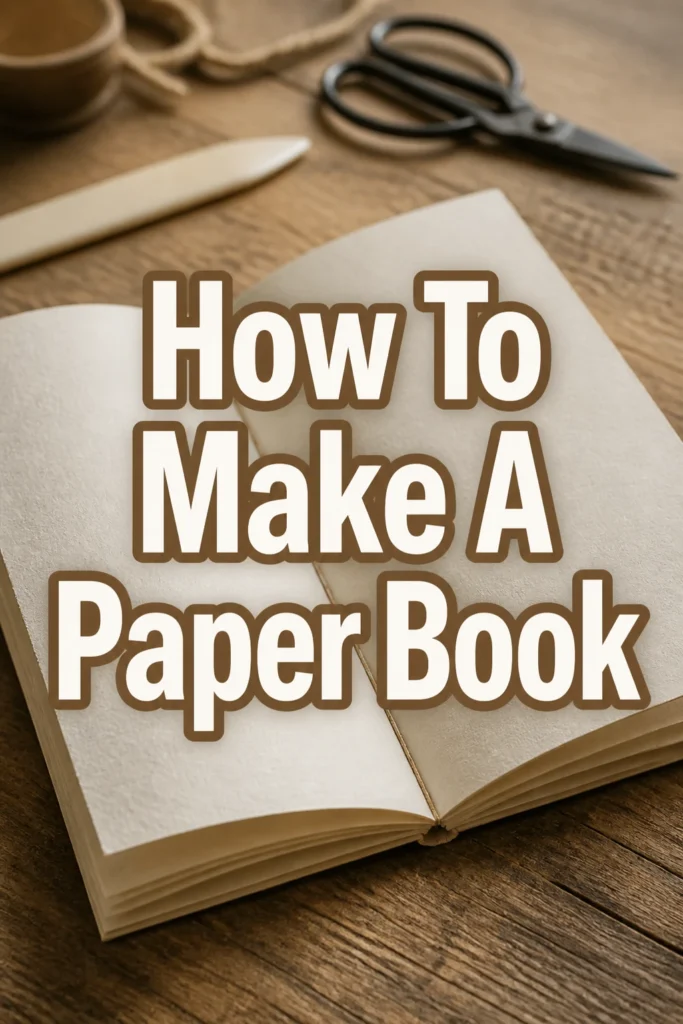
This guide will walk you through crafting a simple, yet elegant paper book. You’ll learn how to prepare your materials, assemble your pages, bind them securely, and add a professional finish.
By the end, you’ll have a custom paper book perfect for journaling, sketching, or gifting.
- Time needed: 2-4 hours (depending on complexity and drying time)
- Difficulty: Beginner to Intermediate
- What you’ll need: Paper, cardstock, ruler, cutting tool, bone folder, needle, thread, glue
Step-by-Step Instructions
Step 1: Gather Your Materials
Collect all your necessary supplies before you begin. Having everything at hand streamlines the process and prevents interruptions.
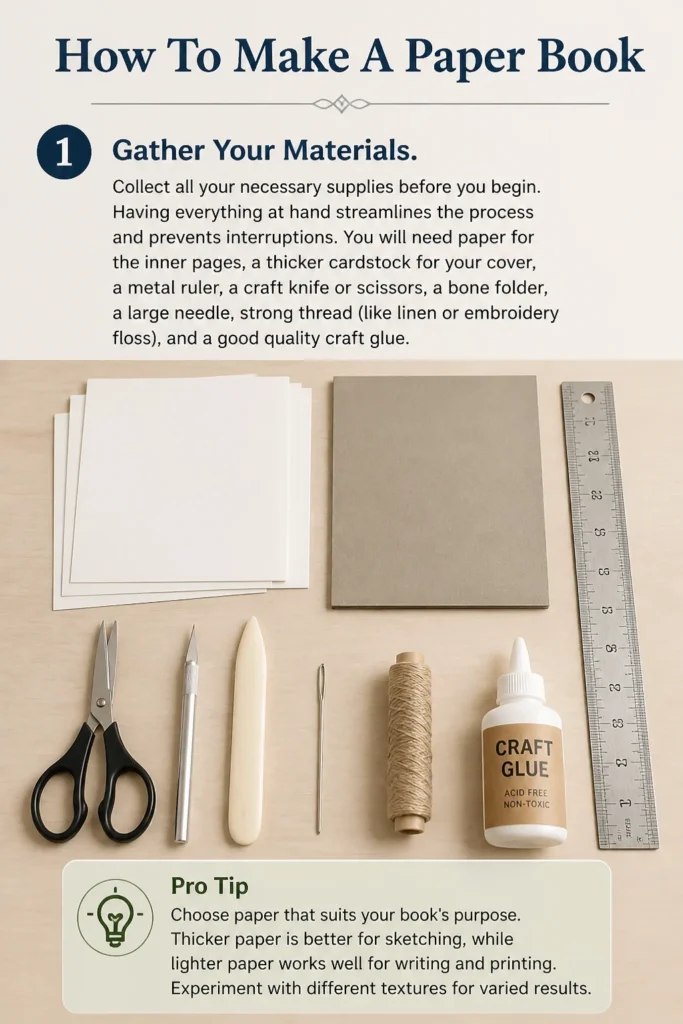
You will need paper for the inner pages, a thicker cardstock for your cover, a metal ruler, a craft knife or scissors, a bone folder, a large needle, strong thread (like linen or embroidery floss), and a good quality craft glue.
Pro Tip: Choose paper that suits your book’s purpose. Thicker paper is better for sketching, while lighter paper works well for writing and printing. Experiment with different textures for varied results.
Step 2: Prepare Your Pages
Decide on the final size of your book. A common size is A5, which means your original sheets should be A4 if you plan to fold them in half.
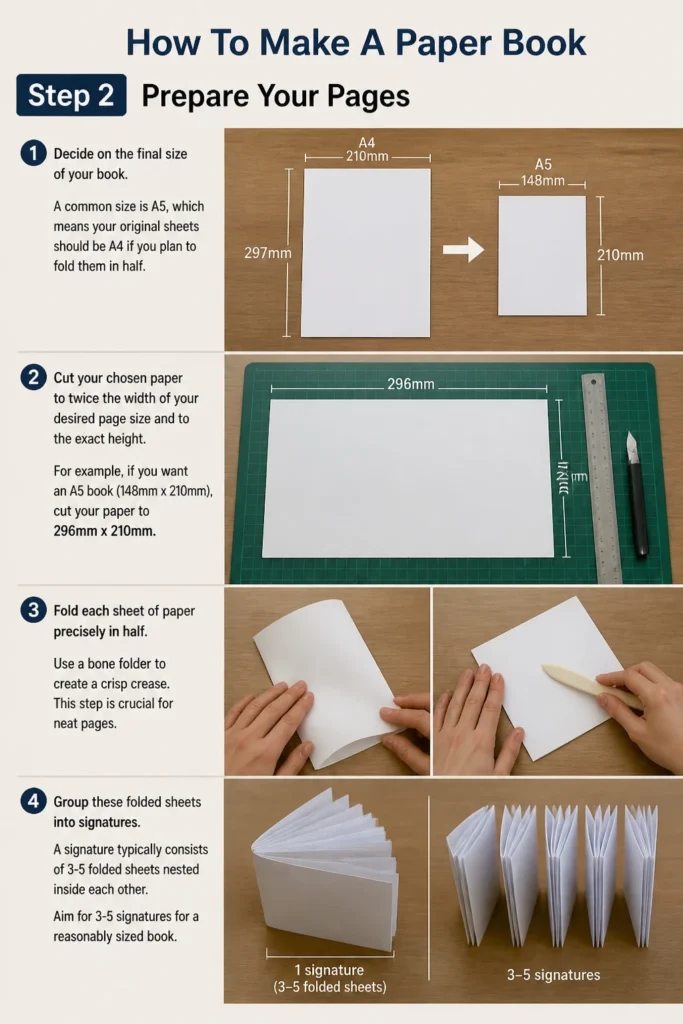
Cut your chosen paper to twice the width of your desired page size and to the exact height. For example, if you want an A5 book (148mm x 210mm), cut your paper to 296mm x 210mm.
Fold each sheet of paper precisely in half. Use a bone folder to create a crisp crease. This step is crucial for neat pages.
Group these folded sheets into “signatures.” A signature typically consists of 3-5 folded sheets nested inside each other. Aim for 3-5 signatures for a reasonably sized book.
Step 3: Create Your Book Cover
Select a sturdy piece of cardstock for your cover. This will protect your pages and give your book a professional look.
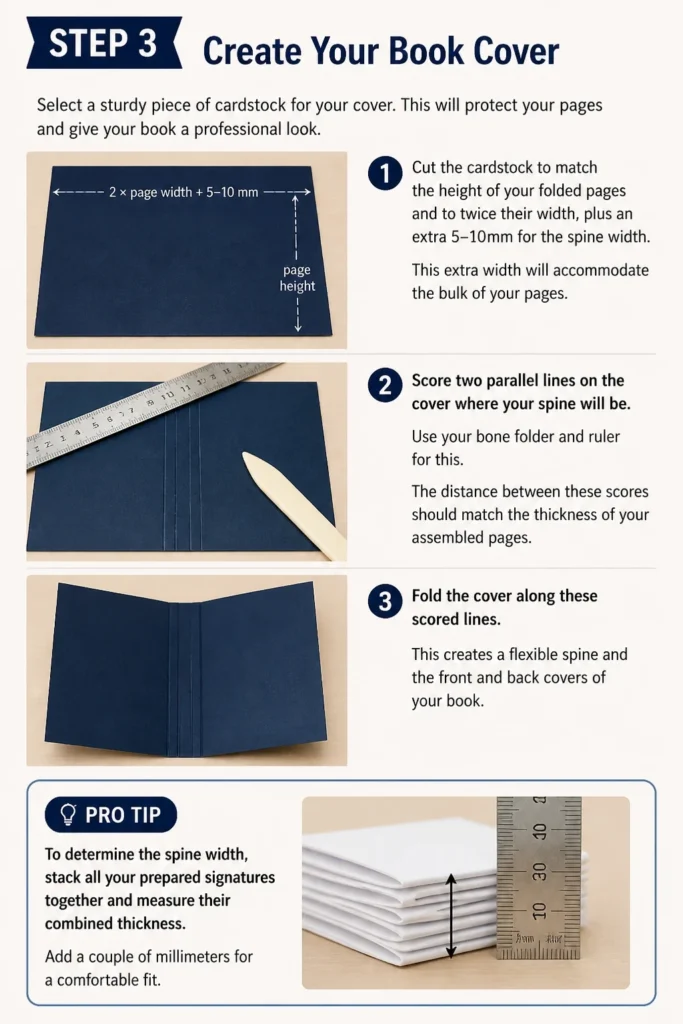
Cut the cardstock to match the height of your folded pages and to twice their width, plus an extra 5-10mm for the spine width. This extra width will accommodate the bulk of your pages.
Score two parallel lines on the cover where your spine will be. Use your bone folder and ruler for this. The distance between these scores should match the thickness of your assembled pages.
Fold the cover along these scored lines. This creates a flexible spine and the front and back covers of your book.
Pro Tip: To determine the spine width, stack all your prepared signatures together and measure their combined thickness. Add a couple of millimeters for a comfortable fit.
Step 4: Assemble and Align Your Book Block
Nest your prepared signatures inside each other, forming a complete book block. Ensure all the folds are aligned perfectly.
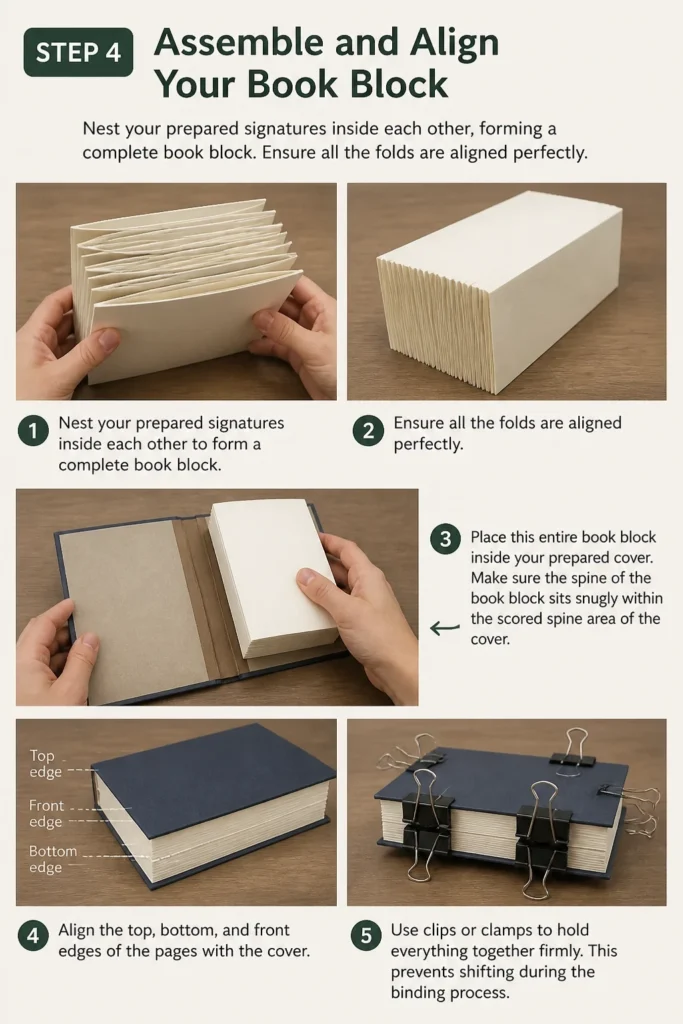
Place this entire book block inside your prepared cover. Make sure the spine of the book block sits snugly within the scored spine area of the cover.
Align the top, bottom, and front edges of the pages with the cover. Use clips or clamps to hold everything together firmly. This prevents shifting during the binding process.
Step 5: Prepare for Binding (Punching Holes)
Mark your binding holes along the spine. For a simple saddle stitch, you’ll want at least three holes: one in the center, and two others spaced equally above and below it, about 1-2 cm from the top and bottom edges.
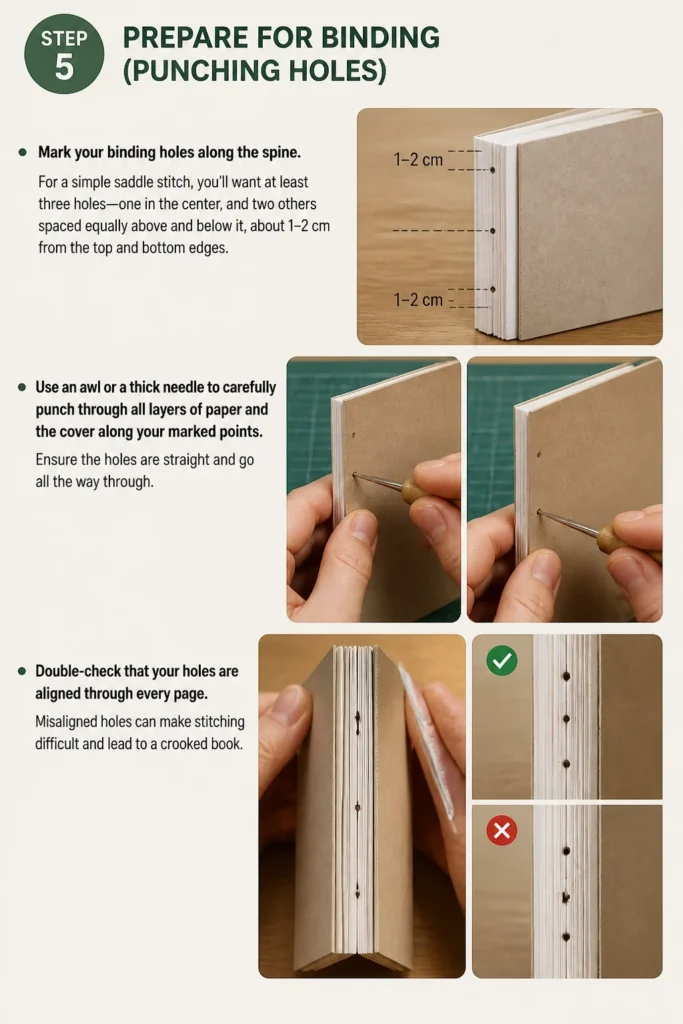
Use an awl or a thick needle to carefully punch through all layers of paper and the cover along your marked points. Ensure the holes are straight and go all the way through.
Double-check that your holes are aligned through every page. Misaligned holes can make stitching difficult and lead to a crooked book.
Step 6: Stitch Your Book
Thread your needle with a piece of strong thread, roughly three times the height of your book. Do not knot the end yet.
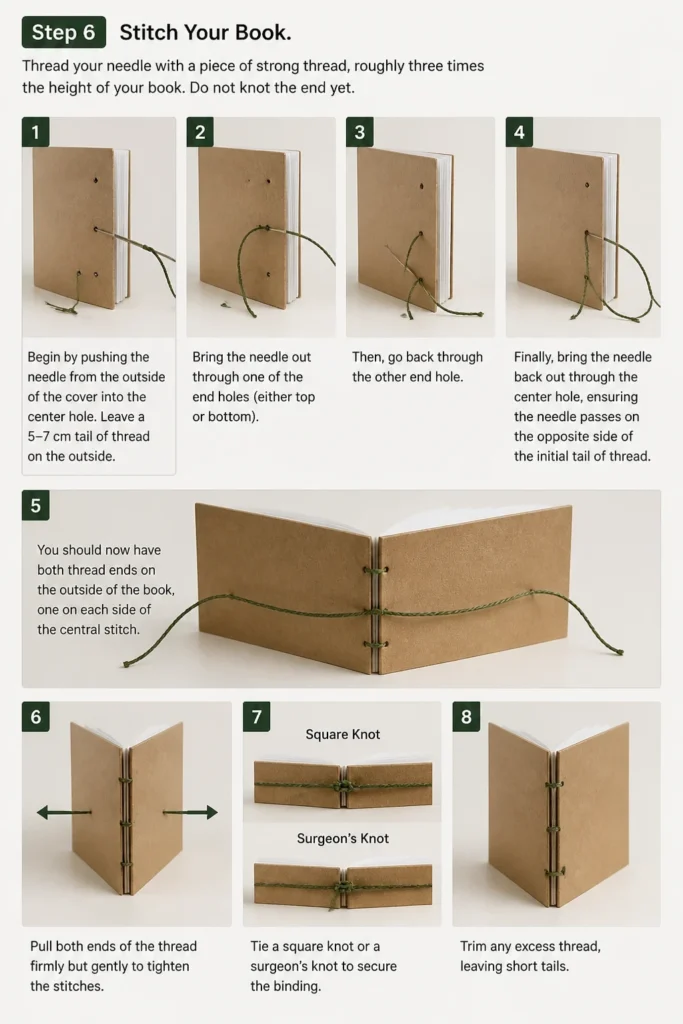
Begin by pushing the needle from the outside of the cover into the center hole. Leave a 5-7 cm tail of thread on the outside.
Bring the needle out through one of the end holes (either top or bottom). Then, go back through the other end hole.
Finally, bring the needle back out through the center hole, ensuring the needle passes on the opposite side of the initial tail of thread. You should now have both thread ends on the outside of the book, one on each side of the central stitch.
Pull both ends of the thread firmly but gently to tighten the stitches. Tie a square knot or a surgeon’s knot to secure the binding. Trim any excess thread, leaving short tails.
Step 7: Trim and Finish the Edges
Inspect your book’s edges. They might be slightly uneven from folding and cutting.
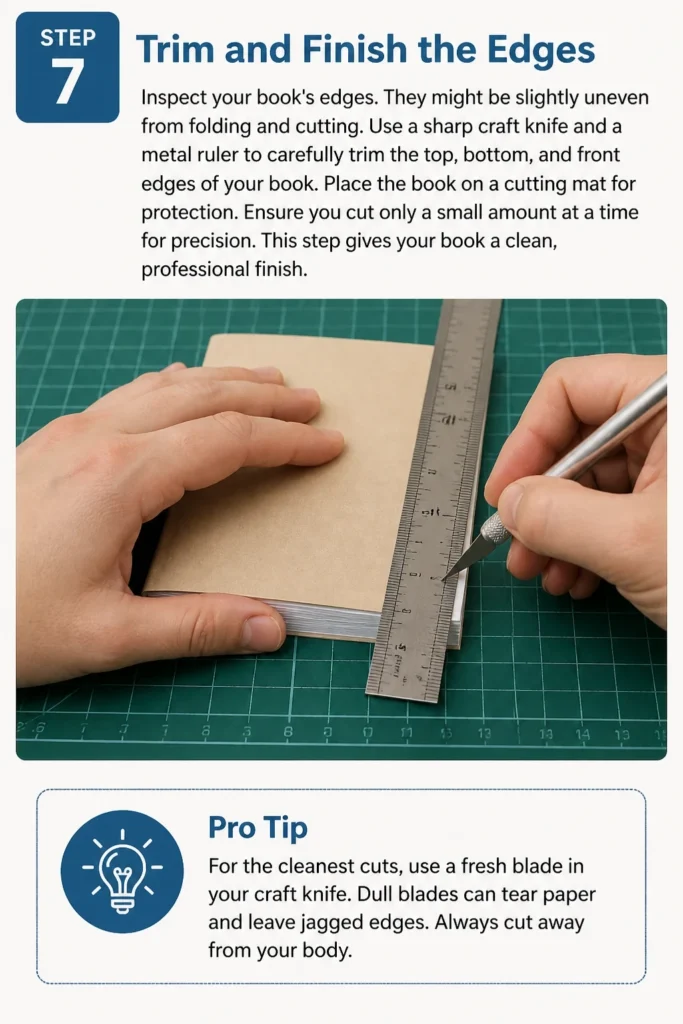
Use a sharp craft knife and a metal ruler to carefully trim the top, bottom, and front edges of your book. Place the book on a cutting mat for protection.
Ensure you cut only a small amount at a time for precision. This step gives your book a clean, professional finish.
Pro Tip: For the cleanest cuts, use a fresh blade in your craft knife. Dull blades can tear paper and leave jagged edges. Always cut away from your body.
Step 8: Add Finishing Touches (Optional)
Consider adding endpapers to your book. These are decorative sheets of paper glued to the inside of the cover and the first/last pages of your book block.
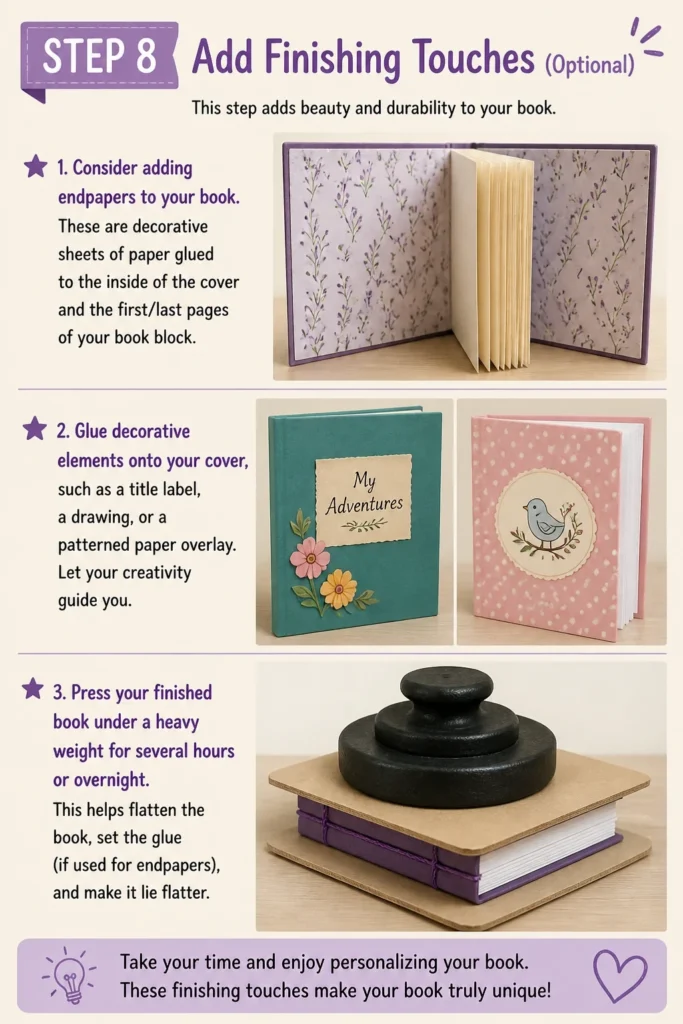
Glue decorative elements onto your cover, such as a title label, a drawing, or a patterned paper overlay. Let your creativity guide you.
Press your finished book under a heavy weight for several hours or overnight. This helps flatten the book, set the glue (if used for endpapers), and make it lie flatter.
Common Mistakes to Avoid
Inconsistent Page Sizes
If your pages are not all the same size and folded precisely, your finished book will look messy and uneven. Take your time during the cutting and folding stages, using a ruler and bone folder for accuracy on every single sheet.
Misaligned Punch Holes
Punching holes without proper alignment can make stitching incredibly frustrating. It can also lead to a crooked spine or pages that don’t sit correctly. Always clamp your book block and cover together tightly and use a consistent guide for marking your holes.
Loose Stitching
A book with loose stitching will fall apart easily. Make sure to pull your thread firmly after each pass and before tying the final knot. However, avoid pulling so hard that you tear the paper, especially with thinner stock.
Rushing the Cutting Process
Trying to cut all edges at once, or rushing with a dull blade, often results in uneven, torn, or jagged edges. Always use a very sharp blade, a metal ruler, and make several shallow passes rather than one deep cut. Patience here pays off immensely.
Troubleshooting
Pages are Uneven After Trimming
This usually happens if the initial cuts were not straight or if the book shifted during trimming. The best approach is to re-clamp the book firmly and make very light, controlled passes with a fresh, sharp blade. Take off only the smallest amount necessary to straighten the edge.
Thread Breaks During Stitching
Breaking thread can indicate that the thread is too thin for the tension, or the holes are too small, causing friction. Try using a stronger, waxed thread, or slightly enlarge your punch holes with your awl before stitching. Ensure your needle doesn’t have any burrs that could snag the thread.
Book Doesn’t Lie Flat
A book that doesn’t lie flat often means the spine was too narrow for the number of pages, or it wasn’t pressed properly. Ensure your cover’s spine width adequately accommodates all pages. After binding, always place your finished book under heavy weights for at least a few hours to help it settle and flatten.
Key Takeaways
- Precision in cutting and folding is vital for a professional-looking book.
- Use a bone folder to create crisp creases on all pages and the cover.
- Careful alignment of pages and cover before punching holes prevents crooked binding.
- Strong, waxed thread is ideal for durability in bookbinding.
- Securely tighten stitches but avoid tearing the paper.
- Trimming edges with a sharp craft knife provides a clean, finished appearance.
- Pressing the completed book under weight helps it lie flat and sets any glue.
Frequently Asked Questions
Can I use a regular stapler instead of stitching?
For very thin pamphlets or zines, a long-reach stapler can work for saddle stitching. However, for anything with more than 10-15 pages, staples can become bulky, tear out easily, and don’t offer the same durability or aesthetic as hand-stitching. Hand-stitching is generally preferred for a more robust and traditional book feel.
What type of paper is best for the inner pages?
The best paper depends on your book’s purpose. For sketching, a heavier, toothier paper (like 80-100lb text weight) is good. For writing or printing, a smoother, lighter paper (20-28lb bond or 60-70lb text weight) works well. Always consider how the paper will hold ink or other mediums.
How can I make my book more durable?
To increase durability, use thicker cardstock for the cover and stronger, acid-free paper for the pages. Waxed linen thread is excellent for binding as it resists fraying. You can also add endpapers with strong PVA glue, which reinforces the connection between the book block and cover. For even more protection, consider a hard cover.
Do I need special tools, or can I use household items?
While specialized tools like an awl and bone folder make the process easier and more precise, you can often substitute household items. A thick needle or small drill bit can replace an awl. The back of a spoon or a dull knife can be used to crease paper instead of a bone folder. Just ensure your substitutions are clean and don’t damage the paper.
Our Top Recommended Finds
- Bone Folder: Essential for crisp creases, making your folds look professional and clean.
- Craft Knife with Extra Blades: A sharp blade is paramount for clean, straight cuts on your pages and cover.
- Waxed Linen Thread: This strong, durable thread is ideal for binding, preventing fraying and providing a lasting hold.
Start Your Bookbinding Journey Today
Creating your own paper book is a rewarding experience, blending craft with creativity.
This guide provides a solid foundation, opening the door to endless possibilities for personalizing your journals, sketchbooks, or unique gifts.
Now that you have the steps, gather your materials and begin crafting your very first paper book. You might discover a new passion for bookbinding.
Beginner-friendly templates, step-by-step guides,
and weekly project ideas in your inbox.