How To Cut Sleeves Off Tshirt

Beginner-friendly templates, step-by-step guides,
and weekly project ideas in your inbox.
Thinking about giving an old t-shirt a fresh look?
Cutting off the sleeves is a simple, effective way to transform your wardrobe.
I’ve personally revamped countless tees this way, from gym shirts to casual summer tops, and I’m here to guide you through achieving a clean, stylish finish every time.
Quick Overview
You’re about to learn how to skillfully remove t-shirt sleeves, turning a standard tee into a tank top, muscle shirt, or vest.
This guide will help you achieve a polished look, whether you prefer a raw edge or a more finished hem.
- Time needed: 15-30 minutes
- Difficulty: Beginner
- What you’ll need: T-shirt, sharp fabric scissors, tailor’s chalk or marker, ruler/straight edge, optional: pins, sewing machine/needle and thread.
Step-by-Step Instructions
Step 1: Choose Your T-Shirt Wisely
Start by selecting the right t-shirt for your project. Cotton or cotton-blend shirts work best as they are easy to cut and less prone to fraying excessively.
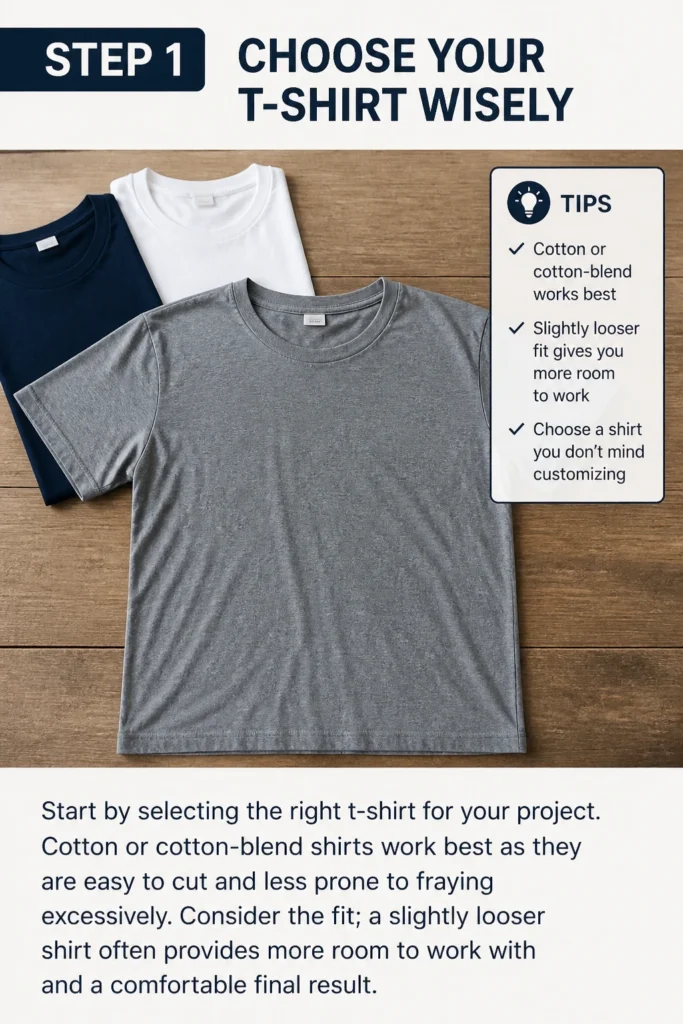
Consider the fit; a slightly looser shirt often provides more room to work with and a comfortable final result.
Step 2: Try On and Mark Your Desired Cut Line
Put the t-shirt on and stand in front of a mirror. This is crucial for visualizing where you want the new armhole to sit.
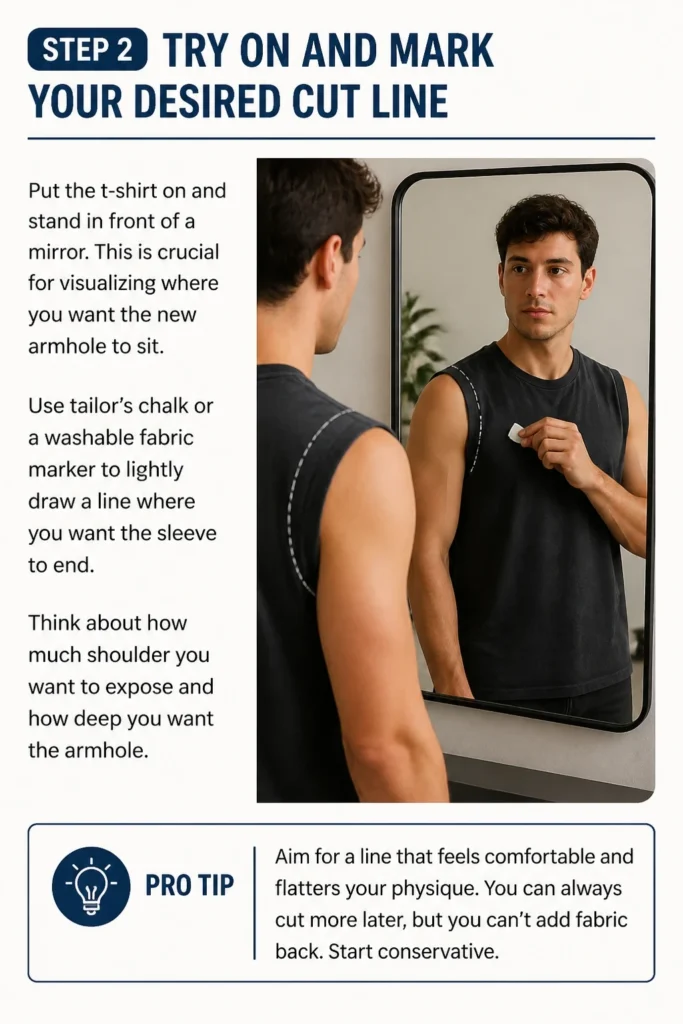
Use tailor’s chalk or a washable fabric marker to lightly draw a line where you want the sleeve to end. Think about how much shoulder you want to expose and how deep you want the armhole.
Pro Tip: Aim for a line that feels comfortable and flatters your physique. You can always cut more later, but you can’t add fabric back. Start conservative.
Step 3: Lay the T-Shirt Flat and Smooth
Take the t-shirt off and lay it flat on a clean, hard surface. Ensure there are no wrinkles or creases, especially around the armhole area.
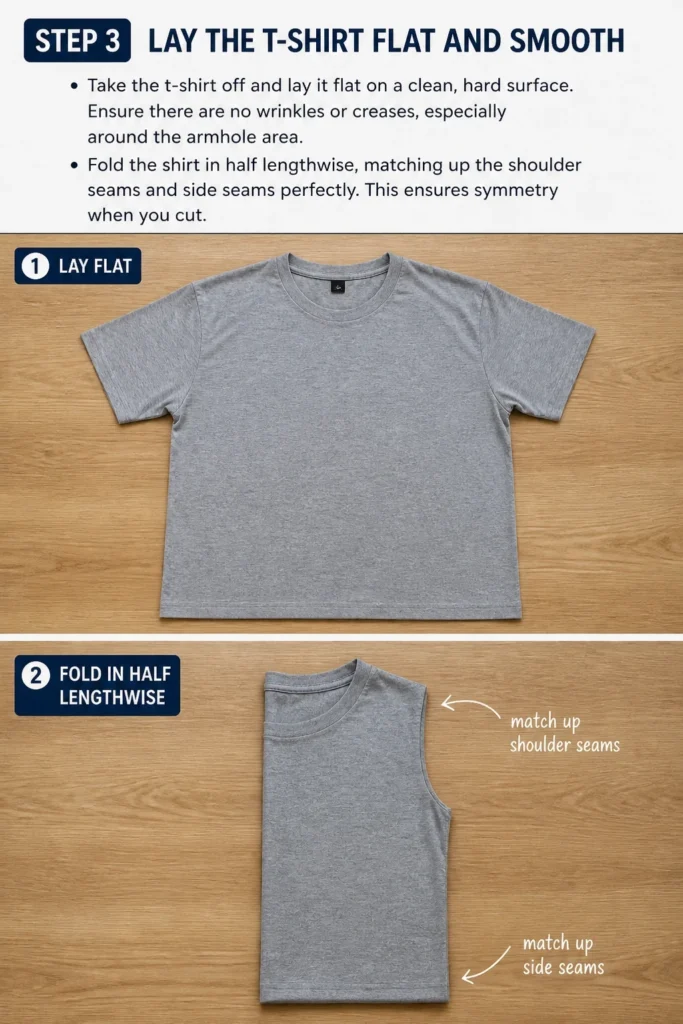
Fold the shirt in half lengthwise, matching up the shoulder seams and side seams perfectly. This ensures symmetry when you cut.
Step 4: Refine Your Cut Line
With the shirt folded, re-evaluate your marked line. Use a ruler or straight edge to create a smooth, even curve from the bottom of the existing armpit seam up towards the shoulder.
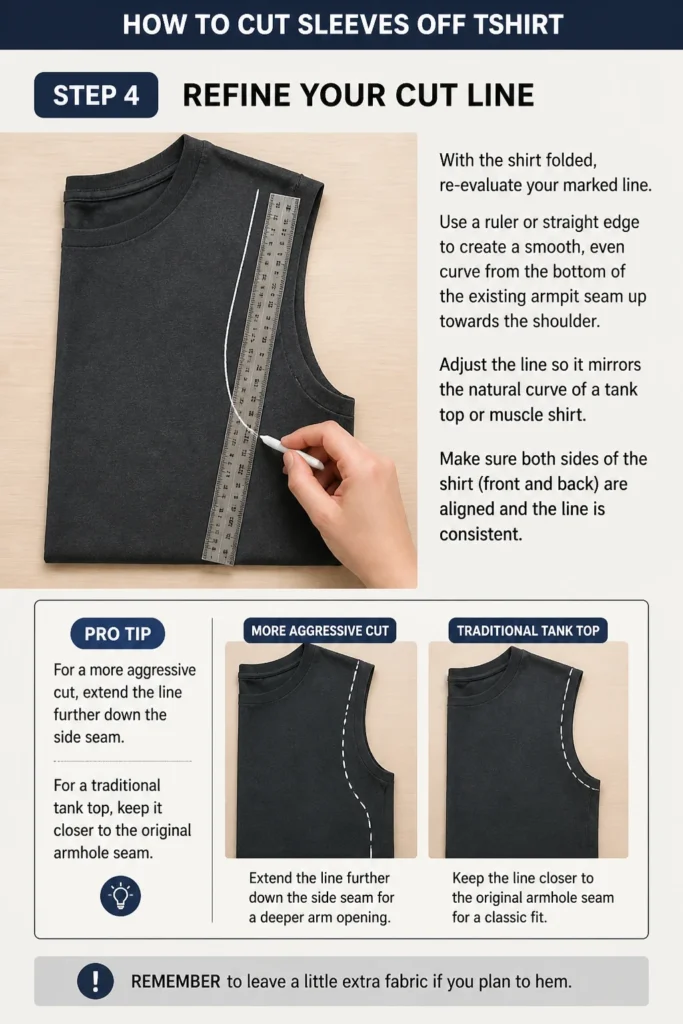
Adjust the line so it mirrors the natural curve of a tank top or muscle shirt. Make sure both sides of the shirt (front and back) are aligned and the line is consistent.
Pro Tip: For a more aggressive cut, extend the line further down the side seam. For a traditional tank top, keep it closer to the original armhole seam. Remember to leave a little extra fabric if you plan to hem.
Step 5: Secure the Fabric (Optional but Recommended)
If your fabric is slippery or you want extra precision, use a few pins to hold the front and back layers of the t-shirt together along your marked line.
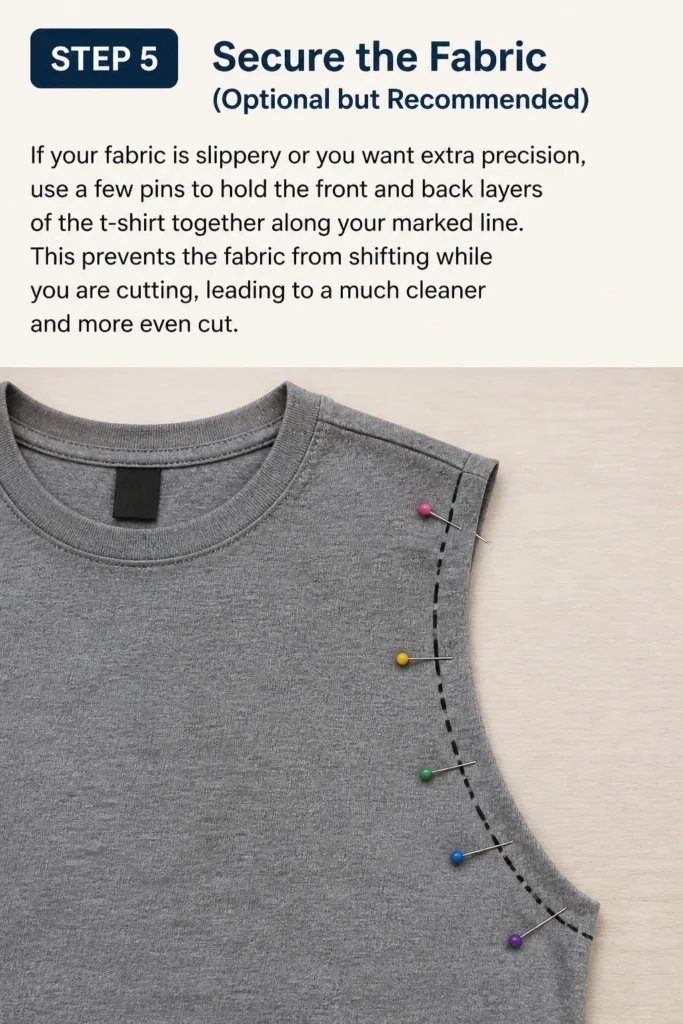
This prevents the fabric from shifting while you are cutting, leading to a much cleaner and more even cut.
Step 6: Make the Cut
Using sharp fabric scissors, carefully cut along your refined chalk line. Take your time and use long, steady strokes for a smooth edge.
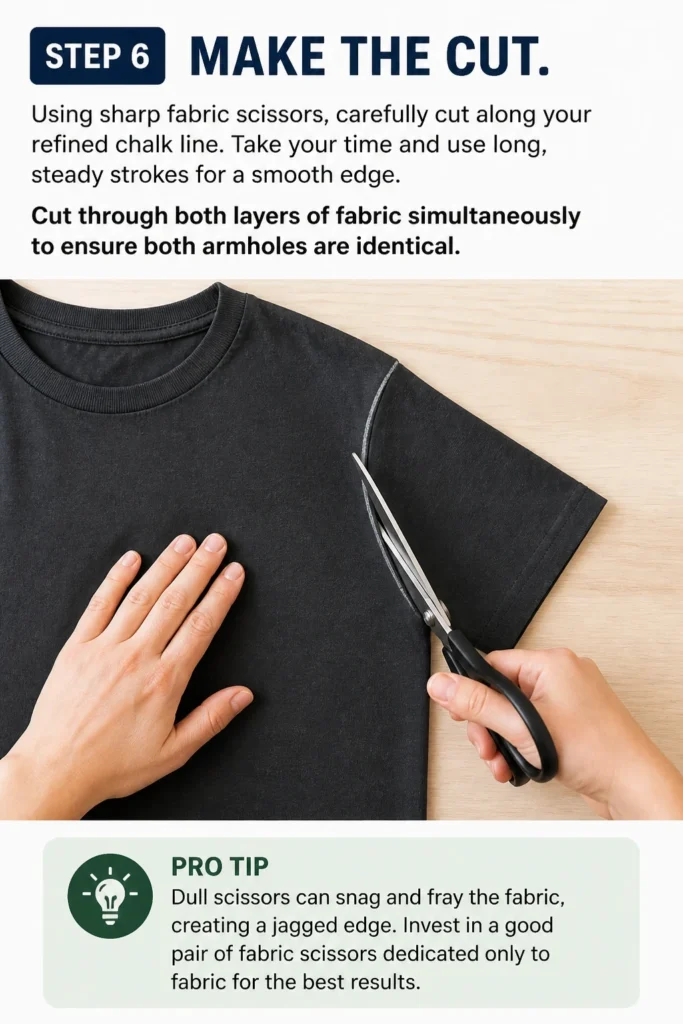
Cut through both layers of fabric simultaneously to ensure both armholes are identical.
Pro Tip: Dull scissors can snag and fray the fabric, creating a jagged edge. Invest in a good pair of fabric scissors dedicated only to fabric for the best results.
Step 7: Check and Trim for Evenness
Unfold the t-shirt and lay it flat again. Inspect both armholes for any unevenness or stray threads.
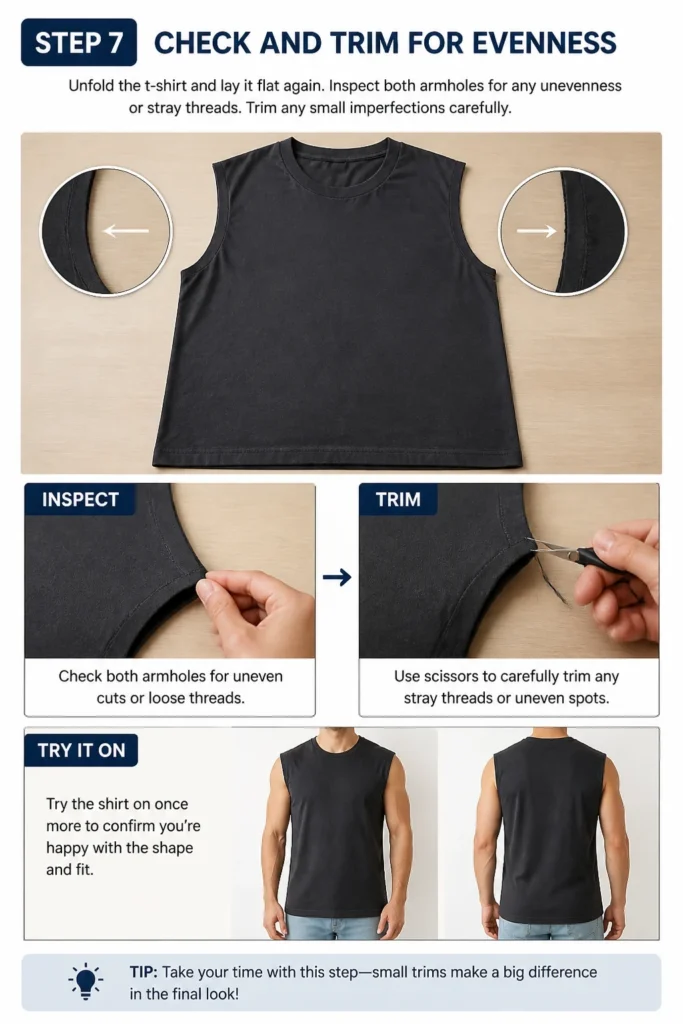
Trim any small imperfections carefully. Try the shirt on once more to confirm you’re happy with the shape and fit.
Step 8: Decide on Your Finish (Raw Edge vs. Hemmed)
At this point, you have a choice. A raw edge gives a casual, distressed look that will naturally curl or fray slightly over time, especially after washing.
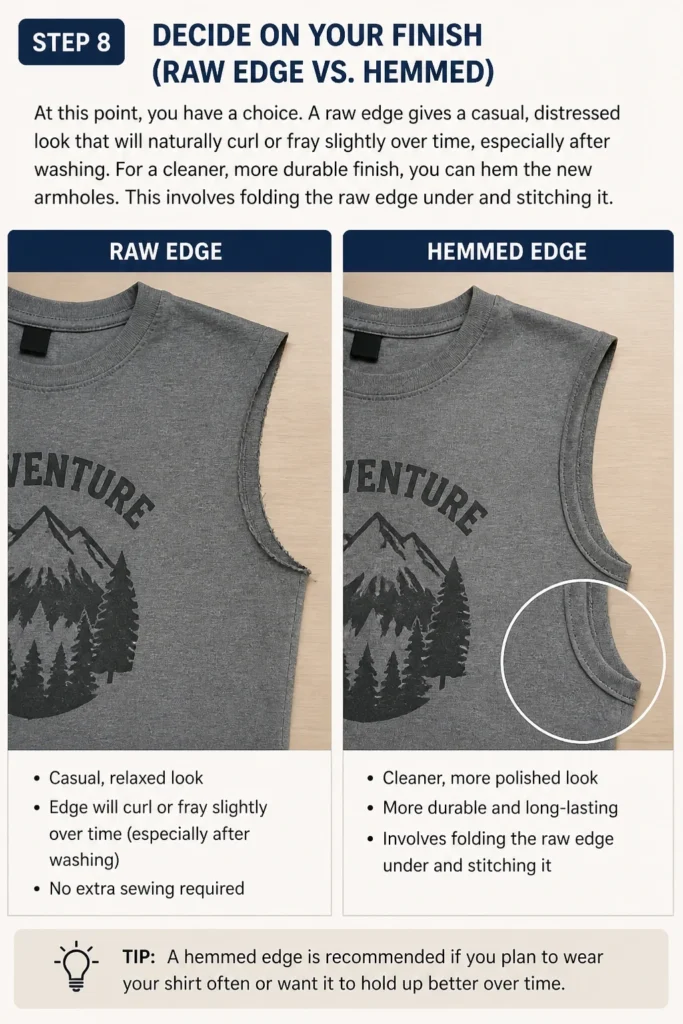
For a cleaner, more durable finish, you can hem the new armholes. This involves folding the raw edge under and stitching it.
Step 9: Finishing with a Hem (Optional)
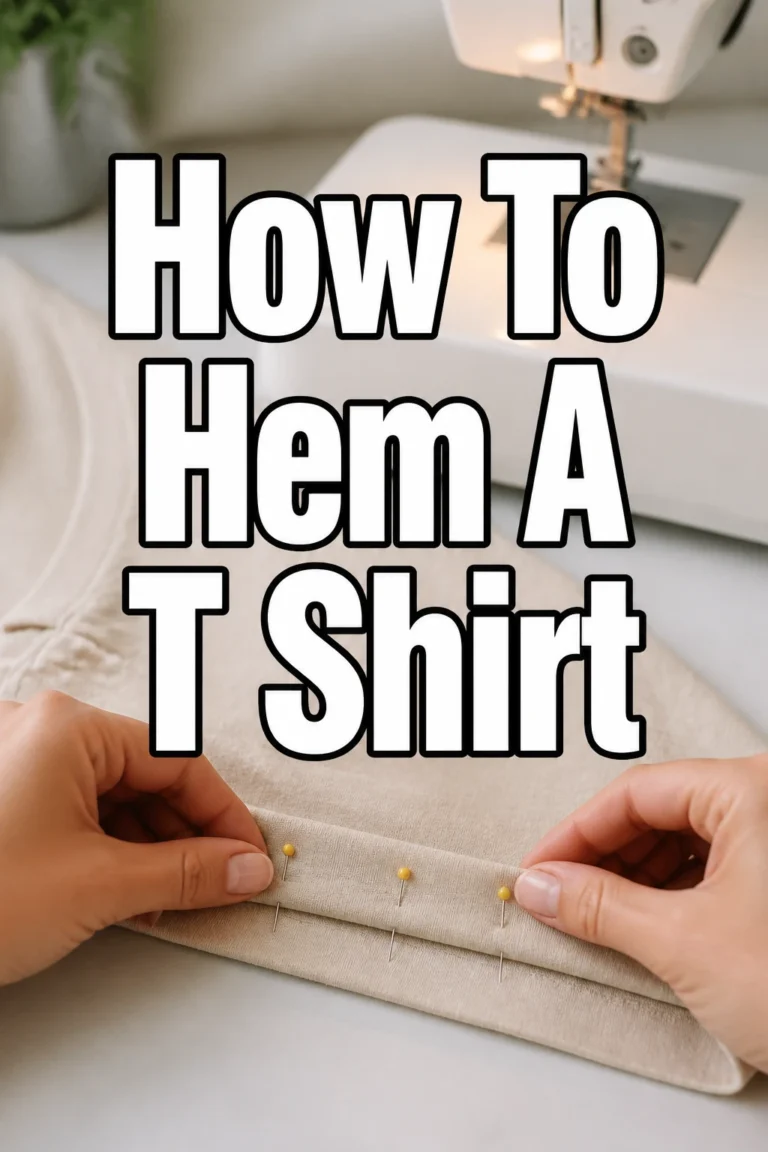
If you choose to hem, fold the raw edge of the armhole inward by about 1/2 to 1 inch. Press it flat with an iron for a crisp fold.
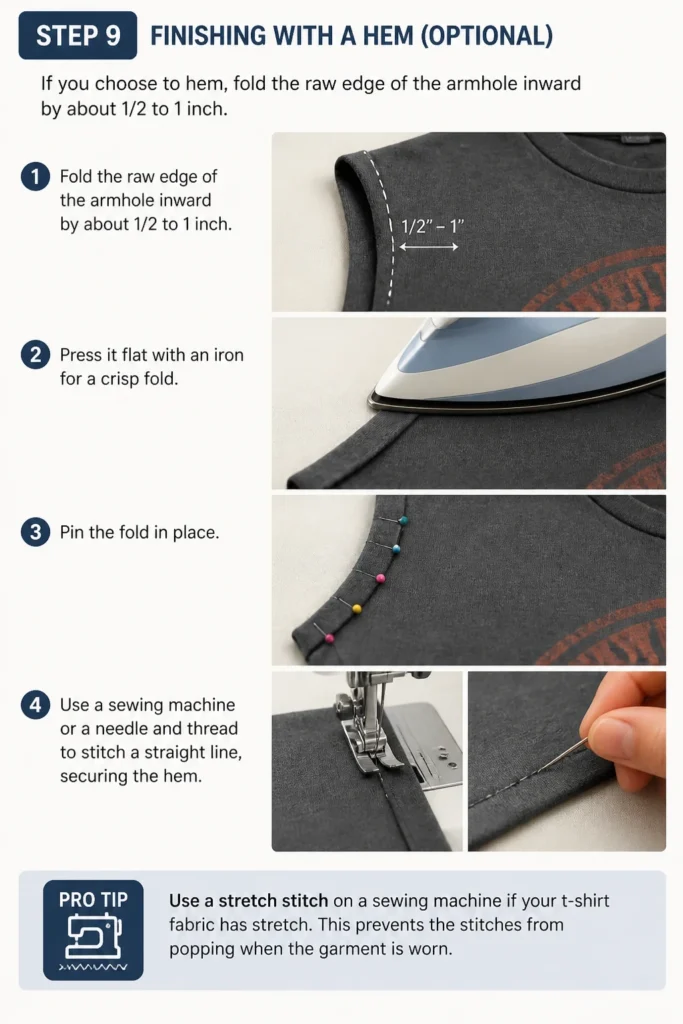
Pin the fold in place. Use a sewing machine or a needle and thread to stitch a straight line, securing the hem.
Pro Tip: Use a stretch stitch on a sewing machine if your t-shirt fabric has stretch. This prevents the stitches from popping when the garment is worn.
Common Mistakes to Avoid
Cutting Too Much Too Soon
Many people get excited and cut too deep or too wide on their first try. This often results in armholes that are too revealing or saggy.
Always start with a conservative cut. You can always trim more fabric later if needed, but you cannot add it back once it’s cut.
Using Dull Scissors
Cutting fabric with dull scissors is frustrating and creates a messy, jagged edge. This can lead to excessive fraying and an unprofessional finish.
Always use sharp fabric scissors. Keep them separate from paper scissors to maintain their edge.
Not Folding the Shirt Evenly
Failing to fold the t-shirt perfectly in half before cutting is a common reason for uneven armholes. One side might be wider or deeper than the other.
Take the extra minute to align all seams and smooth out wrinkles before making your final cut. Use pins if necessary to keep the layers together.
Ignoring Fabric Type
Some fabrics, like very thin knits or rayon, can be trickier to cut and may fray more significantly. Cutting these requires extra care or a different finishing technique.
Begin with cotton or cotton-blend shirts, which are generally more forgiving for beginners. Understand how your chosen fabric behaves before you start.
Troubleshooting
Uneven Armholes
If you notice one armhole is wider or deeper than the other after cutting, don’t panic. Lay the shirt flat again, carefully aligning the shoulders and side seams.
Identify the larger armhole and use it as a template. Trim the smaller armhole to match, taking off tiny slivers at a time until they are symmetrical.
Excessive Fraying After Washing
A raw edge will naturally fray, but if it’s excessive and unsightly, your fabric might be prone to heavy fraying, or your cut wasn’t clean.
Consider adding a simple hem to the armholes. Alternatively, you can apply a small amount of fabric glue (like Fray Check) to the raw edge to minimize further fraying, especially after future washes.
Armholes Feel Too Tight or Restrictive
If the new armholes feel too snug under your arms or restrict movement, you can deepen them slightly. Lay the shirt flat and identify where it feels tight.
Carefully trim a small, even curve from the bottom of the armpit area, extending slightly outward. Remember to do this symmetrically on both sides and only take off a small amount at a time.
Key Takeaways
- Always try on the shirt and mark your cut line before cutting.
- Fold the shirt perfectly in half to ensure symmetrical armholes.
- Use sharp fabric scissors for a clean, professional-looking edge.
- Start with a conservative cut; you can always remove more fabric later.
- Decide between a raw edge for a casual look or a hem for durability.
- Practice on an old t-shirt first if you’re new to fabric cutting.
Frequently Asked Questions
Will the raw edges fray a lot after washing?
Yes, raw edges will naturally fray to some extent after washing, especially with cotton fabrics. This often creates a desired, lived-in look. If you prefer minimal fraying, consider hemming the edges or using a fabric sealant.
Can I cut sleeves off a t-shirt without a sewing machine?
Absolutely. Many people prefer the raw, cut-off look, which requires no sewing. If you want a hemmed finish without a machine, you can hand-stitch the hem, though it will take more time and patience.
What’s the best way to get a perfectly straight cut?
Achieving a perfectly straight or even curved cut comes from careful marking, precise folding, and using sharp scissors. Laying the shirt completely flat, folding it perfectly in half, and using a ruler or straight edge to guide your chalk line are key steps.
How deep should I cut the armholes?
The depth of the armholes is a personal preference. For a standard tank top, cut just outside the original armhole seam. For a muscle shirt, you might extend the cut further down the side seam. Try on the shirt and mark it to ensure the depth feels comfortable and looks good on you.
Transform Your Wardrobe Today
Cutting the sleeves off a t-shirt is more than just a simple DIY project; it’s an opportunity to refresh your style and extend the life of your favorite garments.
Whether you’re aiming for a relaxed beach vibe, a functional gym top, or a unique fashion statement, this guide gives you the tools to achieve it.
Don’t let those old tees gather dust. Grab your scissors, follow these steps, and give them a brand new purpose. You might just discover your next favorite piece of clothing.
Beginner-friendly templates, step-by-step guides,
and weekly project ideas in your inbox.