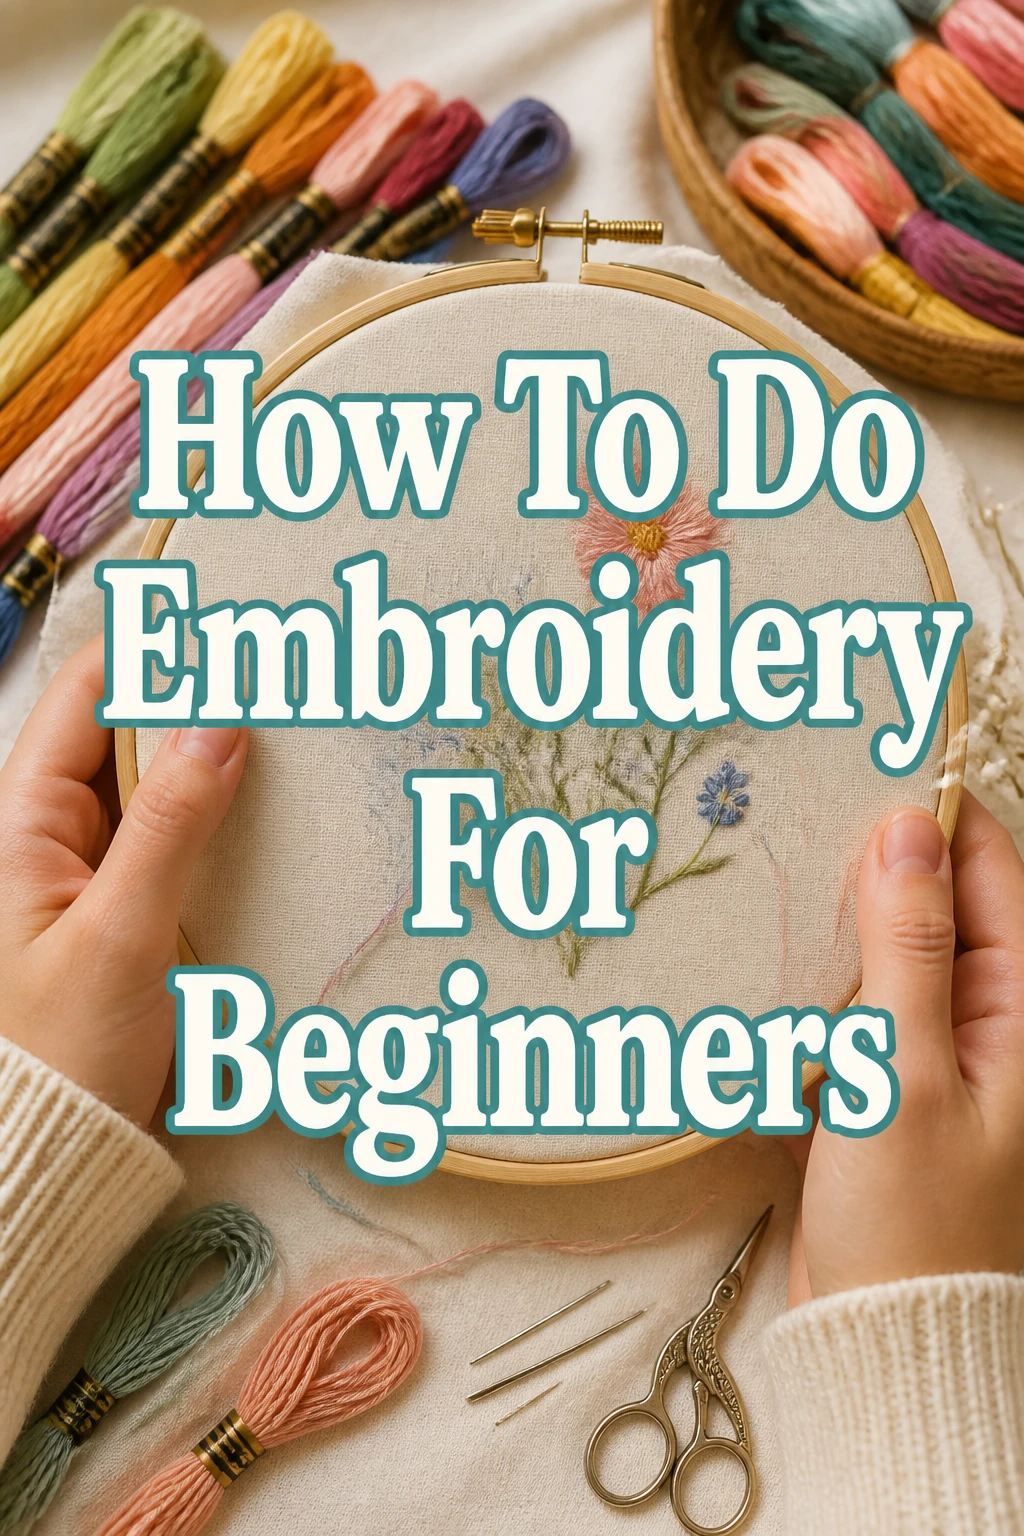
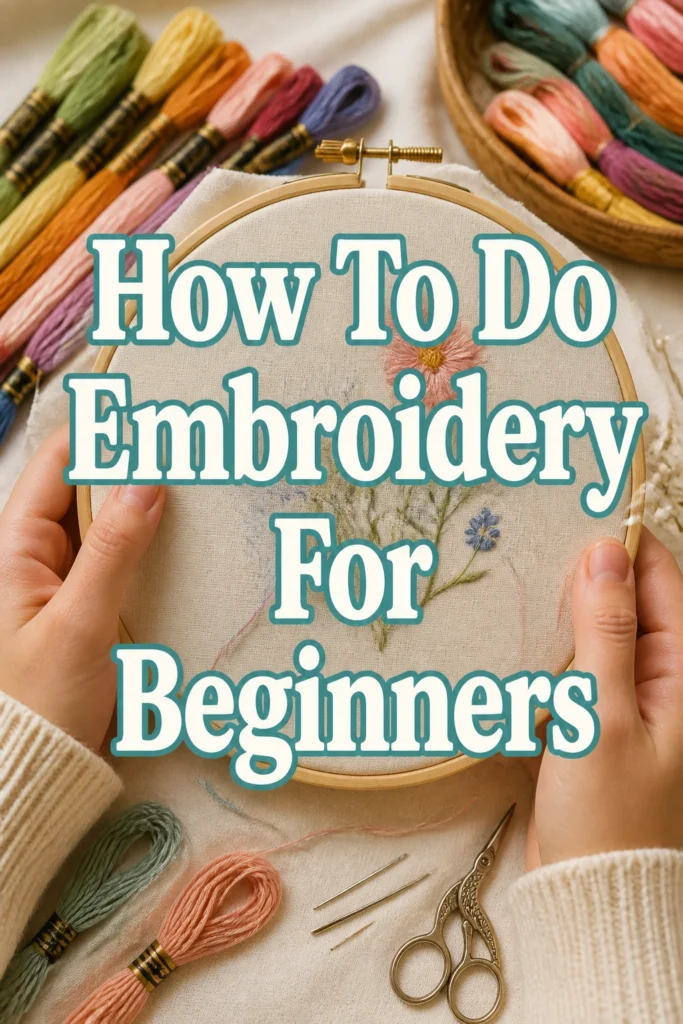
How To Do Embroidery For Beginners

Beginner-friendly templates, step-by-step guides,
and weekly project ideas in your inbox.
Learning embroidery can feel like stepping into a vibrant new world of creativity, one stitch at a time. I remember my first hesitant attempts, grappling with the needle and thread, but quickly falling in love with the mindful process.
This guide is built from years of personal stitching experience, designed to walk you through every essential step so you can confidently create your own beautiful textile art.
Let’s begin your exciting journey into hand embroidery.
Quick Overview
This guide will equip you with the fundamental skills and knowledge to complete your very first embroidery project. You’ll learn how to set up your materials, execute basic stitches, and finish your work.
- Time needed: 1-3 hours for a small beginner project
- Difficulty: Beginner
- What you’ll need: Fabric, embroidery floss, needle, hoop, scissors, pattern (optional)
Step-by-Step Instructions
Step 1: Gather Your Essential Materials
Before you begin, gather all the necessary tools. Having everything ready will make your process much smoother and more enjoyable.
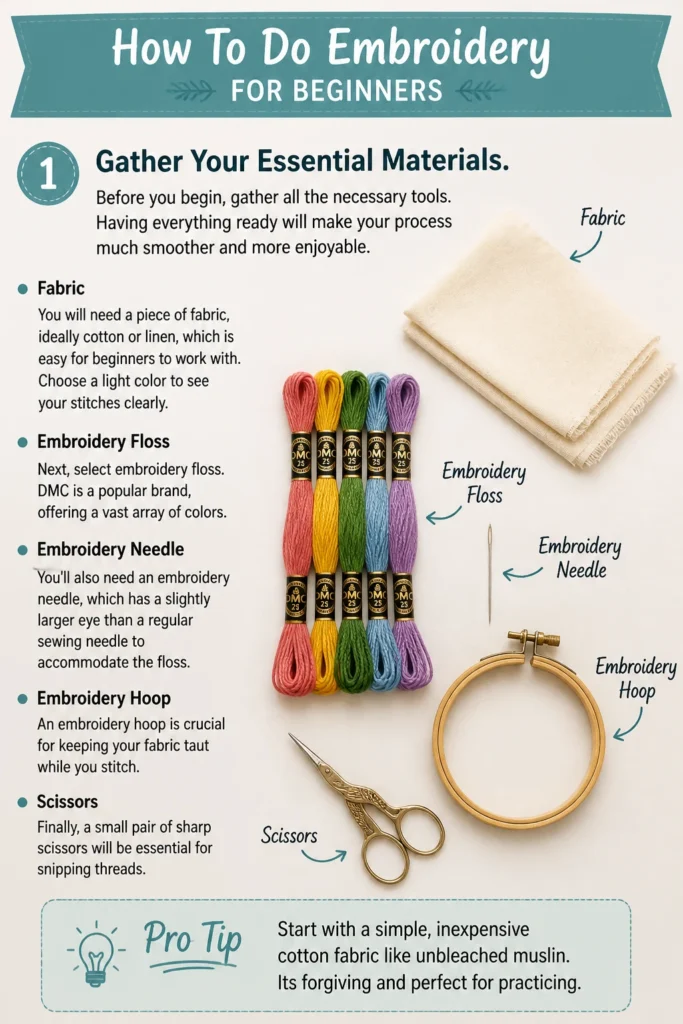
You will need a piece of fabric, ideally cotton or linen, which is easy for beginners to work with. Choose a light color to see your stitches clearly.
Next, select embroidery floss. DMC is a popular brand, offering a vast array of colors. You’ll also need an embroidery needle, which has a slightly larger eye than a regular sewing needle to accommodate the floss.
An embroidery hoop is crucial for keeping your fabric taut while you stitch. Finally, a small pair of sharp scissors will be essential for snipping threads.
Pro Tip: Start with a simple, inexpensive cotton fabric like unbleached muslin. It’s forgiving and perfect for practicing.
Step 2: Prepare Your Fabric and Hoop
Once you have your materials, it’s time to set up your workspace. This step ensures your fabric is stable and ready for stitching.
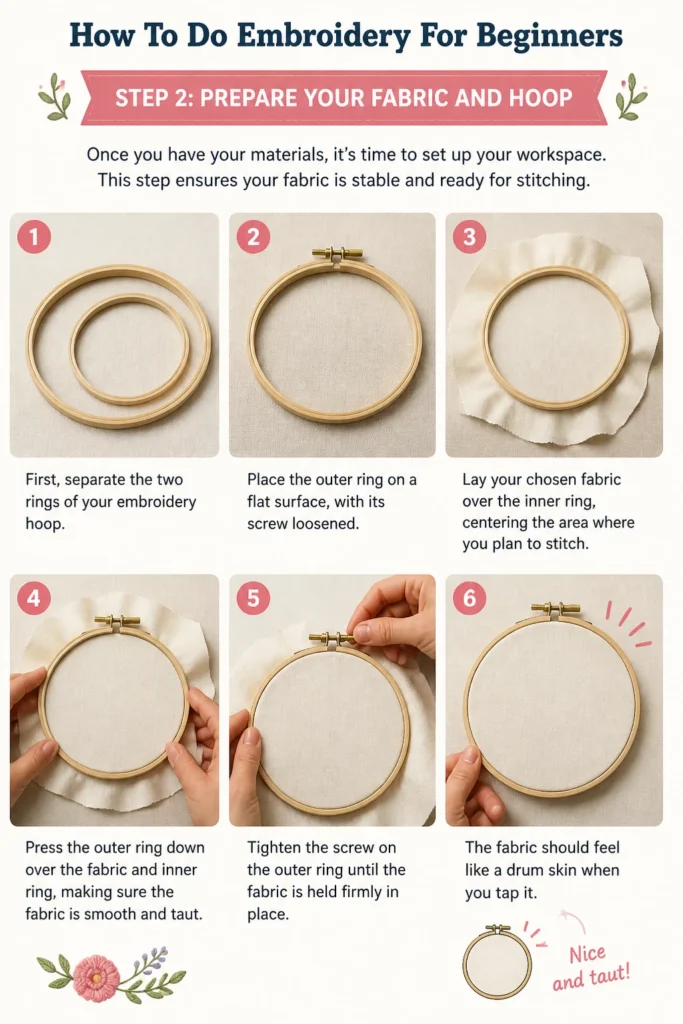
First, separate the two rings of your embroidery hoop. Place the outer ring on a flat surface, with its screw loosened.
Lay your chosen fabric over the inner ring, centering the area where you plan to stitch. Press the outer ring down over the fabric and inner ring, making sure the fabric is smooth and taut.
Tighten the screw on the outer ring until the fabric is held firmly in place. The fabric should feel like a drum skin when you tap it.
Step 3: Transfer Your Design (Optional but Recommended)
For your first project, using a pre-made design can be very helpful. This provides a clear guide for your stitches.
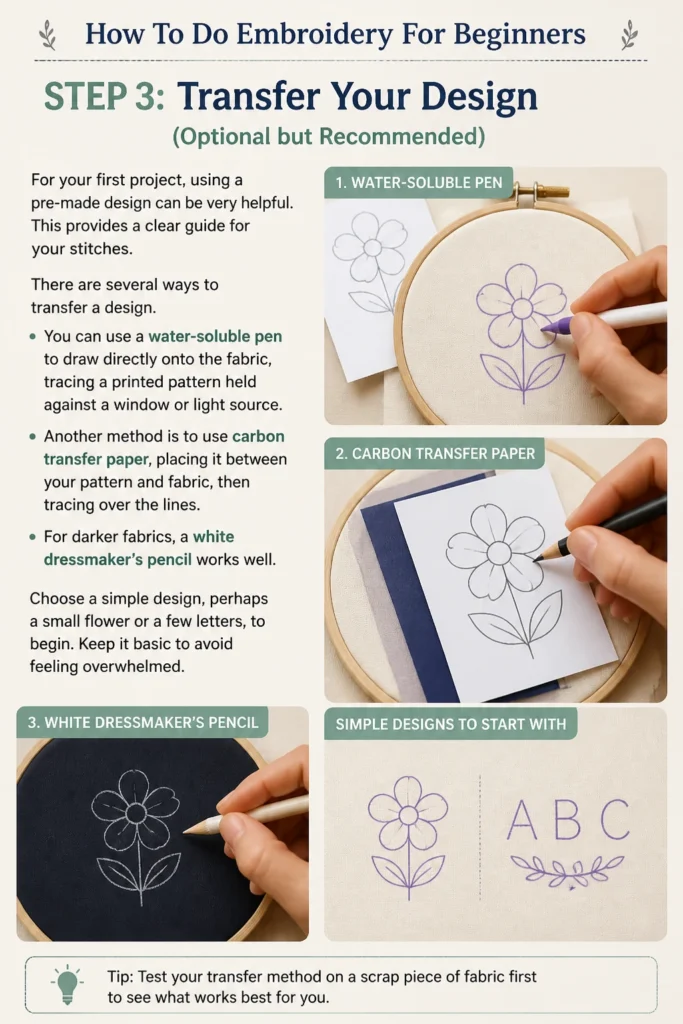
There are several ways to transfer a design. You can use a water-soluble pen to draw directly onto the fabric, tracing a printed pattern held against a window or light source.
Another method is to use carbon transfer paper, placing it between your pattern and fabric, then tracing over the lines. For darker fabrics, a white dressmaker’s pencil works well.
Choose a simple design, perhaps a small flower or a few letters, to begin. Keep it basic to avoid feeling overwhelmed.
Step 4: Thread Your Needle
This might seem simple, but threading embroidery floss requires a specific technique. Embroidery floss usually comes with six strands.
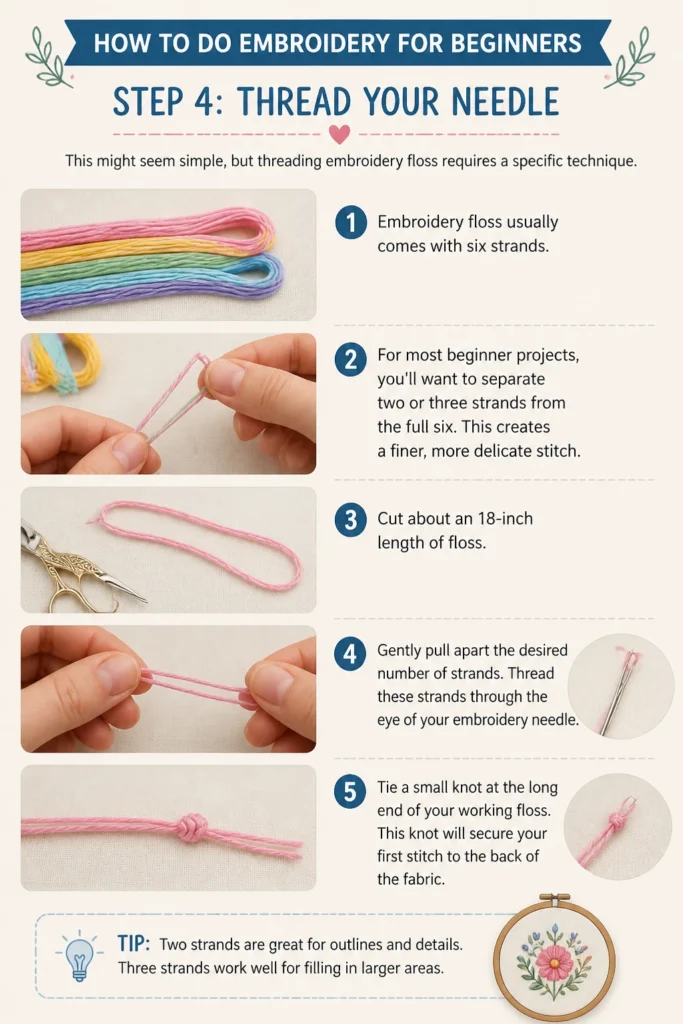
For most beginner projects, you’ll want to separate two or three strands from the full six. This creates a finer, more delicate stitch.
Cut about an 18-inch length of floss. Gently pull apart the desired number of strands. Thread these strands through the eye of your embroidery needle.
Tie a small knot at the long end of your working floss. This knot will secure your first stitch to the back of the fabric.
Step 5: Master the Running Stitch
The running stitch is one of the most fundamental stitches and a great starting point. It’s simple, quick, and highly versatile.
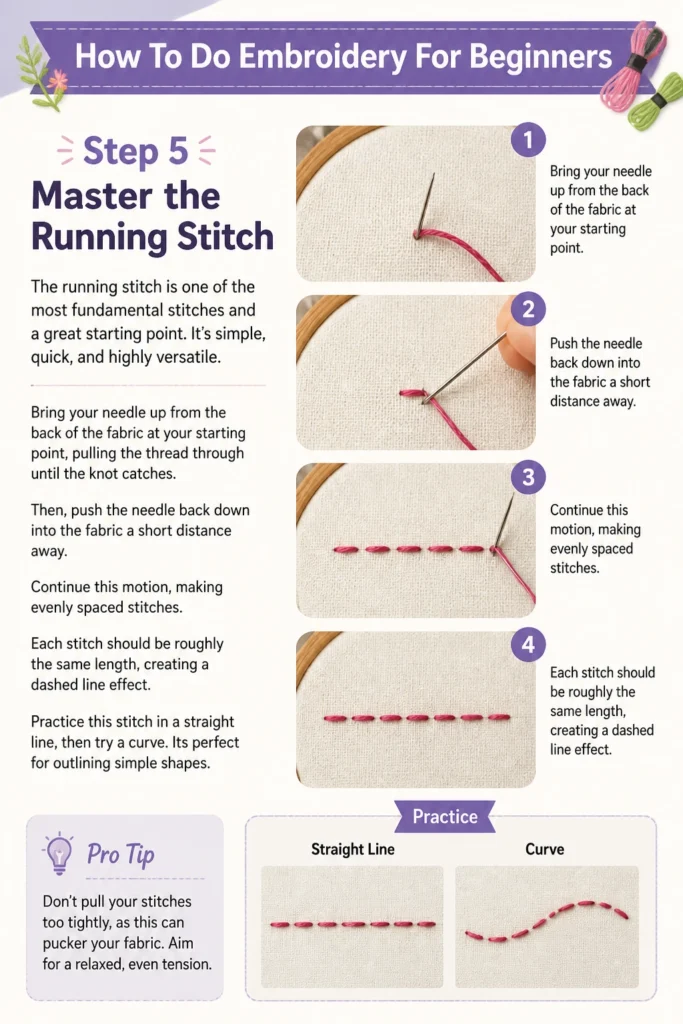
Bring your needle up from the back of the fabric at your starting point, pulling the thread through until the knot catches. Then, push the needle back down into the fabric a short distance away.
Continue this motion, making evenly spaced stitches. Each stitch should be roughly the same length, creating a dashed line effect.
Practice this stitch in a straight line, then try a curve. It’s perfect for outlining simple shapes.
Pro Tip: Don’t pull your stitches too tightly, as this can pucker your fabric. Aim for a relaxed, even tension.
Step 6: Learn the Backstitch
The backstitch is another essential for beginners, offering a solid, continuous line. It’s ideal for outlining and lettering.
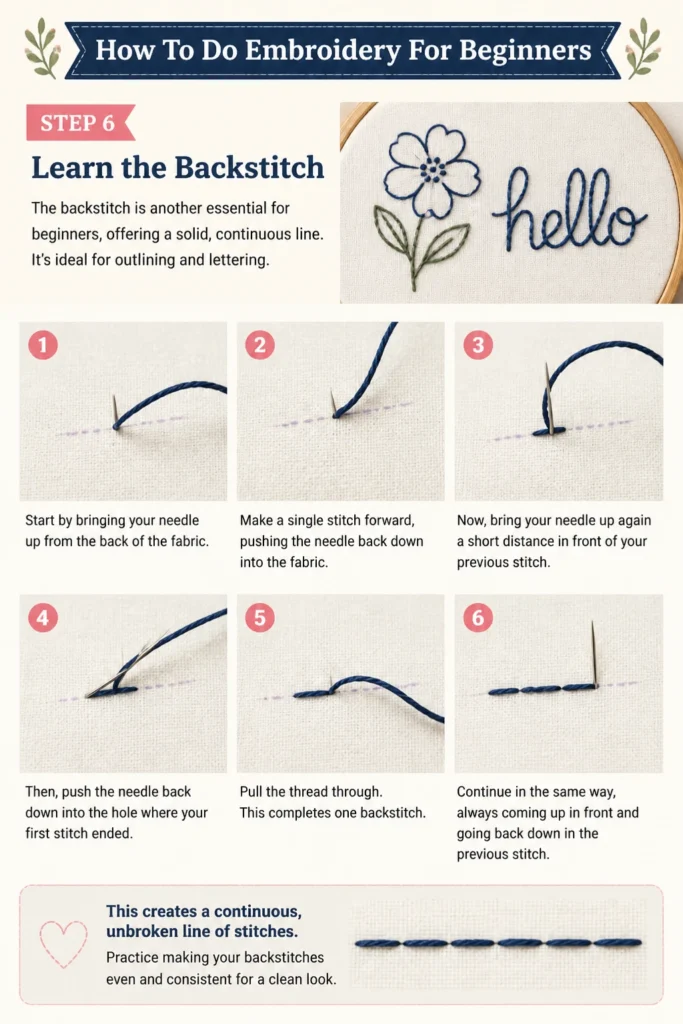
Start by bringing your needle up from the back of the fabric. Make a single stitch forward, pushing the needle back down into the fabric.
Now, bring your needle up again a short distance in front of your previous stitch. Then, push the needle back down into the hole where your first stitch ended.
This creates a continuous, unbroken line of stitches. Practice making your backstitches even and consistent for a clean look.
Step 7: Try the Satin Stitch
The satin stitch is used for filling in areas with solid color, creating a smooth, lustrous surface. It can be a bit more challenging but is very rewarding.
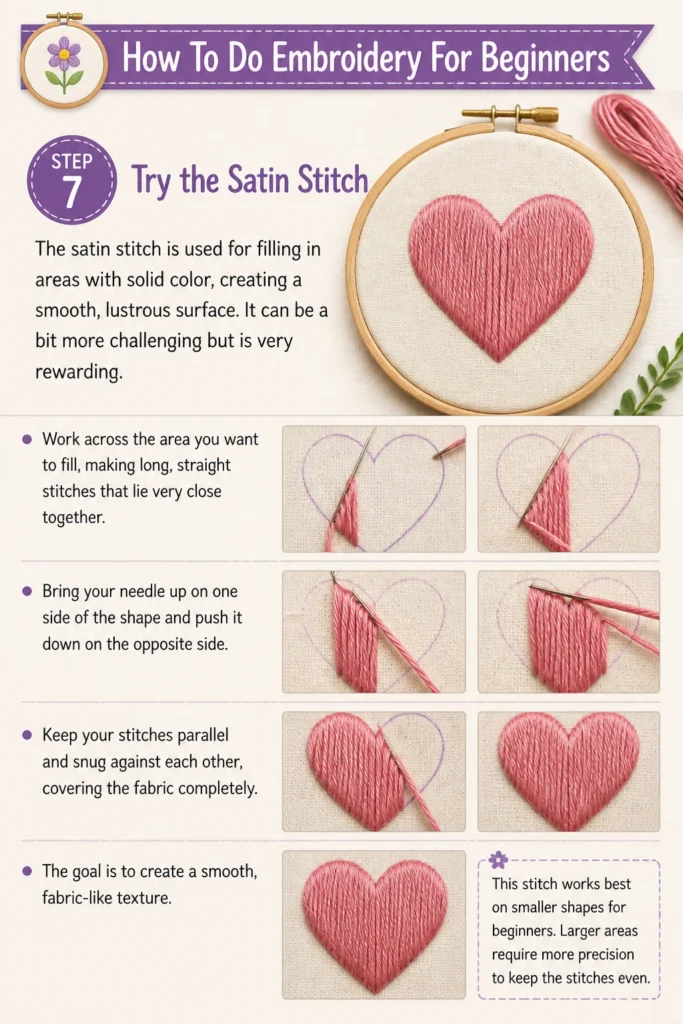
Work across the area you want to fill, making long, straight stitches that lie very close together. Bring your needle up on one side of the shape and push it down on the opposite side.
Keep your stitches parallel and snug against each other, covering the fabric completely. The goal is to create a smooth, fabric-like texture.
This stitch works best on smaller shapes for beginners. Larger areas require more precision to keep the stitches even.
Step 8: Finish Your Thread
Once you’ve completed a section or run out of thread, you need to secure your floss on the back of the fabric. This prevents your stitches from unraveling.
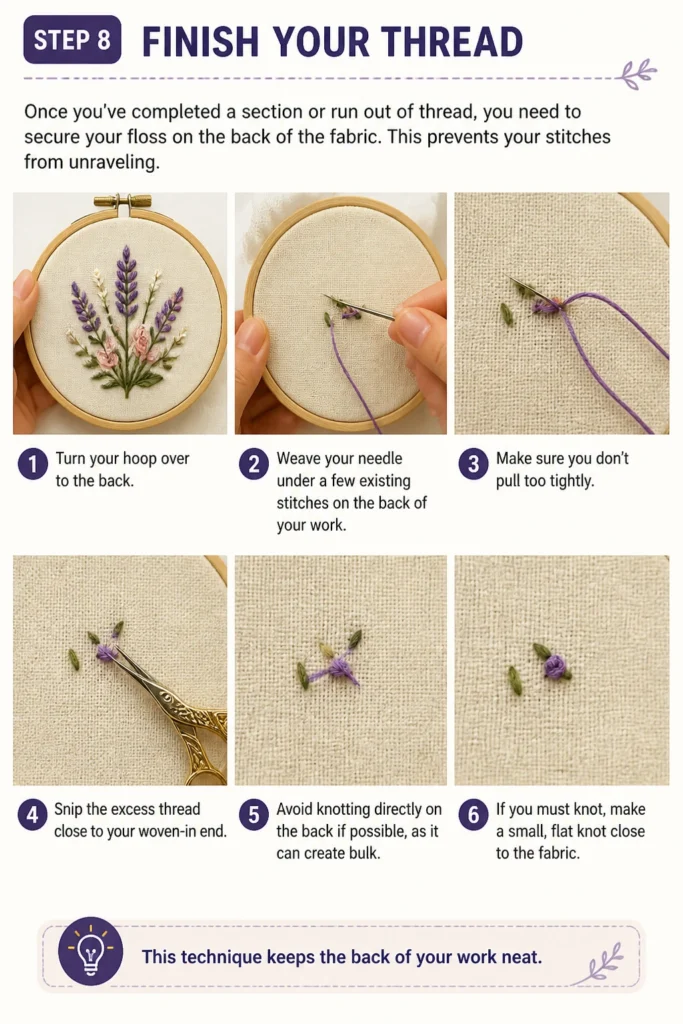
Turn your hoop over to the back. Weave your needle under a few existing stitches on the back of your work. Make sure you don’t pull too tightly.
Snip the excess thread close to your woven-in end. Avoid knotting directly on the back if possible, as it can create bulk.
If you must knot, make a small, flat knot close to the fabric. This technique keeps the back of your work neat.
Step 9: Remove from Hoop and Clean
When your embroidery project is complete, it’s time to remove it from the hoop. Loosen the screw and gently take the fabric out.
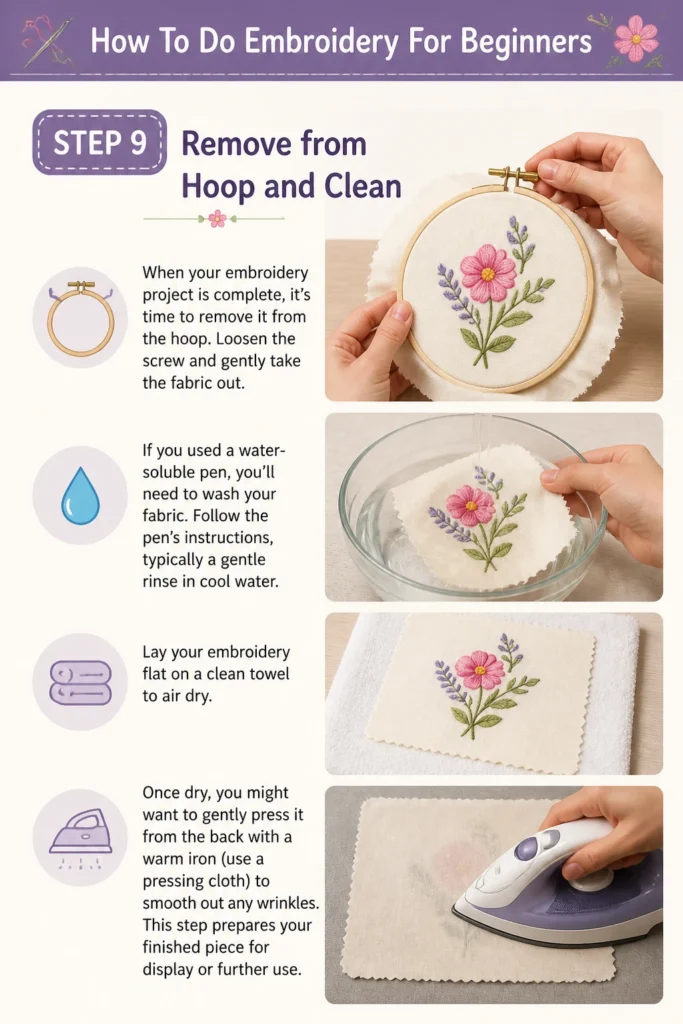
If you used a water-soluble pen, you’ll need to wash your fabric. Follow the pen’s instructions, typically a gentle rinse in cool water.
Lay your embroidery flat on a clean towel to air dry. Once dry, you might want to gently press it from the back with a warm iron (use a pressing cloth) to smooth out any wrinkles.
This step prepares your finished piece for display or further use.
Common Mistakes to Avoid
Pulling Stitches Too Tightly
One of the most common beginner errors is pulling the thread with too much force. Over-tightening your stitches will pucker the fabric, making your design look distorted and uneven.
Always aim for a relaxed tension. Your stitches should lie flat on the fabric surface without pulling it. Practice consistency in your pulling strength to avoid this issue.
Using Too Many Strands of Floss
Embroidery floss comes in six strands, but using all of them for fine work can result in bulky, messy stitches. Many beginner patterns call for two or three strands.
Refer to your pattern instructions, or experiment with different strand counts. Separating strands creates a much neater and more detailed appearance, especially for outlines and small details.
Starting with an Overly Complex Design
It’s exciting to jump into intricate designs, but beginning with something too complex can lead to frustration and discouragement. Intricate patterns require more advanced techniques and patience.
Start with simple outlines, small motifs, or basic lettering. Building your skills on easier projects will give you confidence and a solid foundation before tackling more challenging pieces.
Not Securing the Thread Properly
Failing to properly start and end your threads can lead to your stitches unraveling, wasting all your hard work. A loose knot or insufficient weaving on the back will cause problems.
Always make a secure knot at the beginning (or use a waste knot technique) and weave your thread under several existing stitches on the back when finishing. This ensures your project remains intact.
Troubleshooting
Fabric Puckering
If your fabric is puckering, it’s usually due to pulling your stitches too tight. The tension in your thread is causing the fabric to gather.
Try loosening your grip on the thread as you pull it through. Ensure your embroidery hoop is taut enough to hold the fabric firmly, but not so tight it distorts the weave.
Knots Appearing in Floss
Random knots in your floss while stitching are frustrating. This often happens when working with long pieces of thread or when the floss twists too much.
Use shorter lengths of floss, around 18 inches, to minimize tangles. Let your needle dangle occasionally to allow the thread to untwist itself. You can also run your thread over a small piece of beeswax to smooth it and reduce tangling.
Uneven Stitches
If your stitches look uneven in length or spacing, it’s a common beginner challenge. Consistency comes with practice and a careful eye.
Slow down your stitching process. Pay close attention to where your needle enters and exits the fabric, trying to maintain uniform distances. Tracing your design accurately also helps maintain evenness.
Key Takeaways
- Always gather all your materials before starting to ensure a smooth process.
- Use an embroidery hoop to keep your fabric taut, preventing puckering and making stitching easier.
- Start with simple stitches like the running stitch and backstitch to build your foundational skills.
- Practice maintaining a consistent, relaxed thread tension to avoid fabric distortion.
- Secure your thread properly at the beginning and end of each section to prevent unraveling.
- Begin with an easy, small design to build confidence and enjoy the learning process.
Frequently Asked Questions
What kind of fabric is best for beginners?
For beginners, plain weave cotton or linen fabrics are ideal. They are easy to stitch through, readily available, and forgiving of mistakes. Aida cloth, commonly used for cross-stitch, can also work well as its even weave helps guide your needle.
How do I stop my thread from tangling?
To minimize tangling, use shorter lengths of embroidery floss, typically no more than 18 inches. Allowing your needle to hang freely occasionally helps the thread untwist. Some embroiderers also condition their floss with beeswax to make it smoother and less prone to knots.
Can I use regular sewing needles?
While you can, it’s not ideal. Embroidery needles have a larger eye to accommodate the thicker embroidery floss and a sharper point to pierce the fabric weave cleanly. Using a regular sewing needle can be frustrating due to the smaller eye and might damage your floss.
How do I choose colors for my project?
Choosing colors is part of the fun! For beginners, consider using a pre-designed kit or looking at existing embroidery patterns for inspiration. You can also use a color wheel to find complementary or analogous colors, or simply pick shades that appeal to you for a freestyle design.
Our Top Recommended Finds
- Embroidery Starter Kit: A comprehensive kit often includes fabric, floss, needles, hoops, and a pattern, making it perfect for a first project.
- DMC Embroidery Floss Pack: A multi-pack of assorted colors gives you a wide palette to experiment with without having to buy individual skeins.
- Bamboo Embroidery Hoops: These are lightweight, affordable, and effective for keeping your fabric taut. A 6-inch or 8-inch hoop is a versatile size.
Embark on Your Creative Journey
You now have the essential steps and insights to begin your embroidery adventure. Don’t be afraid to make mistakes; they are simply part of the learning process.
Each stitch you make builds your skill and confidence. Allow yourself to enjoy the rhythm of the needle and thread, transforming simple materials into something beautiful.
Why not pick up some supplies today and start your very first embroidered piece? The world of textile art awaits your unique touch.
Beginner-friendly templates, step-by-step guides,
and weekly project ideas in your inbox.