How To Make Your Own Perfume

Beginner-friendly templates, step-by-step guides,
and weekly project ideas in your inbox.
I remember the first time I attempted to create my own scent. It was a chaotic, yet exhilarating, experiment that ended with a surprisingly delightful jasmine and citrus blend.
That journey taught me that crafting perfume isn’t just about mixing oils; it’s an art, a science, and a deeply personal expression.
This guide will walk you through every step, sharing practical wisdom from my own successes and missteps, so you can confidently create your signature fragrance.
Quick Overview
By following these instructions, you’ll learn to blend essential oils, dilute them properly, and age your custom perfume, resulting in a unique fragrance you’ll be proud to wear.
- Time needed: 2-3 hours for initial blending, plus 2-6 weeks for aging
- Difficulty: Beginner
- What you’ll need: Essential oils, high-proof alcohol, carrier oil, dark glass bottles, droppers, measuring tools
Step-by-Step Instructions
Step 1: Understand Fragrance Notes
Every perfume is built in layers, known as notes. These notes evaporate at different rates, creating a dynamic scent profile over time.
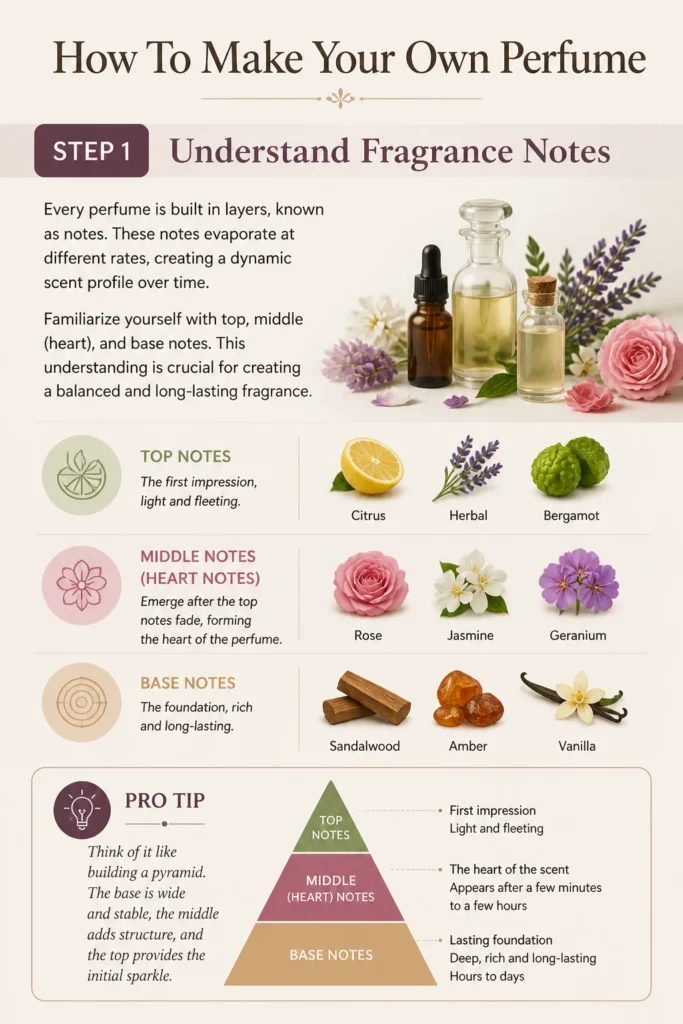
Familiarize yourself with top, middle (heart), and base notes. This understanding is crucial for creating a balanced and long-lasting fragrance.
Top notes are the first impression, light and fleeting. Middle notes emerge after the top notes fade, forming the “heart” of the perfume. Base notes are the foundation, rich and long-lasting.
Pro Tip: Think of it like building a pyramid. The base is wide and stable, the middle adds structure, and the top provides the initial sparkle.
Step 2: Gather Your Essential Materials
Before you begin, ensure you have all necessary components. Quality ingredients make a significant difference in the final product.
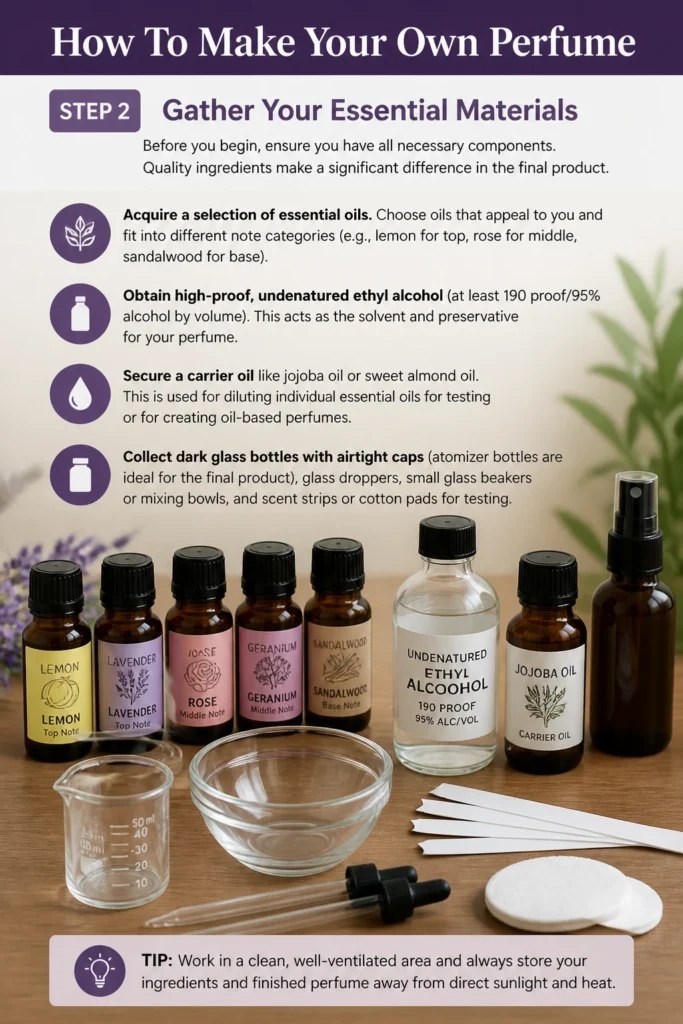
Acquire a selection of essential oils. Choose oils that appeal to you and fit into different note categories (e.g., lemon for top, rose for middle, sandalwood for base).
Obtain high-proof, undenatured ethyl alcohol (at least 190 proof/95% alcohol by volume). This acts as the solvent and preservative for your perfume.
Secure a carrier oil like jojoba oil or sweet almond oil. This is used for diluting individual essential oils for testing or for creating oil-based perfumes.
Collect dark glass bottles with airtight caps (atomizer bottles are ideal for the final product), glass droppers, small glass beakers or mixing bowls, and scent strips or cotton pads for testing.
Step 3: Choose Your Scent Profile
This is where your creativity truly comes alive. Decide on the general character you want your perfume to have.
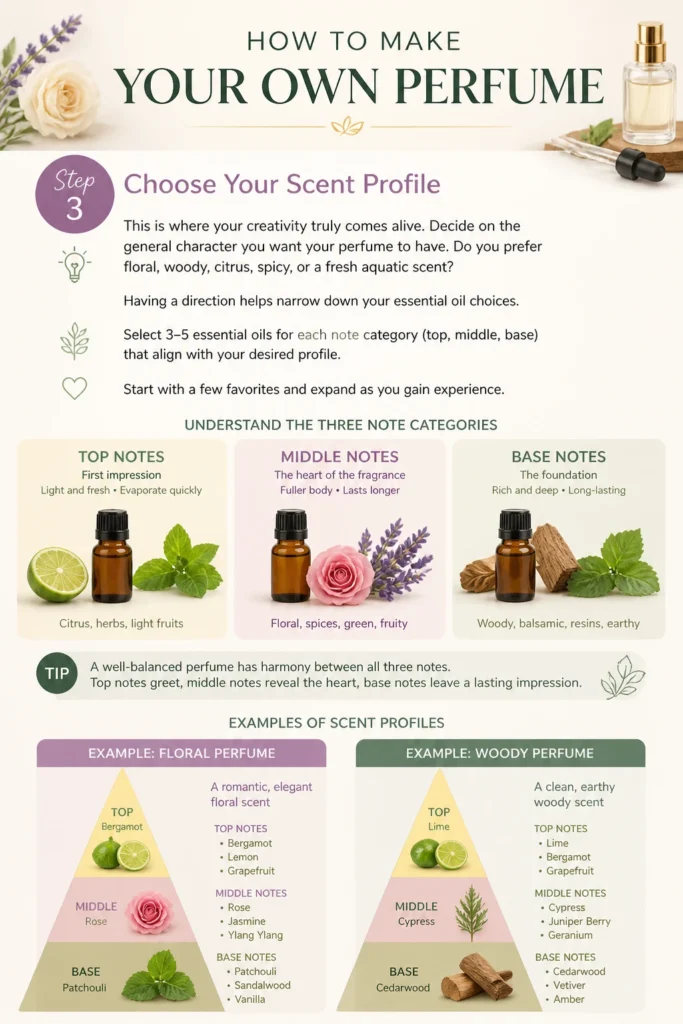
Do you prefer floral, woody, citrus, spicy, or a fresh aquatic scent? Having a direction helps narrow down your essential oil choices.
Select 3-5 essential oils for each note category (top, middle, base) that align with your desired profile. Start with a few favorites and expand as you gain experience.
For example, a floral perfume might use bergamot (top), rose (middle), and patchouli (base). A woody scent could combine cedarwood (base), cypress (middle), and lime (top).
Step 4: Prepare Your Workspace and Test Oils
A clean, organized environment prevents contamination and makes the blending process smoother. Clear a dedicated area for your perfume making.
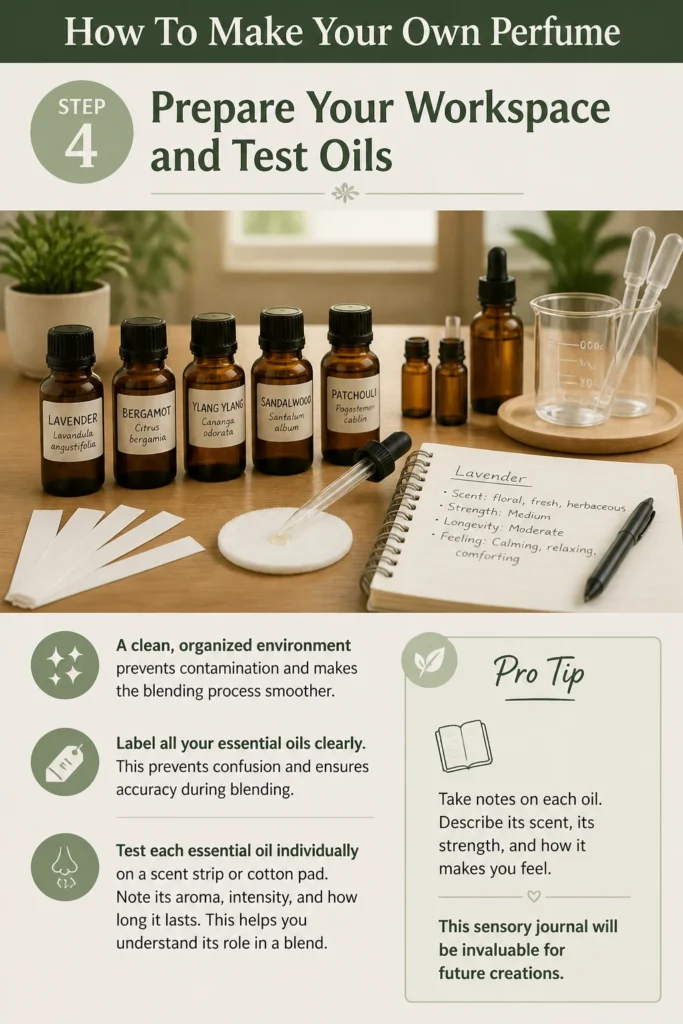
Label all your essential oils clearly. This prevents confusion and ensures accuracy during blending.
Test each essential oil individually on a scent strip or cotton pad. Note its aroma, intensity, and how long it lasts. This helps you understand its role in a blend.
Pro Tip: Take notes on each oil. Describe its scent, its strength, and how it makes you feel. This sensory journal will be invaluable for future creations.
Step 5: Begin Blending with Base Notes
The base notes are the foundation, so they go in first. They provide depth and longevity to your fragrance.
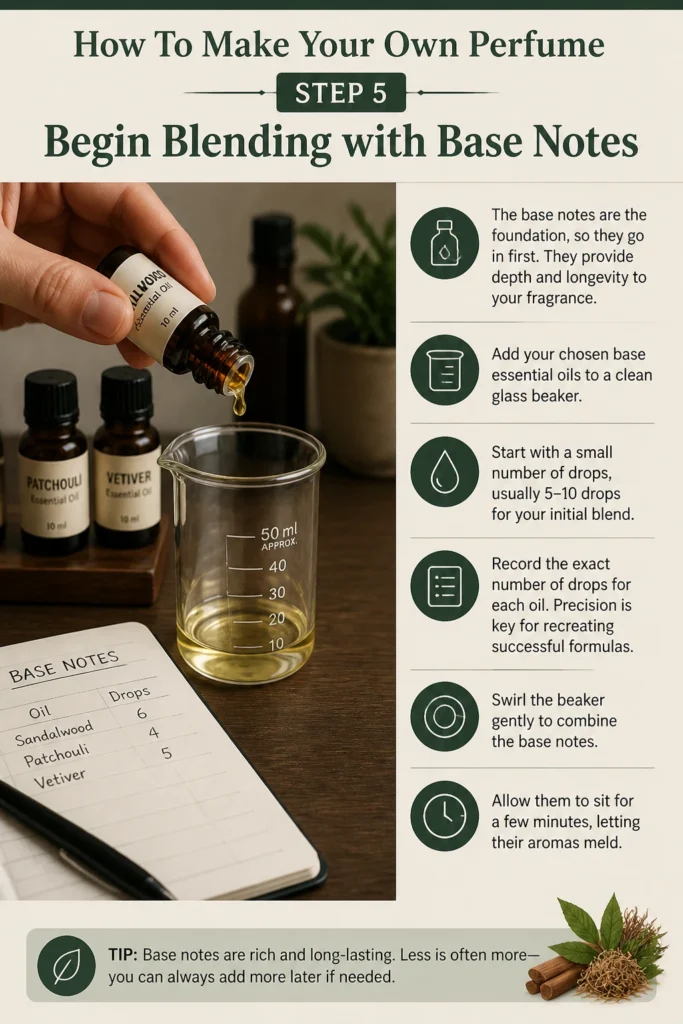
Add your chosen base essential oils to a clean glass beaker. Start with a small number of drops, usually 5-10 drops for your initial blend.
Record the exact number of drops for each oil. Precision is key for recreating successful formulas.
Swirl the beaker gently to combine the base notes. Allow them to sit for a few minutes, letting their aromas meld.
Step 6: Introduce Middle (Heart) Notes
Middle notes define the character of your perfume. They bridge the gap between the initial burst of top notes and the lingering depth of base notes.
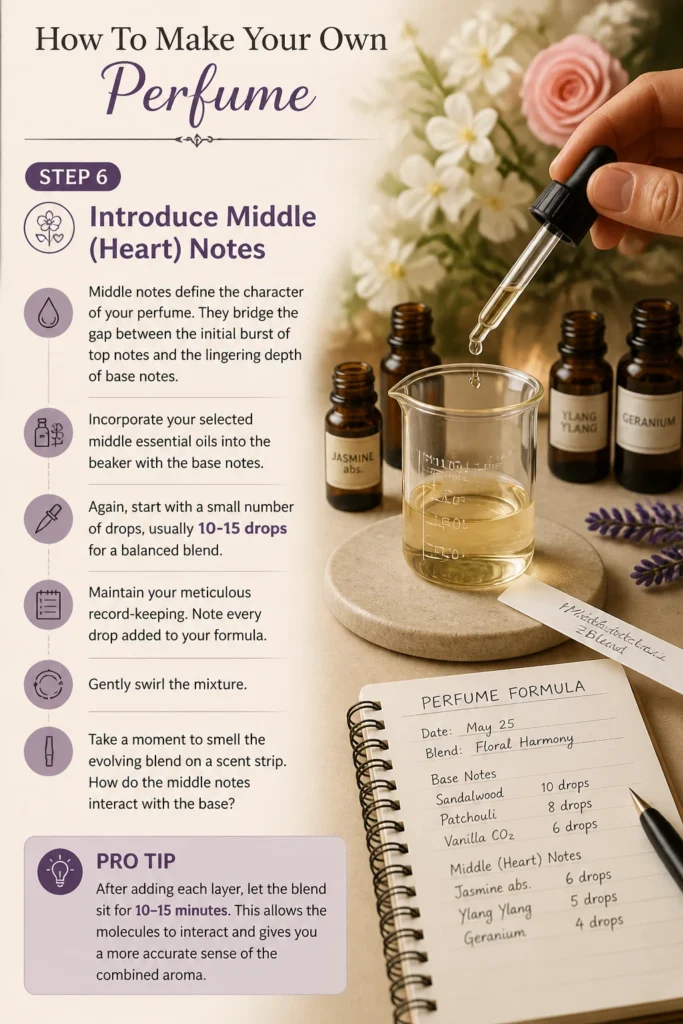
Incorporate your selected middle essential oils into the beaker with the base notes. Again, start with a small number of drops, usually 10-15 drops for a balanced blend.
Maintain your meticulous record-keeping. Note every drop added to your formula.
Gently swirl the mixture. Take a moment to smell the evolving blend on a scent strip. How do the middle notes interact with the base?
Pro Tip: After adding each layer, let the blend sit for 10-15 minutes. This allows the molecules to interact and gives you a more accurate sense of the combined aroma.
Step 7: Add Top Notes for the Initial Impression
Top notes are the most volatile and create the first impression of your perfume. They are often bright, refreshing, and uplifting.
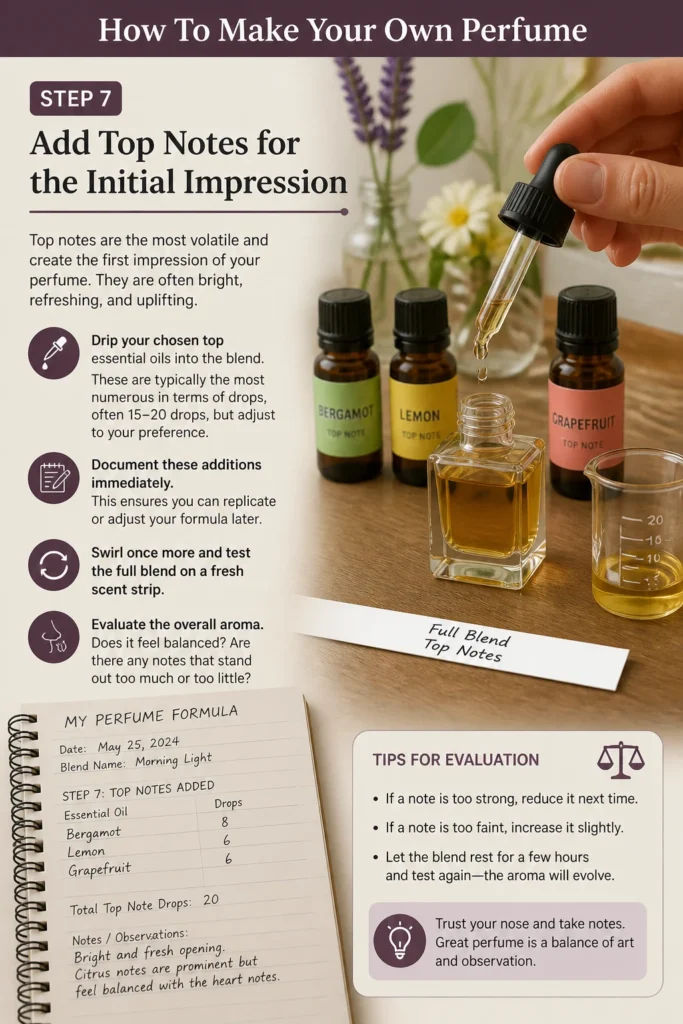
Drip your chosen top essential oils into the blend. These are typically the most numerous in terms of drops, often 15-20 drops, but adjust to your preference.
Document these additions immediately. This ensures you can replicate or adjust your formula later.
Swirl once more and test the full blend on a fresh scent strip. Evaluate the overall aroma. Does it feel balanced? Are there any notes that stand out too much or too little?
Step 8: Dilute with Alcohol and Carrier Oil
Once you’re satisfied with your essential oil blend, it’s time to dilute it into a wearable perfume.
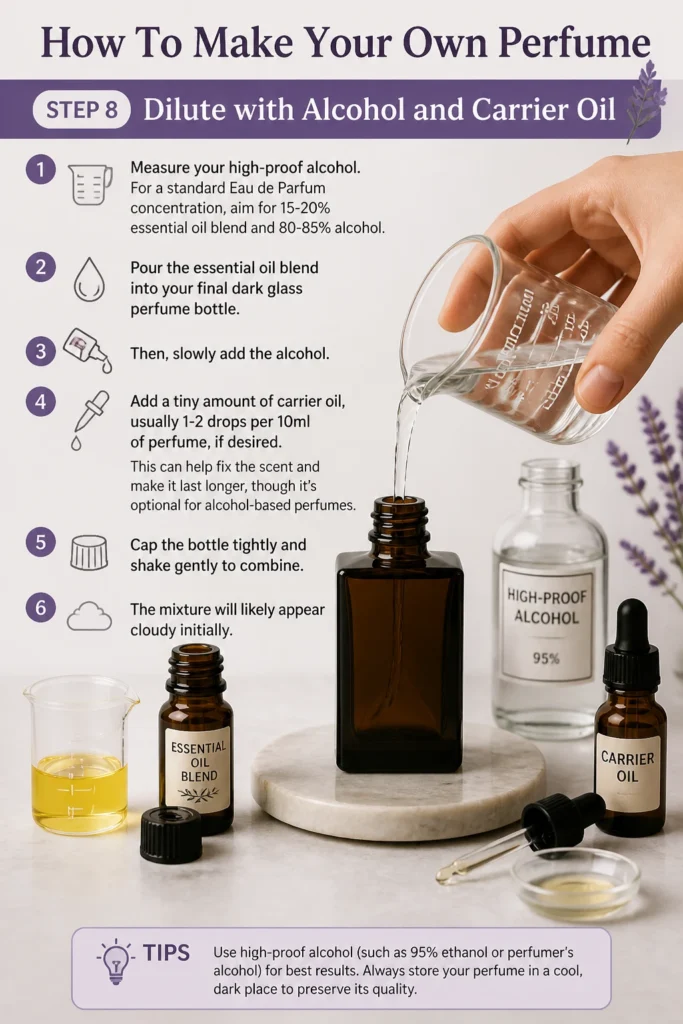
Measure your high-proof alcohol. For a standard Eau de Parfum concentration, aim for 15-20% essential oil blend and 80-85% alcohol.
Pour the essential oil blend into your final dark glass perfume bottle. Then, slowly add the alcohol.
Add a tiny amount of carrier oil, usually 1-2 drops per 10ml of perfume, if desired. This can help “fix” the scent and make it last longer, though it’s optional for alcohol-based perfumes.
Cap the bottle tightly and shake gently to combine. The mixture will likely appear cloudy initially.
Step 9: Age Your Perfume (Maceration)
This is a critical step that many beginners skip, but it dramatically improves the final fragrance. Aging allows the notes to fully meld and mature.
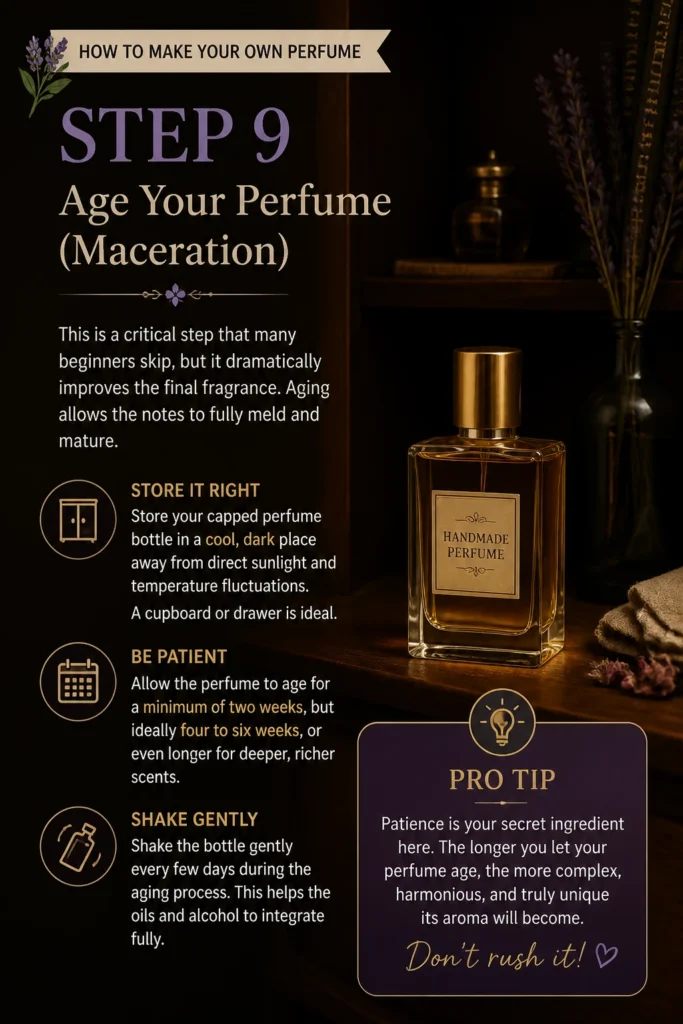
Store your capped perfume bottle in a cool, dark place away from direct sunlight and temperature fluctuations. A cupboard or drawer is ideal.
Allow the perfume to age for a minimum of two weeks, but ideally four to six weeks, or even longer for deeper, richer scents.
Shake the bottle gently every few days during the aging process. This helps the oils and alcohol to integrate fully.
Pro Tip: Patience is your secret ingredient here. The longer you let your perfume age, the more complex, harmonious, and truly unique its aroma will become. Don’t rush it!
Step 10: Filter and Final Bottle
After aging, your perfume is almost ready. A quick filtering step ensures a clear, professional-looking product.
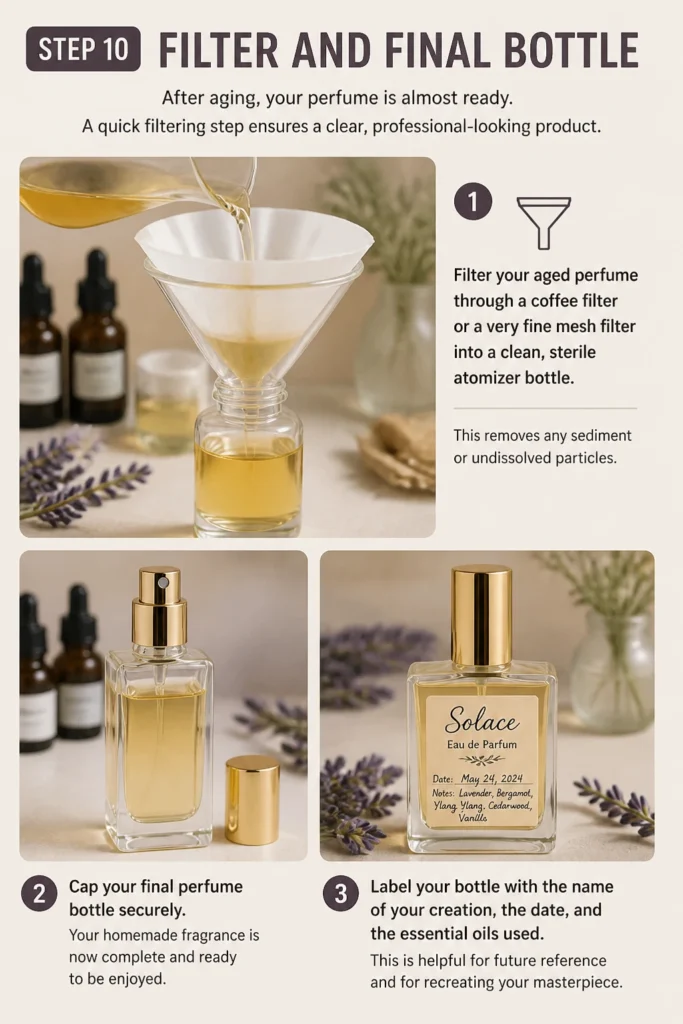
Filter your aged perfume through a coffee filter or a very fine mesh filter into a clean, sterile atomizer bottle. This removes any sediment or undissolved particles.
Cap your final perfume bottle securely. Your homemade fragrance is now complete and ready to be enjoyed.
Label your bottle with the name of your creation, the date, and the essential oils used. This is helpful for future reference and for recreating your masterpiece.
Common Mistakes to Avoid
Over-Blending Too Many Oils
One common pitfall is using too many different essential oils in a single blend. While variety seems appealing, it can lead to a muddled, confusing scent that lacks focus. A simpler blend, often with 3-6 oils, allows individual notes to shine and interact harmoniously.
Instead, choose a core set of oils that complement each other. Start small and build complexity gradually in future attempts, rather than trying to achieve everything in one go.
Skipping the Aging Process
Many new perfumers are eager to use their creation immediately and skip the maceration period. This results in a perfume where the alcohol scent is dominant and the individual essential oils haven’t had a chance to fully integrate.
Always allow your perfume to age for at least two weeks, ideally longer. This “marriage” time is crucial for the fragrance to develop depth, smoothness, and its true character, allowing the alcohol note to dissipate and the oils to blend seamlessly.
Using Low-Quality Ingredients
The quality of your essential oils and alcohol directly impacts the final scent and longevity of your perfume. Cheap, adulterated oils or denatured alcohol can introduce off-notes and cause irritation.
Invest in high-quality, pure essential oils from reputable suppliers. Use undenatured, high-proof ethyl alcohol specifically designed for perfumery. This ensures a cleaner, safer, and more authentic fragrance.
Inaccurate Measuring
Eyeballing drops or not meticulously recording your formula can lead to inconsistent results. If you create a fantastic scent, you won’t be able to replicate it accurately.
Use glass droppers for precise measurement and keep a detailed log of every drop of each essential oil. This allows for precise adjustments and ensures you can recreate your favorite blends reliably.
Troubleshooting
My Perfume Smells Too Alcoholic
This is a very common issue, especially with newly made perfumes. The strong alcohol scent indicates that the perfume hasn’t had enough time to age and for the alcohol to properly evaporate and integrate with the essential oils.
The solution is patience. Ensure your perfume ages for at least 2-6 weeks in a cool, dark place, shaking it gently every few days. This maceration process is vital for the alcohol note to mellow and for the fragrance to fully develop its intended aroma.
The Scent Doesn’t Last Long
If your perfume fades quickly, it might be due to a lack of sufficient base notes or an imbalance in your formula. Base notes are the fixatives that anchor the lighter top and middle notes.
Review your formula and consider increasing the proportion of your base notes (e.g., sandalwood, patchouli, vetiver, cedarwood). Also, ensure you are using a high enough concentration of essential oils (15-20% for Eau de Parfum) in your alcohol.
My Perfume Looks Cloudy
Cloudiness can occur for a few reasons, such as using essential oils that are not fully soluble in alcohol, or if there’s a small amount of water present. Sometimes, it’s also a natural part of the aging process before filtering.
After the aging period, filter your perfume through a coffee filter or a very fine mesh. This usually removes any particulate matter causing cloudiness. Ensure your essential oils are pure and not diluted with carrier oils if making an alcohol-based perfume.
Key Takeaways
- Perfume making is a layered process, starting with understanding fragrance notes.
- Always prioritize high-quality essential oils and high-proof, undenatured alcohol.
- Meticulous record-keeping of your essential oil drops is crucial for successful blends.
- Build your fragrance pyramid by adding base notes first, then middle, then top.
- The aging (maceration) period of 2-6 weeks is essential for a well-rounded fragrance.
- Patience and experimentation are your most valuable tools in creating unique scents.
Frequently Asked Questions
What is the best alcohol to use for perfume?
The best alcohol for perfume making is 190-proof (95% alcohol by volume) undenatured ethyl alcohol, often labeled as perfumer’s alcohol or food-grade ethanol. This type of alcohol is pure, evaporates cleanly, and allows the essential oils to shine without introducing unwanted scents.
Can I use rubbing alcohol to make perfume?
No, rubbing alcohol (isopropyl alcohol) is not suitable for perfume making. It has a distinct medicinal scent that will overpower your fragrance, and it’s not safe for skin application in the same way as perfumer’s alcohol. Always use high-proof ethyl alcohol.
How long does homemade perfume last?
Homemade alcohol-based perfumes typically last 1-3 years if stored properly in a cool, dark place. The shelf life depends on the stability of the essential oils used, as some citrus oils can degrade faster. Oil-based perfumes may have a shorter shelf life, usually 6 months to a year, due to the carrier oil eventually going rancid.
How many essential oils should I use in one perfume?
For beginners, it’s best to start with 3-6 essential oils in a single blend. This allows you to understand how different notes interact without creating an overly complex or muddled scent. As you gain experience, you can experiment with more oils, but simplicity often yields elegant results.
Our Top Recommended Finds
- Dark Amber Glass Bottles with Atomizers: Perfect for storing your finished perfumes, protecting them from light degradation and allowing for easy application.
- Glass Dropper Set: Essential for precise measurement of essential oils, ensuring consistency and accuracy in your formulas.
- Scent Strips (Blotter Papers): Inexpensive and invaluable for testing individual oils and blends without skin contact, allowing you to evaluate the scent evolution.
Embark on Your Olfactory Journey
You now have the knowledge and practical steps to begin crafting your own unique perfumes. This journey is one of discovery, personal expression, and delightful aromas.
Don’t be afraid to experiment, to follow your intuition, and to learn from every blend you create. Each attempt refines your palate and deepens your understanding of fragrance.
Gather your materials, choose your oils, and take that exciting first step today. Your signature scent is waiting to be born, a personal masterpiece crafted by your own hands.
Beginner-friendly templates, step-by-step guides,
and weekly project ideas in your inbox.