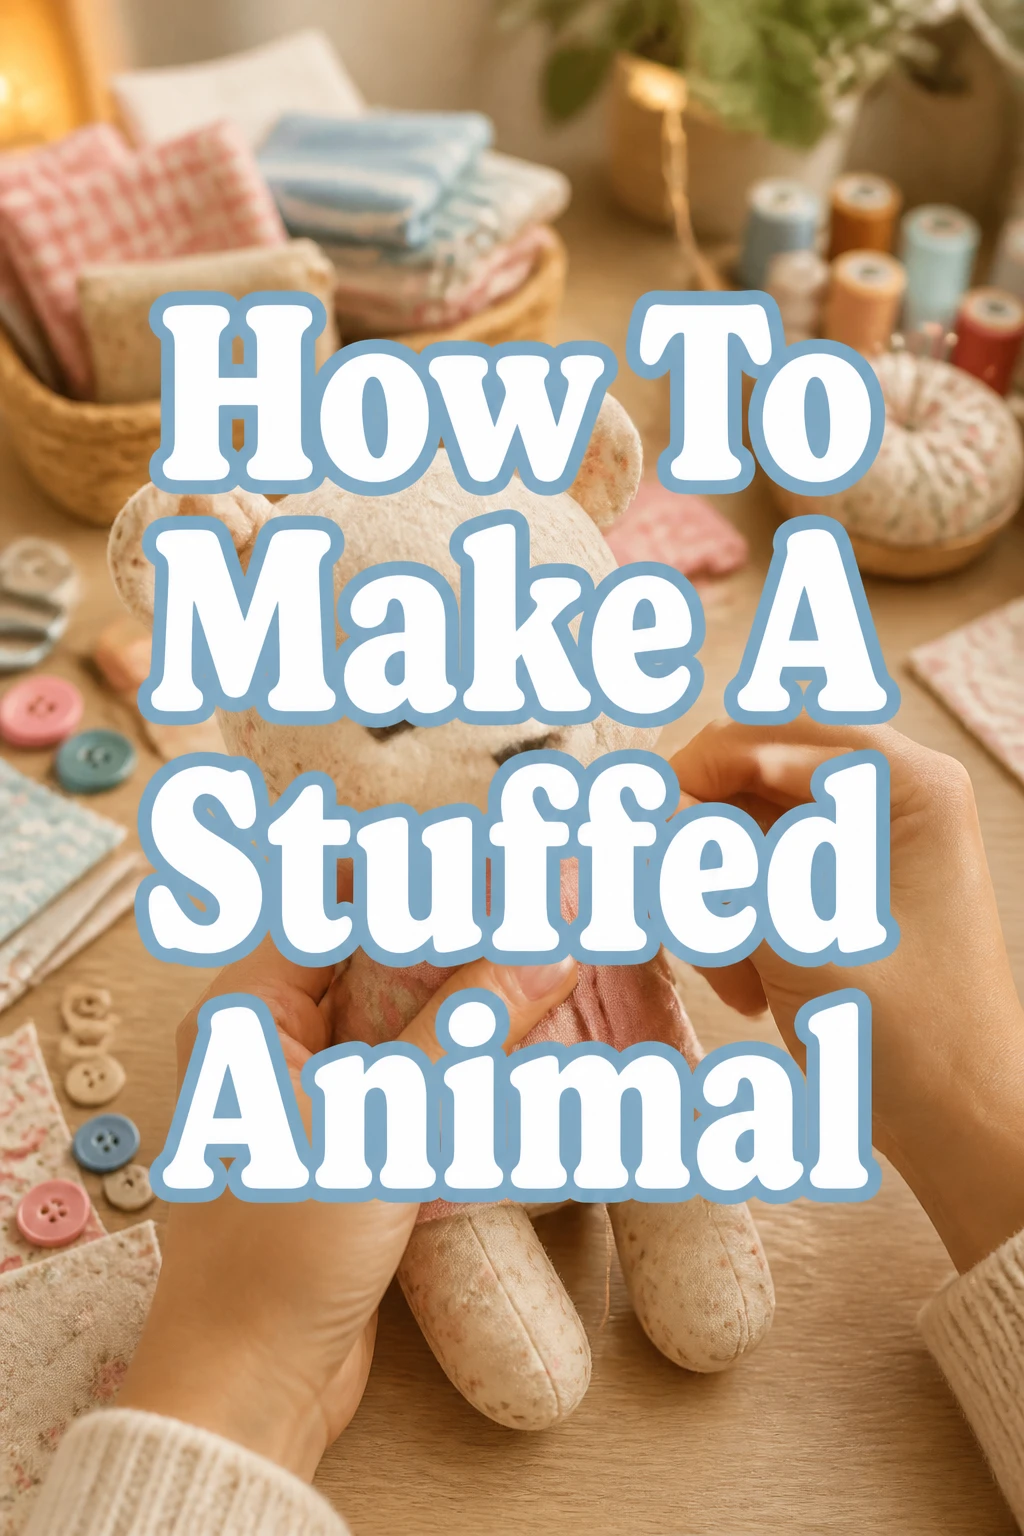
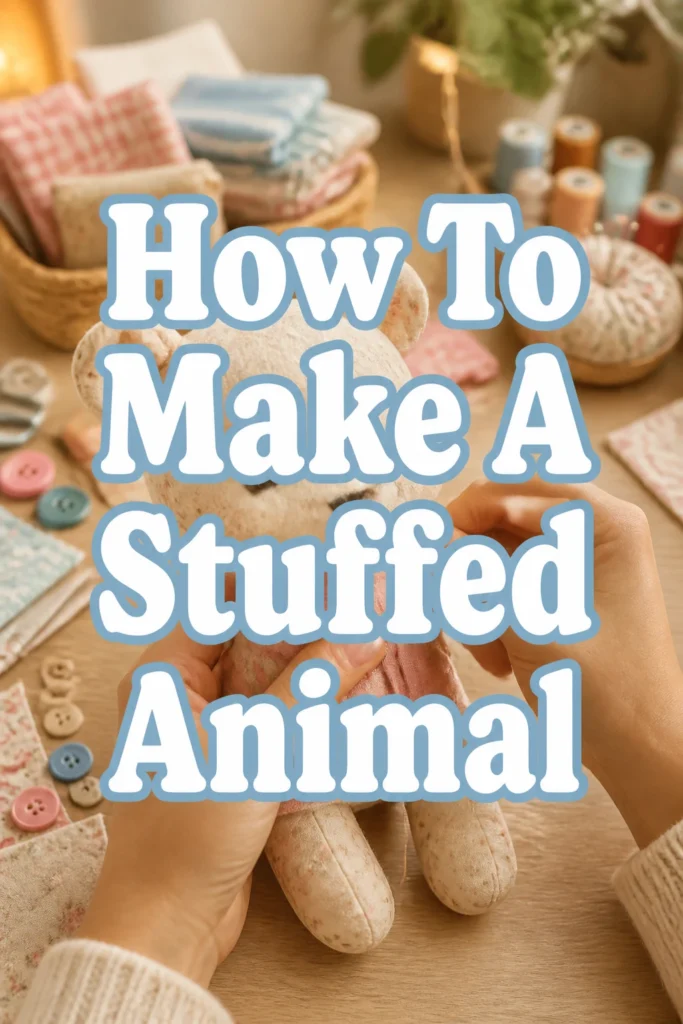
How To Make A Stuffed Animal

Beginner-friendly templates, step-by-step guides,
and weekly project ideas in your inbox.
Remember that special, handmade toy from childhood? The one that carried countless memories and comforting hugs?
Creating a stuffed animal is a deeply rewarding experience, filling a simple form with personality and potential for joy.
I’ve personally brought many fabric friends to life over the years, learning the best tricks and tips to make the process smooth and enjoyable for anyone.
Quick Overview
This guide will walk you through crafting your very own cuddly companion, from selecting materials to adding those final, charming details.
You’ll finish with a unique, handmade creation, perfect for gifting or keeping.
- Time needed: 4-8 hours (depending on complexity and experience)
- Difficulty: Beginner
- What you’ll need: Fabric, stuffing, sewing machine or needle/thread, pattern, scissors, pins, embroidery floss, safety eyes (optional)
Step-by-Step Instructions
Step 1: Gather Your Materials
The foundation of any great project lies in having the right supplies ready before you begin.
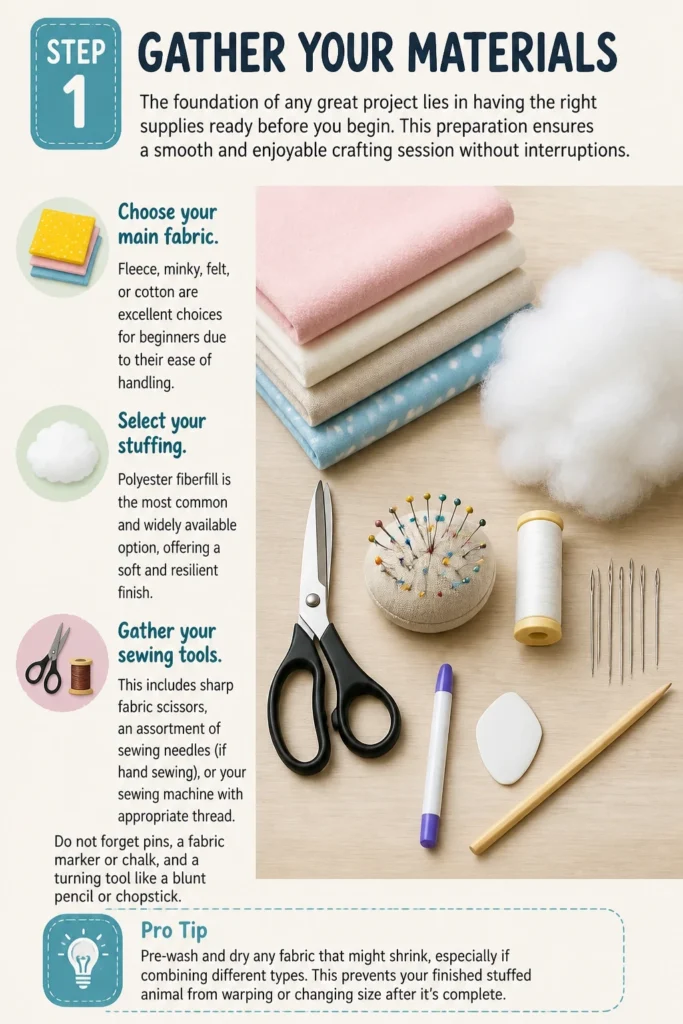
This preparation ensures a smooth and enjoyable crafting session without interruptions.
Choose your main fabric. Fleece, minky, felt, or cotton are excellent choices for beginners due to their ease of handling.
Select your stuffing. Polyester fiberfill is the most common and widely available option, offering a soft and resilient finish.
Gather your sewing tools. This includes sharp fabric scissors, an assortment of sewing needles (if hand sewing), or your sewing machine with appropriate thread.
Do not forget pins, a fabric marker or chalk, and a turning tool like a blunt pencil or chopstick.
Pro Tip: Pre-wash and dry any fabric that might shrink, especially if combining different types. This prevents distortion after your stuffed animal is finished.
Step 2: Choose and Prepare Your Pattern
A good pattern is your blueprint, guiding you through the creation process with precision.
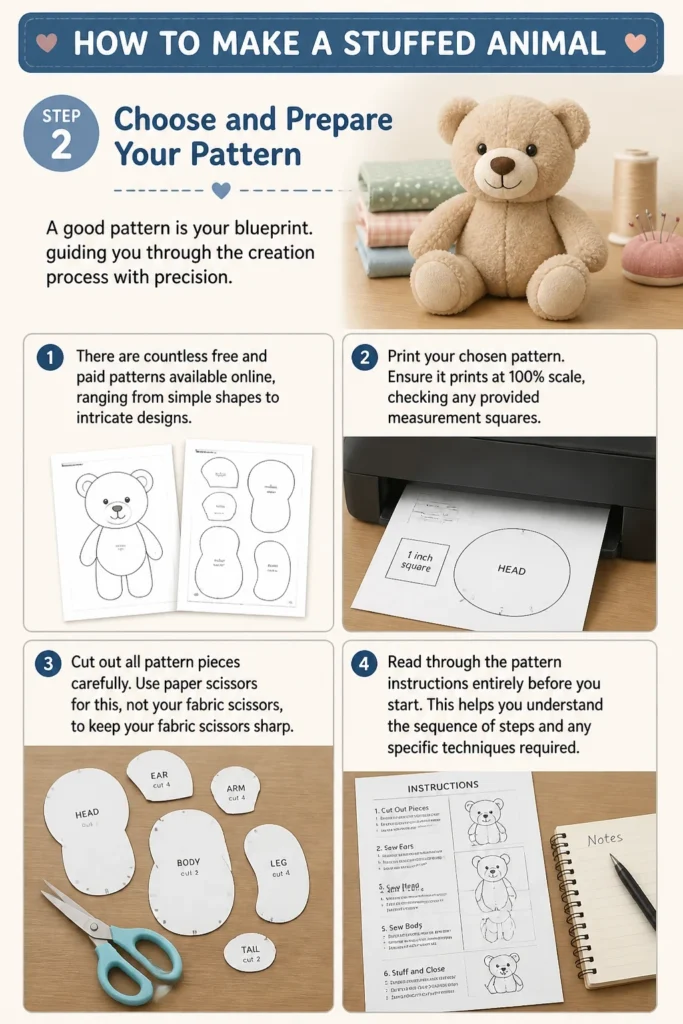
There are countless free and paid patterns available online, ranging from simple shapes to intricate designs.
Print your chosen pattern. Ensure it prints at 100% scale, checking any provided measurement squares.
Cut out all pattern pieces carefully. Use paper scissors for this, not your fabric scissors, to keep your fabric scissors sharp.
Read through the pattern instructions entirely before you start. This helps you understand the sequence of steps and any specific techniques required.
Step 3: Cut Out Your Fabric Pieces
Accuracy in cutting translates directly to a cleaner, more professional-looking finished product.
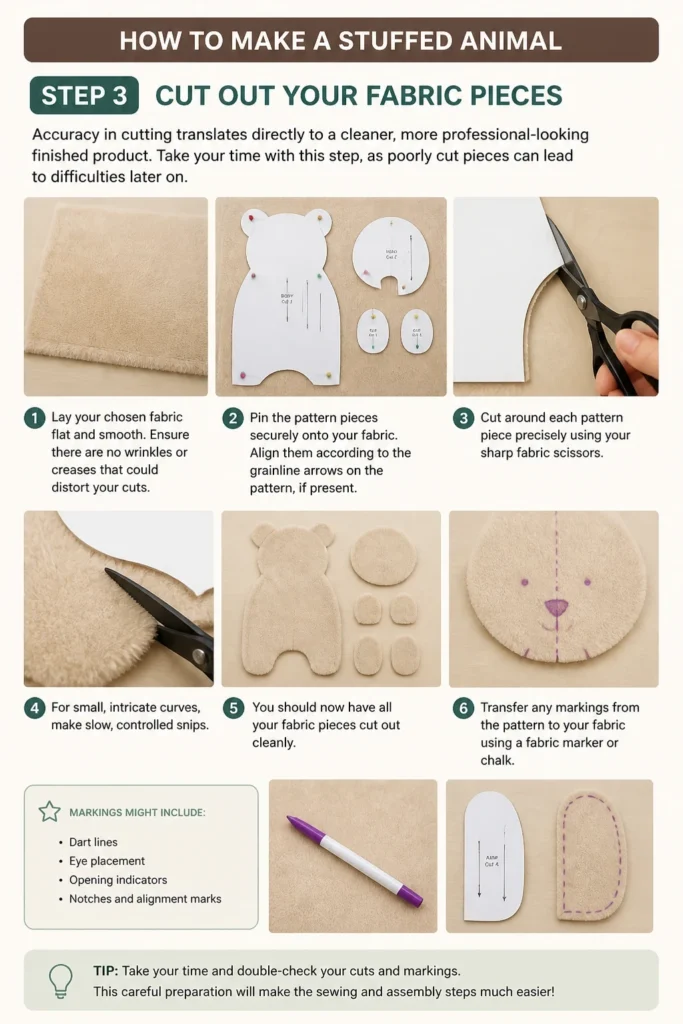
Take your time with this step, as poorly cut pieces can lead to difficulties later on.
Lay your chosen fabric flat and smooth. Ensure there are no wrinkles or creases that could distort your cuts.
Pin the pattern pieces securely onto your fabric. Align them according to the grainline arrows on the pattern, if present.
Cut around each pattern piece precisely using your sharp fabric scissors. For small, intricate curves, make slow, controlled snips.
Transfer any markings from the pattern to your fabric using a fabric marker or chalk. These might include dart lines, eye placement, or opening indicators.
Step 4: Sew the Body Pieces Together
This is where your stuffed animal truly begins to take shape, transforming flat fabric into a three-dimensional form.
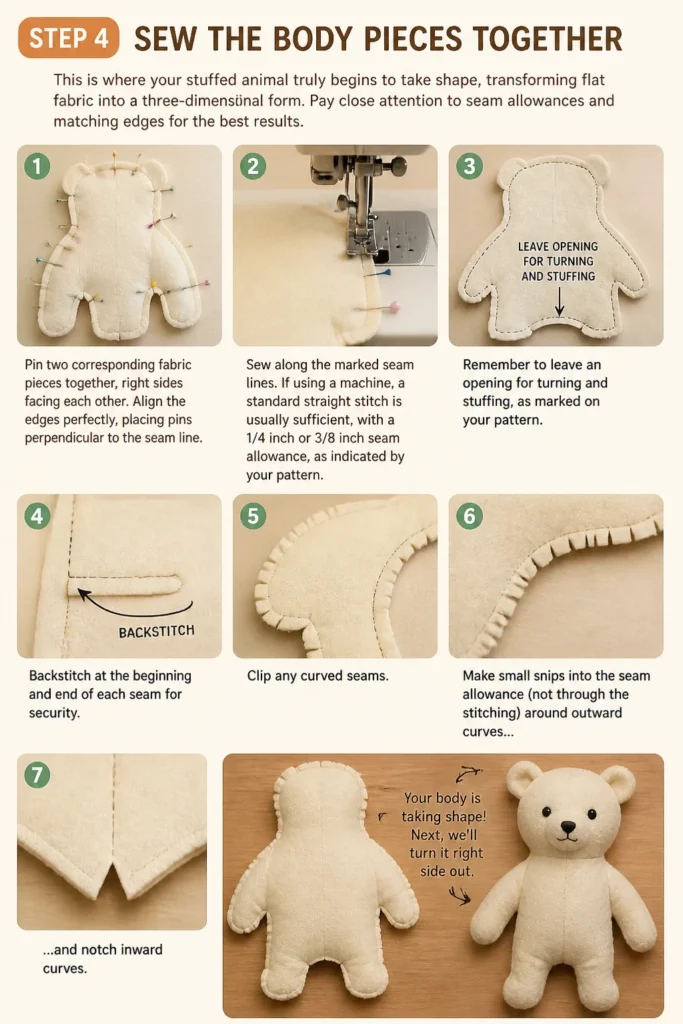
Pay close attention to seam allowances and matching edges for the best results.
Pin two corresponding fabric pieces together, right sides facing each other. Align the edges perfectly, placing pins perpendicular to the seam line.
Sew along the marked seam lines. If using a machine, a standard straight stitch is usually sufficient, with a 1/4 inch or 3/8 inch seam allowance, as indicated by your pattern.
Remember to leave an opening for turning and stuffing, as marked on your pattern. Backstitch at the beginning and end of each seam for security.
Clip any curved seams. Make small snips into the seam allowance (not through the stitching) around outward curves, and notch inward curves. This helps the fabric lie flat when turned right side out.
Pro Tip: Use a slightly shorter stitch length (around 2.0-2.2mm) for stuffed animals. This creates a stronger seam that is less likely to pull apart when stuffed.
Step 5: Add Details (Eyes, Nose, Mouth)
These small additions are what give your stuffed animal its unique character and expression.
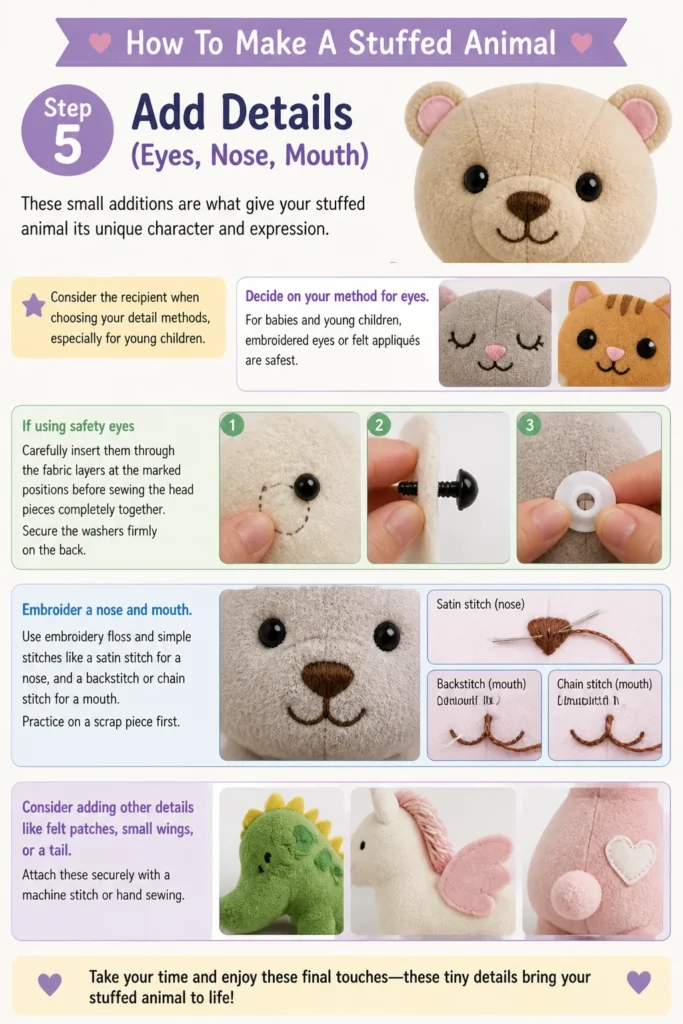
Consider the recipient when choosing your detail methods, especially for young children.
Decide on your method for eyes. For babies and young children, embroidered eyes or felt appliqués are safest.
If using safety eyes: Carefully insert them through the fabric layers at the marked positions before sewing the head pieces completely together. Secure the washers firmly on the back.
Embroider a nose and mouth. Use embroidery floss and simple stitches like a satin stitch for a nose, and a backstitch or chain stitch for a mouth. Practice on a scrap piece first.
Consider adding other details like felt patches, small wings, or a tail. Attach these securely with a machine stitch or hand sewing.
Step 6: Stuff Your Creation
Stuffing is a critical step that brings your flat fabric into a huggable, three-dimensional form.
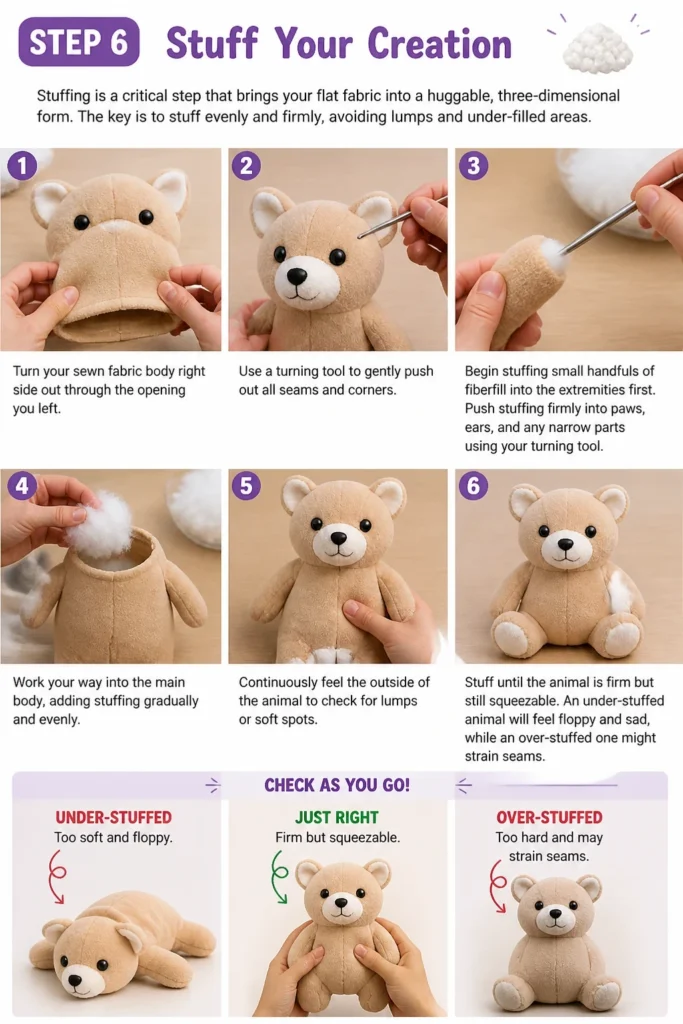
The key is to stuff evenly and firmly, avoiding lumps and under-filled areas.
Turn your sewn fabric body right side out through the opening you left. Use a turning tool to gently push out all seams and corners.
Begin stuffing small handfuls of fiberfill into the extremities first. Push stuffing firmly into paws, ears, and any narrow parts using your turning tool.
Work your way into the main body, adding stuffing gradually and evenly. Continuously feel the outside of the animal to check for lumps or soft spots.
Stuff until the animal is firm but still squeezable. An under-stuffed animal will feel floppy and sad, while an over-stuffed one might strain seams.
Step 7: Close the Opening and Finish
The final stitches seal your creation, making it ready for cuddles.
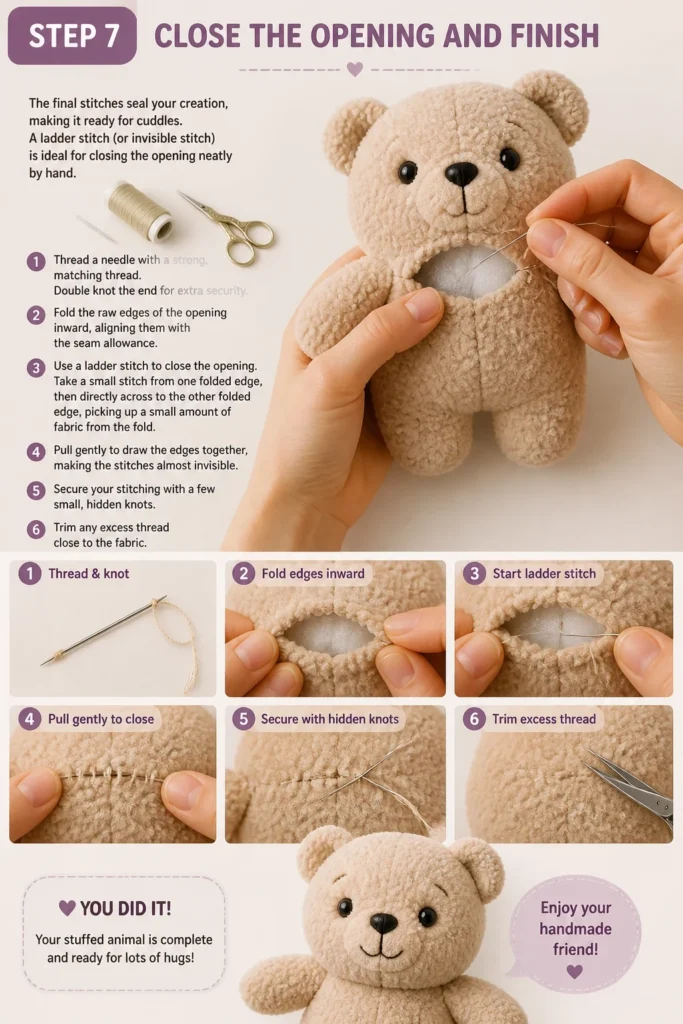
A ladder stitch (or invisible stitch) is ideal for closing the opening neatly by hand.
Thread a needle with a strong, matching thread. Double knot the end for extra security.
Fold the raw edges of the opening inward, aligning them with the seam allowance.
Use a ladder stitch to close the opening. Take a small stitch from one folded edge, then directly across to the other folded edge, picking up a small amount of fabric from the fold. Pull gently to draw the edges together, making the stitches almost invisible.
Secure your stitching with a few small, hidden knots. Trim any excess thread close to the fabric.
Step 8: Give Your Stuffed Animal Life
This final step is less about sewing and more about the magic of creation.
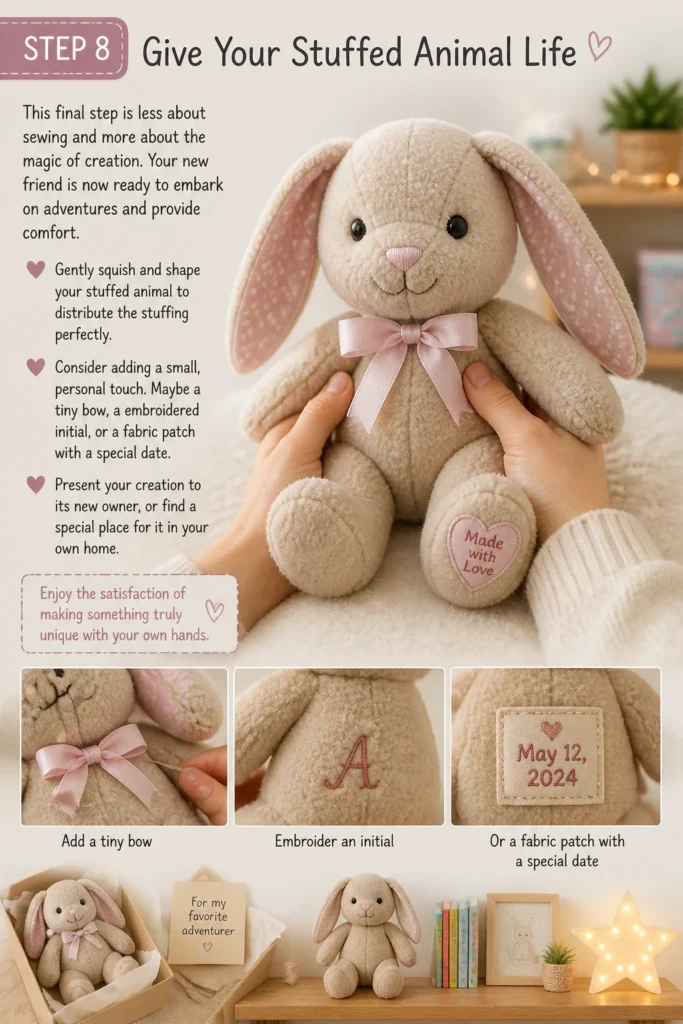
Your new friend is now ready to embark on adventures and provide comfort.
Gently squish and shape your stuffed animal to distribute the stuffing perfectly.
Consider adding a small, personal touch. Maybe a tiny bow, a embroidered initial, or a fabric patch with a special date.
Present your creation to its new owner, or find a special place for it in your own home. Enjoy the satisfaction of making something truly unique with your own hands.
Common Mistakes to Avoid
Not Clipping Curves
Forgetting to clip or notch seam allowances on curves is a common oversight. When you turn a curved seam right side out without clipping, the fabric pulls and puckers, preventing a smooth, rounded shape.
Always make small snips into the seam allowance of outward curves, and cut small wedges out of inward curves. This releases the tension in the fabric, allowing it to lie flat and smooth once turned.
Uneven Seam Allowances
Inconsistent seam allowances can significantly alter the final shape and symmetry of your stuffed animal. If you sew too close to the edge in some places and too far in others, your pieces won’t match up properly.
Use the guides on your sewing machine’s throat plate or a seam gauge to maintain a consistent seam allowance throughout your project. This ensures your pieces fit together as intended by the pattern.
Under or Over Stuffing
The amount of stuffing you use drastically affects the feel and appearance of your finished animal. Under-stuffing makes the animal feel floppy and sad, while over-stuffing can strain seams and make it too rigid.
Stuff gradually, adding small amounts of fiberfill at a time. Continuously feel the animal to ensure even distribution and firmness. It should be firm enough to hold its shape but still soft and squeezable.
Using Unsafe Embellishments
When making stuffed animals for babies or young children, certain embellishments can pose a choking hazard. Small buttons, beads, or loosely attached ribbons are not safe for this age group.
Opt for embroidered features (eyes, nose, mouth) or securely attached felt pieces for children under three. If using safety eyes, ensure they are properly installed and the washers are extremely tight and secure.
Troubleshooting
Lumpy Stuffing
If your stuffed animal feels lumpy or uneven, it’s usually due to stuffing too quickly or in large clumps. This prevents the fiberfill from distributing smoothly.
To fix this, carefully unpick a small section of your closing seam. Reach inside and gently massage the stuffing, breaking up any large clumps and pushing it into empty areas. Add more small bits of stuffing if needed, then re-stitch the opening.
Seams Pulling Apart
If your seams are starting to gape or pull apart, especially after stuffing, it indicates that your stitches might be too loose or the seam allowance wasn’t wide enough for the stress.
Reinforce the strained area by hand-stitching over the existing seam with strong thread. For future projects, use a slightly shorter stitch length and a wider seam allowance if the fabric is prone to fraying or stretching.
Crooked Features (Eyes, Nose)
Discovering that your animal’s eyes or nose are off-center after they’re attached can be frustrating. This often happens if markings weren’t precise or if the fabric shifted during attachment.
For embroidered features, you can carefully unpick the stitches and re-embroider. For safety eyes, if they’re already installed, it’s very difficult to remove them without damaging the fabric. In such cases, consider it a unique “quirk” that adds character, or plan more carefully for the next project by using a ruler and fabric pen to mark exact placement.
Key Takeaways
- Preparation is Key: Gather all materials and prepare your pattern before you begin sewing.
- Cut Precisely: Accurate fabric cutting ensures your pieces fit together correctly and your finished animal is symmetrical.
- Master Seam Allowances: Consistent seam allowances are crucial for maintaining the intended shape and size of your design.
- Stuff with Care: Stuff gradually and evenly to avoid lumps and achieve the perfect firmness.
- Prioritize Safety: Choose appropriate embellishments, especially when crafting for young children, to prevent choking hazards.
- Embrace Imperfection: Each handmade stuffed animal is unique; minor quirks add to its charm and story.
Frequently Asked Questions
What is the best fabric for a beginner?
Felt is often recommended for absolute beginners because it doesn’t fray, making it very forgiving. Fleece and cotton are also excellent choices as they are easy to cut, sew, and widely available in many colors and patterns.
How do I make sure my stuffed animal is child-safe?
To ensure child safety, avoid small buttons, beads, or any embellishments that could be pulled off and become a choking hazard. Opt for embroidered eyes and noses, or use securely installed safety eyes designed for toys. Ensure all seams are strong and durable.
Can I hand sew a stuffed animal?
Absolutely! Many beautiful stuffed animals are created entirely by hand. While it might take a bit longer, hand sewing allows for intricate details and a truly personal touch. Use a strong thread and small, consistent stitches for durability.
How do I wash a handmade stuffed animal?
Most handmade stuffed animals can be gently hand-washed with mild soap and cold water, then air-dried. For machine-washable fabrics and sturdy construction, place the animal in a mesh laundry bag and wash on a delicate cycle with cold water, then air dry or tumble dry on low heat.
Our Top Recommended Finds
- Premium Polyester Fiberfill: Essential for a soft, huggable, and evenly stuffed animal. Look for brands known for their resilience and hypoallergenic properties.
- Sharp Fabric Scissors: A dedicated pair of sharp scissors makes cutting fabric effortless and precise, leading to cleaner edges and better results.
- Safety Eye & Nose Kit: If you plan to make multiple animals or want a professional finish, a kit with various sizes and colors of safety eyes and noses is a fantastic investment.
Your Next Creative Adventure Awaits
You’ve now learned the foundational steps to bring a charming stuffed animal to life with your own hands.
This journey from flat fabric to a cherished companion is incredibly fulfilling, opening doors to endless creative possibilities.
Don’t stop here. Consider trying a more complex pattern, experimenting with different fabrics, or even designing your very own unique creature.
Grab your materials today and start stitching your next heartwarming creation. The joy of making is truly boundless!
Beginner-friendly templates, step-by-step guides,
and weekly project ideas in your inbox.