
How To Make Cookie Dough Edible

Beginner-friendly templates, step-by-step guides,
and weekly project ideas in your inbox.
There’s a special kind of comfort in a spoonful of raw cookie dough. It’s a forbidden pleasure many of us secretly enjoy, despite the warnings. I remember sneaking bites from my grandma’s mixing bowl, a thrill that felt both naughty and deeply satisfying.
This guide is for anyone who loves that taste but wants to enjoy it without a single worry. You can achieve that perfect, safe, and utterly delicious edible cookie dough right in your own kitchen.

Quick Overview
You are about to learn how to transform traditional cookie dough into a safe-to-eat treat. This process focuses on eliminating common raw ingredient risks while preserving all the delicious flavor and texture you crave.
- Time needed: 30-45 minutes (includes flour cooling)
- Difficulty: Beginner
- What you’ll need: All-purpose flour, unsalted butter, granulated sugar, brown sugar, milk (dairy or non-dairy), vanilla extract, salt, your favorite mix-ins, a microwave-safe bowl or baking sheet, a mixing bowl, and a spatula.
Step-by-Step Instructions
The secret to truly safe edible cookie dough lies in two key ingredient adjustments. We will tackle these carefully to ensure your final product is both delicious and worry-free.
Step 1: Gather Your Ingredients and Tools
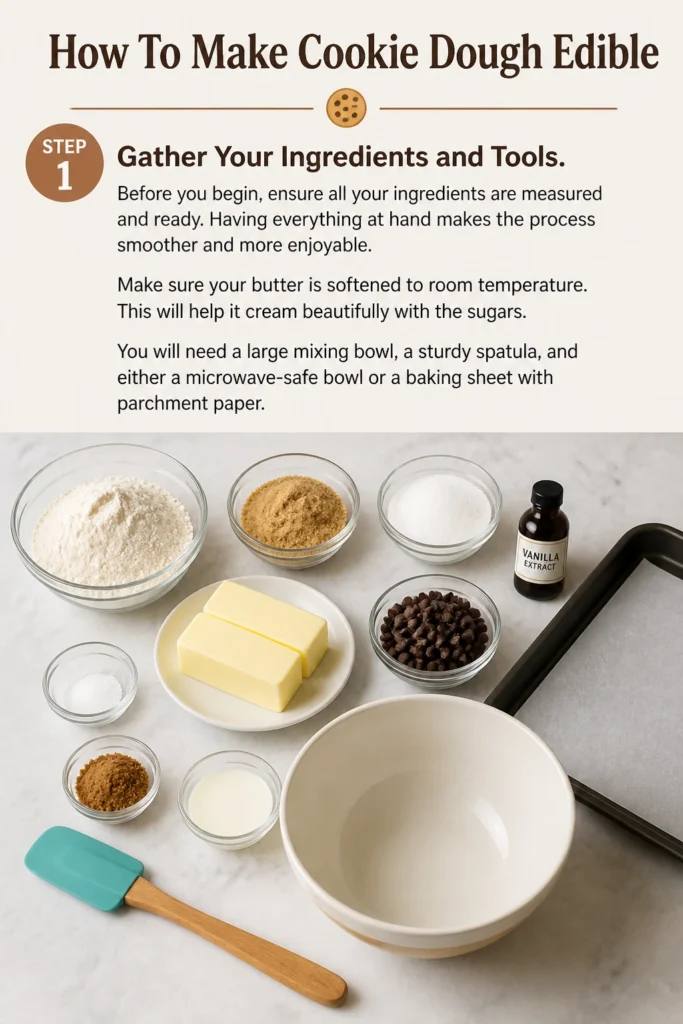
Before you begin, ensure all your ingredients are measured and ready. Having everything at hand makes the process smoother and more enjoyable.
Make sure your butter is softened to room temperature. This will help it cream beautifully with the sugars.
You will need a large mixing bowl, a sturdy spatula, and either a microwave-safe bowl or a baking sheet with parchment paper.
Step 2: Heat Treat Your Flour
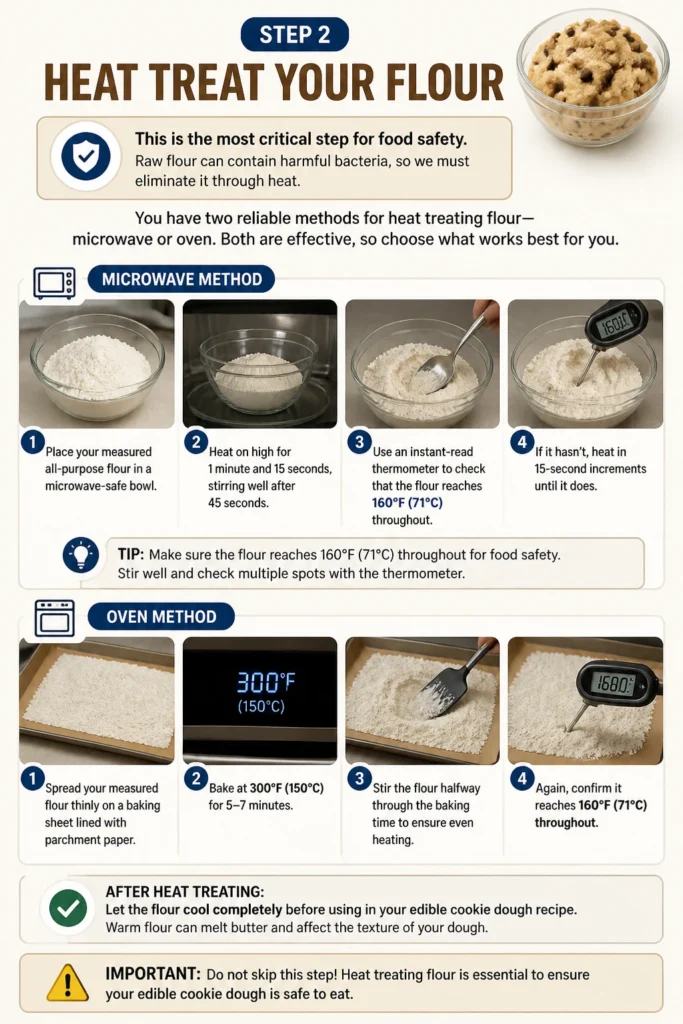
This is the most critical step for food safety. Raw flour can contain harmful bacteria, so we must eliminate it through heat.
You have two reliable methods for heat treating flour: microwave or oven. Both are effective, so choose what works best for you.
For the microwave method, place your measured all-purpose flour in a microwave-safe bowl. Heat it on high for 1 minute and 15 seconds, stirring well after 45 seconds.
Use an instant-read thermometer to check that the flour reaches 160F (71C) throughout. If it hasn’t, heat in 15-second increments until it does.
For the oven method, spread your measured flour thinly on a baking sheet lined with parchment paper. Bake at 300F (150C) for 5-7 minutes.
Stir the flour halfway through the baking time to ensure even heating. Again, confirm it reaches 160F (71C) with a thermometer.
Pro Tip: Always let the heat-treated flour cool completely before adding it to your other ingredients. Warm flour can melt the butter and ruin the dough’s texture. Spread it out on a plate to speed up cooling.
Step 3: Cream the Butter and Sugars
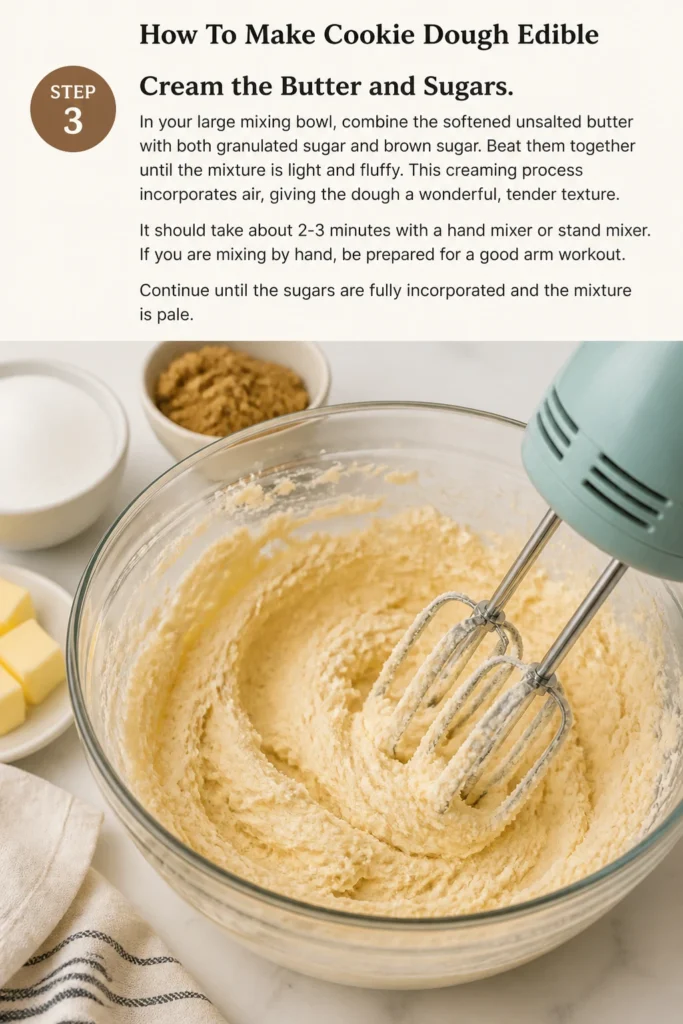
In your large mixing bowl, combine the softened unsalted butter with both granulated sugar and brown sugar. Beat them together until the mixture is light and fluffy.
This creaming process incorporates air, giving the dough a wonderful, tender texture. It should take about 2-3 minutes with a hand mixer or stand mixer.
If you are mixing by hand, be prepared for a good arm workout. Continue until the sugars are fully incorporated and the mixture is pale.
Step 4: Incorporate Wet Ingredients
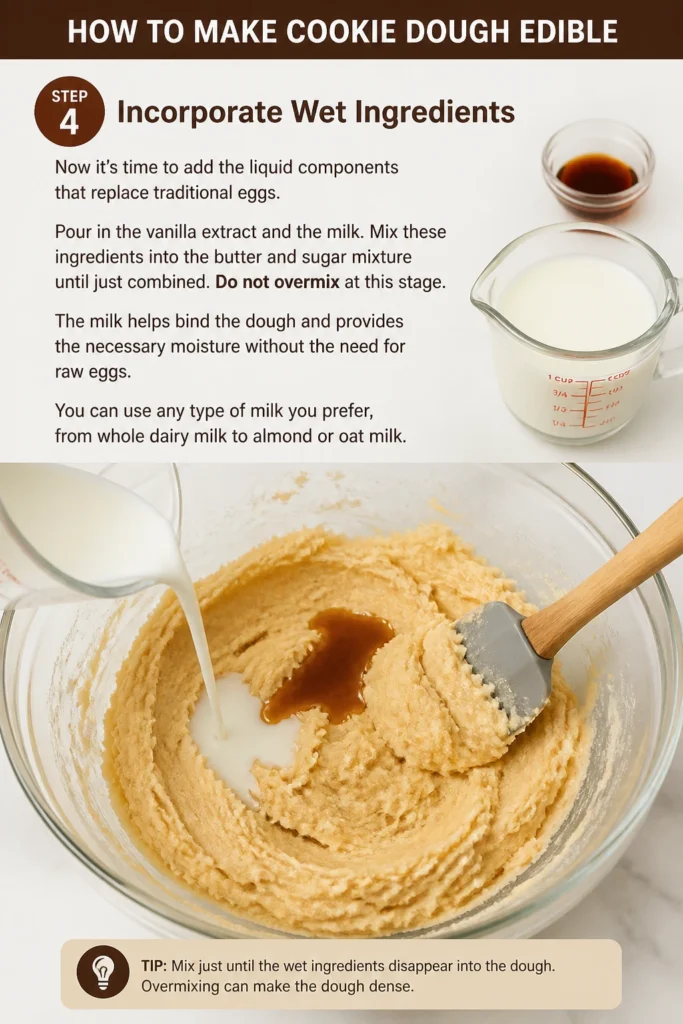
Now it’s time to add the liquid components that replace traditional eggs. Pour in the vanilla extract and the milk.
Mix these ingredients into the butter and sugar mixture until just combined. Do not overmix at this stage.
The milk helps bind the dough and provides the necessary moisture without the need for raw eggs. You can use any type of milk you prefer, from whole dairy milk to almond or oat milk.
Step 5: Gradually Add Heat-Treated Flour and Salt
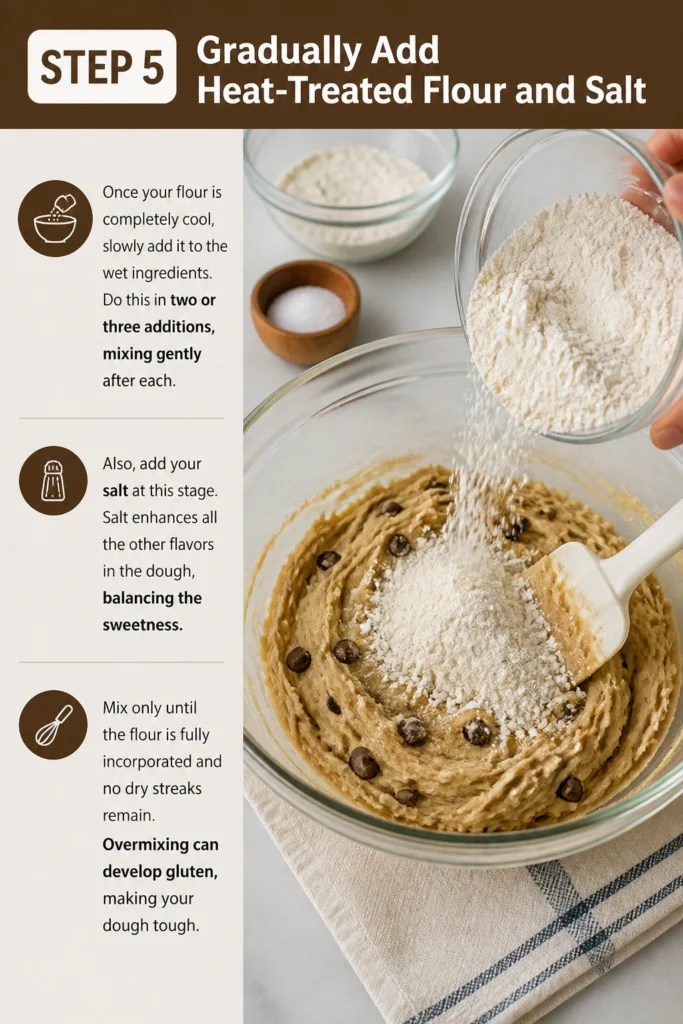
Once your flour is completely cool, slowly add it to the wet ingredients. Do this in two or three additions, mixing gently after each.
Also, add your salt at this stage. Salt enhances all the other flavors in the dough, balancing the sweetness.
Mix only until the flour is fully incorporated and no dry streaks remain. Overmixing can develop gluten, making your dough tough.
Step 6: Fold in Your Favorite Mix-ins
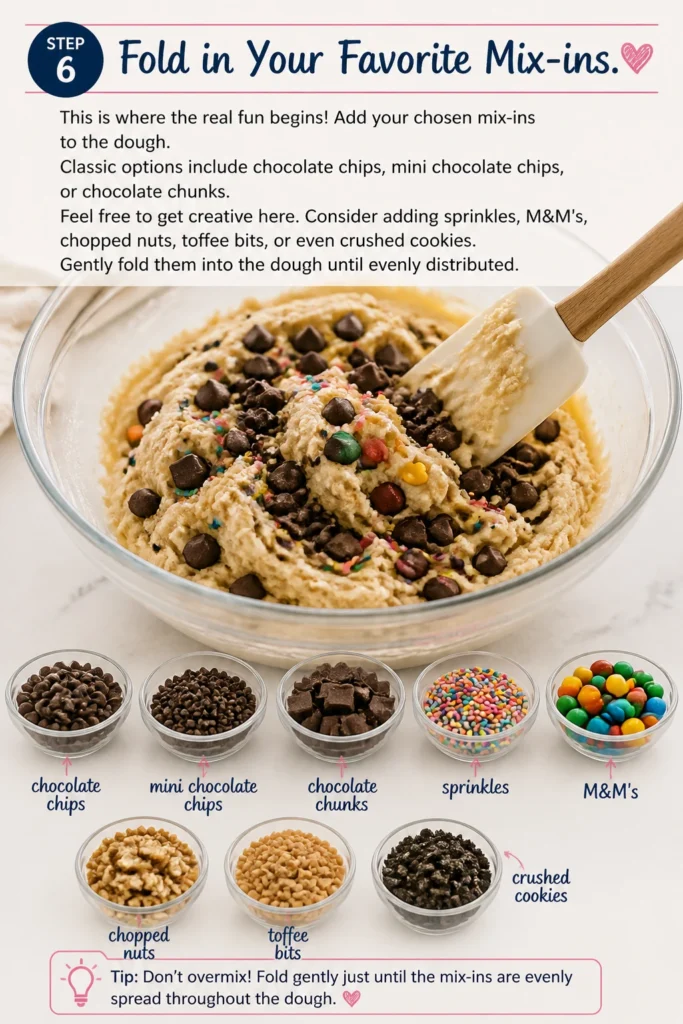
This is where the real fun begins! Add your chosen mix-ins to the dough.
Classic options include chocolate chips, mini chocolate chips, or chocolate chunks. Feel free to get creative here.
Consider adding sprinkles, M&M’s, chopped nuts, toffee bits, or even crushed cookies. Gently fold them into the dough until evenly distributed.
Step 7: Chill for Optimal Texture (Optional but Recommended)
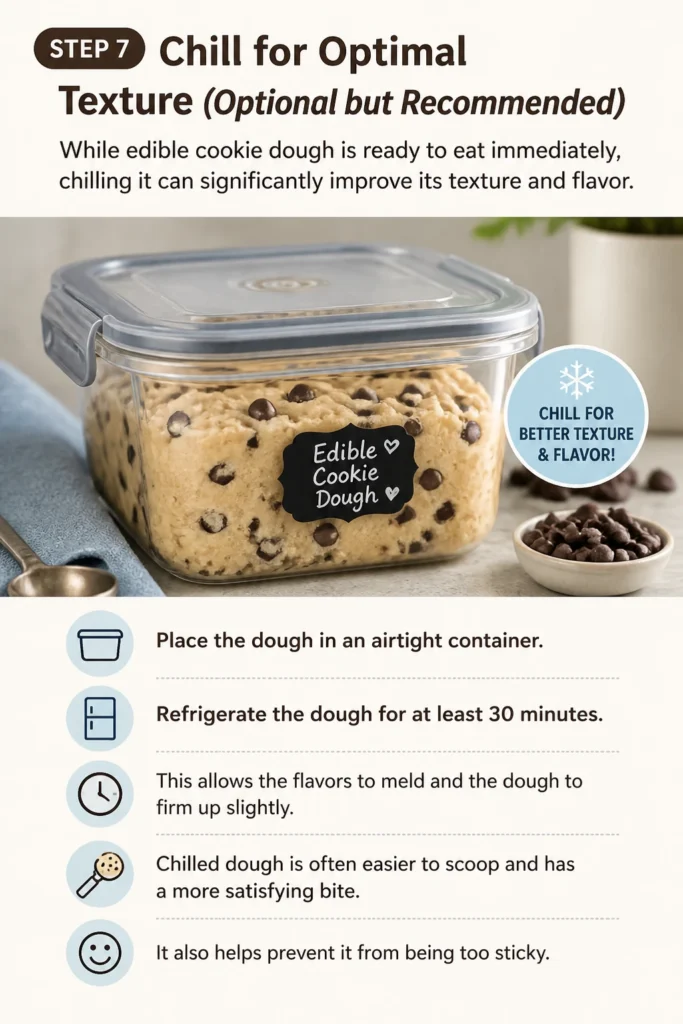
While edible cookie dough is ready to eat immediately, chilling it can significantly improve its texture and flavor. Place the dough in an airtight container.
Refrigerate the dough for at least 30 minutes. This allows the flavors to meld and the dough to firm up slightly.
Chilled dough is often easier to scoop and has a more satisfying bite. It also helps prevent it from being too sticky.
Step 8: Enjoy Your Safe Treat
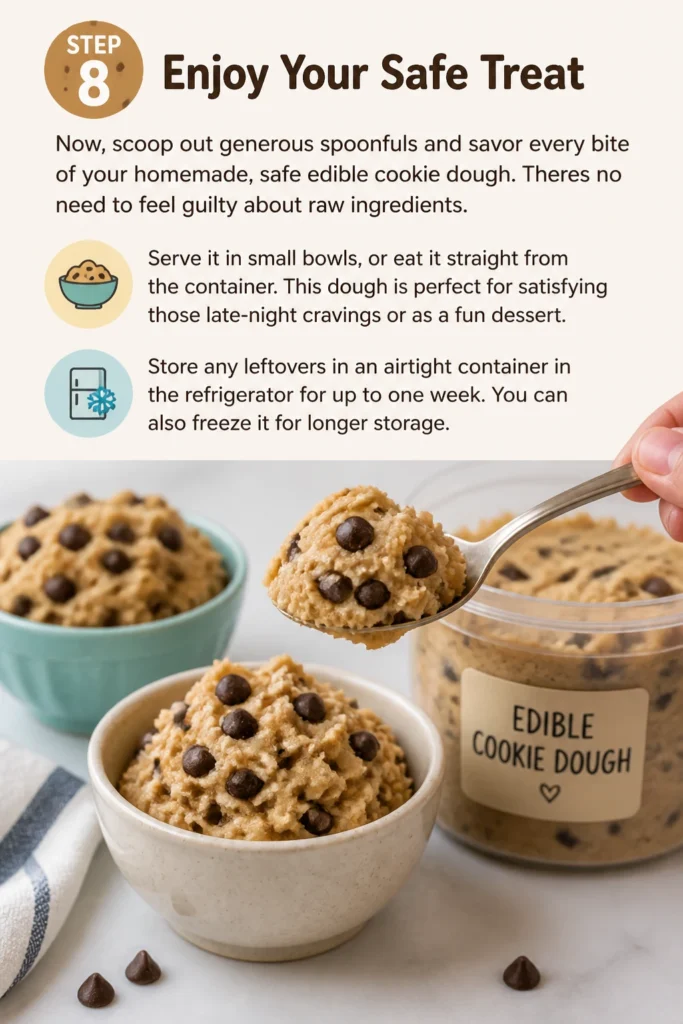
Now, scoop out generous spoonfuls and savor every bite of your homemade, safe edible cookie dough. There’s no need to feel guilty about raw ingredients.
Serve it in small bowls, or eat it straight from the container. This dough is perfect for satisfying those late-night cravings or as a fun dessert.
Store any leftovers in an airtight container in the refrigerator for up to one week. You can also freeze it for longer storage.
Common Mistakes to Avoid
Even with a straightforward recipe, certain pitfalls can derail your edible cookie dough success. Being aware of these common errors will help you achieve perfect results every time.
Skipping Flour Heat Treatment
Many people assume raw eggs are the only concern in raw cookie dough. However, raw flour can also harbor harmful bacteria like E. coli. Omitting the heat treatment step puts your health at risk. Always ensure your flour reaches 160F (71C) to kill any potential pathogens. This step is non-negotiable for safety.
Using Raw Eggs
Traditional cookie dough recipes call for raw eggs, which carry a risk of salmonella contamination. For edible cookie dough, eggs are completely unnecessary and unsafe. Our recipe replaces the binding and moisture properties of eggs with milk, ensuring a delicious and safe product without the risk. Never add raw eggs to dough intended for eating raw.
Over-mixing the Dough
Once the flour is added, it’s easy to get carried away with mixing. Over-mixing develops the gluten in the flour, leading to a tough, chewy, and less pleasant dough texture. Mix only until the ingredients are just combined and no dry streaks of flour remain. A gentle hand will yield a wonderfully tender dough.
Not Adjusting Consistency
Sometimes, despite following the recipe, your dough might end up too dry or too wet. This can happen due to variations in flour absorption or butter consistency. Not adjusting for these differences will result in crumbly or overly sticky dough. Always be prepared to make minor adjustments to achieve the perfect pliable texture.
Troubleshooting
Even the best recipes can present minor challenges. Here are solutions to common issues you might encounter while making your edible cookie dough.
Dough is Too Dry or Crumbly
If your dough feels too dry, crumbly, and won’t hold together, it likely needs more liquid. This can happen if your flour absorbed more moisture than expected or if your butter was slightly firmer. To fix this, add milk, one teaspoon at a time, mixing thoroughly after each addition until the dough reaches a soft, pliable consistency.
Dough is Too Wet or Sticky
Conversely, if your dough is too wet and sticky, making it difficult to handle, you’ll need to absorb some of that excess moisture. The solution is to add a small amount of additional heat-treated flour. Start with one tablespoon of cooled, heat-treated flour, mix it in, and add more if needed until the dough is no longer excessively sticky.
Flour Smells Burnt After Heat Treatment
If your flour smells burnt after microwaving or baking, it means you’ve overheated it. This will impart an unpleasant flavor to your dough. Unfortunately, burnt flour cannot be salvaged. You will need to discard it and heat-treat a fresh batch, ensuring you stir more frequently and check the temperature carefully to avoid scorching.
Key Takeaways
- Always heat treat your flour to 160F (71C) to eliminate harmful bacteria.
- Never use raw eggs in dough intended for raw consumption; milk is a safe substitute.
- Cream butter and sugars thoroughly for a light, fluffy base.
- Mix in flour gently to avoid developing gluten and tough dough.
- Adjust dough consistency as needed with small additions of milk or heat-treated flour.
- Chill your dough for at least 30 minutes for improved texture and flavor.
Frequently Asked Questions
People often have questions about ingredients, storage, and variations when it comes to edible cookie dough. Here are some of the most common inquiries.
Can I use gluten-free flour for edible cookie dough?
Yes, you absolutely can use gluten-free all-purpose flour blends. Just remember that gluten-free flours can absorb liquids differently, so you might need to adjust the amount of milk slightly to achieve the right consistency. Always heat treat gluten-free flour just as you would regular flour for safety.
How long does edible cookie dough last?
When stored properly in an airtight container in the refrigerator, your homemade edible cookie dough will last for up to one week. For longer storage, you can freeze it for up to three months. Thaw it in the refrigerator before enjoying.
Can I bake this edible cookie dough?
No, this specific recipe is formulated for raw consumption and is not designed for baking. It lacks leavening agents like baking soda or baking powder and eggs, which are crucial for traditional baked cookies. If you want to bake cookies, use a standard cookie recipe.
What are some other fun mix-ins I can use?
Beyond chocolate chips, the possibilities are endless! Try crushed Oreos, peanut butter chips, white chocolate chips, butterscotch chips, chopped nuts, mini marshmallows, or even dried fruit. Get creative and customize your dough to your exact preferences.
Our Top Recommended Finds
Having the right tools can make your edible cookie dough experience even better. These simple items are incredibly helpful in the kitchen.
- Instant-Read Thermometer: Essential for accurately checking the flour’s temperature, ensuring it reaches the safe 160F (71C) mark.
- Heat-Safe Mixing Bowl: A sturdy, microwave-safe glass or ceramic bowl is perfect for heat-treating your flour safely and efficiently.
- Airtight Food Storage Containers: Ideal for storing your finished edible cookie dough in the refrigerator or freezer, keeping it fresh and delicious.
Your Next Delicious Adventure
You now possess the knowledge to create perfectly safe and incredibly tasty edible cookie dough. This isn’t just a recipe; it’s a gateway to guilt-free indulgence. No more sneaking bites with a nervous glance over your shoulder!
Why stop at classic chocolate chip? Experiment with different mix-ins, try various extracts, or even swirl in some caramel. Embrace the joy of safe dough. Make a batch today and share the deliciousness with friends, or keep it all to yourself. You’ve earned it!
Beginner-friendly templates, step-by-step guides,
and weekly project ideas in your inbox.