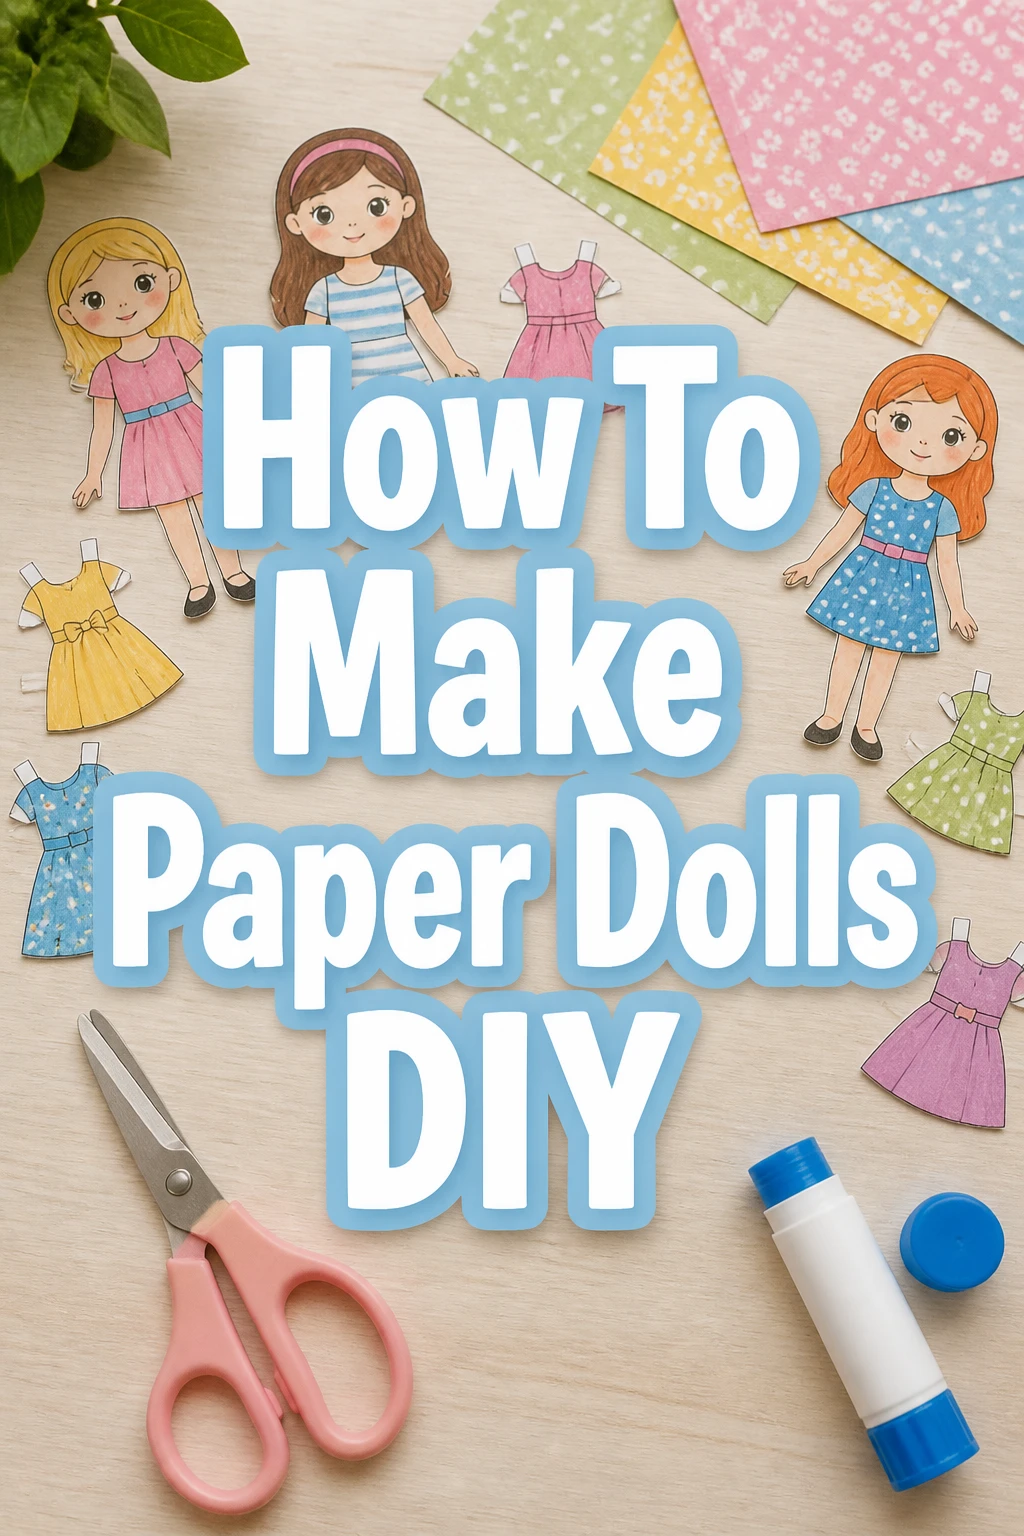
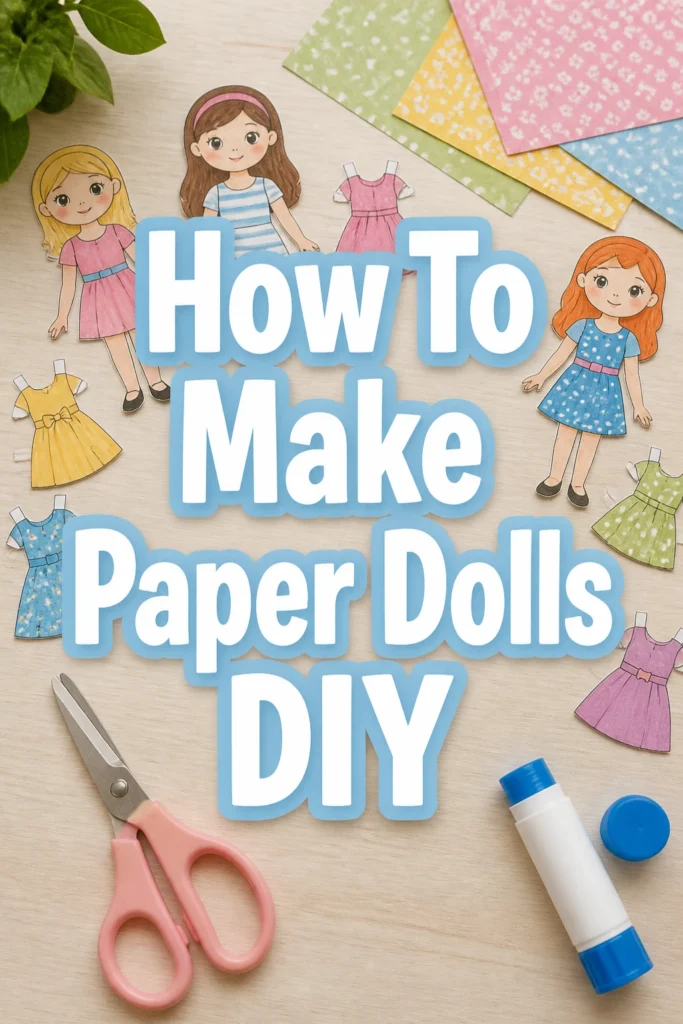
How To Make Paper Dolls DIY

Beginner-friendly templates, step-by-step guides,
and weekly project ideas in your inbox.
Creating paper dolls is a delightful craft, bringing imagination to life with simple materials.
I remember spending countless hours as a child designing outfits and stories for my own handmade paper figures, and I’m excited to share that joy with you.
This guide will walk you through every step, ensuring your DIY paper doll project is a success, whether you’re a beginner or looking for fresh inspiration.
Quick Overview
Making paper dolls is a wonderfully creative project that allows you to design unique characters and their wardrobes. You’ll learn how to sketch, cut, decorate, and create interchangeable outfits, all while having fun and expressing your artistic side.
- Time needed: 2-4 hours (depending on detail and number of outfits)
- Difficulty: Beginner
- What you’ll need: Cardstock, scissors, pencils, markers/crayons, glue stick
Step-by-Step Instructions
Step 1: Gather Your Materials
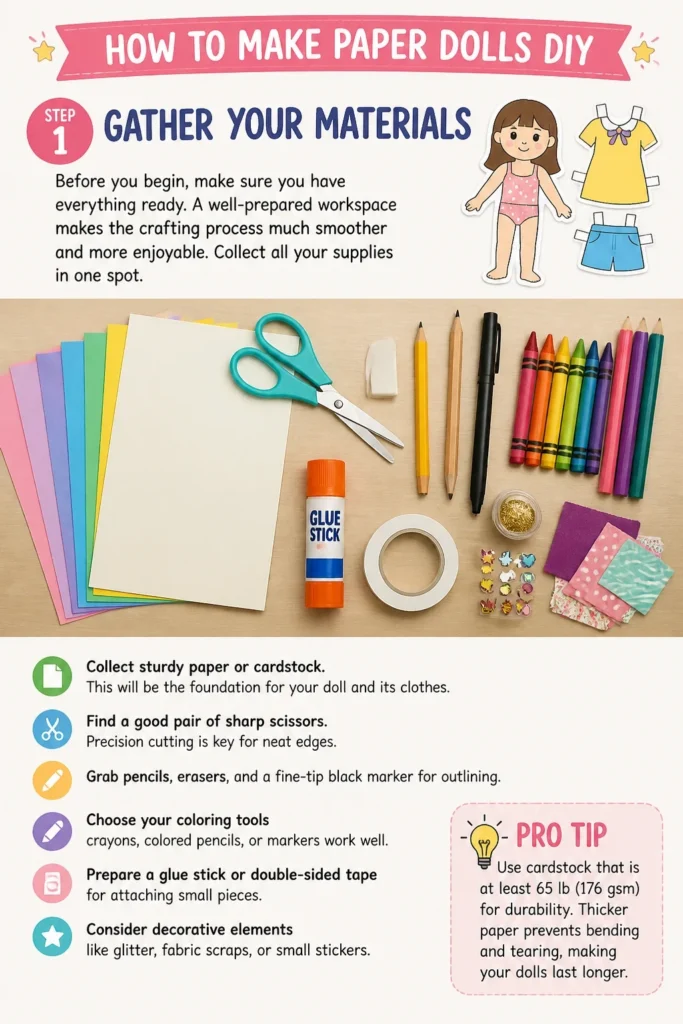
Before you begin, make sure you have everything ready. A well-prepared workspace makes the crafting process much smoother and more enjoyable. Collect all your supplies in one spot.
- Collect sturdy paper or cardstock. This will be the foundation for your doll and its clothes.
- Find a good pair of sharp scissors. Precision cutting is key for neat edges.
- Grab pencils, erasers, and a fine-tip black marker for outlining.
- Choose your coloring tools: crayons, colored pencils, or markers work well.
- Prepare a glue stick or double-sided tape for attaching small pieces.
- Consider decorative elements like glitter, fabric scraps, or small stickers.
Pro Tip: Use cardstock that is at least 65 lb (176 gsm) for durability. Thicker paper prevents bending and tearing, making your dolls last longer.
Step 2: Design Your Doll’s Character
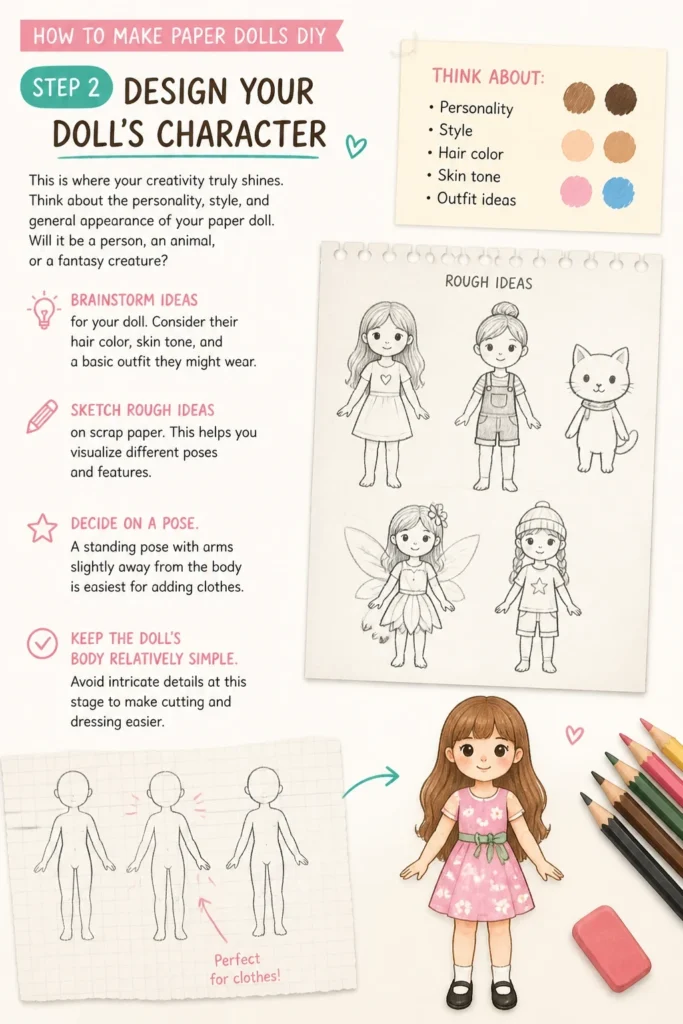
This is where your creativity truly shines. Think about the personality, style, and general appearance of your paper doll. Will it be a person, an animal, or a fantasy creature?
- Brainstorm ideas for your doll. Consider their hair color, skin tone, and a basic outfit they might wear.
- Sketch rough ideas on scrap paper. This helps you visualize different poses and features.
- Decide on a pose. A standing pose with arms slightly away from the body is easiest for adding clothes.
- Keep the doll’s body relatively simple. Avoid intricate details at this stage to make cutting and dressing easier.
Step 3: Draw the Doll’s Outline
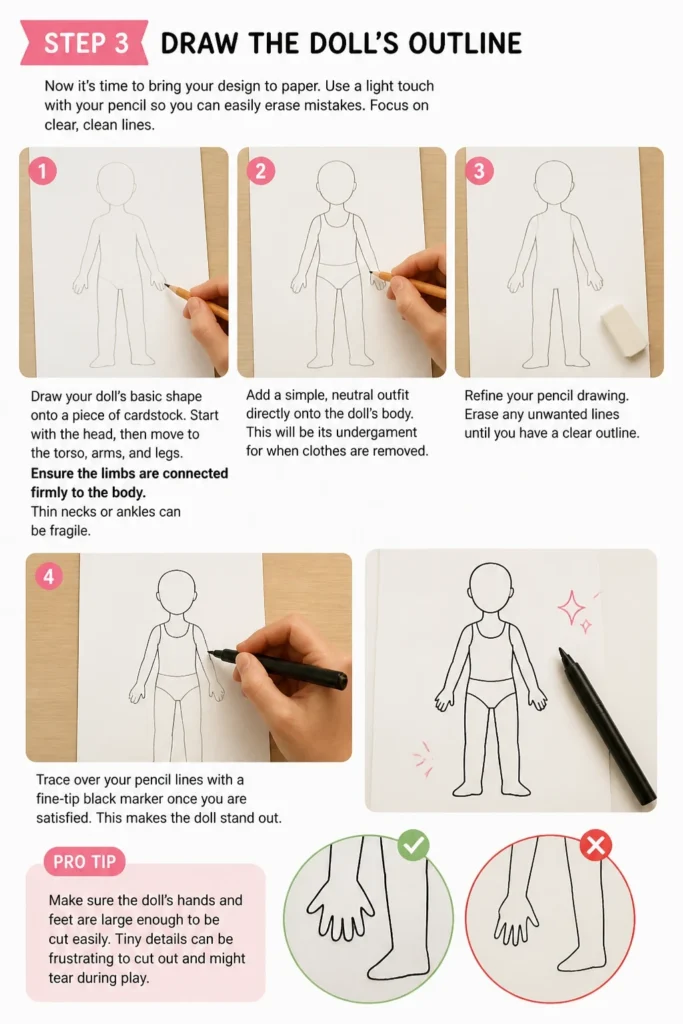
Now it’s time to bring your design to paper. Use a light touch with your pencil so you can easily erase mistakes. Focus on clear, clean lines.
- Draw your doll’s basic shape onto a piece of cardstock. Start with the head, then move to the torso, arms, and legs.
- Ensure the limbs are connected firmly to the body. Thin necks or ankles can be fragile.
- Add a simple, neutral outfit directly onto the doll’s body. This will be its “undergarment” for when clothes are removed.
- Refine your pencil drawing. Erase any unwanted lines until you have a clear outline.
- Trace over your pencil lines with a fine-tip black marker once you are satisfied. This makes the doll stand out.
Pro Tip: Make sure the doll’s hands and feet are large enough to be cut easily. Tiny details can be frustrating to cut out and might tear.
Step 4: Cut Out Your Doll
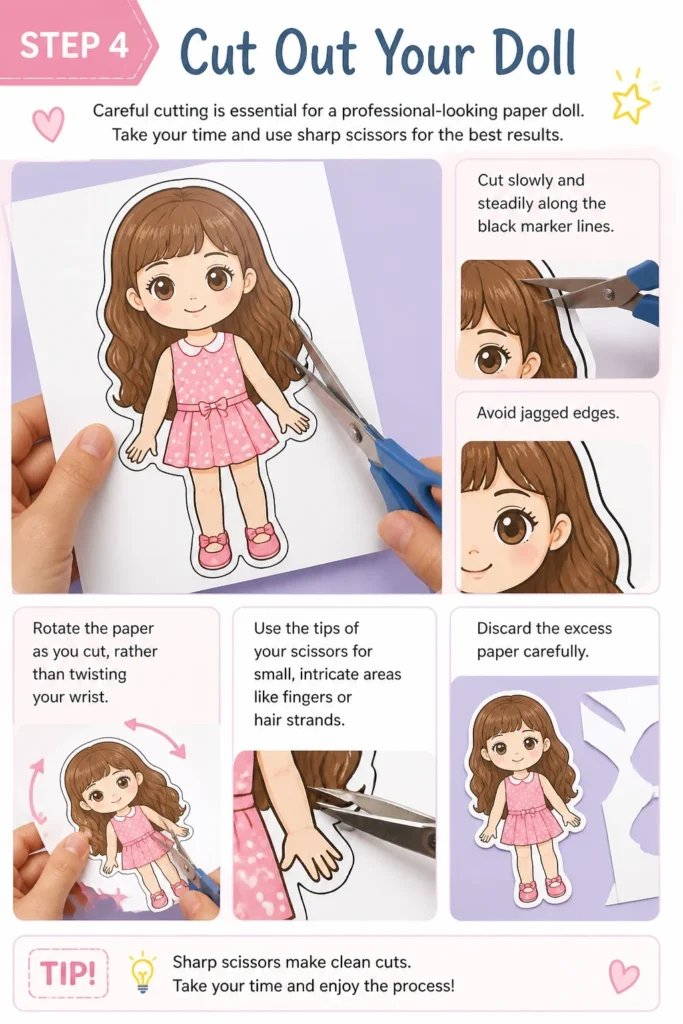
Careful cutting is essential for a professional-looking paper doll. Take your time and use sharp scissors for the best results.
- Cut slowly and steadily along the black marker lines. Avoid jagged edges.
- Rotate the paper as you cut, rather than twisting your wrist. This gives you better control.
- Use the tips of your scissors for small, intricate areas like fingers or hair strands.
- Discard the excess paper carefully.
Step 5: Add Details and Color to Your Doll
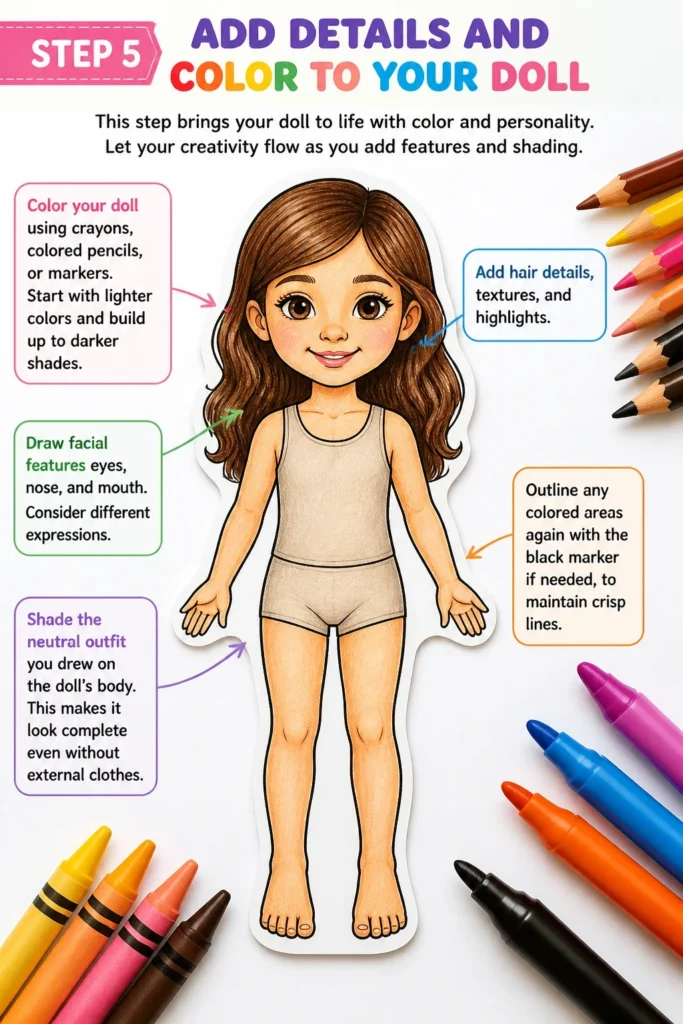
This step brings your doll to life with color and personality. Let your creativity flow as you add features and shading.
- Color your doll using crayons, colored pencils, or markers. Start with lighter colors and build up to darker shades.
- Draw facial features: eyes, nose, and mouth. Consider different expressions.
- Add hair details, textures, and highlights.
- Shade the neutral outfit you drew on the doll’s body. This makes it look complete even without external clothes.
- Outline any colored areas again with the black marker if needed, to maintain crisp lines.
Step 6: Create Clothes and Accessories
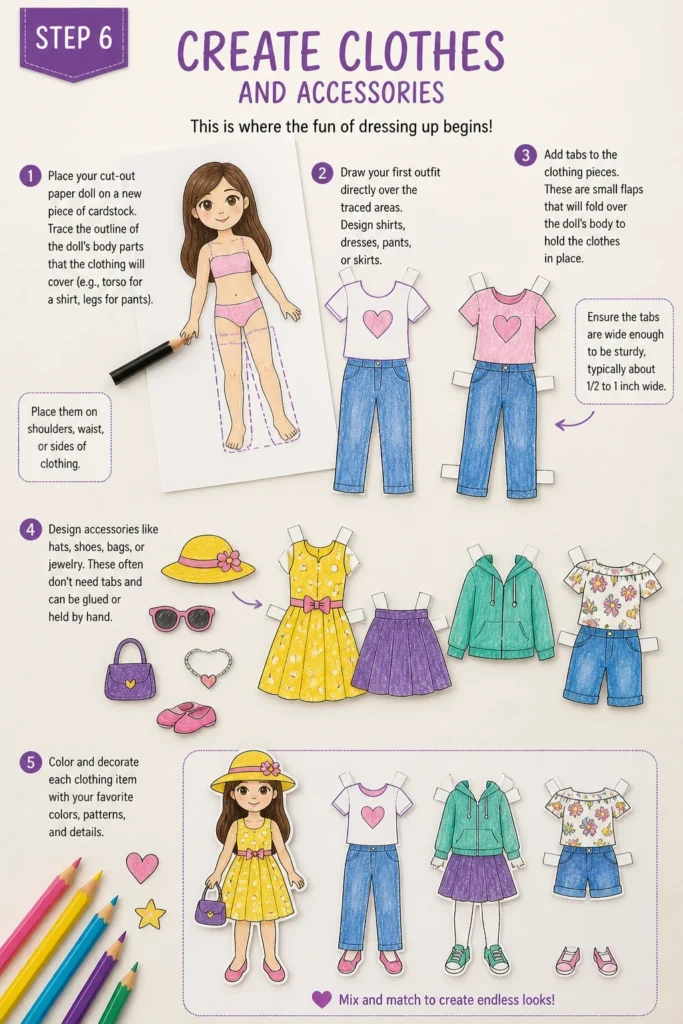
This is where the fun of dressing up begins. Design a wardrobe that reflects your doll’s character and your imagination.
- Place your cut-out paper doll on a new piece of cardstock.
- Trace the outline of the doll’s body parts that the clothing will cover (e.g., torso for a shirt, legs for pants).
- Draw your first outfit directly over the traced areas. Design shirts, dresses, pants, or skirts.
- Add tabs to the clothing pieces. These are small flaps that will fold over the doll’s body to hold the clothes in place.
- Ensure the tabs are wide enough to be sturdy, typically about 1/2 to 1 inch wide. Place them on shoulders, waist, or sides of clothing.
- Design accessories like hats, shoes, bags, or jewelry. These often don’t need tabs and can be glued or held by hand.
- Color and decorate each clothing item and accessory.
Pro Tip: Draw tabs in pencil first, then trace and cut. Make sure they extend slightly beyond the edge of the clothing piece. Aim for 3-4 tabs per major clothing item for good adhesion.
Step 7: Cut Out the Clothes and Accessories
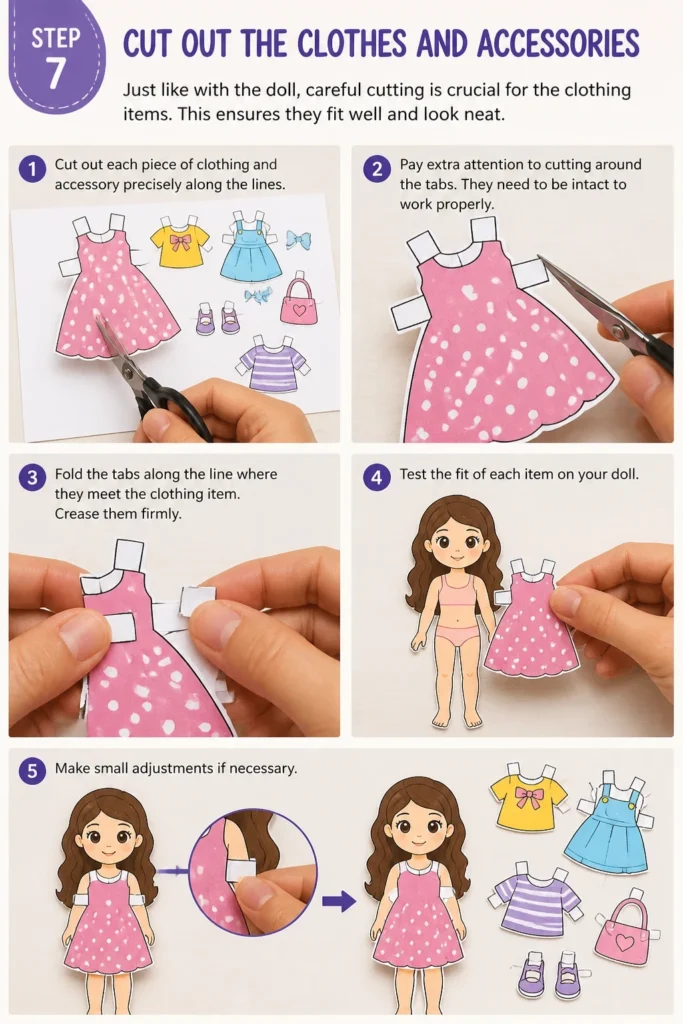
Just like with the doll, careful cutting is crucial for the clothing items. This ensures they fit well and look neat.
- Cut out each piece of clothing and accessory precisely along the lines.
- Pay extra attention to cutting around the tabs. They need to be intact to work properly.
- Fold the tabs along the line where they meet the clothing item. Crease them firmly.
- Test the fit of each item on your doll. Make small adjustments if necessary.
Step 8: Store and Display Your Creations
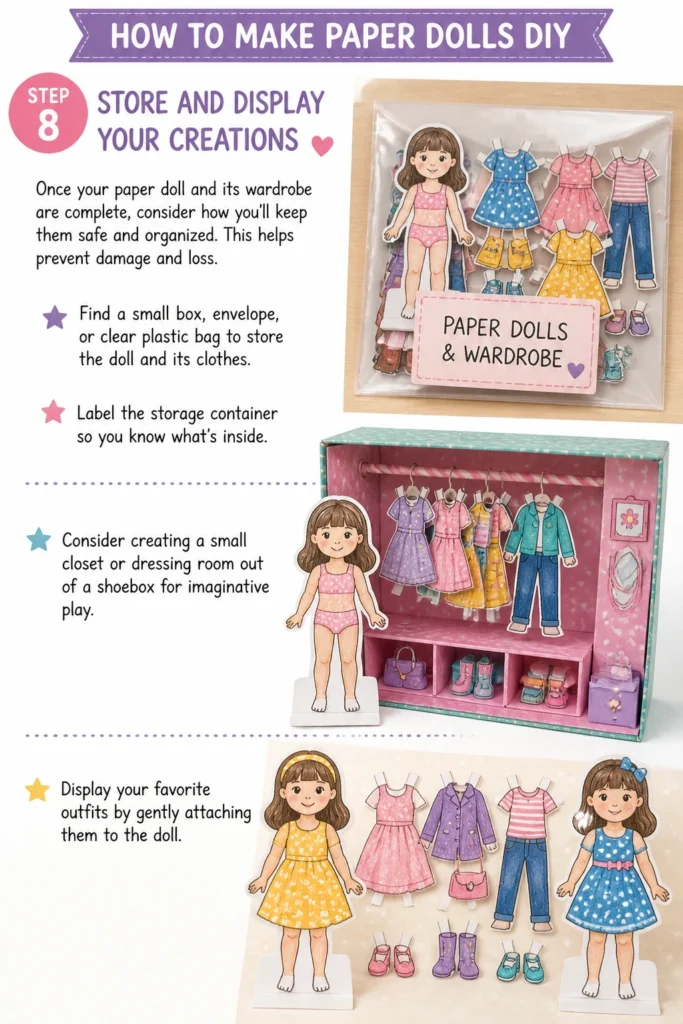
Once your paper doll and its wardrobe are complete, consider how you’ll keep them safe and organized. This helps prevent damage and loss.
- Find a small box, envelope, or clear plastic bag to store the doll and its clothes.
- Label the storage container so you know what’s inside.
- Consider creating a small “closet” or “dressing room” out of a shoebox for imaginative play.
- Display your favorite outfits by gently attaching them to the doll.
Common Mistakes to Avoid
Using Flimsy Paper
Trying to save money by using regular printer paper for your dolls or clothes is a common pitfall. This paper is too thin and will tear easily, especially around the tabs or during play. Always opt for cardstock to ensure durability and longevity for your creations.
Making Tabs Too Small or Too Few
The tabs are crucial for holding the clothes onto the doll. If they are too small, they won’t have enough surface area to grip, causing clothes to fall off. Similarly, using only one or two tabs for a large garment won’t provide enough stability. Aim for at least three to four decent-sized tabs per main clothing item.
Overly Intricate Details
While it’s tempting to draw tiny buttons, lace patterns, or delicate hair strands, these details can be incredibly difficult to cut out precisely. They also make the doll and clothes more fragile. Keep the designs relatively simple, especially for your first few dolls, focusing on clear shapes and manageable cuts.
Not Erasing Pencil Lines
Before you trace with a marker or color, ensure all unnecessary pencil lines are erased. Faint pencil marks can show through coloring or look messy, detracting from the finished product. A clean pencil drawing makes for a much neater final piece.
Troubleshooting
Clothes Won’t Stay On
If your paper doll’s clothes keep slipping off, the tabs might be too short, too narrow, or not creased firmly enough. Ensure the tabs are substantial in size and have a good fold. You can also try adding a small, temporary dab of removable craft adhesive to the back of the tabs for extra grip, or simply add more tabs to the garment.
Doll or Clothes Tearing During Play
Frequent tearing often indicates that the paper used is not thick enough, or the cuts were too close to the edge of the design, creating weak points. For future projects, use heavier cardstock. For existing dolls, you can reinforce tears with a small piece of clear tape on the back. Consider laminating the doll and clothes for ultimate durability.
Difficulty Cutting Intricate Shapes
Cutting small or complex shapes can be challenging. Ensure your scissors are sharp and suitable for detailed work – small craft scissors or even nail scissors can be helpful for tiny areas. If a shape is too complex, simplify the design or consider using a craft knife (with adult supervision) for extremely precise cuts on a cutting mat.
Key Takeaways
- Always use sturdy cardstock for both your doll and its wardrobe to ensure durability.
- Plan your doll’s design and pose carefully to make dressing easier.
- Draw and cut with precision; neat lines make a big difference in the final look.
- Create robust tabs on clothing pieces to ensure they stay securely on the doll.
- Embrace your creativity in designing unique outfits and accessories.
- Store your paper doll and its wardrobe properly to protect them from damage.
Frequently Asked Questions
Can I make paper dolls without drawing them?
Absolutely! There are many free printable paper doll templates available online. You can print these out, color them, and cut them, skipping the drawing step entirely. This is a great option for beginners or those who prefer coloring.
How can I make my paper dolls more durable for younger children?
For added durability, consider laminating your finished paper doll and its clothes. You can use a home laminator or self-adhesive laminating sheets. This makes them waterproof and tear-resistant, perfect for active play.
What if I want to make a doll with different hair colors or styles?
Instead of drawing hair directly onto the doll’s head, you can create separate hair pieces with tabs, just like clothing. This allows you to design multiple hairstyles and colors that can be swapped out, adding more versatility to your doll’s look.
Can I use fabric scraps for paper doll clothes?
Yes, you can! While it adds a bit more complexity, gluing small fabric scraps onto cardstock and then cutting them out can create beautifully textured clothes. Just ensure the fabric is thin enough not to add too much bulk and that your glue is strong enough to hold it.
Our Top Recommended Finds
- Heavyweight Cardstock: Essential for durable dolls and clothes that withstand play.
- Precision Craft Scissors: Small, sharp scissors make cutting intricate details much easier and cleaner.
- Dual-Tip Markers: Offering both fine and broad tips, these are versatile for outlining and coloring.
Unleash Your Inner Fashion Designer
You now have all the tools and knowledge to create your very own paper doll world. From sketching your initial character to designing a full wardrobe, each step is a chance to express your unique style.
Don’t wait to start this rewarding craft. Gather your materials today and begin bringing your imaginative characters to life, one paper outfit at a time.
Beginner-friendly templates, step-by-step guides,
and weekly project ideas in your inbox.